Transcription
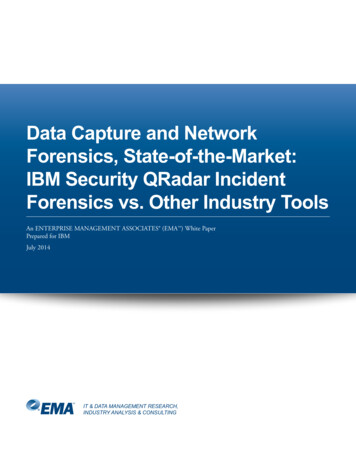
Pre-Workshop ChecklistCongrats! You are on your way to hosting a Salesforce Customer 360 Platform Workshop. We’vecreated the checklist belowto help you stay on track as you plan and prepare for your workshop.Pre-WorkshopChecklistWe know you’re already itching to dig in, so first things first — go to the link below to sign up andaccess a scratch org for this workshop.CREATE YOUR ORG Scratch orgs expire after 24 hours. Feel free to create as many scratch orgs as you need to practice,with a new one created the day of your workshop.4 weeks out Choose a date and venue for your workshop. Create and send invitations – include your workshop topic, date, time, and location. Promote your workshop on social media.*Pro tip: Use the provided promo card image to create your invite and promote on social media.3 weeks out Practice your workshop: You can sign up to access the scratch org for your workshop here. https://platform-workshops.herokuapp.com/adoption2 weeks out Fill out your swag request form to get fun gear to share with your attendees.* https://bit.ly/2LJ6x27 [*5 attendees required]1 week out Send a reminder email to your attendees.Day of Send an email to your attendees with the link to the Lightning Adoption WorkshopLaunchpad, where attendees will go to sign up and access their scratch org. ro tip: Ask your attendees to sign up and load their scratch org on theircomputer no more than 24 hours before the workshop. This will save timeat the beginning of the workshop. If you’re running this workshop for a large group and want to avoid havingto wait for orgs to load when your workshop begins, use the poolbot to spinup many orgs at least a few hours in advance of your workshop. Have fun and share photos from your workshop!Include: #LightningNow #WorkshopInABox.Have questions or feedback about this workshop, runningyour own, or the Workshop-In-A-Box program in general?Please reach out here: https://bit.ly/2MyImAF.
Workshop GuideLightning Experience Is Here,What Now?
Lightning Experience Is Here,What Now?AbstractLearn how to make simple updates to your Salesforce org to make Lightning Experience more thanan new UI for your users.Launch onIntroductionEveryone is moving to Lightning Experience with the Critical Update coming in January. You havea team of recruiters that you want to show how Lightning Experience will make their recruitingprocess better and provide more information to them than ever before.Part 1: Upgrade & Customize our Recruiting AppLet’s start customizing our org and the Recruiting App to take advantage of the new customizationsthat are available to us in Lightning Experience.First, we will update the theme of our org to something a little cooler using one of the standardthemes provided in the org. There are many to choose from:1. Navigate to the Setup Gear Icon, and select Setup.2. In the Quick Find searchbox, type “Theme”.3. Select Themes and Branding.4. Click on the action arrow in the list of themes next to Codey Canyonand select View.5. Select Preview to preview what this theme looks like in the org:a. Notice the different background and color.6. At the top of the page, select End Preview and then Activate to activate thisnew theme.3
LIGHTNING EXPERIENCE IS HERE, WHAT NOW?If you want to get really fancy, you can create your own Custom Theme and even override theRelease image on the Lightning Experience loading page with your own! For now, let’s go withCodey and work on customizing our Recruiting App. In order to customize our Recruiting App weneed to upgrade it from a Classic App to a Lightning App:1. In the Quick Find searchbox, type App Manager.2. In the App List, find the Recruiting App.3. Click on the action arrow and select Upgrade.a. Delete the App Name and API name provided and enter:b. App Name: Easy Recruitingc. API Name: tab to enter or Easy Recruitingd. Select Upgrade.Now, lets configure our new Easy Recruiting Lightning App:1. In the App List, find the Easy Recruiting App.2. Click on the action arrow and select Edit.a. In App Details & Branding:i. Upload Logo: https://drive.google.com/open?id 1zw if s6uUqCk-WmdUj Gmn-1vV0WNRBii. Primary Color Hex Value: #120701iii. Select checkbox for Use the app’s image and color instead of the org’s custom themeiv. Select Save.b. In Utility Items, let’s add an announcement for our recruiters:i. Select Add Utility Items.ii. In the searchbox, type “Rich Text” and select it.1. Label: ANNOUNCEMENTS2. Icon: announcement3. Component Properties: Marc Benioff from Salesforce will be coming on 11/24/2019 aSalesforce Recruiting workshop. See your manager to sign up!iii. Select Save.3. Select the Back link to go back to Setup.4
LIGHTNING EXPERIENCE IS HERE, WHAT NOW?Using the App Launcher, choose the Easy Recruiting App and let’s check out our new theme,utility bar Announcement and app customizations!Note: If you do not see the updates, logout and log back in and select the Easy Recruiting App.Part 2: Let’s make some updates to guide our users through therecruiting processNow that we have our Recruiting App customized, it’s time to make some updates to help ourrecruiters with their jobs. We are even going to make some updates based on the Salesforce#LightningStrikes contest!The first thing we want to do is enable provide our recruiters with some guidance and a littlesurprise when they get a position filled. Let’s enable Path:1. Navigate to the Setup Gear Icon, and select Setup.2. In the Quick Find searchbox, type “Path”3. Select Path Settings.4. Select Enable.5. Select New Path:a. Path Name: Standard Position Pathb. API Reference Name: tab to complete or enter “Standard Position Path”.c. Object: Positiond. Record Type: Standard Positione. Picklist: Status6. Select Next.Now, we will enter the guidance for a few steps along the Path for Recruiters to understandthe process.1. In the New Position status, enter:a. Add the following Key Fields:i. Min Payii. Max Pay5
LIGHTNING EXPERIENCE IS HERE, WHAT NOW?iii. Job Descriptioni. Select Save.b. Add the following in Guidance for Success: “Be sure to update the fields to move yourPosition to Pending Approval.”2. In the Pending Approval status, enter:a. Add the following Key Fields:i. Hiring Managerii. Min Payiii. Max Payiv. Job Descriptionv. Select Save.b. Add the following in Guidance for Success: “Please confirm the Hiring Managerbefore approval.”3. Select Next.4. Select the Toggle beside “B. Activate your path.” to activate the path.5. Next, select the toggle beside “A. When users reach a specific step in the path, help themcelebrate.” to activate Path celebration with the following setting:a. Picklist Value: Closed - Filledb. Celebration Frequency: Always6. Select Finish.Before we can see the Path we just created, we need to add it to the Positions Lightning RecordPage. Let’s do this and make a few other updates to the page:1. Go back to the tab with the Easy Recruiting App open or simply select the Easy Recruiting Appin the App Launcher.2. In Global Search, type “Business Analyst” and select one of the Positions that is shown.3. Then, select the Setup Gear Icon, and select Edit Page.4. In the Lightning Components section, drag the following components onto the page:a. Pathb. Related List Quick Links6
LIGHTNING EXPERIENCE IS HERE, WHAT NOW?5. Next, let’s put an alert on the screen to alert our recruiters that a position is only for anInternal Hire. We will do this using a Rich Text Component. This is also an idea that camefrom #Lightningstrikes.a. Drag the Rich Text Component onto the page above the Highlight Panel.b. In the configuration panel, enter “***INTERNAL CANDIDATES ONLY***”. Make sure you BOLDand CENTER your text and even add a color that will alert the recruiter.c. In the Set Component Visibility section, let’s only make this component visible when theposition requires an internal candidate:i. Select Add Filter1. Field: Internal Only2. Operator: Equal3. Value: Trueii. Select Done.6. Next’s let use Component Visibility to control the “layout” of the page when the Position is theNew Position status using the Related Record component with only a few fields showing:a. Select the Related Record component and drag it onto the page above the component withthe Related and Details Tabs:i. In the configuration panel select:1. Lookup Field: Use This Position c2. Update Action: Update Positionii. In the Set Component Visibility section:1. Select Add Filtera. Field: Statusb. Operator: Equalc. Value: New Position2. Select Done.b. For all of the other status’ we want to show the Related and Details tab so we need to addcomponent visibility here:i. Click into the Tab component for Related and Details tabs.ii. In the Set Component Visibility section:7
LIGHTNING EXPERIENCE IS HERE, WHAT NOW?1. Select Add Filtera. Field: Statusb. Operator: Not Equalc. Value: New Position2. Select Done.7. Select Save.8. Select Activate.9. Select Assign as Org Default.10. Select Close.Select back and let’s cover one more area before we look at our changes.Part 3: Reports in Lightning ExperienceReports have gotten an overhaul in Lightning Experience. There have been several new featuresas well as a new Report builder delivered. We need to create a candidate report that we canadd to our Positions record page to show recruiters how many candidates are available in thelocation of their position (#Lightningstrikes). While we are in the report, lets count the number ofunique candidates there are based on the candidates email address because as you know somecandidates can have the same name. First, we need to setup the Unique Row count feature up(back to Setup we go!):1. Navigate to the Setup Gear Icon, and select Setup.2. In the Quick Find searchbox, type “Reports”3. Select Reports and Dashboards Settings.4. Select Enable Unique Row Count Aggregate in Reports5. Click Save.Now let’s create the report we need:1. Navigating back to the browser tab with the App open, select the Reports tab.2. Select New Report.3. In the searchbox, type “Candidate” and select it from the options.4. Select Continue.8
LIGHTNING EXPERIENCE IS HERE, WHAT NOW?5. In the report builder, search and select the following fields for our report:a. First Nameb. Last Namec. Emaild. Citye. State/Province6. In order to add a report chart, we need to group our report. Let’s group by City.7. Next, to get an idea of how many unique candidates we have let’s set the Unique Row countfeature on the Email field. This will show us by email address how many are unique even thoughthere are candidates that appear duplicated with the same name.a. Navigate to the email fieldb. Click the action arrow and select Show unique count.8. Now lets add the Report Chart and Save:a. Select Add Chart.b. Select the gear icon, and edit the chart properties:i. Chart Title: Candidates by Cityii. Value: Record Countc. Select Save and Rund. Report Name: New Candidates Reporte. For the folder field, click on Select Folder and choose Public Reportsf. Click on Select Folderg. Select Save.When you look at the report you will see that it appears that we have no duplicated candidatesbased on the Unique Count of email addresses. If you want to test out the Unique count featuremore, clone a Candidate and watch the Unique Count stay the same but the record count go up.The last thing we need to do here is put this report chart on our Positions Lightning record pageso that when a recruiter looks at a position, they can see what candidates are located in the city oftheir position:1. Navigate to the Positions Tab and select the action arrow to select your recent record:Business Analyst9
LIGHTNING EXPERIENCE IS HERE, WHAT NOW?2. Then, select the Setup Gear Icon, and select Edit Page.3. In the Lightning Components section, drag the Report Chart component onto the page abovethe Activity component. Since we only have one report available it is already configured but inyour org you may need to configure the component for the right chart to appear.4. Select Save.5. Select back.Now let’s go back and review all that we have done: First, let’s test our internal candidate alert. Edit the record and check the Internal Only?checkbox and Save. Do you see the alert? Take a look at the Path and select New Position and Pending Approval status’ to see theguidance given. Hover over the Related List Quick Links. Take a look at the page layout in the New Position status. Do you see just the fields from theupdate action? Move the Position to Pending Approval. Do you see the full details and related list tabs appear?Part 4: Stay in Lightning Experience (optional)Let’s activate the feedback form so the we capture why recruiters are switching toSalesforce Classic:1. Navigate to the Setup Gear Icon, and select Setup.2. In the Quick Find searchbox, type “Adoption”.3. Select Adoption Assistance.4. Toggle the Switch to Salesforce Classic User Feedback Form to On.5. Check the checkbox Show every time the user switches to Salesforce Classic.6. Set the Chatter Group to Lightning Experience Feedback.7. Select Activate.8. Navigate to your profile and select Switch to Salesforce ClassicDid you see the form come up? Now you will be able to get real time feedback from your users onwhy they are switching.10
LIGHTNING EXPERIENCE IS HERE, WHAT NOW?ConclusionLightning Experience is Here and Now You know What to do to make it an even better experience!
Codey and work on customizing our Recruiting App. In order to customize our Recruiting App we need to upgrade it from a Classic App to a Lightning App: 1. In the Quick Find searchbox, type App Manager. 2. In the App List, find the Recruiting App. 3. Click on the action arrow and select Upgrade. a. Delete th