Transcription
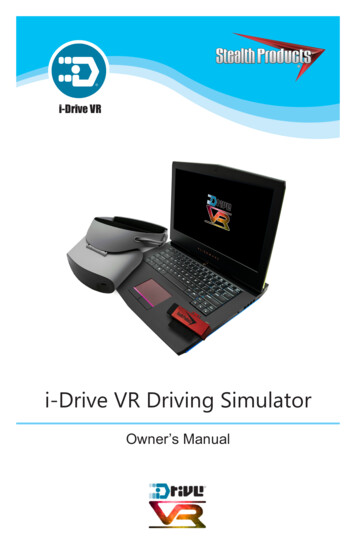
i-Drive VRi-Drive VR Driving SimulatorOwner’s Manual
Customer Satisfaction1.0Stealth Products is committed to 100% customer satisfaction. Yourcomplete satisfaction is important to us. Please contact us withsuggestions or feedback to help us improve the quality and usabilityof our products.You may reach us at:Stealth Products, LLC104 John Kelly DriveBurnet, TX 78611Phone: (512) 715-9995 Toll Free: (800) 965-9229Fax: (512) 715-9954Toll Free: (800) s.comMDSS GmbHSchiffgraben 4130175 Hannover, GermanyGeneralRead and understand all instructions prior to the use of the product.Failure to adhere to instructions and warnings in this document mayresult in property damage, injury, or death. Product misuse or failureto follow instructions will void the warranty.Immediately discontinue use if any function is compromised, partsare missing or loose, or any component shows signs of excessivewear. Contact your supplier for repair, adjustment, or replacement.i
Important Information1.0Important Information!All persons responsible for fitting, adjustment, and daily use of thedevice(s) discussed in the these instructions must be familiar withand understand all safety aspects of the device(s). In order for ourproducts to be used successfully, you must read and understand all instructions and warnings, andmaintain our products according to their care and maintenanceinstructions.NOTICEThis product is not a medical deviceSupplier ReferenceSupplier:Telephone:Address:Purchase Date:Model:Notes:ii
Introduction3.0This manual was designed to guide users through the options andpossibilities with their products.The input, pictures, illustrations, and specifications presented in thismanual are based on the information available at the time thedocument was published; the images and illustrations displayed arerepresentative examples and are not intended to portray preciserenderings of products or their component parts.All suggestions, instructions, warnings, procedures, and noticesrecorded herein were developed with the expressed intent of usewith standard configurations. This manual contains informationregarding product care and safety, and discusses potentialcomplications that could occur before and during product use.For further assistance (or for more advanced product applications),please contact your product supplier, or contact Stealth Products at(512) 715-9995, or toll free at (800) 965-9229. Do not dispose of thismanual. Keep it in a clean, safe place to ensure it can be referencedas necessary.Ordering DocumentationAdditional copies of this manual are available for download online.Copies can be accessed by visiting the Stealth Products’ homepage(https://stlpro.site/stealth-docs) and entering “i-Drive VR DrivingSimulator” in the search bar at the top of the page.In Case of Product FailureIn the event of a product failure covered by our warranty, pleasefollow the procedures outlined below: iiiCall Stealth Products at (512) 715-9995 or toll free at (800) 965-9229.Request a Return Authorization (RA) form from the ReturnsDepartment and follow the documentation instructions.
Warranty3.0WarrantyOur products are designed, manufactured, and produced to the highest standards. Should anydefect in material or workmanship is found, Stealth Products, LLC will repair or replace the productat our discretion. Any implied warranty, including the implied warranties of merchantability andfitness for a particular purpose, shall not extend beyond the duration of this warranty. StealthProducts, LLC does not warrant damage resulting from (but not limited to): Misuse, abuse, or misapplication of product, and/orModification of product without written approval from Stealth Products, LLC.Any alteration or lack of serial number, where applicable, will automatically void this warranty.Stealth Products, LLC Is liable for replacement parts only.and is not liable for any incurred laborcosts. No person is authorized to alter, extend, or waive these warranties.Stealth Products, LLC warrants against failure due to defective materials or workmanship:Covers: 18 monthsHardware: 5 yearsElectronics: 3 yearsThe laptop provided is under a limited warranty from its manufacturer and does not extend to anyhardware product from which the serial number has been removed, or a hardware product thathas been damaged or rendered defective:1.As a result of an accident, misuse, liquid spills, abuse, contamination, improper or inadequate maintenance orcalibration, or other external causes;2.By operation outside the usage parameters stated in the user documentation shipped originally with thelaptop hardware product;3.By software, interfacing, parts, or supplies not supplied by the laptop manufacturer;4.By improper site preparation, maintenance, or environmental conditions that do not conform to laptopmanufacturer site specifications;5.By virus, infection, worm, or similar malicious code not introduced by the laptop manufacturer;6.By loss or damage in transit;7.By modification or service by anyone other than the manufacturer-authorized service provider; or8.By improper installation of end-user replaceable laptop manufacturer-approved parts if available for yourhardware product in the servicing country or region.Any laptop hardware product found to be overclocked after delivery from the laptop manufacturerwill be excluded from the term of this limited warranty other than damaged or defectivecomponents where the damage or defect is found to be unrelated to the overclocking. The laptopmanufacturer is not responsible for any inoperability or compatibility issues that may arise, when:1.Products, software, or options not supported by the laptop manufacturer are used;2.Configurations not supported by laptop manufacturer are used; or3.Parts intended for one system are installed in a system of a different make or model.As a precaution against possible failures, alterations, or data loss, periodically create backup copiesof the data stored on the hard drive or other storage devices. Before returning any hardwareproduct for service, ensure its data has been backed up and any confidential, proprietary, orpersonal information has been removed.To the extent permitted by local law, the laptop manufacturer is not responsible for damage to orloss of any programs, data, or removable storage media. To the extent permitted by local law, thelaptop manufacturer is not responsible for the restoration or reinstallation of any programs or dataother than software installed by the laptop manufacturer at the time the hardware products weremanufactured, subject to any applicable updates. Memory data may be lost during repair.iv
Table of Contents5.01.0 Customer Satisfaction .i2.0 Important Information.ii3.0 Introduction.iii4.0 Warranty.iv5.0 Table of Contents.v6.0 Warning Labels.vi6.1 Warning Labels.vi6.2 Limited Liability .vi6.3 Testing.vi7.0 Design and Function . 17.1 Intended Use. 17.2 Features. 18.0 Setup. 28.1 Initial Setup. 29.0 Using the i-Drive VR Driving Simulator. 49.1 Understanding the i-Drive VR Driving Simulator. 49.2 Using the i-Drive VR Driving Simulator . 410.0 Tips for Starting with VR .1011.0 Maintenance.1211.1 Care and Maintenance.1211.2 Safety .1211.3 Updates.1211.4 Technical Data .12v
Warning LabelsWarning Labels6.06.1Warnings are included for the safety of the user, client, operator, and property.Please read and understand what the signal words DANGER, WARNING,CAUTION, NOTICE, and SAFETY mean, and how they could affect the user, thosearound the user, and property.DANGER Identifies an imminent situation which, if not avoided, mayresult in severe injury, death, and property damage.WARNINGIdentifies a potential situation which, if not avoided, may resultin severe injury, death, and property damage.Identifies a potential situation which, if not avoided, may resultCAUTION in minor to moderate injury and property damage.NOTICEIdentifies important information not related to injury, butpossible property damage.SAFETYIndicates steps or instructions for safe practices, reminders ofsafe procedures, or important safety equipment that may benecessary.Limited Liability6.2Stealth Products, LLC accepts no liability for personal injury or damage to propertythat may arise from the failure of the user or other persons to follow therecommendations, warnings, and instructions in this manual.Stealth Products does not hold responsibility for final integration of final assemblyof product to end user. Stealth Products is not liable for user death or injury.Testing6.3Initial setup and driving should be done in an open area free of obstacles until theuser is fully capable of driving safely.vi
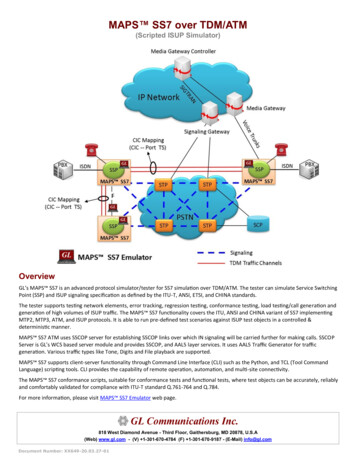
Design and FunctionIntended Use7.07.1The i-Drive Virtual Reality (VR) Driving Simulator is intended for useas a clinical tool to allow users to safely practice maneuvering theirchairs via alternative drive controls in a realistic and immersive virtualenvironment.The system is designed to accurately simulate drive controlnavigation in multiple environments and terrain settings, while alsoreplicating obstacles and conditions users would find in real-worldchair navigation scenarios.Features7.2The i-Drive VR system includes a high-performance laptop with thedriving simulator software installed, and a VR headset with handcontrols.Typically, VR systems will also include an i-Drive interface.Additionally, customers can choose between either a VR systempackage that includes four proximity sensors and four switches, or apackage that includes a standard joystick and four switches.To request additional information on VR system packages, contact aStealth Products sales representative.1
Setup8.0Initial Setup8.08.1All necessary software will be pre-installed on the laptop included in either VRsystem package. Follow the instructions below to set up and initiate the i-Drive VRDriving Simulator.Step One: Connect the laptop to a power source. The laptop must be connectedto a power source while using the i-Drive VR Driving Simulator.Step Two: Turn the laptop on. You will be taken to a login screen displaying aMicrosoft email account and an empty input box labeled “PIN”. Input the number2223. Make note of this Microsoft email address. Information regardingthe VR system will be mailed to this address, and it will be used toreceive further updates.Log-on Email Address:Step 3: Plug the i-Drive interface into the laptop. This includes connecting: The USB to the laptop.The mini USB to the i-Drive interface.The control input (joystick/switch) to the i-Drive interface. (Note: Thei-Drive interface only accepts Hirose micro-miniature interfaceconnectors. I-Drive interfaces come with two compatible dongles.)the 12V i-Drive power cord to the i-Drive interfaceThe 12V i-Drive power cord to the power source (e.g. wall outlet)DO NOT PLUG IN THE VR GOGGLES AT THIS POINT.Step Four: On the laptop’s desktop, double-click the icon labeled “06-Step 1”.This will open a command prompt. The prompt will require the “port index or full name”. Input thenumber 1 and press “Enter” on the laptop keyboard.The command screen will now display an ongoing series of zeros. Trymoving the joystick or activating the switch connected to the i-Driveinterface – if this alters the series of zeros, the joystick/switch iscommunicating properly with the laptop and the i-Drive interface.Minimize the command screen when the proper devicecommunication has been confirmed.DO NOT EXIT OUT OF THE COMMAND PROMPT SCREEN.2
Setup8.08.0Step Five: Plug the VR goggles into the laptop. This includes connecting: The goggles’ HDMI plug to the laptop’s HDMI port.The goggles’ USB plug to the laptop’s USB port.When the VR goggles are properly connected to the laptop, a screen titled “MixedReality Portal” will appear. Minimize this screen.Step 6: On the laptop’s desktop, double-click the icon labeled “07-Step 2”. Thiswill launch the i-Drive VR Driving Simulator. When the i-Drive VR Driving Simulator appears, use the laptop mouseto click anywhere on the screen. You will now be able to control the“i-Drive VR Driving Simulator” cursor with the laptop keyboard arrowkeys, or with the joystick/switch you’ve connected to the i-Driveinterface.Step Seven: Use the laptop keyboard arrow keys or the connected joystick/switch to scroll the cursor to the button labeled “Play”. Use the laptop mouse toclick “Play”.Step Eight: To end the VR session: Press the Windows buttonon the keyboard;Go to the Unity symbolon the task bar at the bottom of thescreen;Right-click and choose “Close Window”.Step Nine: To change the Level of Play: Follow Step Eight to end the current VR session;Follow Step Six and Step Seven, then choose the new level you wishto play.Step Ten: To change the Driving Method: 3Follow Step Eight to end the VR session and close the commandprompt screen opened in Step Four;Connect the new driver control into the i-Drive and make anynecessary changes to the i-Drive using the I-Drive Configapplication;Disconnect from i-Drive Config.;Follow Step Four and Step Six to start a new VR session with the newdriver control.
Using the VR Driving SimulatorUnderstanding the VR Driving Simulator9.09.1The driving simulator is divided into three platform levels: Level 1, Level 2, andLevel 3. Each of these levels is comprised of sub-levels. Different platform levelshave different numbers of sub-levels.By maneuvering the cursor of the home screen, a user may select any of the threeplatform levels. After a user has selected the desired level, he or she is virtuallytransported to the starting position of the main level’s first sub-level. Each sublevel has unique obstacles that arise in the course of completing the objective. Inorder to progress through the successive sub-levels of each platform level, the usermust accomplish tasks required to complete the objective of each sub-level.The driving simulator has no time limits; a user may take as much time as isnecessary to complete sub-level objectives.As the user commences with each sub-level, the VR system will generate that sublevels environment on-screen. Positioned near the top of the screen, a score willbe displayed. (The initial value of this score will always be 100). The score displayserves to reflect how successfully a user is able to avoid coming into contact withobstacles throughout each sub-level. Each time a user comes into contact with anobstacle, the displayed score will decrease.Using the VR Driving Simulator9.2Level 1 takes place in a gymnasium. It consists of five scenarios, each requiring theuser to successfully navigate obstacle courses and reach the objective.Level 2 takes a step outside to a nearby woodland path. It consists of fivescenarios, each requiring the user to navigate outdoor hazards and successfullyreach its objective.Level 3 delivers the user home to an apartment. It consists of four scenarios, eachrequiring the user to successfully navigate furniture and household items to reachits objective.4
Using the VR Driving Simulator9.0Level 1: Gymnasium1A Objective: Navigate the chair into the blue box.This objective helps users to orient themselves to and familiarize themselves with thedrive control mechanisms of their virtual wheelchairs.In this scenario, the user must execute a 180 turn then guide his or her chair into abright blue box displayed at the opposite end of the gymnasium’s basketball court.When the user has successfully positioned his or her chair into the box, a large trophywill appear, signifying completion of the objective.Obstacles: Objects around the perimeter of the gymnasium.1B Objective: Navigate the chair around the gym.This objective helps users to practice driving straight and executing right-hand(clockwise) turns.In this scenario, a user must navigate his or her virtual chair around the gym clockwise,making four right-hand turns and maintaining the chair’s placement between a pathconsisting of a white line (to be kept on the user’s left side) and a yellow line (to be kepton the user’s right side). Following the final right-hand turn, the user must position hisor her chair into a bright blue box, where a large trophy will appear, signifying success.Obstacles: Straying from the path between the yellow and white line; objects around theperimeter of the gymnasium.1C Objective: Navigate the chair to avoid objects.This objective helps users to practice driving straight and executing left-hand(counterclockwise) turns.In this scenario, a user must navigate his or her virtual chair around the gymcounterclockwise, making four left-hand turns and maintaining the chair’s placementbetween a path consisting of a yellow line (to be kept on the user’s left side), and awhite line and clapboard signs (to be kept on the user’s right side). Following the finalturn, the user must position his or her chair into a bright blue box, where a large trophywill appear.Obstacles: Straying from the path between the yellow and white line; clapboard signs;objects around the perimeter of the gymnasium5
Using the VR Driving Simulator9.01D Objective: Navigate the chair through turns and obstacles.This objective helps users to practice executing tight left-hand and right-hand turns, aswell as executing a U-turn.In this scenario, a user must slalom through a line of four orange cones, navigating tothe right of the first cone, to the left of the second cone, etc. After passing the finalcone, the user must position his or her chair into a bright blue box, then execute a 180 turn in the box. Upon successful completion of the U-turn, a large trophy will appear.Obstacles: Orange cones; objects around the perimeter of the gymnasium1E Objective: Navigate the chair and score a goal!This objective helps users practice free-form driving.In the final scenario of Level 1, the user must navigate his or her chair and “kick” thesoccer ball into a goal on the opposite end of the gymnasium. When the user hasscored a goal, Level 1 is complete.Obstacles: Objects
This manual was designed to guide users through the options and possibilitieswiththeirproducts. . user will encounter shadows and a large sand pit, which the user must avoid. Additionally, the user mus
