Transcription
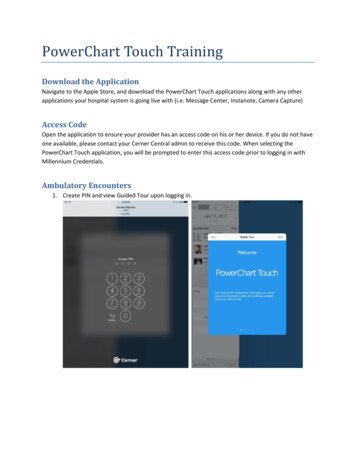
PowerChart Touch TrainingDownload the ApplicationNavigate to the Apple Store, and download the PowerChart Touch applications along with any otherapplications your hospital system is going live with (i.e. Message Center, Instanote, Camera Capture)Access CodeOpen the application to ensure your provider has an access code on his or her device. If you do not haveone available, please contact your Cerner Central admin to receive this code. When selecting thePowerChart Touch application, you will be prompted to enter this access code prior to logging in withMillennium Credentials.Ambulatory Encounters1. Create PIN and view Guided Tour upon logging in.
2. Add the provider’s schedule to the List View.
3. Select patient from List or search for patient and select encounter.
4. Review Demographic bar.
5. Review Chief Complaint Field.6. View Notes. If provider has seen patient, flag will indicate the provider’s previous notes.Provider can select the document to view/search for key words. Selecting VIEW MORE will allowproviders to view ALL documents, radiology, and pathology results. Filters available with funnelicon.
7. Provider will choose US/Metric for Vitals. Colors will indicate above/below average. Can viewtrending results by selecting VIEW MORE and relevant vital/measurements. Provider has abilityto see specific information by selecting specific result.
8. Tap to search for new problem/diagnosis. Red or Blue (i) icon will launch ICD 10 DX Assistant.Select problem on Review screen to associate for this visit (will need to check THIS VISIT box andsave).
9. Review allergies, Home Medications, and In Office Medications on review page.10. Laboratory Results display in groups. Provider will select group to view table. Lab result detailswill display by selecting specific result.
11. Diagnostics and Pathology results will display similarly to Notes.
12. Immunizations will show amount of administrations. Selecting the immunization will list alldates that they were administered.13. Histories display Social, Family, and Procedure for review.
14. Visit list displays previous visits as well as any future schedule appointments.15. History of Present Illness, Review of Systems, Physical Exam, and Assessment and Plan sectionshow free text fields that can be used to dictate into. Tap in box and select microphone abovebackspace button. Once it turns red/orange and appears to be spinning, it is listening. Holdingdown on microphone will launch to “What Can I Say” page where provider can view voicecommands, verbal commands, etc. Save sections before moving on.
16. Order Tab on bottom of the screen will launch to the Orders page.17. To refill or discontinue a medication, simply swipe left on medication and select refill ordiscontinue.
18. Tap to view Add Order screen.19. Frequent orders will display top 25 most commonly prescribed medications the providerprescribes. List will update as provider continues to order.
20. Folders will display any favorite folders/order the provider has saved.21. Select search box and type out or dictate desired order to add a new order. Once the order isfound, select it and choose Done.22. Address any orders displaying in red. Required details will show once provider has selected theorder. Once all required fields are complete, select Sign. Will need to tap Sign again on Orderreview page to place orders.
23. To remove an order from the Orders Detail page, select Actions in top right corner and selectremove.24. Tap Document at bottom of screen to view Note Manager
25. Favorite Dynamic Document templates will display. All templates folder also available.26. Tap desired template and complete note. Selecting free text box will allow for dictation.Selecting a header, such as “Immunizations” will allow provider to remove section from note orrefresh.
27. Sign note by selecting Sign in top right corner. Provider also has option to Save note. Theprovider will be able to view on Note Manager tab or in PowerChart on the desktop. Afterselecting Sign or Save, provider will need to indicate Note Type. Personal/Position note typeswill display under filter if they have been set up. Save once Note Type has been selected.Inpatient Encounters1. Create PIN and view Guided Tour upon logging in. (Note: if this has been set up, you will not beprompted)
2. Select Lists in top left corner.3. Patient lists provider has available to he or she will display at the bottom. Select patient list orrounds list and choose to sort by location, name, or status. Select Done.
4. Patient’s Name, Chief Complaint, Status, and Location will display.5. Select blue (i) to view/update patient handoff. Illness Severity can be updated by selected statusand choosing appropriate option from dropdown. Code status will display once order is placed.Patient Summary, Actions, and Situational Awareness are all free text fields. Provider will selectand dictate as needed. Once complete, tap Done in top right corner.
6. When viewing Rounds list, in top right corner will allow provider to pull specific patients bypatient list.7. Patient search available at bottom right of the list view by selecting magnifying glass icon. Oncepatient and encounter is found, select it to view patient chart. Swipe left on screen to viewhandoff.
8. Select patient from Rounds List/Patient List by tapping patient name.
9. Review Demographic bar10. Select Chart Navigator. Components of patient chart display. You can jump to any section of thechart by choosing it from the list.
11. Review Chief Compliant Field12. View Notes. If provider has seen patient, flag will indicate the provider’s previous notes.Provider can select the document to view/search for key words. Selecting VIEW MORE will allowproviders to view ALL documents, radiology, and pathology results. Filters available with funnelicon.
13. Provider will choose US/Metric for Vitals. Colors will indicate above/below average. High andlow result for last 24 hours will display for Temperature, Heart Rate, and Respiratory Rate. Can
view trending results by selecting specific result and relevant vital/measurements.14. Intake and Output will display charted results for the last 7 days. Select white circle to view totalintake/total output. Tapping intake or output will display more specific details.15. Tap to under Problems to search for new problem/diagnosis. Swipe left on problem on Reviewscreen to associate for this visit. Gray (i) icon will launch ICD 10 DX Assistant.
16. Review Allergies. Allergy details will display on right once selected.17. Visit list displays previous visits as well as any future schedule appointments.
18. Laboratory Results display in groups. Acute encounters will display results from last 72 hours.Provider will select Lab group to view table, which will show results from last 30 days.19. Diagnostics and Pathology results will display similarly to Notes.
20. Immunizations will group together.21. Histories display Social, Family, and Procedure details for your review.22. History of Present Illness, Review of Systems, and Physical Exam section show free text fieldsthat can be used to dictate in. Tap in box and select microphone above backspace button. Once
it turns red/orange and appears to be spinning, it is listening. Holding down on microphone willlaunch to “What Can I Say” page where provider can view voice commands, verbal commands,etc. Save sections before moving on.
23. Order Tab on bottom of the screen will launch to the Orders page.24. Tap to view Add Order screen.
25. Folders will display any favorite folders/order the provider has saved.26. Select search box and type out or dictate desired order to add a new order. Once the order isfound, select it and choose Done.
27. To remove an order from the Orders Detail page, select Actions in top right corner and selectremove.28. Address any orders displaying in red. Required details will show once provider has selected theorder. Once all required fields are complete, select Sign. Will need to Sign again on Order reviewpage to place orders.
29. Tap Document at bottom of screen to view Note Manager.30. Tap desired template and select Note Template from drop down. Favorite Note Templates willdisplay if user have these set up.
31. Complete Note. Selecting free text box will allow for dictation. Selecting a header, such as “LabResults” will allow provider to remove from note or refresh.32. Save note by selecting Save in the top right corner. Select note type. The provider will be able toview on Note Manager tab or in Millennium on the desktop.
33. Sign note by selecting Sign in top right corner. Choose not type. Sign again to endorse documentto chart.
PowerChart Touch Training Download the Application Navigate to the Apple Store, and downlo