Transcription
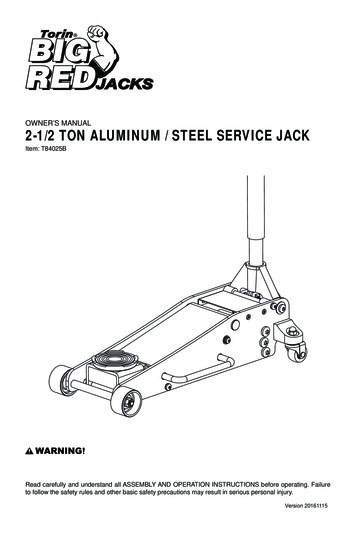
OWNER’S MANUAL2-1/2 TON ALUMINUM / STEEL SERVICE JACKItem: T84025BRead carefully and understand all ASSEMBLY AND OPERATION INSTRUCTIONS before operating. Failureto follow the safety rules and other basic safety precautions may result in serious personal injury.Version 20161115
IMPORTANTBefore You Begin Register This Product.For future reference, record the model name, model number, date of manufacture and purchase date of thisproduct. You can find this information on the product.Model NameModel NumberDate of ManufactureDate of PurchaseOWNER / USER RESPONSIBILITYDO NOT OPERATE OR REPAIR THIS PRODUCT WITHOUT READING THIS MANUAL.Read and follow the safety instructions. Keep Instructions readily available for operators. Make certain alloperators are properly trained and understand how to safely and correctly operate the product. By proceedingyou agree that you fully understand and comprehend the full contents of this manual. Failure to operate thisproduct as intended may cause injury or death. The manufacturer is not responsible for any damages or injurycaused by improper use or neglect. Allow product operation only with all parts in place and operating safely.Use only genuine replacement parts. Service and maintain the product only with authorized or approvedreplacement parts; negligence will make the product unsafe for use and will void the warranty. Carefullyinspect the product on a regular basis and perform all maintenance as required. Store these instructionsin a protected dry location. Keep all decals on the product clean and visible. Do not modify and/or use forany application other than that for which this product was designed. If you have any questions relative to aparticular application, DO NOT use the product until you have first contacted the distributor or manufacturer todetermine if it can or should be performed on the product.INTENDED USEThis heavy-duty jack has a single hydraulic pump piston that effortlessly raises the lift arm. Pump piston dustshields and wiper seals protect the hydraulic system from contaminants. The jack features an overload valvebypass system to prevent jack damage and user injury. Compact design allows use in confined spaces. Easilyfits under low vehicles. Meets ASME PASE safety standards.TECHNICAL SPECIFICATIONSItemCapacityT840252.5 TONLifting RangeMin. (Inch)3-15/16Lifting RangeMax. (Inch)18-5/162Lifting RangeMin. (cm)10Lifting RangeMax. (cm)46.5
GENERAL SAFETY RULESWARNING: Read and understand all instructions. Failure to follow all instructions listed below may resultin serious injury.CAUTION: Do not allow persons to operate or assemble this jack until they have read this manual andhave developed a thorough understanding of how the jack works.WARNING: The warnings, cautions, and instructions discussed in this instruction manual cannotcover all possible conditions or situations that could occur. It must be understood by the operatorthat common sense and caution are factors that cannot be built into this product, but must be supplied bythe operator.GENERAL SAFETY RULESIMPORTANT SAFETY CONSIDERATIONSINSPECTION Inspect the jack carefully before each use. Ensure the jack is not damaged, excessively worn, or missingparts. Do not use the jack unless it is properly lubricated. Using a jack that is not in good clean working condition or properly lubricated may cause serious injury. Inspect the work area before each use. Make sure it is free and clear of any potential hazards.DO NOT OPERATE OR REPAIR THIS EQUIPMENT WITHOUT READING THIS MANUAL.To maintain the Service Jack and user safety, the responsibility of the owner is to read and follow theseinstructions. Inspect the service jack for proper operation and function. Keep instructions readily available for equipment operators. Make certain all equipment operators are properly trained; understand how to safely and correctly operatethe unit. Allow unit operation only with all parts in place and operating properly. Use only genuine replacement parts. Service and maintain the unit only with authorized or approved replacement parts; negligence will make thejack unsafe for use and void the warranty. Carefully inspect the unit on a regular basis and perform all maintenance as required. Store these instructions in the handle of your jack. Keep all decals on the unit clean and visible.3
SAFETYAlways follow safety precautions when installing and operating this jack. Keep all decals on the unit clean andvisible. Before proceeding ensure that you fully understand and comprehend the full contents of this manual.Failure to operate this equipment as directed may cause injury or death. The distributor is not responsible forany damages or injury caused by improper use or neglect.THIS IS A LIFTING DEVICE ONLY! This jack is designed only for lifting part of the total vehicle. Do not move or dolly the vehicle while on the jack. The vehicle must be supported after lifting immediately by appropriately rated jack stands. NEVER go under a vehicle that is not supported with appropriately rated jacks stands. Use wheel chocks or other blocking device on opposing wheels before using jack stands.WARNING!Always use Jack Stands!DO NOT USE wood blocks or any other non-approved load sustaining devices. The manufacturer onlywarrants loads to be sustained by jack stands that meet current ASME standards.DO NOT USE wood blocks or any other non-approved lifting devices for a means of lifting with the jack and orload being raised. Failure to head these warnings may cause injury or death.SAFETY MARKINGSWARNING!1. Study, understand, and follow all instructions before operating this device.2. Do not exceed rated capacity.3. Use only on hard, level surfaces, with less than 3 degrees of slope.4. Lifting device only. Immediately after lifting, support the vehicle with appropriate means.5. Do not move or dolly the vehicle while on the jack.6. Lift only on areas of the vehicle as specified by the vehicle manufacturer.7. No alterations shall be made to this product.8. Only attachments and/or adapters supplied by the manufacturer shall be used.9. Do not get under or allow anyone under the vehicle until it has been supported by jack stands.10. Center load on saddle prior to lifting.11. Use wheel chocks or other blocking device on opposing wheels before using jack.12. Never use on a lawn mower or lawn tractor.13. Do not use this jack for any use other than the manufacturer specified usage.14. Do not rock the vehicle while working on or around equipment.15. The following are not recommended for supporting on this equipment: Foundations, Homes, MobileHomes, Trailers, RV’s, Campers, nor Fifth Wheels, etc.16. Failure to heed these markings may result in personal injury and/or property damage.4
GENERAL SAFETY INSTRUCTIONSPosition the JackPosition the jack to only lift on the areas of the vehicle as specified by the vehicle manufacturer.Always Use Jack StandsAfter lifting the vehicle always support the load with appropriately rated vehicle Jacks stands before workingon the vehicle.Do Not Overload JackDo not overload this jack beyond its rated capacity. Overloading this jack beyond its rated capacity can causedamage to or failure of the jack.Always Use on Hard Level SurfacesThis jack is designed only for use on hard level surfaces capable of sustaining the load. Use on unstable orother possible loss of load.Chock and Block (Stabilize)Apply parking brake in vehicle before operating jack.A chock is a wedge for steadying an object and holding it motionless, or for preventing the movement of awheel Chock the wheel opposite the end being lifted.When you block a load, you secure and support a load that is being lifted. The block(s) or stabilizer(s) shouldhave a weight capacity that is greater than the weight of the load which is being lifted.Center Load on Jack SaddleCenter load on jack saddle before lifting vehicle.Off-center loads and loads lifted when the jack is not level can cause loss of load or damage to the jack.Do not raise or lower the vehicle unless tools, materials and people are clear.When the lift is being lowered, make sure everyone is standing at least six feet away. Be sure there are notools or equipment left under or around the jack before lowering.Always lower the jack slowly.DO NOT USE THE JACK TO SUPPORT OR STABILIZE A LOAD.Using the jack to support or stabilize a load may result in unexpected movement and result in serious injury,being crushed and death. Always securely chock and block (stabilize) the load to be lifted. Never place anypart of the body under a raised load without properly chocking and supporting the load.Never use the jack on curved or tubular vehicleBumpers, this will result in the vehicle slipping off the jack and falling, causing serious injury or death. Use abumper lift to lift most vehicles with curved bumpers or plastic bumpers.Wear ANSI-approved safety glasses and heavy-duty work gloves during use.Do not adjust the safety valve.Do not move or dolly vehicle while jack is in use.Stay alert. Use caution and common sense when operating jack. Do not use a jack when tired,incoherent, dizzy, under the use or drugs or alcohol.TrainingRead this manual before use. Do not allow anyone who has not read this manual, and/or does not understandthe requirements, to use the jack.SpectatorsDo not allow bystanders around the jack or under the load supported only by the jack. -Do not allow anyone inthe vehicle while the jack is in use. Keep all bystanders away from vehicle when in use.InspectionInspect the jack carefully before each use. Ensure the jack is not damaged, excessively worn, or missingparts. -Do not use the jack unless it is properly lubricated. -Using a jack that is not in good clean workingcondition or properly lubricated may cause serious injury.Additional Notes:Save the receipt, warranty and these instructions.Do not modify the jack in any way. Unauthorized modification may impair the function and/or safety andcould affect the life of the equipment. There are specific applications for which the jack was designed.Always check for damaged or worn out parts before using the jack. Broken parts will affect theequipment operation. Replace or repair damaged or worn parts immediately.When jack is not in use, store it in a secure place out of the reach of children. Inspect it for good workingcondition prior to storage and before re-use.5
ASSEMBLY3. Refer to picture 2 when performing this step.Press Quick Disconnect on handle piece 2, thiswill allow slide handle pieces 1 and 2 connect,align the holes on both sections to allow quickdisconnect to trigger. Quick disconnect willautomatically pop out when hole position iscorrect.1. Familiarize yourself with the jack.Lifting ArmSaddleFront WheelHandlePC. 2HandleHandlePC. 1QuickDisconnectRear SwivelCasters4. Unfasten the screw located in the Handle Socketto insert the assembled handle.Pump PlungerHandle SocketScrewOil Fill Plug2. Prior to assembly, carefully remove the stopperattached to the handle socket. CAUTION: Thesocket will tend to spring upward when the clipis removed. To prevent possible injury, place onehand on the top of handle socket to control theupward motion of the handle socket, and thencarefully remove the stopper. After removedslowly allow handle socket to rise back intoresting position.5. Line up the square whole located at the bottom ofthe handle over the square bolt inside the HandleSocket. (SEE IMAGE STEP 6)6. Secure the handle in place by tightening thescrew in the Handle Socket Without any vehicleon the jack. Cycle the lift up and down severaltimes to insure the hydraulic system is operatingproperly. (Perform to the Air Purge Procedurebefore first use.)stopperWARNING: Do not lift or carry jack by handle.Handle could dislodge and jack may fall,resulting in possible injury or property damage.WARNING!Once retaining stopper is removed, SLOWLYallow handle socket to rise back into restingposition. Use CAUTION when removing retainingclip, handle socket will spring forward rapidly.6
SYSTEM AIR PURGE PROCEDUREIMPORTANT: BEFORE FIRST USEPerform the following Air Purge Procedure to remove any air that may have been introduced into the hydraulicsystem as a result of product shipment and handling. This step is to be completed without any weight on thejack.3. Remove the cover plate, then use a flat bladescrewdriver, push the oil fill plug slightly to theside to purge trapped air from system.(Use caution not to tear or puncture the oil plug.)1. Turn release valve counter-clockwise on full turnto the open position.2. Rapidly pump the handle 6-8 times. Leave handlein down position to expose oil fill plug.4. Turn release valve clockwise to the closedposition.5. Jack is now ready for use. Check for proper pumpaction. (Repeat steps if neccessary).7
BEFORE USE1. Before using this product, read the owner's manual completely and familiarize yourself thoroughly with theproduct and the hazards associated with its improper use.2. Perform the air purge procedure. (See System Purge Procedure.)3. Check and that the pump operates smoothly before putting into service.4. Inspect before each use. Do not use if bent, broken or cracked components are noted.OPERATIONRAISING THE JACK1. Block the vehicle’s wheels for lifting stability. Secure the load to prevent inadvertent shifting and movement2. Position the jack near desired lift point.3. Set the Parking Brake in the vehicle.4. Refer to the vehicle manufacturer owner’s manual to locate approved lifting points on the vehicle. Positionthe jack so that the saddle is centered and will contact the load lifting point firmly.5. Assemble the handle; ensure to align with slots.6. Close the release valve by turning it clockwise until it is firmly closed.7. Before raising the vehicle double check and verify the saddle is centered and also has full contact with thelifting point.8. Pump handle to lift until saddle contacts load. Continue to pump the jack handle to lift the vehicle to thedesired height. After lifting, support the load with appropriately rated vehicle support stands before workingon the vehicle.CAUTION: NEVER WIRE, CLAMP OR OTHERWISE DISABLE THE LIFT CONTROL VALVE TOFUCTION BY ANY MEANS OTHER THAN BY USING THE OPERATOR'S HAND. USE THE HANDLEPROVIDED WITH THIS PRODUCT OR AN AUTHORIZED REPLACEMENT HANDLE TO ENSUREPROPER RELEASE VALVE OPERATION. DO NOT USE EXTENSIONS ON THE OPERATINGHANDLE.8
LOWERING THE JACK1. Raise load high enough to allow clearance for the jack stands to be removed, then carefully remove jackstands.2. Remove support stands.3. Grasp the handle firmly with both hands. Securely hold on to the jack handle so your hands do not slip andensure the release valve does not rapidly lower.4. Carefully open the Release Valve by slowly turning the handle counter-clockwise. (Do not allow bystandersaround the jack or under the load when lowering the jack.5. After removing jack from under the load, keep jack in the lowered position to reduce exposure to rust andcontamination.WARNING: WARNING: USE EXTREME CAUTION WHEN LOWERING THE JACK. THE JACK HANDLEMAY TURN RAPIDLY. OPENING THE RELEASE VALVE TOO FAST CAN CAUSE THE JACK TOLOWER RAPIDLY. FAILURE TO HEAD THESE WARNINGS COULD CAUSE SERIOUS INJURY ORDEATH.9
MAINTENANCE INSTRUCTIONSIf you use and maintain your equipment properly, it will give you many years of service. Follow themaintenance instructions carefully to keep your equipment in good working condition. Never perform anymaintenance on the equipment while it is under a load.InspectionYou should inspect the product for damage, wear, broken or missing parts (e.g.: pins) and that all componentsfunction before each use. Follow lubrication and storage instructions for optimum product performance.BindingIf the product binds while under a load, use equipment with equal or a larger load capacity to lower the loadsafely to the ground. After un-binding; clean, lubricate and test that equipment is working properly. Rustycomponents, dirt, or worn parts can be causes of binding Clean and lubricate the equipment as indicated inthe lubrication section. Test the equipment by lifting without a load.CleaningIf the moving parts of the equipment are obstructed, use cleaning solvent or another good degreaser to cleanthe equipment. Remove any existing rust, with a penetrating lubricant.LubricationThis equipment will not operate safely without proper lubrication. Using the equipment without properlubrication will result in poor performance and damage to the equipment. Some parts in this equipment are notself-lubricating inspect the equipment before use and lubricate when necessary. After cleaning, lubricate theequipment using light penetrating oil, lubricating spray. Use a good lubricant on all moving parts. For light duty use lubrication once a month. For heavy and constant use lubrication recommended every week. NEVER USE SANDPAPER OR ABRASIVE MATERIAL ON THESE SURFACES!Rust Prevention:Check rams and pump plungers on the power unit assemblies daily for any signs of rust or corrosion.Without a load lift the equipment as high as it goes and look under and behind the lifting points. If signs of rustare visible clean as needed.Grease FittingsSome models contain grease fittings the will regularly need to be greased and lubricated.How the Jack OperatesWith release valve closed, an upward stroke of the jack handle draws oil from the reservoir tank into theplunger cavity. Hydraulic pressure holds the valve closed, which keeps the oil in the plunger cavity. Adownward stroke of the jack handle releases oil into the cylinder, which forces the ram out. This raises thesaddle. When the ram reaches maximum extension, oil is bypassed back into the reservoir to prevent an overextended ram stroke and possible damage to the jack. Opening the release valve allows oil to flow back intoreservoir. This releases hydraulic pressure on the ram, which results in lowering the saddle.Storing the Jack1. Lower the Lifting Arm.2. Place the handle in the upright position.3. Store in a dry location, recommended indoors.Note: If the jack is stored outdoors, be sure to lubricate all parts before and after use to ensure the jack staysin good working condition. Always store jack in the fully retracted postion when stored in outdoor or causticenviroments that can cause corrosion and/or rust.10
TO ADD JACK OILTO REPLACE JACK OIL1. Position the jack on level ground and lower thesaddle.1. Position the jack on level ground and lower thesaddle.2. Remove cover plate. Remove the oil plug.2. Open release valve by turning handle counterclockwise.Cover PlateOil Plug3. Remove cover plate. Remove the oil plug.3. Fill the oil case until oil level is just beneath thelower rim of the oil fill hole.Cover PlateOil Plug4. Replace oil plug.Perform the Air Purge Procedureand Replace coverplate.4. Turn the jack on its side to drain old oil from theoil fill hole.Cover PlateOil Plug11
5. Position the jack on level ground and keep saddlein the lowered position. Fill the oil case until oillevel is just beneath the lower rim. Keep dirt andother foreign materials clear when pouring.ADDITIONAL WARNINGS: DO NOT USE MOTOR OIL IN THE JACK. ONLY USE ANTI-FOAMING JACK OIL. ALWAYS USE A GOOD GRADE HYDRAULICJACK OIL. DO NOT USE HYDRAULIC BRAKE FLUID,ALCOHOL, GLYCERINE, DETERGENT, MOTOROIL OR DIRTY OIL. USE OF A NON-RECOMMENDED FLUIDCANCAUSE DAMAGE TO A JACK. AVOID MIXING DIFFERENT TYPES OF FLUIDAND NEVER USE BRAKE FLUID, TURBINEOIL, TRANSMISSION FLUID, MOTOR OIL ORGLYCERIN. IMPROPER FLUID CAN CAUSEPREMATURE FAILURE OF THE JACK AND THEPOTENTIAL FOR SUDDEN AND IMMEDIATELOSS OF LOAD. DISPOSE OF HYDRAULIC FLUID INACCORDANCE WITH LOCAL REGULATIONS.6. Replace oil plug.Perform the Air Purge Procedureand Replace coverplate.Cover PlateADDITIONAL LUBRICATION:1. Periodically check the pump piston and ram forsigns of rust or corrosion. As needed thoroughlywipe with a clean non-scratching oil solubl
Save the receipt, warranty and these instructions. Do not modify the jack in any way. Unauthorized modification may impair the function and/or safety and could affect the life of the equipment. There are specific applications for which the jack was designed. Always check for damaged or wo