Transcription
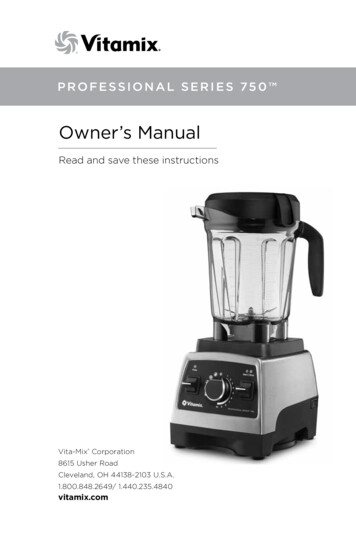
PROFESSIONAL SERIES 750 Owner’s ManualRead and save these instructionsVita-Mix Corporation8615 Usher RoadCleveland, OH 44138-2103 U.S.A.1.800.848.2649/ 1.440.235.4840vitamix.com
CO N T E N TSContents.2Let’s Get Started.3Symbols.3Service and Registration. 4Important Safeguards.5Parts and Features.7Control Panel.9About the Blades. 11Tamper. 12How to Use the Tamper. 13Hints for Setting Speeds. 14Operating Instructions. 15Care and Cleaning. 17Troubleshooting. 19Warranty.20Notes. 23Specifications. 242
L E T ’ S G E T STA RT E DCongratulations!You are about to see how quick, easy and delicious healthy eating can be!Before first use:1.Please read all the safety information, warnings and instructional materialfound in this booklet.2.Set your Vitamix machine on a dry, level surface.3.Carefully remove the cable tie on the power cord.4.Make sure the power switch is set to Off. Plug the machine into angrounded electrical outlet.5.Follow the cleaning instructions on page 17 to prepare your machinefor use.SY M B O L SCautionNever touch movingparts. Keep hands andutensils out of container.Electrical shockhazardOperate with lid andlid plug in placeHigh temperaturewhen blending hotliquidsRead and understandowner’s manualDo not insert itemsinto container whileblender is in useDo not immerseUnplug while not in use, before cleaning, changingaccessories or approaching parts that move in use3
S E R VIC E A N D REGIST R A T IONVitamix ServiceRecord the model number and serial number of your Vitamix in the spacesprovided below for future reference. These numbers can be found on the backof the motor base.Model NumberSerial NumberDate of PurchasePurchased FromBefore returning this product for any reason, including repair, first contactVitamix Customer Service at 1.800.848.2649 or 1.440.235.4840, emailservice@vitamix.com, or contact your local dealer.Product RegistrationIf you purchased your Vitamix machine directly from the Vita-Mix Corporation viathe company’s website or call center by phone, your product was registered at thetime of purchase and your Vitamix machine’s warranty has been activated.If you purchased your Vitamix machine from an International Distributor or Dealerin countries other than the United States, Canada, United Kingdom, or Ireland, yourproduct is warranted through the International Distributor or Dealer and need not beregistered with the Vita-Mix Corporation.Your machine is not yet registered with Vitamix if you:1.Purchased from a Dealer in the United States, Canada, United Kingdom, or Ireland2. Purchased from a military base3. Purchased from a retail or wholesale store4. Received your Vitamix machine as a gift5. Are not the original owner of the machineEnjoy faster and easier service in the future by taking a few minutes to register yourVitamix machine today.Choose one of these easy ways to register your machine:1.Online at vitamix.com/warranty2. Email service@vitamix.com3. Call 1.800.848.2649 or 1.440.235.4840Your warranty may be honored by Vita-Mix Corporation or an authorized dealer.Failure to register your machine will not diminish your warranty rights.4
I M P O RTA N T SA F E G UA R DSWARNING: To avoid the risk of serious injury when using yourVitamix blender, basic safety precautions should be followed, includingthe following.READ ALL INSTRUCTIONS, SAFEGUARDS, ANDWARNINGS BEFORE OPERATING BLENDER.1.2.3.4.5.6.7.8.9.10.11.12.13.14.15.Read all instructions.Not intended for use by or near children or persons with reduced physical,sensory, or mental capabilities or lack of experience and knowledge. Closesupervision is necessary when any appliance is used by or near children orincapacitated persons.To protect against the risk of electrical shock, do not put the blender base inwater or other liquid.Unplug from outlet when not in use, before putting on or taking off parts, andbefore cleaning.Avoid contacting moving parts.Do not operate any appliance with a damaged cord or plug or after the appliancemalfunctions, or is dropped or damaged in any manner. Call Vitamix CustomerService at 1.800.848.2649 or 1.440.235.4840 or email service@vitamix.com atonce for examination, repair, replacement, or electrical or mechanical adjustment.If purchased outside the U.S.A. or Canada, contact your local Vitamix dealer.Alteration or modification of any part of the blender base or container, includingthe use of any part or parts that are not genuine authorized Vitamix parts, maycause fire, electric shock, or injury.The use of attachments not expressly authorized or sold by Vitamix for use withthis blender, including canning jars, may cause fire, electric shock, or injury.Do not use outdoors.Do not let cord hang over edge of table or counter.Do not let cord contact hot surface, including the stove.Keep hands and utensils out of container while blending to reduce the risk ofsevere injury to persons or damage to the blender. A rubber scraper or spatulamay be used, but only when the Vitamix blender is not running.The tamper provided must be used only when the main part of the lid is in place.Blades are sharp. Handle or remove blade and blade assembly from thecontainer with extreme care to avoid injury. To reduce the risk of injury, neverplace a blade assembly on the motor base unless assembled to the Vitamixcontainer.Do not leave foreign objects, such as spoons, forks, knives or the lid plug, in thecontainer as this will damage the blades and other components when startingthe machine and may cause injury.16. Never attempt to operate with damaged blades.17.Do not leave foreign objects, such as spoons, forks, knives or the lid plug, in thecontainer as this will damage the blades and other components when starting themachine and may cause injury.Important Safeguards continues on page 65
IMPORTANT SAFEGUARDSI M P O RTA N T SA F E G UA R DS18. Never attempt to operate with damaged blades.19. Always operate blender with lid and lid plug firmly in place. The lid plug should beremoved only when adding ingredients and when using the tamper.20. When blending hot liquids or ingredients, use caution; spray or escapingsteam may cause scalding and burns. Do not fill container to the maximumcapacity. Always begin processing on the lowest speed setting, variablespeed 1. Keep hands and other exposed skin away from the lid opening toprevent possible burns.21. When making nut butters or oil-based foods, do not process for more thanone minute after the mixture starts to circulate in the container. Processingfor longer periods can cause dangerous overheating.SAVE THESE INSTRUCTIONSWARNINGTo Avoid Injury.Read and understand instruction manualbefore using this machine.IMPORTANT INSTRUCTIONS FOR SAFE USEThis product is intended for HOUSEHOLD USE ONLY and is not intended to beused for commercial purposes.Do not leave your Vitamix blender unattended when operating.Any repair, servicing, or the replacement of parts must be performed by Vitamix oran authorized service representative.WARNINGElectrical Shock Hazard.Use grounded outlet only.DO NOT remove ground.DO NOT use an adapter.DO NOT use an extension cord.Always unplug before cleaning themotor base or when not in use.Do not put the motor base in water orother liquid.Failure to follow instructions can causedeath or electrical shock.6NOTICE: THE FAILURE TO FOLLOW ANY OF THE IMPORTANT SAFEGUARDSAND THE IMPORTANT INSTRUCTIONS FOR SAFE USE IS A MISUSE OF YOURVITAMIX BLENDER THAT CAN VOID YOUR WARRANTY AND CREATE THE RISKOF SERIOUS INJURY.
PA RTS A N D F E AT U R E S341ON1OFF2On/Off Switch: The On/Off (or Power) Switch is on the right side of themachine base. The On/Off Switch controls the power to the machine.When the Pulse and Start / Stop Symbols brighten, the On / Off Switch is inthe On position and power is flowing.2Control Panel: For more information, refer to Control Panel on Page 9.CAUTION: Lids and tampers are not interchangeable between differentcontainer styles, types and sizes. For more information, refer to Tamper onPage 12.3Low-profile 64-oz. capacity container with 2-part lid: Always use the lid and the lid plug when the machine is in operation Never operate the blender without checking to make sure that the lidis securely locked in place. Ounces, Milliliters and Cups are clearly marked. Insert the lid plug through the lid and secure by turning clockwise. Remove the lid plug to use the tamper or to add ingredients.4Tamper: Using the tamper maintains circulation by preventing air pocketsfrom forming during blending.Parts and Features continues on page 87
PARTS ANDSAFEGUARDSFEATURESIMPORTANTPA RTS A N D F E AT U R E SWARNINGRotating Blades CanCause Severe Injury.DO NOT reach into the container while themachine is running.To Lock the Lid in Place: Position the lid on the container with the lid flaps midwaybetween the spout and the handle. Push the lid onto the container until it locksinto place. The lid must always be secured when processing, especially whenblending hot liquids that may scald. Never operate the blender without checkingto make sure that the lid is securely locked in place.To Remove the Lid: Lift up on one lid flap, while holding the container securely.To Remove the Lid Plug: Rotate the lid plug anti-clockwise from the “locked” tothe “unlocked” position and lift out.Power Cord: Your machine is equipped witha long power cord. Store the unused portionneatly underneath. Plastic cable retainershold the cord securely. They are flexible andreturn to position after the cord is lifted out.FrontBack8
CONTROL PANELCO N T R O L PA N E L24ON5OFF311. On / Off Switch:The On / Off (or Power) Switch is located on the lower right-hand sideof the machine. The On / Off Switch controls the power to the machine.BEFORE moving the On / Off Switch to the On (I) position, make surethe marker on the Variable Speed Dial is pointed at the Stop Symbol (at the top of the dial.)After plugging in the unit, move the On / Off Switch to the On position toready the machine for blending. Move the On / Off Switch to the Off positionat night and whenever the machine will be left unattended.If the On / Off switch is moved to the Off position to stop a program mid-cycle,wait 30 seconds for power to recycle and the timer to reset before moving theOn / Off switch to the On position.When the Pulse and Start / Stop Symbols brighten, the On / Off Switch is in theOn position and power is flowing.2. Start () / Stop () Switch:After the marker on the Variable Speed Dial is rotated off of the Stop Symbol( ) to either Variable Speed 1 or a Program setting, press the Start / Stop Switchto start the machine and initiate the blending process. Pressing the Start / StopSwitch again will stop the blending process.Programs can be interrupted by pushing down the Start / Stop switch at anytime. If reactivated by pushing down the Start / Stop switch, the program willstart at the beginning.3. Pulse Switch ():Variable Speed: Pressing down on the Pulse Switch will cause the machine toblend at the speed setting shown on Variable Speed Dial for as long as thePulse Switch is held down.Programs: The Pulse function can be used when a program is selected. Pushingdown the Pulse switch when a program is selected will cause the machine torun at 50% of high power for as long as the Pulse switch is pushed down.Control Panel continues on page 109
CONTROLPANELIMPORTANTSAFEGUARDSCO N T R O L PA N E LCAUTIONNever Start on Speeds Above 1 with HotLiquids to Avoid Possible Burns.Escaping steam, splashes or contents may scald.To secure the contents, lock the lid and lid plugsecurely in place prior to operating the machine.Always start on Variable 1, slowly increase to 10.4. Variable Speed Dial:The Variable Speed Dial serves two functions; the use of five programssettings or ten Variable Speed settings. To use programs: rotate the Variable Speed Dial to the left to thedesired program. To use Variable S
Owner’s Manual Read and save these instructions PROFESSIONAL SERIES 750 Vita-Mix Corporation 8615 Usher Road Cleveland, OH 44138-2103 U.S.A. 1.800.848.2649/ 1.440.235.4840
