Transcription
Desktop SetupUser GuideLast updated: August 04, 2020
Help Desk TechnologyTable of ContentsServicePRO Desktop Setup – User Guide . 21.ServicePRO Portal Setup – Information to Note . 22.Setting up ServicePRO Desktop in Client Systems . 32.1Updating from Previous ServicePRO Versions running WebTop (OOB) . 32.2Fresh Install of ServicePRO Desktop - Option 1 – GPO Deployment . 32.3Fresh Install of ServicePRO Desktop - Option 2 – Manual Deployment . 52.4Installation of ServicePRO Desktop for Test Environments . 53.Updates to ServicePRO Version . 64.If the ServicePRO Portal alias is modified manually . 65.Note on ServicePRO Prerequisites Setup. 6iServicePRO Desktop Setup User Guide
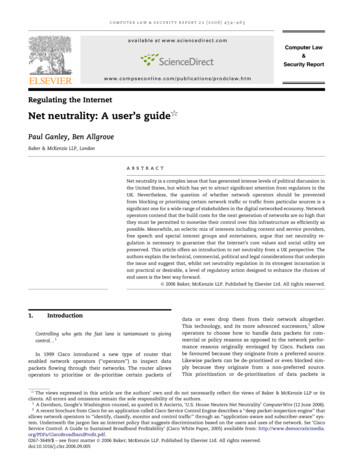
Help Desk TechnologyServicePRO Desktop Setup – User Guide1. ServicePRO Portal Setup – Information to NoteAfter completing installation of the ServicePRO Support Portal, a URL linking to a ZIP file will beprovided, as shown in the image below. This ZIP file contains files for the ServicePRO Desktop setup forclient systems.Administrators will be able to copy this URL from the ServicePRO INI file, available in the ServicePRONetwork Installation icePRO Desktop Setup User Guide
Help Desk Technology2. Setting up ServicePRO Desktop in Client Systems2.1Updating from Previous ServicePRO Versions running WebTop(OOB)Whenever the user launches the currently installed ServicePRO WebTop (OOB) in their PCs, it willautomatically download and install ServicePRO Desktop.NOTE:If your current version is 14.1.x version or lower, then it won't be a direct migration from OOBto Desktop – The users need to uninstall OOB first manually and then install ServicePRODesktop.2.2Fresh Install of ServicePRO Desktop - Option 1 – GPODeploymentNOTE:HDT Tech Support should advise all clients to use GPO deployment (as opposed to manualdeployment) if they require their reps to use the Desktop client. ServicePRO Administrators can download the Desktop GPO Deployment Guide ZIP file(ServicePRO Desktop GPO Deployment Guide.zip) from the specific ServicePRO version folder(eg: 14.2.15, 14.2.16 etc.,) under this huDYzVdWISp3A ServicePRO administrators can use this ZIP file along with the ServicePRO Desktop (Out ofBrowser) Setup ZIP file from the URL specified in the Finish dialog for ServicePRO Setup (alsopresent in the INI file) to set up GPO deployment of ServicePRO Desktop for their support reps. ServicePRO administrators should configure one (1) Startup script GPO as detailed in the stepsbelow: Using Startup Script GPO, Install ServicePRO Desktop.1. Download and Extract the ServicePRODesktop.zip file typically found in the/predownload/ folder of your ServicePRO installationi.e. p.zip2. Verify that the INI file, ServicePRODesktop.ini, has the correct URI/IP valuespointing at the ServicePRO website.3. Copy the Desktop deployment files 'ServicePRODesktopSetup.exe' and'ServicePRODesktop.ini' to a shared folder location where the target computerhas Read permissions. Please note that both files must reside in the samedirectory.4. Extract the batch file from the zip fileServicePRO Desktop GPO Deployment Guide.zip.3ServicePRO Desktop Setup User Guide
Help Desk Technology5. Update the following lines in the batch file SPDesktopStartupGPODeploy.batwith your server name and with the share location from step 3. Replace[ServerName] and [SharedDir] according to your environment configuration:set DeployServer \\ServerName\SharedDirset LogLocation \\ServerName\SharedDir\InstallLogs6. To assign computer startup scriptsi.Click Start, click Control Panel, click Administrative Tools, and clickGroup Policy Management.ii.In the console tree, double-click Group Policy Objects in the forest anddomain that contains the Group Policy object (GPO) that you want toedit. This is located in Forest name/Domains/Domain name/GroupPolicy Objects.iii.Right-click the GPO you want to use to assign scripts and click Edit. Thisopens the Group Policy Object Editor console.iv.In Group Policy Object Editor, in the console tree, click Scripts(Startup/Shutdown). This is located in the ComputerConfiguration\Windows Settings node.v.In the details pane, double-click Startup.vi.In the Startup Properties dialog box, click Add.vii.In the Add a Script dialog box, do the following:viii.In Script Name, type the path to the script, or click Browse to search forthe script file in the Netlogon shared folder on the domain controller.For this example, the script will be SPDesktopStartupGPODeploy.bat.ix.In the Startup Properties dialog box, specify the options you want touse. The following options are available:x.Startup Scripts for Group Policy object. Lists all the scripts that arecurrently assigned to the selected Group Policy object. If you assignmultiple scripts, the scripts are processed in the order that you specify.To move a script up in the list, select the script and click Up. To move ascript down in the list, select the script and click Down.xi.Add. Opens the Add a Script dialog box, where you can specifyadditional scripts to use.xii.Edit. Opens the Edit Script dialog box, where you can modify scriptinformation, such as name and parameters.xiii.Remove. Removes the selected script from the Startup Scripts list.xiv.Show Files. Displays the script files that are stored in the selected GroupPolicy object.4ServicePRO Desktop Setup User Guide
Help Desk TechnologyNOTE:ServicePRO Desktop Setup may trigger User Account Control (UAC) on somesystems. Users will be required to click ‘Yes’ in the UAC prompt to continue theinstallation.2.3Fresh Install of ServicePRO Desktop - Option 2 – ManualDeploymentServicePRO Administrators will need to send the URL for the ServicePRO Desktop Setup ZIP file tosupport reps in order to install ServicePRO Desktop on their machines.After receiving the URL for ServicePRO Desktop’s installer files, the Support Rep will need to performthe following steps:1. Download the zip file from the URL (ServicePRODesktop.zip)2. Extract the contents to a local folder. Two files will be extracted to the folder:ServicePRODesktopSetup.exe and ServicePRODesktop.ini3. Launch the extracted Desktop setup file (ServicePRODesktopSetup.exe) manually to begin asilent installation.4. After setup is completed, find the ‘ServicePRO’ shortcut underStart Menu\Programs (or on the Desktop), and run ServicePRO.The client can also be accessed from the following osoft\Windows\Start Menu\ProgramsNOTE:ServicePRO Desktop Setup will trigger User Account Control (UAC). Users will berequired to click ‘Yes’ in the UAC prompt to continue the installation.If the user is not an administrator on the PC, the ServicePRO Desktop setup willprompt for Administrator Credentials.2.4Installation of ServicePRO Desktop for Test EnvironmentsIf you have a ServicePRO test environment installed, it is now possible to install a ServicePRODesktop TEST client side-by-side with your production ServicePRO Desktop. ServicePROadministrators will need to provide the download URL to support reps wanting to run the Testinstance of ServicePRO Desktop.On the ServicePRO test instance installation folder, the /predownload/ folder of your ServicePROinstallation will also contain a ZIP file ServicePRODesktopTEST.zip. This file can be used to installServicePRO Desktop on a clean machine or on a machine with an already existing productionServicePRO Desktop client.The Support Rep who will be installing the ServicePRO Test will need to perform the following steps:5ServicePRO Desktop Setup User Guide
Help Desk Technology1. Download the zip file from the URL (ServicePRODesktopTEST.zip)2. Extract the contents to a local folder. Two files will be extracted to the folder:ServicePRODesktopSetupTEST.exe and ServicePRODesktop.ini3. Launch the extracted Desktop setup file (ServicePRODesktopSetupTEST.exe) manually tobegin a silent installation.4. A desktop shortcut ‘ServicePRO Test’ will be created with ‘Test’ prefix. This will allowlaunching the ServicePRO Desktop test related instance client. If you have theproduction client installed as well, it will continue to work as normal.3. Updates to ServicePRO VersionWhenever a revised version of ServicePRO portal is installed on the Web Server, the ServicePROAdministrator will need to notify support reps to perform the following actions:1. Log out and re-launch the ServicePRO Desktop client (i.e. via Desktop shortcut).2. When the client has re-opened, it will launch the updated version of ServicePRO automatically.4. If the ServicePRO Portal alias is modified manuallyIf a ServicePRO administrator changes the ServicePRO Portal website alias, ServicePRO Desktopinstances set up for client systems will not function until configured correctly.In these instances, the administrator will be required to contact HDTC ServicePRO Support to receivedirections on installing Desktop setup properly.ServicePRO Tech Support will temporarily provide a setup file (PrepareSPDesktopSetup.exe), whichenables preparing Desktop Setup on the fly. The preparation setup file needs to be launched with thefollowing e abc.com;https:// ServicePRO.abc.com/ServicePRO.Service;q”Yellow highlighted part in this command line needs to be updated with the following information: The location of the setup files in client’s system The client’s ServicePRO URL5. Note on ServicePRO Prerequisites SetupRunning ServicePRO from within a browser in elevated trust requires 3 registry entries and a digitalcertificate installation from the Trusted Publishers store.As a result, if the user launches ServicePRO from Internet Explorer 11 on the same machine where theServicePRO Desktop is installed, after login, it will prompt a download and installation of ServicePROpre-requisites setup.6ServicePRO Desktop Setup User Guide
Help Desk TechnologyServicePRO’s pre-requisite installer will deploy the registry and digital certificate information requiredfor running ServicePRO in elevated trust in the browser automatically.7ServicePRO Desktop Setup User Guide
Help Desk Technology 2 ServicePRO Desktop Setup User Guide ServicePRO Desktop Setup – User Guide 1. ServicePRO Portal Setup – Information to Note After completing installation of the Servi