Transcription
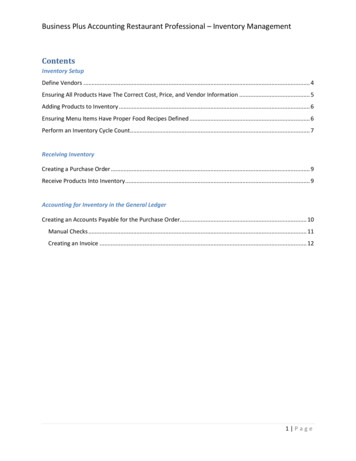
Lynx PlusSecurity SystemProgramming ESTBYPASSSELECTAWAYADDLIGHTS ON89CODECHIME7LIGHTS OFF0STATUS800-038599/09 Rev. ANO DELAYFUNCTIONSTAYDELETE
TABLE OF CONTENTSData Fields .3 56 Enhanced Zone Programming.10 56 Enhanced Zone Programming Worksheet.13 80 Device Programming.15 81 Zone Lists .16Powerline Carrier Device Worksheet for 80 and 81.17 83 Enhanced Sequential Mode .18 84 Assign Zone Voice Descriptors .19Vocabulary Index (for 84 Assign Zone Voice Descriptors) .19 85 Record Custom Voice Descriptors.205800 Series Transmitter Loop Numbers Diagram .21Lynx Plus Summary of Connections Diagram.23Refer to the Lynx Plus Series Installation and Setup Guide P/N 800-03858 or later for detailedinformation on programming the system. The Installation and Setup Guide contains full descriptions forall data fields.ULLynx Plus is not intended for UL985 Household Fire applications unless a 24-hour backup battery(P/N LYNXRCHKIT-HC or LYNXRCHKIT-SHA) is installed.To Enter Programming Mode:You may find it convenient to adjust the volume setting before entering the Programming Mode. This will allowyou to clearly hear feedback announcements or system beeps.1. Power up, then depress [ ] and [#] both at once, within 50 seconds of powering up.OREnter: Installer Code (4 1 1 2) plus 8 0 0. System will display “Entering Program Mode”.Notes: 1. If a different Installer Code has been programmed, enter: the New Installer Code 8 0 0.2. If 98 was previously used to exit programming, the first method shown above must be used to reenter the program mode)2. Upon entry into Program mode, data field “20 INSTALLER CODE” will be displayed (the first data field inthe system) and both keypad LEDs will flash.To Program the Data Fields:1. Press [ ] followed by the desired field number (e.g., 21), then make the required entry.2. The keypad beeps three times after entering data, then displays the next data field in sequence.3. For phone number and account number fields, press [ ] to end the entry if less than number maximumnumber of digits is entered.4. To view data entered in field, press [#] plus the field that you wish to view (e.g., #21). The system will beepthree times and data programmed for that field will be displayed to the right of the field number. The systemwill scroll through the data for longer numbers and a beep will sound after each number is displayed orthree times after the final digit is displayed.5. To delete an entry, simply press [ ] plus that field number and reenter the correct data. For phone numberand account number fields 40- 44, 88 and 94, press [ ] field number [ ].Interactive Menu Modes:There are six interactive menu modes as listed below. To enter these modes, first enter Program mode. While inProgram mode, press [ ] plus the mode number desired (e.g., 56). 56 Enhanced Zone Programming .For programming zone characteristics, report codes, etc. 80 Device Programming.For programming Powerline Carrier Devices 81 Zone List Programming .For programming zone lists for use with Powerline Carrier Devices 83 Enhanced Sequential Mode .For entering transmitter serial numbers 84 Assign Zone Voice Descriptors .For assigning voice descriptors to zones 85 Record Custom Voice Descriptors .For recording custom voice descriptors-2-
To Initialize Download ID and Subscriber Account Number for Downloading: 96 Resets all subscriber account numbers and CSID in preparation for an initial download.To Load a Default Set: 97 Enter a number 1-4 corresponding to the selected default table (See the Installation Instructions for thedefault tables). Enter 0 if you are not selecting a default table.To Exit Programming Mode: 98 Exits programming mode and prevents re-entry by: Installer Code 8 0 0. If 98 is used to exitprogramming mode, system must be powered down, then press [ ] and [#] within 50 seconds of powerup to re-enter programming mode. 99 Exits programming mode and allows re-entry by: Installer Code 8 0 0 or: Power-up, then press [ ]and [#] within 50 seconds of power up.DATA FIELDSData Field DisplayFunction& Programming OptionsSYSTEM SETUP ( 20– 30)20INSTALLER CODE21QUICK ARM ENABLE22KEYPAD BACKLIGHT23FORCED BYPASS24RF HOUSE ID CODE25X10 HOUSE CODE26CHIME BY ZONE27CLOCK DISPLAY29DST MNTH STR/END[ ] Programmed Table 1 Default Values† Entering a number other than the one specified may give unpredictable results.Installer Code[4112]Enter 4 digits, 0–9Quick Arm Enable†[1]0 no; 1 yesKeypad Backlight Timeout[0]0 none (backlighting always on); 1 backlight off after 10secsForced Bypass†UL installations 0[0]0 none; 1 bypass open zonesRF House ID Code [00]00 disable all wireless keypad usage; 01–31 5804BD/5804BDV house IDPowerline Carrier Device (X10) House ID[0]0 A; 1 B, 2 C, 3 D, 4 E, 5 F, 6 G, 7 H, 8 I, 9 J, #10 K, #11 L,#12 M, #13 N, #14 O, #15 PChime By Zone† [0]0 no; 1 yes (program zones to chime on zone list 3)Real Time Clock Display† [1]0 no; 1 yes, display time on keypadDaylight Saving Time Start/End Month[3, 11]StartEnd1-9, # 10,# 11,# 12. Enter 0,0 if no daylight savings time used.-3-
Data Field Display30DST WEEK STR/ENDFunction& Programming Options[ ] Programmed Table 1 Default ValuesDaylight Saving Time Start/End Weekend[2,1]StartEnd0 disable; 1 first; 2 second; 3 third; 4 fourth; 5 last; 6 next to last; 7 third from lastZONE SOUNDS AND TIMING ( 31– 39)† Entering a number other than the one specified may give unpredictable results.Single Alarm Sounding/ZoneUL installations 031SINGLE ALARM SND32FIRE SND TIMEOUT33ALRM SND TIMEOUT34EXIT DELAY TIME35ENTRY DELAY 136ENTRY DELAY 237EXIEXIT SND/QK EXIT38CONFCONF ARM ING DING† [0]0 Alarm Sounding Per Zone will be the same as the Swinger Shutdown” set in field *92;1 yes, limit once per arming period (also applies to long range radio output if “0” isselected in 91 field)Sounder Timeout† [0]0 timeout; 1 no timeoutAlarm Bell TimeoutUL installations 1 (4 min) minimum† [1]0 none; 1 4 min; 2 8 min; 3 12 min; 4 16 minExit Delay UL installations 60 seconds max.† [70]00-99 exit delay time (in seconds)Entry Delay 1 (zone type 01) UL installations 45 seconds max.† [30]00-99 entry delay time (in seconds)Entry Delay 2 (zone type 02) UL installations 45 seconds max.† [60]00-99 entry delay 2 time (in seconds)Audible Exit Warning / Quick Exit† [1, 1]Exit Warn Quick Exit0 no; 1 yesConfirmation of Arming DingNote: Confirmation ding only sounds when LYNX is Armed Away or disarmed after being ArmedAway. If LYNX is armed by RF button (key fob), a confirmation ding occurs immediately after armingregardless of field 38 settings. If LYNX is disarmed by RF button (key fob), additional disarmingconfirmation ding occurs immediately after disarming and is longer than arming confirmation ding.† [0]0 no arming confirmation ding after arming system by APX32EN keypad or RF keypad; 1 armingconfirmation ding after arming system by APX32EN keypad or RF keypad; 2 arming confirmationding after arming from RF keypad only39PWR UP PRV STATEPower Up In Previous State† [1]0 no; 1 yes; UL installations 1DIALER PROGRAMMING ( 40– 53) In fields 40, 41, 42, enter up to the number of digits shown.Enter 0–9; # 11 for ' '; # 12 for '#'; # 13 for a pause.PABX Access Code40PABX ACCESS CODEEnter 6 digits. If fewer than 6 digits are entered, pressing advances to the next field. Toclear entries from field, press 40 † Entering a number other than the one specified may give unpredictable results.-4-
Data Field DisplayFunction& Programming OptionsPrimary Phone Number41PRIMARY TEL NUM[ ] Programmed Table 1 Default ValuesEnter up to 20 digits; Do not fill unused spaces. If fewer than 20 digits entered, pressing advances to the next field. To clear entries from field, press 41 .Secondary Phone Number42SECOND TEL NUMEnter up to 24 digits; Do not fill unused spaces. If fewer than 24 digits entered, pressing advances to the next field. To clear entries from field, press 42 .!All four digits of the subscriber account number must be entered in Fields 43 and 44. If ten digit format is selectedin 48 (option 5), all ten digits of the Subscriber Account number must be entered.In fields 43, 44, enter 4 to 10 digits. Enter 0–9; # 11 for B; # 12 for C; # 13 for D; # 14 for E; [# 15 for F].Enter as 4th digit, if 3 1 dialer reporting is to be used. If only 3 digits used, pressing advances to the nextfield. Enter [ ] as the fifth digit if a 4-digit account number (for 4 1, 4 2, CID ) is used. To clear entries fromfield, press 43 or 44 .Examples:For Acct. 1234, enter:1 2 3 4For Acct. 1234567890, enter:43PRIMARY ACCOUNT#44SECNDRY ACCOUNTACCOUNT#46FOLLOW ME PHONE#; For Acct. B234, enter: # 11 2 3 41 2 3 4 5 6 7 8 9 0; For Acct. 123, enter:1 2 3 Primary Subscriber Account NumberSee note above.Secondary Subscriber Account NumberSee note above.“Follow Me” Reminder Phone NumberEnter up to 24 digits; Do not fill unused spaces. If fewer than 24 digits entered, pressing advances to the next field. To clear entries from field, press 46 .Enter 0-9, # 11 for ‘ ’; # 12 for ‘#’; # 13 for a pause (two seconds).47PHONE SYS SELECTPhone System Select† [5]CentralStation48REP FRMT PRI/SECNote: If you are using Pulse (rotary) Dialing, you must enter thenumbers slowly to allow the pulse dialer time to operate.Dialing ModePulseTonePulseToneNo WATS0 No Speaker 1 NoPhoneSpeaker Phone4 WithSpeakerPhone5 WithSpeaker PhoneWATS2 No Speaker 3 NoPhoneSpeaker Phone6 WithSpeaker Phone7 WithSpeaker PhoneReport Format for Primary/Secondary[7, 7]PrimaryNote: Option 5 or 7 (ADEMCO Contact ID )must be selected for AAV.Secondary0 3 1, 4 1 ADEMCO L/S STANDARD1 3 1, 4 1 RADIONICS STANDARD2 4 2 ADEMCO L/S STANDARD3 4 2 RADIONICS STANDARD5 ADEMCO CONTACT ID REPORTINGWITH 10-DIGIT SUBS ACCT NO.6 or undefined 4 2 ADEMCO EXPRESS7 ADEMCO CONTACT ID REPORTINGWITH 4-DIGIT SUBS ACCT NO.8 3 1, 4 1 ADEMCO L/S EXPANDED9 3 1, 4 1 RADIONICS EXPANDED† Entering a number other than the one specified may give unpredictable results.-5-
Data Field Display49SPLIT/DUAL REPFunction& Programming Options[ ] Programmed Table 1 Default ValuesSplit/Dual Reporting[0]To Primary Phone No.0 All reports1 Alarms, Restore, Cancel2 All except Open/Close, Test3 Alarms, Restore, Cancel4 All except Open/Close, Test5 AllTo Primary Phone No.6 All reports except Open/Close7 All reports8 All reports9 All reports except Open/CloseTo Primary Phone No.10 All except Open/Close11 All reports12 All reports13 All except Open/CloseTo Secondary Phone No.None, unless primary fails, then allOthersOpen/Close, TestAllAllAllTo Paging NumberAlarms, Open/Close‡, TroublesAlarms, TroublesAlarms, Open/Close‡, TroublesAlarms, TroublesTo Follow Me System Phone Number)Alarms, Open/Close‡, TroublesAlarms, TroublesAlarms, Open/Close‡, TroublesOpen/Close‡‡ Will report users 0, 5-8 or wireless arm/disarm button zones 26-33; all other zones and users do notreport.5015 SEC DIAL DLY51PERIOD TEST REP52TEST REP OFFSET53SESCOA/RADIONICS54LACK OF USAGE55REPORT CHANNELS58RF JAM DETECTION15 Second Dialer Delay (Burglary)UL installations 0† [0]0 no; 1 yes;Periodic Test Report (enter Test Code in field 64)† [0]0 none; 1 24 hours; 2 weekly; 3 30 daysFirst Test Report Offset† [2]0 24 hour; 1 6 hours; 2 12 hours; 3 18 hoursSESCOA/Radionics Select[0]0 Radionics (0–9, B–F reporting);1 SESCOA (0–9 only reporting). Select 0 for all other formats.Lack of Usage Notification[0]0 Disabled1 1 day2 7 days 3 27days4 90 days5 180 days6 365 daysReporting Channels[0]0 Telco Line (no Radio)1 LRR/IP(Digital Communication only) and Telco Line3 LRR/IP (Digital Communication only) (no Telco Line)5 LRR/IP (Digital Communication with AAV) (Telco Line connections for 2-way voicesession only, if applicable)RF Jam DetectionNote: For event logging option 2 must be selected.[0]0 no RF Jam Detection; 1 RF Jam Detect on, no CS report;2 RF Jam Detect on with CS report (if trouble/restore report is enabled in fields 60, 71)† Entering a number other than the one specified may give unpredictable results.-6-
Data Field DisplayFunction& Programming Options[ ] Programmed Table 1 Default ValuesTO PROGRAM SYSTEM STATUS, & RESTORE REPORT CODES ( 59– 76, & 89):With a 3 1 or 4 1 Standard Format: Enter a code in the first box: 1–9, 0, B, C, D, E, or F. Enter "# 10" for 0, "# 11" forB, "# 12" for C, "# 13" for D, "# 14" for E, "# 15" for F.A "0" (not "# 10") in the first box will disable a report.A "0" (not "# 10") in the second box will result in automatic advance to the next field when programming.With an Expanded or 4 2 Format: Enter codes in both boxes (1st and 2nd digits) for 1–9, 0, or B–F, as described above.A "0" (not "# 10") in the second box will eliminate the expanded message for that report.A "0" (not "# 10") in both boxes will disable the report.With ADEMCO Contact ID Reporting: Enter any digit (other than "0") in the first box, to enable zone to report (entries in thesecond boxes will be ignored).A "0" (not "# 10") in the first box will disable the report.Examples:For Code 3 (single digit), enter:3 0For Code 3 2 (two digits), enter:3 2For Code B 2 (Hexadecimal), enter:# 11 2SYSTEM STATUS REPORT CODES ( 59– 68)Exit Error Report Code59EXIT ERROR REP60TROUBLE REP CODE61BYPASS REP CODE62AC LOSS REP CODE63LOW BAT REP CODE64TEST REPORTREPORT CODE65OPEN REPORT CODE66AWAY/STAY REPORTREPORT67RF TRANS LB REP68CANCEL REP CODE2nd digit is automatically sent as 2nd digit of the zone alarm reportcode programmed in 56, if expanded or 4 2 reporting is selected.[1]Trouble Report Code [1,0]Bypass Report Code [0,0]AC Loss Report Code [0,0]Low Bat Report Code [1,0]Test Report Code (†† 2nd digit is automatically sent as the usernumber if expanded or 4 2 reporting is selected.)[1,0]Open Report Code†† [0]Arm Away/Stay Report Code†† [0,0]AWAYSTAYRF Transmitter Low Battery Report Code [1,0]Cancel Report Code 2nd digit is automatically sent as 2nd digit of thezone alarm report code programmed in 56, ifexpanded or 4 2 reporting is selected.[1,0]RESTORE REPORT CODES ( 70– 76)Alarm Restore Report Code70ALARM RES REPORT71TROUBLE RES REP[1]Trouble Restore Report Code [1,0]-7-
Data Field Display72BYPASS RES REP73AC RESTORE REP74LO BAT RES REP75RF LOBAT RES REP76TEST RES REPORTFunction& Programming Options [ ] Programmed Table 1 Default ValuesBypass Restore Report Code [0,0]AC Restore Report Code [0,0]Low Bat Restore Report Code [1,0]RF Transmitter Low Battery Restore Report Code [1,0]Test Restore Report Code [0,0]DYNAMIC SIGNALING FIELD ( 77)Dynamic Signaling Options77DYNAMIC SIG OPTS78PROG TONE GEN TM [0, 0]1st Entry (delay before switch CS reporting path)#13 195 seconds0 Redundant3 45 seconds8 120 secondsreporting on dialer 4 60 seconds9 135 seconds #10 #14 210 seconds 150 seconds#15 225 secondsand LRR/IP device 5 75 seconds#11 165 seconds1 15 seconds6 90 seconds#12 180 seconds2 30 seconds7 105 seconds2nd Entry0 Primary Dialer1 LRR/IP2 LRR/IPPreferred Channel Preferred Channel reporting onlyProgrammable Tone Generation Time [0, 0]00 Disabled; 01-09 100-900 ms; 10-99 1.0 – 9.9 secsOUTPUT AND SYSTEM SETUP ( 80, 81, 83– 85) See Procedures later in this manual.Multi-Mode (E-Mail Notification)86MULTIMULTI-MODE EMAIL87AUX FUNC 1BTN PG88PAGER CHARACTERS[0]0 Disable multi-mode devices; 1 Enable multi-mode device address #6 only;2 Enable multi-mode device address #7 only; 3 Enable multi-mode addressesAux Function/ 1-Button Paging[0]0 Aux key performs defined function (macro);1 Aux key sends message to pager or voice message to follow me system phonenumber.If 1, you must also select an option 6-9 in field 49 for the pager or 10-13 for the follow mesystem announcement.Pager CharactersUp to 16 digits can be entered that will appear in front of the 7-digit pager message sent bythe control. Refer to the Installation Instructions (fields 87, 88 and 49) for fulldescriptions of the paging feature. You do not need to fill all 16 digits (press [ ] toadvance to next field).To clear entries, enter 88 . To enter “ ” [#] [11]; To enter “#” [#] 12]; Toenter 2-second pause [#] [13] (some pagers require an additional delay [pause] inorder to receive the entire message)-8-
Data Field Display89EVNT LOG 80% REP90EVNT LOG OPTIONSFunction& Programming Options[ ] Programmed Table 1 Default ValuesEvent Log 80% Full Report Code [0,0]Event LoggingNote: System messages are logged whenany non-zero selection is made.[3]0 None; 1 Alarm/Alarm Restore; 2 Trouble/Trouble Restore; 4 Bypass/BypassRestore; 8 Open/Close.Example: To select “Alarm/Alarm Restore”, and “Open/Close”, enter 9 (1 8); To selectall, enter #15.91AAV/REM PHN CTRLAlarm Audio Verification (AAV)/Remote Phone Control[2]0 None1 AAV and remote phone control2 remote phone control only4 AAV onlyNotes: (1)(2)(3)(4)(5)(6)92# REPS ARMED PERIn order to activate the Remote Phone Control feature and defeat an answering machine,ensure that the correct ring detection count (“15”) has been programmed in field 95.Remote phone session will be terminated if a report must be sent.Alarm Audio Verification will only function when Contact ID is selected. AAV cannot beused for UL installations.If an alarm will be reported to primary and secondary phone numbers, AAV can onlyfunction via the secondary number.If an alarm will be reported to a follow me phone number (10-12 in field 49) AAV cannotbe used.If AAV is selected and LRR/IP communications device is enabled, you must enter "0"(primary dialer preferred channel) as the second entry in Field 77.Number of Reports In Armed Period[0]0 10 Alarm/Alarm Restore Reports;1 Unlimited (UL installations 0)DOWNLOAD INFORMATION ( 93– 95)Flexible Callback93FLEXBLE CALLBACK94DOWNLOAD PHONE #[0]0 No flexible callback; 1 Last digit flexible;2 Last 2 digits flexible; 3 Last 3 digits flexibleDownload Phone NumberNote: In UL installations, downloading may only be performed if a technician is at the site.Enter up to 20 digits, 0–9; # 11 for ' '; # 12 for '#'; # 13 for a pause. Do not fill unusedspaces. If fewer than 20 digits entered, pressing advances to the next field. To clearentries from field, press 94 .95RING DET COUNTRi
- 3 - To Initialize Download ID and Subscriber Account Number for Downloading: 96 Resets all subscriber account numbers and CSID in preparation for an initial download. To Load a Default Set: 97 Enter a number 1-4 corresponding to the selected default table (See the Installation Instructions for the default tables). Enter 0 if you are not selecting a default table.
