Transcription
Contents2.Overview3 - 4.Pipe5.Fittings6.Features & Benefits7-13.Installation Considerations14-16.Jointing Instructions17-23.Pipe Sizing Calculations & Tables24-28.Gas Plus Fitting & Tools Range29.Warranty
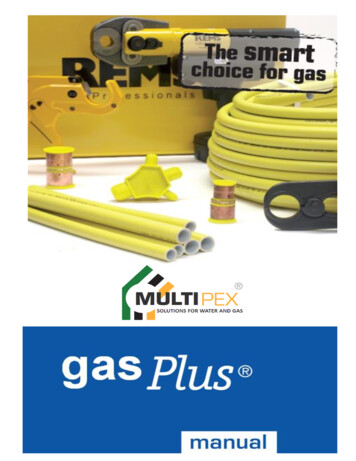
OverviewThe Gas Plus system has been developed at therequest of plumbers, gasfitters and builders who wereseeking a high quality yet cost effective compositepipe system for use with natural or propane gas.Gas Plus joins the Multipex family (Pex Plus, CrimpPlus & Push Plus), providing a total solution for waterand gas applications.The Gas Plus system utilizes a premium qualityPe-X/Al/PE composite pipe and DZR brass fittings.This combination provides a flexible, lightweight andcorrosion resistant system.All installations should be carried out by anappropriately licensed tradesperson and in fullaccordance with the Gas Plus installation guidelines,the relevant Australian standards and any additionallocal authority requirements. When installed subjectto the above conditions the Gas Plus system willprovide years of trouble free service.2
PipeGas Plus pipe is a high quality composite pipe. Itcomprises of three separate layers bonded to form alightweight, flexible and extremely resilient pipe. Theinside layer is a plain Pex-b crosslinked Polyethylene,this is completely surrounded by a layer of Aluminiumwhich inturn is encased with an outer layer of PEGas Plus pipe is available in the following sizes DN 16,DN 20, DN 25, and DN 32, supplied in either coil formor straight lengths. Gas Plus pipe sizes DN 40 and DN50 are only available in straight lengths.3
Gas Plus Pipe DimensionsNom. Size16mm20mm25mm32mm40mm50mmMean OD(mm)16.020.025.032.040.050.0Mean ID(mm)12.016.020.026.032.041.0Gas Plus Standard Supply UnitsNom Size16mm20mm25mm32mm40mm50mmStraight Lengths(m)555555Coils(m)50505025NANAThe use of Gas Plus pipe provides users with manyadvantages over traditional piping materials. Due toit’s smooth internal surface it provides very low levelsof friction loss and in some cases can reduce the needto up-size pipe work. The jointing methods are byway of a crimp operation so there is no requirementfor solvents, solder, flux or other consumables.Gas Plus pipe is manufactured and tested to complywith AS 41764
FittingsGas Plus fitting bodies are manufactured from DZRbrass, whilst the crimp rings are of a high qualitycopper construction to provide exceptional resistanceto corrosion. Gas Plus fittings are supplied with sleeveprotection plugs to protect the integrity of the crimpring during both shipping and storage. Systemswithout these plugs may be prone to problems causedby out-of-shape crimp rings. These sorts of problemscan slow down the installation process considerably.Crimp Plus fittings are manufactured with an overallbarb and crimp ring length that is longer than manyof it’s competitors. This adds to the integrity of eachjoint.All Gas Plus fittings are manufactured and tested tofully comply with AS 4176.Gas Plus Fittings DimensionsNom Size16mm20mm25mm32mm40mm50mmMean Bore (mm)8.511.014.220.026.034.55
Features and Benefits Quick and easy jointing system less time on the job - increased productivitySimple Hand tool crimp method less capital outlay on toolingMinimal need for Brazing reduced cost on gas and consumablesInternal Sealing method reduced risk of leaks due to scratched orscuffed pipe, No O-Ring requiredLightweight reduced likelihood of OH&S issuesFlexible can result in decreased fittings use6
Installation ConsiderationsGas Plus should always be installed in compliancewith AS 5601:2004. Most installation requirementscan be sourced from this document.Heat exposureGas Plus should not be installed in positions where itis likely to be exposed to naked flame. Installersshould ensure that adequate clearances aremaintained from heat sources such as burners, fluesetc Installers should also ensure that all weldingoperations are completed and allowed to cool prior toassembling the Gas Plus joints7
Thermal expansionGas Plus pipe has a thermal expansion rate of approx0.25mm per metre of pipe per 10 C temperaturechange. This expansion or contraction should betaken into considered for any installation and theappropriate allowances in pipe layout or fixingpositions made. Care should be taken not to pull thepipe tightly between fixed points during installation asthe pipe may contract at a later time and applyexcessive forces to the joints. This could result in jointfailure.Protection from physical damageDue care should be taken to protect pipe and fittingsfrom any physical damage both prior to, during andafter installation. Possible causes of physical damagemay include (but are not limited to) sharp edges orimplements, machinery, rodents, excessive heat,radiation, mechanical forces, corrosive agents.Where Gas Plus pipe penetrates timber or metalframework appropriate precautions should be takento protect it from damage. Holes should be sized toallow for longitudinal movement, expansion andcontraction of pipe whilst still securing the pipeadequately. Suitable grommets or sleeves should beused in metal frames to protect the pipe fromabrasion.The use of silicone sealant or other chemicaladhesives is not recommended for these purposes.8
Pipe BendingDo not apply bending forces to joints which havealready been completed. Finish all bending operationsprior to crimping the fitting.Due care should be taken during bending to ensurethat the pipe is not damaged or kinked. If you doencounter a kinked or damaged section of pipe itshould be cut out and replaced as a precaution.Gas Plus pipe has limits as to the minimum radiusthat it may be bent to. For smaller sizes (16 & 20mm)it can be easily bent by hand, in which case the radiusof the bend should be not less than 5 times thediameter of the pipe.It is also possible to use many of the mechanicalbending devices currently available in the market. Inthis case the minimum radius is as indicated on thebelow table.Minimum Mechanical Bending RadiusNom Size16mm20mm25mm32mm40mm50mmMin Mechanical BendingRadius (mm)50601001304005009
ClippingIn accordance with AS 5601:2004 fixing spacingshould be observed for both horizontal and verticalpipe runs as outlined on the table below.Clipping should be by way of a recognized fixingwhich complies with the requirements AS 5601:2004.This excludes things such as bent over nails, tie wire,pierced metal strapping etc.Clip Spacing TableNom Size16mm20mm25mm32mm40mm50mmVertical or Horizontal RunSpacing (m)1.01.251.52.02.02.5For pipe work being suspended on rod hangers theminimum diameter of the rod hanger should be9.5mm for all pipe sizes up to and including 50mm.Appliance ConnectionGas Plus pipe is not to be used as an applianceconnection in accordance with AS 5601:2004 (5.6.2restriction on appliance connections)10
UndergroundPipe should be buried with a minimum cover of450mm. Marker tape should be installed approx150mm above the pipe.Fittings being DZR brass should be able to be installeddirectly in the trench without any form of coating.Additional precautions should obviously be taken inareas where aggressive soil conditions are known toexist or where it may be a requirement of the localcertifying authority.When being buried beneath a building the pipe mustbe free of joints.Chases, In-Slab, Under-floorWhere Gas Plus pipe is installed in chases or cast inslabs the installation must be in accordance with bothAS 5601:2004 and any other relevant buildingregulations or standards.UV ExposureIt is recommended that the pipe be sleeved orwrapped to ensure that the installation satisfies therelevant authorities and or the local authorities’interpretation of the Australian Gas Installationstandard. Refer to AS 5601:2004 (4.11.4 protectionagainst UV degradation).11
Future ExtensionIt is good practice to allow for future extension of theconsumers pipe work. This may be done by way of:a). An Equal Tee with a short piece of pipe fitted tothe branch and terminated with a #3 Male adaptorand brass screwed cap.b). A #30 FI Tee terminated with a brass plugscrewed into the threaded branch.Connection to other materialsGas Plus is suitable for connection to most existingpipe work systems by the use of our range ofthreaded adaptors.When connecting to other materials you shouldensure that you use an approved gas sealant for allthreaded fittings. It is also recommended to removeany remaining flux or other jointing compounds whichcould possibly compromise the integrity of the joint.Caravans or Marine CraftThe Gas Plus system is not suitable for installation incaravans or marine craft, it’s use in these situationsmay not comply with the relevant Australianstandards.12
TestingAll testing should be undertaken in accordance withAS 5601:2004 – Appendix E (pressure testing for gasinstallations) and in addition to any other localregulations or requirements.During testing all joints should be checked for leaks,that they are assembled correctly and that the crimpoperation has been completed properly.13
Jointing Instructions1. Cut pipeCut pipe to desired length. Cutshould be square and free fromany swarf or burrs.Use REMS pipe cutter or similarblade type cutter. Do not use ahacksaw as this creates excessiveswarf.2. Round PipeInsert rounding tool into cut pipeto correct any flattening that mayhave occurred during cutting.3. Check fitting assemblyEnsure that the copper crimp ringand plastic ring retainer areassembled correctly onto thefitting. Both can be pushed on byhand if they have moved awayfrom the fitting shoulder. Witnesshole should be located toward theinwards end of each barb.14
4. Insert PipeSlide pipe onto fitting untilit reaches the depth stop.Pipe should be fully visiblethrough the witness holeson the crimp ring5. Crimp tool PositioningPosition crimping tool evenlyover the copper crimp ring.You should leave a similardistance between the outsideof the jaw and the end ofthe crimp ring at both ends.Crimp tool should be placedat 90 to the pipework.6. CrimpFully close jaws of the crimpingtool to compress the coppercrimp ring. Do not compressthe plastic ring retainer.15
7. Check Crimp RingFinally and most importantly,check the crimp ring dimensionby placing the crimp gaugeover the centre of the indentedring on the crimp sleeve. On acorrectly crimped fitting thecrimp gauge should pass freelyover the crimp ring at this point8. Pressure TestAt completion, carry out pressure testing as requiredper AS 5601:2004 – Appendix E (pressure testing forgas installations) and or any requirements specifiedby local authorities.16
Pipe Sizing CalculationsThe pipe sizing process is extremely important inensuring that the installed system performs to theexpectation of the end user. In the past someinstallations have adopted a “near enough is goodenough” approach to pipe sizing. This has in manycases resulted in substandard installations whereappliances have been “starved” of gas and thereforehave not functioned properly. Failure to incorrectlysize systems could ultimately lead to voiding ofmanufactures warrantyInformation required to complete pipe sizing exercise:a). Gas Type Natural or LPGb). Gas Consumption for each appliance (Mj/h)c). Pressure available at the start of the consumerpiping (meter pressure)d). Allowable pressure drop. (Difference betweenmeter pressure and minimum inlet pressurerequired by the appliance).e). Proposed layout for the pipe work in question.17
Method1. Sketch the proposed piping layout includingpositions of all appliances.a). Record all pipe lengths on sketch and the gasconsumption of each applianceb). Allocate a letter to each branch on the diagramcommencing at the meter with letter “A”c). Allocate a letter to each appliance position on thediagramReference the above diagram for subsequent steps.2.Determine the main run.This is the length of piping from the meter to thefurthest appliance. This critical measurement willbe used throughout the sizing process. (Example:Main run for this diagram 5m 3m 4m 4m 16m)18
3.Add an allowance for number of fittings used onthe main line. For each Tee, Elbow, Connector,Coupling on the main line add the equivalent of2m pipe length to your Main Run Length.(Example: 16m 5 fittings @ 2m 26m Total)4.Select the pipe sizing table that corresponds withthe gas type, supply pressure and allowablepressure drop required. (Example: Use the tablewhich is for natural gas 1.25kpa Meter Pressurewith 0.12kpa Pressure drop – this will allowavailable pressure of 1.13kpa at the appliance)5.Prepare a simple chart to assist in calculating thepipe sizing for each section of piping. For GasFlow column you record all flows that need to runthrough that section of pipe. Nom Pipe Sizecolumn is then filled by working from the tablePipeSectionA-BB-CC-DB-EC-FCalculatedGas Flow (mj/h)Length(Main RunLength) (Fitting Qty x 2)2650 100 40 1902650 40 90264026100265019NomPipe Size32mm25mm20mm25mm20mm
6.a).b).c).d).e).Nom Pipe Size column is then filled by workingfrom the pipe sizing tableSelect the Main Run Length from the figuresshown under the “Pipe Run length” column.(always round up where applicable in the case ofour example round up to 30)Section A – B has a total flow rate of 190 mj/h.Follow the 30m column down until you reach the190 figure (or the next larger if your exact figureis not shown)Read across the table to the indicated “NominalSize” (Example: 30m @ 210mj/h 32mm PipeSize – next size down (25mm) will only handle121mj/h).Insert this pipe size into your chart against thesection for pipe section A – B.Calculate the pipe size of remaining sections byusing the mj/h required to that point and theMain Run Length -not the pipe length forindividual sections.(Example: Run B - C you would use figures of90mj/h @ 26m which returns a result of 25mmPipe Size)The above methods make generous allowances forpipe sizing, this has been done intentionally to allowfor the possibility of appliance
Gas Plus pipe is available in the following sizes DN 16, DN 20, DN 25, and DN 32, supplied in either coil form or straight lengths. Gas Plus pipe sizes DN 40 and DN 50 are only available in straight lengths. 3