Transcription
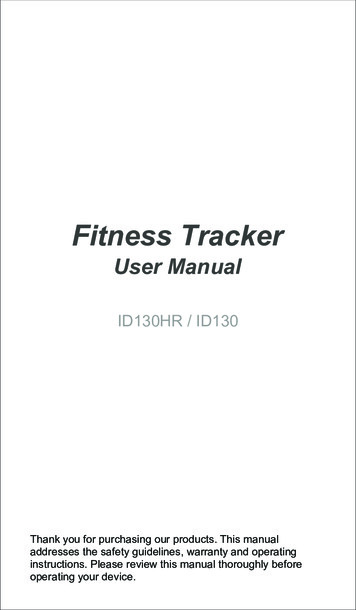
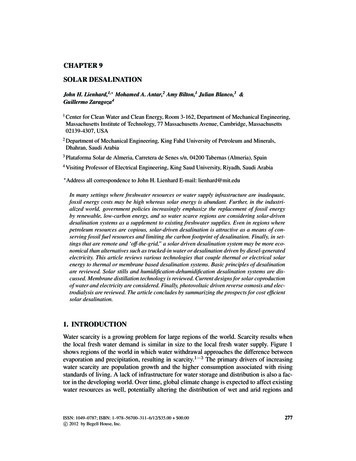
Request TrackerRequest Tracker is the ticket tracking system that is used by many groups at MIT. Itis a web and perl based tracking system developed by Best Practical. IS&T and thecomputing helpdesk migrated from Casetracker in the Summer of 2006 and theRCCs migrated from the RCCdb tracking system in late Fall 2006.First time using RTRT allows certificate based and password basedauthentication. RT does not use your kerberospassword. It has its own password store and youmust setup a new password before you can loginusing this method.After successfully logging into RT, you should immediately go to the preferencespage to correctly setup your profile in RT. Please follow the directions belowaccurately.Setting PreferencesWhen you first open RT by going to http://help.mit.edu, youshould click the “Certificate Login” button. Once you're logged in,proceed to set your preferences. You can get to the preferencespage through the preferences link on the left hand column Set your password – Thiscan come in handy if youhave to access RT from acomputer that you do nothave certificates on.1. Change your default ticket page to Call Center Update Page If you do not like this page view, you can change it later. Call Center Update view offers the most information on one screen2. Change your Default Working Queue to Help Desk::Athena3. Select the Help Desk::Athena for your Quick Search queues. They will now show up on the right hand side of the main screen Also select Help Desk::Call Center if you work for the HD or wantto include Helpdesk tickets in your search results4. Set 'New Ticket' links create tickets immediately to YES5. Set Requestor 'Change' Button on Call Center Screen to YES
6. Create a signature that bestreflects your status as an IS&TClient Support Services employee.For Athena Consultanting, pleaseenter:Your NameAthena ConsultingClient Support ServicesMIT Information Services and Technologyx3-4435olc@mit.eduVolunteer Consultants may replace “Athena Consulting” with “Volunteer Athena Consultant”.7. Click Save Preferences (other changes can be made once you are comfortable using RT)12345
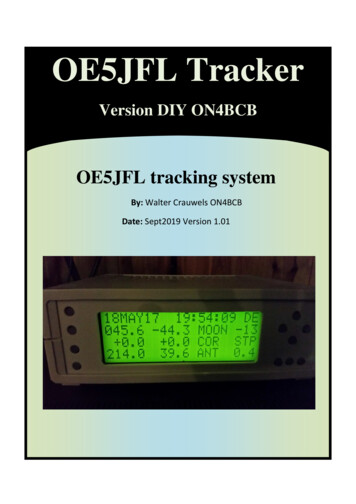
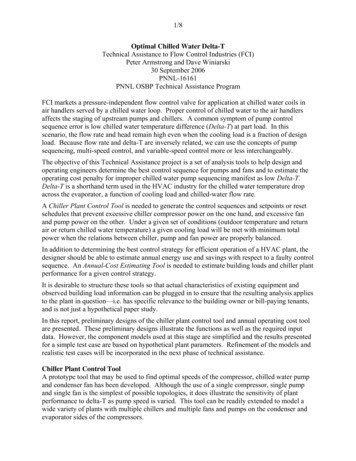
RT Home Page1324New Ticket createTo create a new ticket, select the appropriate queue from the list. If you setyour RT preferences correctly, Help Desk::Athena should appear as the default inthis list. Then click “Go.”1Search BoxTo quickly view a specific ticket, you can type the RT ticket number into thesearch bar at the top of the RT screen. This will be available from any page withinRT. You can also search for the requestor's email address through this search bar.2Saved SearchesYou will automatically see the helpdesk-athena group saved search namedOLC Queue on the RT home screen. You can also use the Search page in RT to addyour own personal saved searches. If you have any suggestions for saved searchesthat would benefit the other consultants, feel free to submit them to the OLCsupervisors.In the image above, the helpdesk-athena searches are at the bottom of the savedsearches list. There are also two personal saved searches in this list. They areunder “My saved searches.”3Quick SearchesThe quick searches are set through the preferences page. Once you select thequeues in the preferences section of the preferences, they will appear on the righthand side of your RT home screen. Here you can see the number of new, open andwaiting tickets in each of the queues and: View all new open and waiting cases by clicking on the name of the queue View all the new tickets, open tickets or waiting tickets individually by clickingon one of the respective numbers.4
Searching RTThe easiest way to perform a search for a particular ticket is touse the link on the left hand column “Ticket Search.” Bydefault, this should open the simple search page. There are twoother types of searches you can do in RT, the Query Building andAdvanced. These will not be covered in this manual. QueryBuilder can be used to createyour own “saved searches”mentioned above.Search the correct queueWhen starting a new simplesearch, it's important to notethat it will default to searchingyour default working queue andonly new, open or waitingtickets. So please check tomake sure the queue you'researching in is selected (youcan select more than onequeue) and if you're looking for cases that couldbe resolved or rejected, please include thosestatus types as well.It's also a good idea to narrow down your search criteria as much as possible.Searching through multiple queues, large date ranges or through the ticket historyrather than subject/requestor can result in very time consuming searches. If youcan narrow down the queue, status or creation date, then the search will finishmuch, much quicker than an ambiguous search.Using the query builder to create saved searchesSaved searches are items that appear in the center of the RT homescreen. As amember of the OLC group, you should see the OLC Queue saved search. Moresaved searches may be added later.To build your own saved search, first use the simple search to create theparameters and find the results. Once the search completes, click on the QueryBuilding link. You should now see the parameters for your search in the Querybox on the upper right. Below that, you can type the name of your search and clicksave. This will save it in your personal saved searches. If you'd like to suggest thesearch for all consultants, click the Advanced link and copy the text of the searchin an email to olcsuper@mit.edu.
Search and Quick Search resultsThe ticket view screen (Quick Search list on the right) is also a saved search and willdisplay the search results much like the saved searches on the home screen. # - Ticket number – unique RT ticket number. Requestors – email address of the ticket requestor (person needing help) Created – Relative time since the ticket was created Topic – Corresponds to one of our pre-defined OLC topics Last Contact – how long ago we sent mail to the client Subject – The subject line of the e-mail the user sent us Status – Open, New, Waiting, Resolved, Rejected or Deleted New means the ticket has not yet been seen (OLCR: unseen) Open means we are currently working on the ticket (OLCR: pending) Waiting means we're waiting for a response from the client (OLCR: pickup) Resolved – case is considered resolved and should be closed (OLCR: done) Rejected – used for SPAM (OLCR: cancel) Deleted – shouldn't be used. We cannot get tickets back that are deletedLast Updated – last time anything was done with the case usually indicates the last time the client sent mail or we sent mail to the clientPriority and Time left – Not used
Take, Release StealLike the old OLCR system, RT requires you to take ownership of a ticket before youcan update it. Unlike the old OLCR system, this is required for comments as wellas replies to the user.When you first view a ticket, you'll see the “Display” page, which contains read-onlyinformation about the ticket. At the top of the screen, you'll a message like thisone:To work on the ticket, click the Take link in the top right corner of the screen.When a ticket is owned by someone else, you'll see this message instead:You can click “Steal” to take ownership of the ticket.Note: Do NOT steal tickets without first checking with the person who currentlyowns the ticket. If they're not logged in (zephyrable), it's probably ok to steal it, butif you're not sure, please don't steal it. If the person is in the middle of composing areply, and you steal the ticket, they will be unable to save the reply and it will belost.When you are done working on a ticket, be sure to release it by clicking the“Release” link in the top right hand corner of the screen:Alternatively, you can release all your tickets by clicking the “OLC Release” link inthe left sidebar.
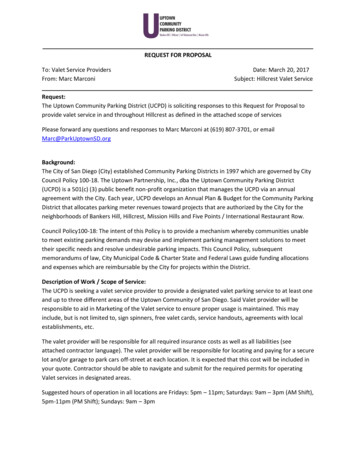
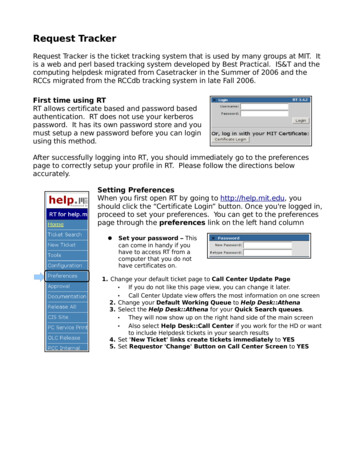
Displaying ticket InformationIf you set your preferences to use the “Call Center Update Screen” by default, thenyou're ticket display should look similar to the image near the bottom of this page.To view the ticket information, either 1.) click on the ticket number from anysearch results page or 2.) type the ticket number into the search box at the topof the page. You can also 3.) click on the link from any email pertaining to theticket you'd like to display.123If the ticket is not displayed in the Call Center View, you can click on the CallCenter link on the left hand column. The Call Center View should have a text boxin the right hand column to update the ticket. This view contains the most amountof information in one screen.
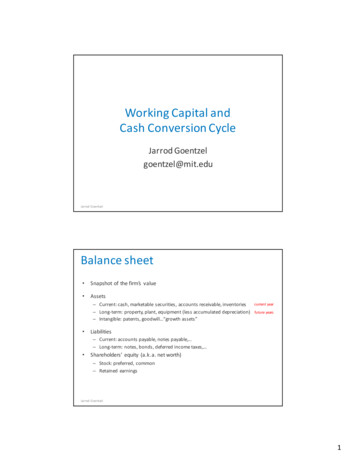
Updating the ticketThe easiest way to update a ticket is to use the Call Center View. This view willshow you all of the ticket custom fields: Topic, Hostname, Workstation Info,Summary, etc., the ticket history on the lower right and a text box to add any newentries in the upper right.Please make sure the Topic is correct. Many users send email to olc@mit.edu, which shows up as “other”. The firstthing to do after “Taking” a ticket is to make sure the topicis correct.Adding a comment or replying to thecustomerThe text box in the upper right hand corneris where you should type most updates tothe case. Select the appropriate update type (reply orcomment)Type your message in the boxClick Save Changes (in the upper right hand corner) to complete the update.Difference between Reply and CommentWithin the RT web based application, replies are visible by anyone with read accessto the queue as well as the requestor of the ticket. Comments are only visible tothe consultants with access to the queue, not to the requestor.When the Send Email button is checked or when corresponding through an emailclient rather than the RT frontend, RT will email certain recipients based on whetheran update is a reply or a comment. Replies will be emailed to the requestor, adminCCs and Ccs (if they exist.)Comments will be emailed to the ticket and queue adminCCs.How to add an additional recipient or change the recipient list(this is useful when forwarding information to olcsuper@mit.edu)To add an additional recipient or to change who the email gets sent to entirely clickon the reply or comment link near the top of the page.Then add the recipient to the To:, CC: or BCC: line in the update screen. Use thecheckbox to select or deselect the original recipients. Click Update Ticket to sendthe email.
Reply to or comment a ticket using emailAll mail you receive regarding a case should always come from AND be sent to oneof these email addresses: OLC Reply address:olc@mit.eduOLC Comment address:olc-comment@mit.eduThis allows RT to handle all correspondences and forward each one to theappropriate receivers. Because of this, replying to any mail you get from RT will putyour reply into the case as long as the subject line is preserved.If you are corresponding through email, be sure that the subject contains:[help.mit.edu # ticket number ]Depending on which email address you send to (comment or regular) will determineif the requestor also gets an email. Sending to the comment address will put your update in the ticket history, but it will notsend mail to the requestor. The requestor will also not be able to see that particularupdate in the ticket history. Sending to the regular address will put your update in the ticket history, email yourcomment to the requestor. The requestor will be able to see that particular update in theticket history.Additional RecipientsWhen adding a correspondence to a ticket by sending email to RT, additionalrecipients can be added by simply using the CC or BCC fields when composing themessage.
Request Tracker Request Tracker is the ticket tracking system that is used by many groups at MIT. It is a web and perl based tracking system developed by Best Practical. IS&T and the computing helpdesk migrated from Casetracker in the Summer of 2006 and the RCCs migrated from the RCCdb tracking system