Transcription
Circuit Playground FirmataCreated by Tony d-firmataLast updated on 2022-01-11 10:28:47 PM EST Adafruit IndustriesPage 1 of 28
Table of ContentsOverview3Firmata Sketch4 Install WebUSB Library5Example Python Code9 Install Dependencies Python Circuit Playground Firmata Code910Firmata Extension Reference14 1516181921242627Circuit Playground Firmata SysEx CommandsNeoPixel CommandsSpeaker/Buzzer CommandsAccelerometer CommandsTap Detection CommandsCapacitive Touch CommandsColor Sensing CommandsOther Components Adafruit IndustriesPage 2 of 28
OverviewCircuit Playground (https://adafru.it/ncE) is Adafruit's all-in-one Arduino-compatiblephysical computing board. This tiny board packs a lot of cool hardware like anArduino-compatible microcontroller, NeoPixels (addressable RGB LEDs), anaccelerometer to detect forces, tilting, and taps, sensors for temperature, light, andsound, buttons & capacitive touch inputs, and more. All of these components comepreassembled and soldered to the board--you're ready to start learning and playingwith Circuit Playground immediately!However one challenging aspect for newcomers to programming and hardware islearning how to use programming languages like C & C. Higher level programminglanguages like Python are typically easier for beginners to learn, but can youcontrol Circuit Playground with Python or other high level languages? It turns out thatyes you can use high level programming languages with Circuit Playground using atool called Firmata!Firmata (https://adafru.it/ncF) is a protocol for talking to and controlling Arduinocompatible boards. By programming Circuit Playground with a special Firmata sketchyou can control it from Python and other code running on your computer. This greatlyreduces the barrier to entry when learning programming and hardware. Just plugCircuit Playground into your computer and start writing Python and other code tocontrol its hardware!This guide will show you how to program Circuit Playground with a special Firmatasketch that allows it to be controlled from your computer. You'll also see how to runPython example code that talks to the Circuit Playground Firmata board and controlsall of its hardware, like lighting up the NeoPixels, reading the accelerometer, andmuch more.Before you get started make sure to follow the Circuit Playground guide (https://adafru.it/ncG) to familiarize yourself with the board and setup the Arduino IDE toprogram it. Then continue on to learn about loading the Circuit Playground Firmatasketch. Adafruit IndustriesPage 3 of 28
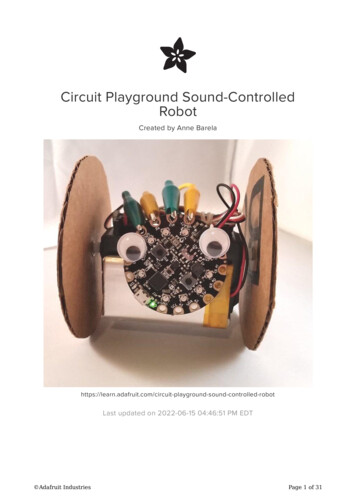
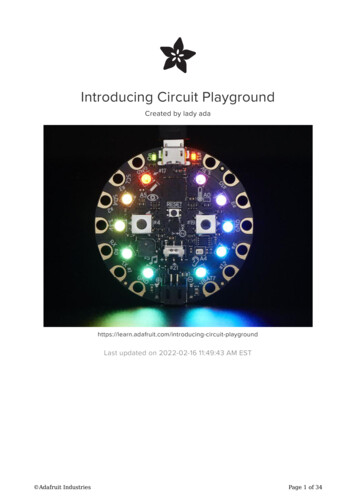
Firmata SketchTo load the Circuit Playground Firmata sketch you'll first need to make sure theArduino IDE is setup to program Circuit Playground. Follow the Circuit Playgroundguide (https://adafru.it/ncG) and make sure you can upload basic sketches like blink tothe board.Next you'll need to install a library which the sketch uses. Use the library manager (https://adafru.it/fCN) in the latest versions of Arduino to search for and install thislibrary: Adafruit Circuit Playground (https://adafru.it/naF)Finally download the latest version of the Circuit Playground Firmata code from itshome on GitHub (https://adafru.it/ncH) by clicking the button below:Download Circuit PlaygroundFirmata Codehttps://adafru.it/ncIUnzip the archive and you'll see two folders inside: CircuitPlaygroundFirmata - This is the Arduino sketch you'll load on the CircuitPlayground board to make it a Firmata device. Python Examples - These are examples of Python code that can control a CircuitPlayground board running the Firmata sketch.Open the CircuitPlaygroundFirmata sketch in the Arduino IDE and you should seesomething like the following: Adafruit IndustriesPage 4 of 28
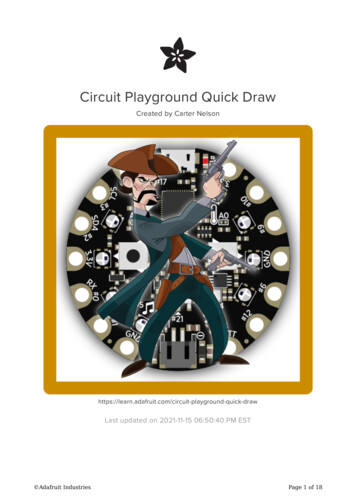
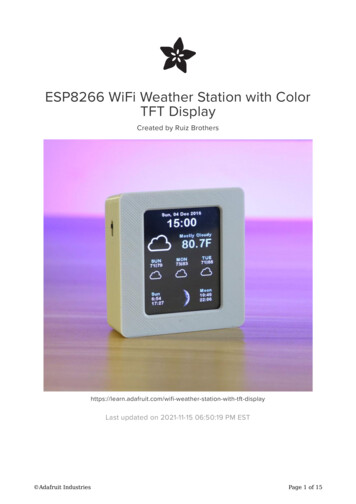
There isn't anything you normally need to change in the sketch, however if you'd everlike to enable debug output on the serial pins (pin 0 and 1 on Circuit Playground) youcan uncomment the debug mode line near the top:// Uncomment below to enable debug output.//#define DEBUG MODEWith debug mode enabled the serial pins 0 and 1 will output debug text during certainFirmata actions. You can hook up a USB to serial cable to these pins to read theoutput (use 9600 baud).Install WebUSB LibraryYou'll need to install a library first, before uploading.Visit the WebUSB repository athttps://github.com/webusb/arduino (https://adafru.it/XOE) Adafruit IndustriesPage 5 of 28
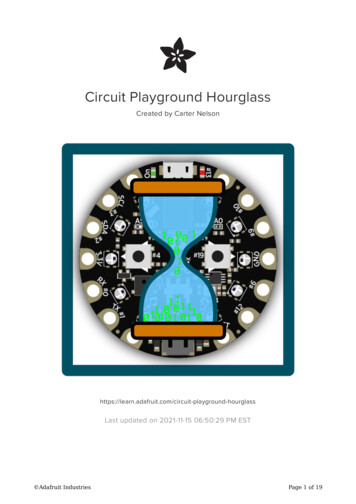
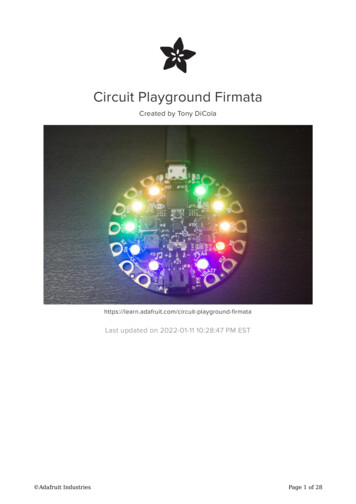
Once there, click the Code button in the top-right to get the code download. Thenclick Download ZipYou will get a zip file to download. Save it to your desktop or somewhere elseconvenient!Open the zip to find a folder called gh-pages Adafruit IndustriesPage 6 of 28
Then open that to find a folder called LibraryThen inside that folder is a folder called WebUSBDrag the WebUSB folder out to your DesktopOpen up your Sketches folder. Find it by going to the Arduino Preferences menu Adafruit IndustriesPage 7 of 28
It's called Sketchbook location, find and open that location on your computer!Drag the WebUSB folder you extracted earlier into the libraries folder within yoursketchbook folder.Now make sure Circuit Playground is selected in the Tools - Board menu, and theserial port for Circuit Playground is selected in the Tools - Port menu. Then press theupload button in the Arduino IDE to compile and upload the Firmata sketch. Adafruit IndustriesPage 8 of 28
Note that if the upload fails for some reason try double pressing the reset button onCircuit Playground. This will force it into bootloader mode and you should see the redLED start pulsing on and off. As soon as the red LED pulses press upload and tryuploading the sketch again.Once the sketch has successfully uploaded you're all set and are ready to start usingFirmata clients to control Circuit Playground. Continue on to the next page to learnabout Python example code to control Circuit Playground.Example Python CodeOnce your Circuit Playground is running the Firmata sketch you can use manydifferent Firmata clients to control the board. For example standard Firmata clientscan control the digital pins on the board and even read some of the analog sensorslike the thermistor and light sensor. However to make full use of the CircuitPlayground Firmata sketch you'll want to use a client that's specially modified to usecustom Firmata commands that interact with Circuit Playground's on-board hardwarelike its accelerometer, NeoPixels, and more.Included in the repository with the Circuit Playground Firmata sketch (https://adafru.it/ncH) is a set of Python code to talk to Circuit Playground Firmata. This codeimplements all of the custom Firmata extensions to control every component on theboard. You can write simple Python programs to light up the NeoPixels, read theaccelerometer & tap detection, capacitive inputs, and much more.If you're using a different Firmata client (https://adafru.it/ncF) you might need to lookinto how it supports custom Firmata SysEx extensions. See the Firmata ExtensionReference page (https://adafru.it/ncJ) for details on the custom Firmata extensions forCircuit Playground.Install DependenciesTo get started you'll first need to install a few dependencies to use the Python Firmataexample code. The Python code is based on the excellent PyMata library (https://adafru.it/ncK) which implements most of the code to talk to Circuit PlaygroundFirmata.First make sure you've installed the latest version of Python (https://adafru.it/fa7),either 2.7.x or 3.4 . Adafruit IndustriesPage 9 of 28
Next you will want to install the pip Python package manager (https://adafru.it/ncL).Some recent versions of Python include pip, however if you don't have pip installed(i.e. running the pip command at the command prompt fails with an unknowncommand error) follow the installation instructions (https://adafru.it/ncM) to downloadand run get-pip.py.After pip is installed you're ready to install the PyMata library (https://adafru.it/ncK).Open a command prompt and run the following command to install the library:pip install pymataNote on Linux and Mac OSX you might need to prefix the command with sudo so itruns as root and installs pymata globally:sudo pip install pymataMake sure you see the PyMata installation succeeds, for example you might see textlike:Collecting pymataDownloading PyMata-2.12.tar.gzCollecting pyserial> 2.7 (from pymata)Downloading pyserial-3.0.1.tar.gz (134kB)100% 143kB 3.9MB/sInstalling collected packages: pyserial, pymataRunning setup.py install for pyserial . doneRunning setup.py install for pymata . doneSuccessfully installed pymata-2.12 pyserial-3.0.1If you see the installation fail with an error go back and check you have both Pythonand pip installed and try again.Once PyMata is installed you're ready to run the Python Circuit Playground Firmatacode.Python Circuit Playground Firmata CodeTo run the Python Circuit Playground Firmata code first make sure you have a CircuitPlayground board that is running the Circuit Playground Firmata sketch. Check outthe previous page (https://adafru.it/ncN) if you haven't setup a Circuit Playground withthe Firmata sketch yet. Adafruit IndustriesPage 10 of 28
Next make sure you've downloaded the Circuit Playground Firmata repository (https://adafru.it/ncH) code. You can use the button below to download this code:Download Circuit PlaygroundFirmata Codehttps://adafru.it/ncIUnzip the archive and notice the Python Examples subfolder. Inside this folder is allthe Python code to control Circuit Playground Firmata.Before you run the example code first make sure the Circuit Playground board isplugged into the computer using its micro-USB port. You'll also want to find the nameof the serial port for Circuit Playground. Check the Tools - Port menu in the ArduinoIDE and remember the name of the port that you see for Circuit Playground, like COM1, /dev/tty.usbmodem143431, /dev/ttyUSB0, etc.Open a command prompt and navigate to the Python Examples folder. Start byrunning a simple example to test the buttons on the Circuit Playground board:python buttons.py /dev/tty.usbmodem143431Replace /dev/tty.usbmodem143431 with the name of the serial port for CircuitPlayground on your computer.You should see text like the following that shows PyMata connecting to the board andthen the example code waiting for buttons to be pressed:Python Version 2.7.11 (default, Jan 22 2016, 08:29:18)[GCC 4.2.1 Compatible Apple LLVM 7.0.2 (clang-700.1.81)]PyMata version 2.12Copyright(C) 2013-16 Alan YorinksAll rights reserved.Opening Arduino Serial port /dev/tty.usbmodem143431Please wait while Arduino is being detected. This can take up to 30 seconds .Board initialized in 0 secondsTotal Number of Pins Detected 30Total Number of Analog Pins Detected 12Press the left button, right button, or slide switch (Ctrl-C to quit).Switch is on the left!Try pressing and releasing the left button, right button, and moving the slide switchbetween its left and right positions. You should see text printed to the console:Left button pressed!Left button released!Right button pressed! Adafruit IndustriesPage 11 of 28
Right button released!Switch is on the right!Switch is on the left!If you see an error check you have Python and the PyMata library successfullyinstalled. Also confirm Circuit Playground is connected to the serial port youspecified when running the example. Finally be sure the Circuit Playground board isrunning the Circuit Playground Firmata sketch--it doesn't hurt to reload the sketch ifyou're unsure.As the buttons.py code runs you can see it listens for button presses on the CircuitPlayground board and prints text when they are pressed. This is a great example ofusing Circuit Playground to interact with Python code running on your computer.When you're finished press Ctrl-C in the terminal to stop the program.Try running other examples in the Python Examples directory. Each example is run inthe same way as buttons.py, you must specify a command line parameter with thename of the serial port for Circuit Playground.Note: If you see an error like IndexError: list out of range this means PyMata is a littleconfused about all the data being sent to it as it connects to the Circuit Playgroundboard. Usually this happens when a previous example was run and it turned onstreaming of values to the host computer. You can fix this by unplugging andplugging back in the Circuit Playground board. This will reset it and make sure it isn'tstreaming any data that confuses PyMata.Below is a description of each example: accelerometer.py - This example will take a single reading from theaccelerometer's X, Y, Z axis every 2 seconds and print it out. This is asimple example of how to read the accelerometer with a function call, but youmight want to look at the accelerometer streaming.py example for a faster andmore efficient way to use it. The units for accelerometer data are meters persecond squared. accelerometer streaming.py - This example uses fast streaming to quickly readand print the accelerometer's X, Y, Z axis acceleration. The code will show howstreaming can be turned on and off (for 5 seconds in the example) and then onagain. When accelerometer data is streamed you'll see much faster updaterates, up to about 5 times a second, compared to the simpler accelerometer.pyexample. This is great for quickly detecting when the acceleration andorientation of the Circuit Playground board changes. The units foraccelerometer data are meters per second squared. Adafruit IndustriesPage 12 of 28
buttons.py - This example will listen for button presses on the Circuit Playground(left button, right button, slide switch) and print them out. cap touch.py - This example will listen for capacitive touches on pin 10 of CircuitPlayground. Every two seconds the pin will be checked and if a large enoughcapacitance is found, like if a human is touching it, then a message will beprinted. This is a simple example of reading a capacitive touch input. You cansee a faster and more efficient way with the cap streaming.py example. cap streaming.py - This example will listen for capacitive touches on both pins 3and 10 of Circuit Playground. The code shows how these changes are quicklystreamed back to the host computer for fast responses. In addition the codeshows how streaming can be turned on and off and back on again. Streamingthe capacitive touch input is faster than the simple cap touch.py example andwill help programs quickly detect capacitive touches. circuitplayground.py - This actually is not an example to run, instead it's a helperclass to simplify talking to the Circuit Playground Firmata board. You can copythis file and place it in the same directory as Python scripts you write yourself tocontrol Circuit Playground! light sensor.py - This example will print out the light sensor value as it changes.Note that you'll only see values printed when there is a change in light level--ifthe light level isn't changing then it won't print out. The value has no units but isproportional to how bright the light is hitting the sensor. Darkness will have alow value and bright light will have a very high value in the thousands.Experiment to see what values appear with different levels of light! pixels.py - This example will animate lighting the NeoPixels on CircuitPlayground. As the example runs you'll see a rainbow of colors move along theLEDs. sound.py - This example will read the microphone and print out its readings as itchanges. Note that these readings are raw samples from the microphone anddon't necessarily relate to volume level or sound pressure--you might need toaverage out or apply other smoothing to find the volume of sound. tap.py - This example will read the tap detection on the LIS3DH accelerometerevery two seconds and print out if the board has been tapped or double-tapped.Note that this example is meant to show a simple way to check the tapdetection state and isn't very accurate or fast at detecting taps. Instead look atthe tap streaming.py example for a fast and efficient way to detect taps. tap streaming.py - This example will stream tap detection to the computer. Thecode will turn on, off, and then on again streaming of tap detection. Try tappingthe LIS3DH accelerometer (tiny square in the exact middle of the CircuitPlayground board) and you should see single and/or double tap events printed.Note that tap detection is a little 'noisy' and you might see both a single anddouble tap or even multiple tap events so be aware in your own code that tapsmight occur multiple times in a short period. Adafruit IndustriesPage 13 of 28
temperature.py - This example will print the temperature from the thermistorevery second. In addition it will print the 'raw' analog to digital converter valuefor the thermistor in case you want to do your own processing on it. tones.py - This example will play a music scale using the buzzer on CircuitPlayground. The code demonstrates simple tone playback at differentfrequencies and durations.If you'd like to write your own Python code to control Circuit Playground you'll want touse the included circuitplayground.py file. This file implements a class that simplifiestalking to the Circuit Playground board and all of the examples above use this class tointeract with Circuit Playground.To use the class in your own code make sure you copy circuitplayground.py into thesame directory as your code. Then just import circuitplayground.py by adding to thetop of your Python code:# Import CircuitPlayground class from the circuitplayground.py in the samedirectory.from circuitplayground import CircuitPlaygroundCheck out the code for the examples above to see how they use the circuitplayground.py class to talk to the board. There are simple functions to read sensors like thethermistor, light sensor, microphone, etc. In addition there are functions to read theaccelerometer, tap detection, capacitive touch inputs, and more. Some of thecomponents are actually read using PyMata's standard analog and digital inputfunctions, while others use special Firmata extensions to control parts of the boardlike the NeoPixels. The great thing is that your code doens't need to worry about howCircuit Playground Firmata works or is implemented--just call the functions in circuitplayground.py and you'll be controlling the board in no time!That's all there is to using Circuit Playground Firmata with Python! Let yourimagination run wild as you write Python code to control Circuit Playground!Firmata Extension ReferenceThis page describes the format for custom extensions to the standard Firmata sketchthat the Circuit Playground Firmata sketch implements. These extensions allowFirmata clients to interact with the devices on the board more easily, like to readaccelerometer data or light up the NeoPixels. Adafruit IndustriesPage 14 of 28
If you're developing a library or code to talk to the Circuit Playground Firmata sketchthis page will be very useful to review. However if you're just planning to use CircuitPlayground Firmata with Python or other existing Firmata clients then you don't needto worry about the information here--you're all set to start exploring Firmata andCircuit Playground!Also it is highly recommended that you skim through and familiarize yourself with theFirmata protocol (https://adafru.it/ncO) before diving too deeply into these customextensions.Circuit Playground Firmata SysExCommandsTo support controlling the components of Circuit Playground with Firmata a set ofcustom Firmata/MIDI SysEx commands are implemented. These commands follow theSysEx message format in the Firmata protocol (https://adafru.it/ncP) and use a variablenumber of arguments depending on the command. None of the standard Firmatacommands have been modified with Circuit Playground Firmata, only new SysExcommands were added.For all Circuit Playground SysEx commands they start with a unique byte value thatidentifies the command as specific to Circuit Playground. The value of this CircuitPlayground SysEx command byte is 0x40. SysEx messages that start with this bytewill be interpreted as Circuit Playground commands.Following the Circuit Playground SysEx identifier is sub-command byte (or in somecases two bytes) that identifies the type of Circuit Playground command. Each CircuitPlayground command has a unique sub-command value that's described below.All bytes that follow the sub-command byte are parameters to the Circuit Playgroundcommand. See the description of a command below to see the exact number andformat of parameters to expect with the command. Remember a byte in the Firmataprotocol is only 7-bytes long--the high order bit is always 0 to indicate the byte beingdata instead of a command. In order to send an 8-bit or larger value it must bebroken down into multiple 7-bit bytes and reassembled. Carefully read thedescription of commands to understand how and when they break large values intosmaller 7-bit bytes.Below is a description of each custom Circuit Playground SysEx command: Adafruit IndustriesPage 15 of 28
NeoPixel CommandsSet NeoPixel ColorSub-command byte: 0x10Parameters: 5 bytes total NeoPixel ID (1 byte): This is the number of the NeoPixel on the board (0-9) tochange. Color (4 bytes): These 4 bytes pack in 24 bits of color data for the NeoPixel inred, green, blue component order. Each component is a full 8-bit byte with avalue from 0-255 (lowest intensity to highest intensity). For example the bits ofthe color parameters look like: 0RRRRRRR 0RGGGGGG 0GGBBBBB 0BBB0000Notice the first bit of each byte is 0 (Firmata protocol requirement) and colorcomponent bits are tightly packed into the bits that follow.Description: This command will change the color of the specified NeoPixel. Note thatthe pixel won't actually change, instead just the color in the pixel data buffer will beupdated. You must call the pixel show command to push the pixel data buffer to allthe pixels and update them.Example: To change the color of pixel 2 to red 255, green 127, blue 63 thefollowing SysEx command bytes are sent:0x40 0x10 0x02 0x7F 0x5F 0x67 0x70Show NeoPixelsSub-command byte: 0x11Parameters: NoneDescription: This command pushes the current NeoPixel color buffer out to thephysical pixels. After calling this command the pixels will update their colors.Example: To call the show NeoPixels command send the following SysEx commandbytes: Adafruit IndustriesPage 16 of 28
0x40 0x11Clear All NeoPixelsSub-command byte: 0x12Parameters: NoneDescription: This command will clear all NeoPixels in the pixel data buffer to 0/off.You must call the show NeoPixels command to update the pixels after calling thiscommand!Example: To call the clear all NeoPixels command send the following SysEx commandbytes:0x40 0x12Set NeoPixel BrightnessSub-command byte: 0x13Parameters: 1 byte Brightness (1 byte): This is the brightness value to set for the NeoPixels (see theNeoPixel library setBrightness function for more information). The value shouldbe a byte from 0 to 100 inclusive.Description: This command will adjust the brightness of all the NeoPixels. The valueshould be 0 to 100 where 0 is completely dark and 100 is full brightness. Note thatanimating brightness is not recommended as going down to 0 will 'lose' informationand not bable to go back up to 100. Instead just use this function to set thebrightness once at the start. Note that by default the pixels are set to 20% brightness.Example: To change the brightness to 50% send the following SysEx command bytes:0x40 0x13 0x32 Adafruit IndustriesPage 17 of 28
Speaker/Buzzer CommandsPlay ToneSub-command byte: 0x20Parameters: 4 bytes total Frequency (2 bytes): These two 7-bit bytes define an unsigned 14-bit frequencyfor the tone in hertz (0-16,383). The byte order is little endian with the first bytedefining the lower 7 bits and the second byte defining the upper 7 bits. Duration (2 bytes): This is the duration to play the tone in milliseconds. Likefrequency this is an unsigned 14-bit value in little endian byte order. Note that avalue of 0 (zero) will start playback of a tone with no duration--the stop tonefunction must be called to stop playback.Description: This command will play a tone of the specified frequency on the speaker/buzzer. The tone is generated using a square wave so it will have a slightly harshsound but is great for simple sounds and music. You can specify the duration thetone should be played, or you can specify to start playing the tone forever until a stoptone command is sent.Example: To play a 440 hz tone for 2 seconds (2000 milliseconds) send the followingSysEx command bytes:0x40 0x20 0x38 0x03 0x50 0x0FTo start playback of a 338 hz tone send (no duration, i.e. play forever) the followingSysEx command bytes:0x40 0x20 0x52 0x02 0x00 0x00Stop ToneSub-command byte: 0x21Parameters: NoneDescription: This command will stop the playback of any tone on the speaker/buzzer. Adafruit IndustriesPage 18 of 28
Example: To stop tone playback send the following SysEx command bytes:0x40 0x21Accelerometer CommandsSingle Accelerometer ReadingSub-command byte: 0x30Parameters: NoneDescription: This command will request a single accelerometer reading. The result ofthis command will be an accelerometer read response command sent back from theCircuit Playground board to the host computer. See the description of theaccelerometer read response below for what data to expect.Example: To request a single accelerometer reading send the following SysEx bytes:0x40 0x30Accelerometer Read ResponseSub-command byte: 0x36 0x00 (Note this sub-command has two bytes instead of onebyte as a side-effect of using internal Firmata sketch SysEx functions)Parameters: 24 bytes total X Axis Acceleration (8 bytes): These bytes define a 32-bit floating point value inlittle endian byte order (least significant bytes first). Each pair of 7-bit bytesdefines an 8-bit byte in the float so 8 bytes total will give 4 bytes of floatingpoint data (32 bits total). For these pairs of 7-bit bytes they are in little endianorder with the 7 lowest bits first and the 8th/high order bit in the secondposition. This parameter is the X axis acceleration in meters per secondsquared. Y Axis Acceleration (8 bytes): These bytes define a 32-bit floating point value inlittle endian byte order (least significant bytes first). Each pair of 7-bit bytesdefines an 8-bit byte in the float so 8 bytes total will give 4 bytes of floatingpoint data (32 bits total). For these pairs of 7-bit bytes they are in little endianorder with the 7 lowest bits first and the 8th/high order bit in the second Adafruit IndustriesPage 19 of 28
position. This parameter is the Y axis acceleration in meters per secondsquared. Z Axis Acceleration (8 bytes): These bytes define a 32-bit floating point value inlittle endian byte order (least significant bytes first). Each pair of 7-bit bytesdefines an 8-bit byte in the float so 8 bytes total will give 4 bytes of floatingpoint data (32 bits total). For these pairs of 7-bit bytes they are in little endianorder with the 7 lowest bits first and the 8th/high order bit in the secondposition. This parameter is the Z axis acceleration in meters per secondsquared.Description: This command is sent back from the Circuit Playground board to the hostcomputer when an accelerometer reading is available. The current X, Y, Zacceleration is returned in meters per second squared units.Example: An accelerometer reading of X 9.8, Y -1.0, Z 0.0 will have the followingSysEx command bytes:0x40 0x36 0x00 0x41 0x00 0x1C 0x00 0x4C 0x01 0x4D 0x01 0x3F 0x01 0x00 0x010x00 0x00 0x00 0x00 0x00 0x00 0x00 0x00 0x00 0x00 0x00 0x00Enable Accelerometer StreamingSub-command byte: 0x3AParameters: NoneDescription: This command will turn on continuous streaming of accelerometerreadings from Circuit Playground to the host computer. Reading will be taken every20 milliseconds and sent to the host using the accelerometer read responsecommand above. This is useful for quickly reading the accelerometer without all theoverhead of constantly sending single accelerometer read requests. To disable thestreaming see the disable accelerometer streaming function below.Example: To enable steaming of accelerometer data send the following SysEx bytes:0x40 0x3ADisable Accelerometer StreamingSub-command byte: 0x3B Adafruit IndustriesPage 20 of 28
Parameters: NoneDescription: This command will turn off continuous streaming of accelerometerreadings from Circuit Playground to the host computer.Example: To disable steaming of accelerometer data send the following SysEx bytes:0x40 0x3BSet Accelerometer RangeSub-command byte: 0x3CParameters: 1 byte Range (1 byte): This value defines the range of the accelerometer and should beone of the following values: 0 /- 2G 1 /- 4G 2 /- 8G 3 /- 16GDescription: This command will change the range of the accelerometer. Increasingthe range will allow you to read higher forces, but will reduce the accuracy of thereadings. The default range is /- 2G.Example: To set the range of the accelerometer to /- 16G send the following SysExbytes:0x40 0x3C 0x03Tap Detection CommandsSingle Tap Detection ReadingSub-command byte: 0x31Parameters: None Adafruit IndustriesPage 21 of 28
Description: This command will request a single tap detection reading. The result ofthis command will be a tap detection response command sent back from the CircuitPlayground board to the host computer. See the description of the tapdetection response below for what data to expect.Example: To request a single tap detection reading send the following SysEx bytes:0x40 0x31Tap Detection ResponseSub-command byte: 0x37 0x00 (Note this sub-command has two bytes instead of onebyte as a side-effect of using internal Firmata sketch SysEx functions)Parameters: 2 bytes Tap Detection Register Value (2 bytes):
Circuit Playground (https://adafru.it/ncE) is Adafruit's all-in-one Arduino-compatible physical computing board. This tiny board packs a lot of cool hardware like an . Adafruit Circuit Playground (https://adafru.it/naF) Finally download the latest version of the Circuit Playground Firmata code from its