Transcription
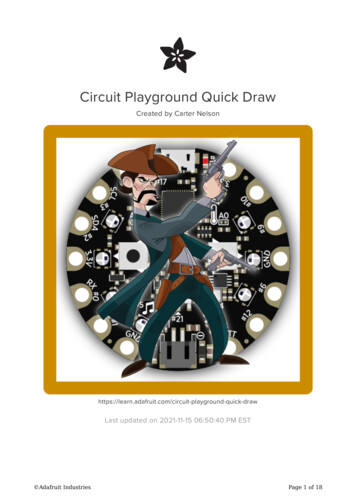
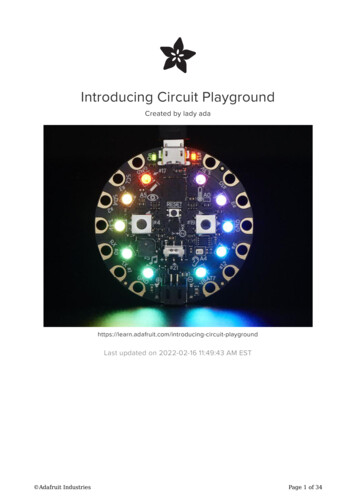
Introducing Circuit PlaygroundCreated by lady playgroundLast updated on 2022-02-16 11:49:43 AM EST Adafruit IndustriesPage 1 of 34
Table of ContentsOverview5Classic vs. Express7 How to tell if you have a Classic How to tell if you have an Express88Guided Tour9 99101011111111121212131313141415Power and DataMicro B USB connectorJST Battery InputAlligator/Croc Clip PadsMicrochipLEDsGreen ON LEDRed #13 LED10 x Color NeoPixel LEDSpeakerSensorsLight SensorTemperature SensorMicrophone Audio SensorMotion SensorCapacitive TouchSwitches & ButtonsPinouts Power PadsInput/Output PadsCommon to all padsEach Pin!Internally Used Pins!161617171818Windows Driver Installation19 Manual Driver Installation22Arduino22Set Up & Test Arduino23 Download Latest Arduino IDEInstall Drivers (Windows 7 Only)BlinkManually bootloadingUbuntu & Linux Issue Fix2323232525Circuit Playground Library25 Installing Via Library ManagerRun the DemoSelect the Circuit Playground BoardSelect the matching PortLoad the Demo ProgramCompile/Verify the Demo Adafruit Industries262626272728Page 2 of 34
Upload Demo28HELP!30Downloads32 Windows Driver SoftwareSourceDatasheetsSchematicFabrication Print Adafruit Industries3232323333Page 3 of 34
Adafruit IndustriesPage 4 of 34
OverviewWould you like to learn electronics, with an all-in-one board that has sensors andLEDs built in? Circuit Playground is here, and it's the best way to practiceprogramming on real hardware. No soldering or sewing required!Circuit Playground features an ATmega32u4 micro-processor, just like our popularFlora. It also is round and has alligator-clip pads around it. You can power it from USB,a AAA battery pack (http://adafru.it/727), or Lipoly (for advanced users). Program yourcode into it, then take it on the go. ATmega32u4 Processor, running at 3.3V and 8MHz MicroUSB port for programming and debugging with Arduino IDE USB port can act like serial port, keyboard, mouse, joystick or MIDI Adafruit IndustriesPage 5 of 34
Circuit Playground has built-in USB support. Built in USB means you plug it in toprogram it, it just shows up - all you need is a Micro-B USB cable, no additionalpurchases are needed! With the new 1.6.4 Arduino IDE, it takes only a few secondsto add support (https://adafru.it/nb4). The Circuit Playground has USB HID support, soit can act like a mouse or keyboard to attach directly to computers.Here's some of the great goodies baked in: 10 x mini NeoPixels, each one can display any rainbow color 1 x Motion sensor (LIS3DH triple-axis accelerometer with tap detection, free-falldetection) 1 x Temperature sensor (thermistor) 1 x Light sensor (phototransistor) 1 x Sound sensor (MEMS microphone) 1 x Mini speaker (magnetic buzzer) 2 x Push buttons, left and right 1 x Slide switch 8 x alligator-clip friendly input/output pinsIncludes I2C, UART, and 4 pins that can do analog inputs/PWM output All 8 pads can act as capacitive touch inputs Green "ON" LED so you know its powered Red "#13" LED for basic blinking Reset button Adafruit IndustriesPage 6 of 34
We've started out with a Developer Edition of Circuit Playground. This version isdesigned for people who have a little experience with Arduino already, who want tohelp build & document projects. There might be minor hardware or software bugs.Once we feel like the design is really solid we'll revise/re-release it into a universaledition for anyone to use!Classic vs. ExpressCircuit Playground started its life as a board with simple requirements - just work withArduino IDE and Code.org. But since it's initial launch in 2015 we've learned a lot andimproved the board greatly!There are TWO Circuit Playgrounds - one Classic and one Express.The Classic version can run Arduino and Code.orgThe Express version can run MakeCode, CircuitPython, Arduino, and Code.org CSDiscoveries. Adafruit IndustriesPage 7 of 34
How to tell if you have a ClassicCurrent Circuit Playground Classicboards have Classic written on the backlower halfOlder Circuit Playground Classics didn'thave the word Classic on the back, butthey do have text that says the chip type,ATmega32U4How to tell if you have an ExpressExpress boards have CIRCUITPLAYGROUND EXPRESS on the backlower half. They'll also note the chip is anATSAMD21 Adafruit IndustriesPage 8 of 34
Guided TourLet me take you on a tour of your Circuit Playground Classic (we'll shorten that toCPC). Each CPC comes chock-full of good design to make it a joy to use.Power and DataMicro B USB connectorThis is at the top of the board. We wentwith the tried and true micro-B USBconnector for power and/or USBcommunication (bootloader, serial, HID,etc). Use with any computer with astandard data/sync cable. Adafruit IndustriesPage 9 of 34
JST Battery InputThis is at the bottom of the board. Youcan take your CPC anywhere and powerit from an external battery. This pin cantake up 6V DC input, and has reversepolarity, over-current and thermalprotections. The circuitry inside will useeither the battery input power or USBpower, safely switching from one to theother. If both are connected, it will usewhichever has the higher voltage. Worksgreat with a Lithium Polymer battery orour 3xAAA battery packs with a JSTconnector on the end. There is no built inbattery charging (so that you can useAlkaline or Lithium batteries safely)Alligator/Croc Clip PadsTo make it super-easy to connect to the microcontroller, we have 14 connection pads.You can solder to them, use alligator/croc clips, sew with conductive thread, even usesmall metal screws!Of the 14 pads, you get a wide range ofpower pins, I2C, UART, Analog In, DigitalIn/Out and PWMt.Some of them can even sense the touchof your finger!See the next pinouts page for moredetails!All 8 non-power pads around the circuit playground have the ability to act ascapacitive touch pads. Each pad has a 1Mohm resistor between it and digital pin #30.You can toggle this pin to control whether the resistor is a pullup or pulldown orfloating. Note that this means that all the pads have a 2Mohm resistance betweenthem. Adafruit IndustriesPage 10 of 34
You can also of course just use those pads for GPIO, we expose the hardware Serial(TX RX), hardware I2C (SDA SCL) and 4 gpio pins that can also do analogreadings. They are the same exact pins as those on the FloraMicrochipThe brains of the operation here is the ATMEGA32u4 an 8-bit AVR microcontroller. Itsits in the top center, and is what you use to run Arduino!LEDsGreen ON LEDTo the left of the USB connector. ThisLED lets you know that the CPC ispowered on. If it's lit, power is good! If it'sdim, flickering or off, there's a powerproblem and you will have problems. Youcan't disable this light, but you can coverit with electrical tape if you want to makeit black.Red #13 LEDTo the right of the USB connector. ThisLED does double duty. Its connected witha series resistor to the digital #13 GPIOpin. It pulses nicely when the CPC is inbootloader mode, and its also handy forwhen you want an indicator LED. Manyfirst projects blink this LED to prove thatprogramming worked. Adafruit IndustriesPage 11 of 34
10 x Color NeoPixel LEDThe ten LEDs surrounding the outer edgeof the boards are all full color, RGB LEDs,each one can be set to any color in therainbow. Great for beautiful lightingeffects!SpeakerYou can make your circuit playgroundsing with the built in buzzer. This is aminiature magnetic speaker connected todigital pin #5 with a transistor driver. Youcan use PWM at varying frequencies tomake basic tones.SensorsThe Circuit Playground Classic has a large number of sensor inputs that let you addall sorts of interactivity to your project. Adafruit IndustriesPage 12 of 34
Light SensorThere is an analog light sensor, partnumber ALS-PT19 (https://adafru.it/tC2),in the top left part of the board. This canbe used to detect ambient light, withsimilar spectral response to the humaneye.This sensor is connect to analog pin A5and will read between 0 and 1023 withhigher values corresponding to higherlight levels. A reading of about 300 iscommon for most indoor light levels.With some clever code, you can use thisas a color sensor or even a pulse sensor!Temperature SensorThere is an NTC thermistor (MurataNCP15XH103F03RC) that we use fortemperature sensing. While it isn't an allin-one temperature sensor, with linearoutput, it's easy to calculate thetemperature based on the analog voltageon analog pin #A0. There's a 10K resistorconnected to it as a pull down.Microphone Audio SensorA MEMS microphone can be used todetect audio levels and even performbasic FFT functions. You can read theanalog voltage corresponding to theaudio on analog pin #A4. Note that this isthe raw analog audio waveform! Whenit's silent there will be a reading of 330and when loud the audio will readbetween 0 and 800 or so. Averaging andsmoothing must be done to convert thisto sound-pressure-level. Adafruit IndustriesPage 13 of 34
Motion SensorWe can sense motion with anaccelerometer. This sensor detectsacceleration which means it can be usedto detect when its being moved around,as well as gravitational pull in order todetect orientation.A LIS3DH 3-axis XYZ accelerometer is inthe dead center of the board and you canuse it to detect tilt, gravity, motion, aswell as 'tap' and 'double tap' strikes onthe board. The LIS3DH is connected tothe hardware SPI pins (to leave the I2Cpins free) and has the CS pin on digitalpin #8 and an optional interrupt outputon digital pin #7 (also known as IRQ #4)Capacitive TouchThe CPC has some resistor pullups andan extra pin that gives it the ability toperform capacitive touch readings. Thisis a great way to sense human touchwithout additional components. Evenanimals will work if its directly touchingtheir skin!On the Classic you get eight capacitivetouch pads (all GPIO pads) Adafruit IndustriesPage 14 of 34
Switches & ButtonsThere are two large buttons, connectedto digital #19 (Left) and #5 (Right)each. These are pulled to ground whennot pressed, and connected to 3.3Vwhen pressed, so they read HIGH.This small button in the center of theboard is for Resetting the board. You canuse this button to restart or reset theCPC.Press this button once to reset, doubleclick to enter the bootloader manually.There is a single slide switch near thecenter of the Circuit Playground. It isconnected to digital #21 and will readLOW when slid to the left, and HIGHwhen in the right hand position Adafruit IndustriesPage 15 of 34
PinoutsDespite having only 14 pads with 8 general purpose I/O pins available, there are a lotof possibilities with Circuit Playground Classic. We went over all the internals in thelast page. On this page we'll go through each pin/pad to explain what you can do withit.No external I/O pads are shared with internal sensors/devices, so you do not need toworry about 'conflicting' pins or interactions!Power PadsThere are 6 power pads available, equally spaced around the perimeter. GND - there are 3 x Ground pads. They are all connected together, and are allthe signal/power ground connections 3.3V - there are two 3.3 Volt output pads. They are connected to the output ofthe onboard regulator. The regulator can provide about 500mA max, but thatincludes all the built in parts too! So you should roughly budget about 300mAavailable for your usage (450mA if you are not using the onboard NeoPixels) VBATT - there is one Voltage Output pad. This is a special power pad,it will beconnected to either the USB power or the battery input, whichever has thehigher voltage. This output does not connect to the regulator so you can drawas much current as your USB port / Battery can provide. Adafruit IndustriesPage 16 of 34
Input/Output PadsNext we will cover the 8 GPIO (General Purpose Input Ouput) pins! For reference youmay want to also check out the datasheet-reference in the downloads section for thecore ATMEGA32U4 pin. We picked pins that have a lot of capabilities.Common to all padsAll the GPIO pads can be used as digital inputs, digital outputs, for LEDs, buttons andswitches. In addition, all can be used as analog inputs (10-bit ADC). All pads can beused for hardware capacitive touch.Each pad can provide up to 20mA of current. Don't connect a motor or other highpower component directly to the pins! Instead, use a transistor to power the DC motoron/off (https://adafru.it/aUD)All of the GPIO pads are 3.3V output level, and should not be used with 5V inputs. Ingeneral, most 5V devices are OK with 3.3V output though.All of the pads are completely 'free' pins, they are not used by the USB connection,LEDs, sensors, etc so you never have to worry about interfering with them whenprogramming. D6, D9, D10 and D11 can be analog inputs Adafruit IndustriesPage 17 of 34
D3, D6, D9 and D10 can be PWM outputs D0, D1, D2 and D3 can be hardware interrupt inputEach Pin!Let's start with #10 which is in the top right corner, and work our way clockwise D10 / A10 - This pin can be digital I/O, or Analog Input. This pin has PWM output D9 / A9 - This pin can be digital I/O, or Analog Input. This pin has PWM output. D6 / A7 - This pin can be digital I/O, or Analog Input. This pin has PWM output. D12 / A11 - This pin can be digital I/O, or Analog Input. D1 - This pin can be digital I/O, it is also used for Hardware Serial Transmit, andcan be an interrupt input. D0 - This pin can be digital I/O, it is also used for Hardware Serial Receive, andcan be an interrupt input. D2 - This pin can be digital I/O, it is also the I2C SDA pin, and can be aninterrupt input D3 - This pin can be digital I/O or PWM output, it is also the I2C SCL pin, and canbe an interrupt inputInternally Used Pins!These are the names of the pins that are used for built in sensors and such! D4 - Left Button A D5 - Speaker PWM output D7 - Accelerometer interrupt D13 - Red LED D17 - Built-in 10 NeoPixels D19 - Right Button B D21 - Slide Switch A0 - Temperature Sensor A4 - Microphone sound sensor A5 - Light Sensor Adafruit IndustriesPage 18 of 34
Windows Driver InstallationMac and Linux do not require drivers, only Windows folks need to do this stepWindows 10 users probably can skip this step, because Windows 10 already hasmany drivers built in. Try skipping the installation first to see if it's unnecessary.Before you plug in your board, you'll need to possibly install a driver!Click below to download our Driver Installer.Download Latest Adafruit WindowsDriver Installerhttps://adafru.it/AB0Download and run the installer.Run the installer! Since we bundle the SiLabs and FTDI drivers as well, you'll need toclick through the license Adafruit IndustriesPage 19 of 34
Select which drivers you want to install, we suggest selecting all of them so you don'thave to do this again!As of version 2.5.0.0, the Adafruit drivers package is no longer signed, and some ofthe drivers it contains are also no longer signed. You'll need to click the second itemin this dialog box when it appears: Adafruit IndustriesPage 20 of 34
On Windows 7, by default, we install a single driver for most of Adafruit's boards,including the Feather 32u4, the Feather M0, Feather M0, Express, Circuit Playground,Circuit Playground Express, Gemma M0, Trinket M0, Metro M0 Express. On Windows10 that driver is not necessary (it's built in to Windows) and it will not be listed.The Trinket / Pro Trinket / Gemma / USBtinyISP drivers are also installed by default.You can also, optionally, install the Arduino Gemma (different than the AdafruitGemma!), Huzzah and Metro 328 drivers.Click Install to do the installin'.Note that on Windows 10, support for many boards is built in. If you end up notchecking any boxes, you don't need to run the installer at all! Adafruit IndustriesPage 21 of 34
Manual Driver InstallationIf windows needs the driver files (inf/cat) for some reason you can get all the driversby downloading the source code zip file from this link:Latest Adafruit Windows Driversreleasehttps://adafru.it/AB0And point windows to the Drivers folder when it asks for the driver locationArduinoArduino is an open-source electronics platform based on easy-to-usehardware and software. Arduino boards (https://adafru.it/oVa) are able toread inputs - light on a sensor, a finger on a button, or a Twitter message and turn it into an output - activating a motor, turning on an LED, publishingsomething online. You can tell your board what to do by sending a set ofinstructions to the microcontroller on the board. To do so you use the Arduino programming language (https://adafru.it/oVb) (based on Wiring (https://adafru.it/oVc)), and the Arduino Software (IDE) (https://adafru.it/fvm),based on Processing (https://adafru.it/ddm).-- https://www.arduino.cc/en/Guide/Introduction (https://adafru.it/Bf6)Arduino has over a decade of projects and history, so you'll find a lot of existing codethat you can use with your Circuit Playground Classic.Since Circuit Playground is now built into Arduino, it's great for beginners - and youcan take advantage of the huge Arduino community. Adafruit IndustriesPage 22 of 34
For experts - Arduino is essentially C/C with a built in library of hardware interfaces.You can embed assembly, write ultra-fast code, and twiddle registers.Set Up & Test ArduinoThe Circuit Playground Classic is 'natively' supported in the Arduino IDE so its reallyeasy to set up!Download Latest Arduino IDEDownload the latest Arduino IDE, version 1.8.5 or greater is required!You can also use Arduino Create, in which case the IDE is already the latest versionDownload Arduino IDEhttps://adafru.it/fvmInstall Drivers (Windows 7 Only)When you plug in the board, you'll need to possibly install a driverClick here to download our Driver Installer (https://adafru.it/B-2)BlinkNow you can upload your first blink sketch!Open up the Blink example from the Arduino IDE Adafruit IndustriesPage 23 of 34
Select Circuit Playground from the Tools - Board dropdown menulPlug in the Circuit Playground and wait for it to be recognized by the OS (just takes afew seconds). It will create a serial/COM port, you can now select it from thedropdown, it'll even be 'indicated' as a Circuit Playground board!And click upload! That's it, you will be able to see the LED blink rate change as youadapt the delay() calls.If you are having issues, make sure you selected the matching Board in the menuthat matches the hardware you have in your hand. Adafruit IndustriesPage 24 of 34
Manually bootloadingOnce it is in bootloader mode, you can select the newly created COM/Serial port andre-try uploading.If you ever get in a 'weird' spot with the bootloader, or you have uploaded code thatcrashes and doesn't auto-reboot into the bootloader, click the RESET button twice(like a double-click) to get back into the bootloader.The red LED will pulse so you know that its in bootloader mode.In the Arduino IDE, re-select the Serial Port to the new port that has been created forthe bootloader.Then upload Blink - make sure that works!Once that works, go back and re-select the 'normal' USB serial port next time youwant to use the normal upload.Ubuntu & Linux Issue FixNote if you're using Ubuntu 15.04 (or perhaps other more recent Linux distributions)there is an issue with the modem manager service which causes the Bluefruit LEmicro to be difficult to program. If you run into errors like "device or resource busy","bad file descriptor", or "port is busy" when attempting to program then you are hittingthis issue. (https://adafru.it/sHE)The fix for this issue is to make sure Adafruit's custom udev rules are applied to yoursystem. One of these rules is made to configure modem manager not to touch theFeather board and will fix the programming difficulty issue. Follow the steps forinstalling Adafruit's udev rules on this page. (https://adafru.it/iOE)Circuit Playground LibraryWe wrapped up everything you need to run Arduino code on your Circuit Playgroundis wrapped up into a tidy library that integrates all the sensing and lighting. Adafruit IndustriesPage 25 of 34
Installing Via Library ManagerThe Circuit Playground library is available on the Adafruit GitHub website (https://adafru.it/naF). but what's nice is that Arduino IDE comes with a version of the libraryand its super easy to update.We recommend updating the library even if you just installed the Arduino IDE, wehave constant updates!In the menubar click "Sketch", then"Include Library"At the top, click "Manage Libraries. . ."Search for Adafruit Circuit Playground library and click Update to get the very latestversion!Run the DemoNow that you have the library installed you can continue.Follow the Arduino Set Up guide page to make sure you can Blink upload. (https://adafru.it/B-3)Once that's known to work, come back here.Select the Circuit Playground BoardUnder the Tools - Board submenu, pick Adafruit Circuit Playground Adafruit IndustriesPage 26 of 34
Select the matching PortUnder Tools- Port select the port that is labeled (Circuit Playground)Load the Demo ProgramOK you're now ready to load the demo. Under File- Examples locate Adafruit CircuitPlayground and then select the demo program. Adafruit IndustriesPage 27 of 34
Compile/Verify the DemoClick the Verify button (also the Sketch- Verify menu item) to compile/verify the demo.Make sure you get "Done compiling." and no errorsUpload DemoClick the Upload button to upload the code Adafruit IndustriesPage 28 of 34
You should get a Done uploading. message in the blue statusbarYou can now run the serial console to get data output: Adafruit IndustriesPage 29 of 34
You'll get information such as: "Capacitive touch" readings for all 8 outer pads (under 50 means not touched,over 100 usually means the pads are touched) Slide switch location (left or right) If the Right and Left buttons are pressed Light sensor readings, higher values mean more light Sound sensor readings X, Y and Z accelerometer readings Temperature in CelsiusHELP!I just plugged it in and I can't seem to connect to myCircuit Playground with Arduino!99% of initial problems with circuit playground are due to having charge USBcables instead of sync cables. Do not use a cable you've only used for charging aphone. Make sure its a cable that can pass data as well as power. Lately, there'sbeen a lot of products shipped with charging only cables and it's very confusingbecause the Circuit Playground lights up but does not show up in the Arduino IDE!So, please, try multiple USB cables, and if you find a charge-only cable, cut it in halfand throw it away so you will not make the mistake again! Adafruit IndustriesPage 30 of 34
Ack! I "did something" and now when I plug in the CircuitPlayground it doesn't show up as a device anymore so Icant upload to it or fix it.No problem! You can 'repair' a bad code upload easily. Note that this can happen ifyou set a watchdog timer or sleep mode that stops USB, or any sketch that'crashes' your Circuit Playground1. Turn on verbose upload in the Arduino IDE preferences2. Plug in Circuit Playground, it won't show up as a COM/serial port that's ok3. Open up the Blink example (Examples- Basics- Blink)4. Select the correct board in the Tools menu, e.g. Circuit Playground (makesure you select the correct board)5. Compile it (make sure that works)6. Click Upload to attempt to upload the code7. The IDE will print out a bunch of COM Ports as it tries to upload. During thistime, double click the reset button, you'll see the red pulsing LED that tellsyou its now in bootloading mode8. The Cplay will show up as the Bootloader COM/Serial port9. The IDE should see the bootloader COM/Serial port and upload properly Adafruit IndustriesPage 31 of 34
I can't get the Circuit Playground USB device to show up I get "USB Device Malfunctioning" errors!This seems to happen when people select the wrong board from the ArduinoBoards menu. Make sure you select Circuit Playground! Do not use anything else,do not use the 32u4 breakout board line.Use the 'repair' technique above to fix it.DownloadsWindows Driver Software Available here (https://adafru.it/naC)Source Arduino Circuit Playground interfacing library (https://adafru.it/naF) Adafruit Board Support Pkg (Should be installed via the Board Manager!) (https://adafru.it/eTY) PCB Files in EagleCAD format (https://adafru.it/nb5) Fritzing object available in the Adafruit Fritzing Library (https://adafru.it/aP3)Datasheets Microcontroller datasheet (https://adafru.it/ecK) Buzzer datasheet (https://adafru.it/vCA) MEMS microphone datasheet (https://adafru.it/vCB) Thermistor datasheet (https://adafru.it/vCC) Adafruit IndustriesPage 32 of 34
SchematicFabrication PrintDims in inches Adafruit IndustriesPage 33 of 34
Adafruit IndustriesPage 34 of 34
Adafruit Industries Page 2 of 34. 28 30 32 32 32 32 33 33 Upload Demo HELP! Downloads Windows Driver Software Source Datasheets Schematic Fabrication Print . Circuit Playground started its life as a board with simple requirements - just work with Arduino IDE and Code.org. But since it's initial launch in 2015 we've .