Transcription
ESP8266 WiFi Weather Station with ColorTFT DisplayCreated by Ruiz ation-with-tft-displayLast updated on 2021-11-15 06:50:19 PM EST Adafruit IndustriesPage 1 of 15
Table of ContentsOverview3 3445Weather StationPrerequisite GuidesPartsTools & SuppliesSoftware6 6688910Adafruit Feather HUZZAH with ESP8266 Arduino LibrariesDownload & Install Arduino LibrariesArduino SketchSettingsUploading Sketch to Adafruit HUZZAH with ESP8266Connected ESP8266 WiFi3D Printing10 Design Files Slice Settings Fusion 360 Design Archive101111Assembly11 1112121213141415Solder Headers onto Adafruit Feather HUZZAHMount 2.4" TFT Display to Adafruit Feather HUZZAH ESP8266Turn on TFT DisplayConnect Battery (Optional)Connect Slide Switch (Optional)Install TFT DIsplay to Enclosure CoverInstall Cover to CaseFinished Assembly! Adafruit IndustriesPage 2 of 15
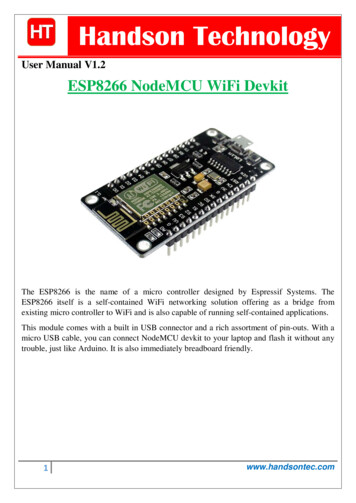
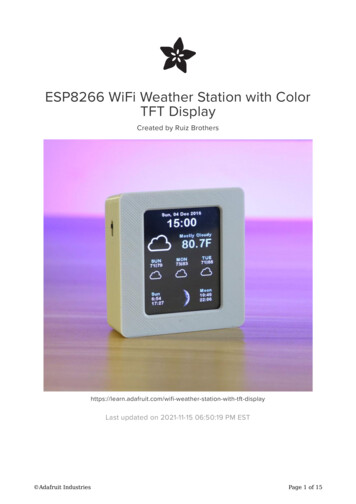
OverviewWUnderground no longer provides API keys for free so we've updated the codein this guide to use the newer OpenWeatherMap code, the assembly is the samebut the final graphics will differ!Weather StationIn this project, we'll learn how to make a DIY fully featured weather station using anESP8266 and a 2.4" TFT touchscreen display. This project pulls weather data usingthe Wunderground API. It displays the date, time, current weather conditionals, 4-dayforecast and even moon phases.This great code is by Daniel Eichhorn - we just made a lovely case for it! (https://adafru.it/sXB) Adafruit IndustriesPage 3 of 15
Prerequisite GuidesWe recommend walking through the guides listed here to get a better understandingof the components used in this project. Adafruit Feather HUZZAH with ESP8266 (https://adafru.it/nEN) Adafruit 2.4" TFT Feather Wing (https://adafru.it/sXC) Collin's Lab: Soldering (https://adafru.it/sXD)PartsYou'll need the following parts to build this project. 2.4" TFT Feather Wing 320x240 Touchscreen (https://adafru.it/szd) Adafruit IndustriesPage 4 of 15
Adafruit Feather HUZZAH with ESP8266 WiFi (http://adafru.it/2821) 2000mAh Rechargeable Battery (http://adafru.it/2011) (Optional) Slide Switch (http://adafru.it/805) (Optional)Tools & Supplies Soldering Iron & Solder 3D Printer & Filament microUSB Data Cable 30AWG Silicone Coated Stranded Wire Adafruit IndustriesPage 5 of 15
SoftwareWUnderground no longer provides API keys for free so we've updated the codein this guide to use the newer OpenWeatherMap code, the assembly is the samebut the final graphics will differ!Adafruit Feather HUZZAH with ESP8266 Arduino LibrariesIf you're new to the Adafruit Feather HUZZAH ESP8266, you'll need to install theboard and libraries in order to compile and upload code to it using the Arduino IDE.Follow the guide below to install the board and libraries, then come back hereonce you've successfully installed it.The guide walks you through installing the Arduino IDE as well.Follow Adafruit HUZZAH EPS8266Arduino Guidehttps://adafru.it/lRCDownload & Install Arduino LibrariesYou'll need to download and install a few libraries in order to compile the sketch.The Adafruit libraries are in the library manager so use that to install them: Adafruit GFX Library (https://adafru.it/aJa)If using an earlier version of the Arduino IDE (pre-1.8.10), locate and install Adafruit BusIO (https://adafru.it/GxD) (newer versions handle this prerequisite automatically). Adafruit IndustriesPage 6 of 15
Then back to Adafruit ILI9341 Library (https://adafru.it/d4d) Adafruit STMPE610 (https://adafru.it/d4f) Mini Grafx by Daniel Eichhorn (https://adafru.it/Cw-) simpleDSTadjust by neptune2 (https://adafru.it/Cx0) ESP8266 Weather Station Library by ThingPulse (https://adafru.it/t7D) JSON Streaming Parser by Daniel Eichhorn (not Bartosz) (https://adafru.it/t7E) Adafruit IndustriesPage 7 of 15
WiFiManager for ESP8266 by tzapu (https://adafru.it/t7C)Arduino SketchDownload the Arduino Sketch by clicking the green button below.The original software was written by Daniel Eichhorn @ http://blog.squix.ch wemade some changes to make it plug-n-play with this setup!Latest Weather Station Color codefor Adafruit Feather HUZZAHhttps://adafru.it/BC4SettingsYou'll need to manually adjust a few settings in order to properly display weatherconditions from your area. In the settings.h file, look for the "WIFI SSID" section. Here,you'll need to enter your WiFi SSID & Password Adafruit IndustriesPage 8 of 15
// Setup#define WIFI SSID "yourssid"#define WIFI PASS "yourpassw0rd"#define WIFI HOSTNAME "ThingPulse-weather-station-color"Then, lower down findString OPEN WEATHER MAP LOCATION "Zurich,CH";and change it to sayString OPEN WEATHER MAP LOCATION "New York,US";Finally, you can set your timezone at this section by adjusting the UTC offset for yourlocation - if you have to deal with DST, there's also code to set that as well!#define UTC OFFSET 1struct dstRule StartRule {"CEST", Last, Sun, Mar, 2, 3600}; // Central EuropeanSummer Time UTC/GMT 2 hoursstruct dstRule EndRule {"CET", Last, Sun, Oct, 2, 0};// Central EuropeanTime UTC/GMT 1 hour// Settings for Boston// #define UTC OFFSET -5// struct dstRule StartRule {"EDT", Second, Sun, Mar, 2, 3600}; // EasternDaylight time UTC/GMT -4 hours// struct dstRule EndRule {"EST", First, Sun, Nov, 1, 0};// EasternStandard time UTC/GMT -5 hourUploading Sketch to Adafruit HUZZAH with ESP8266Once your adjustments have been made, you can upload the sketch to the board.Before you do, goto Tools Board and select Adafruit HUZZAH ESP8266. Then,check the varies options below: CPU Frequency: 80 MHz Flash Size: 4M (3M SPIFFS) - this is not default! Upload Speed: 115200Plug in a microUSB data cable into the board and connect it to a USB port on yourcomputer. Under the Port section, in the Tools menu, you should see the board listed.(If you're on a Mac, it will be listed as /dev/cu.SLAB USBtoUART.) Adafruit IndustriesPage 9 of 15
With those options selection, you can now upload the code to the board by clickingthe upload button. You'll see the status of the upload in the black window onthe bottom of the Arduino IDE.Connected ESP8266 WiFiThe ESP8266 will then automatically download the assets (weather condition icons) tothe board. Once it's finished, it'll automatically display the date, time, weather, andmoon phases. Pretty cool, huh? :-)3D PrintingDesign FilesYou can download the files below.Download STLs on Thingiversehttps://adafru.it/sYbDownload STLs on Pinshapehttps://adafru.it/sYcDownload STLs on YouMaginehttps://adafru.it/sYd Adafruit IndustriesPage 10 of 15
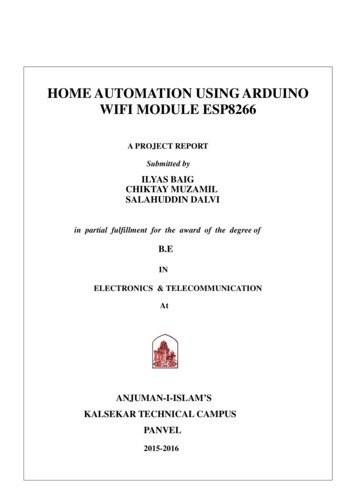
Slice SettingsDepending on your 3D printer, you may need to adjust the slice settings. We testedthe enclosure on a Sigma BCN3D, Deltaprintr Go and a Printrbot Play. They do notrequire any support material and are oriented to print "as is". Nozzle: 0.4mm Extrusion Multiplier: 1.0 Extrusion Width: 0.48mm Layer Height: 0.2mm Nozzle Temperature: 220cFusion 360 Design ArchiveYou can remix the design if you'd like to make any adjustments or reuse components.Download F360 Archivehttps://adafru.it/sYeAssemblySolder Headers ontoAdafruit Feather HUZZAHFirst, we'll need to solder on plain maleheaders onto the pins of the AdafruitFeather HUZZAH. You can follow thedetailed instructions on the AdafruitFeather HUZZAH guide (https://adafru.it/sYf). Adafruit IndustriesPage 11 of 15
Mount 2.4" TFT Display to Adafruit Feather HUZZAHESP8266With the male headers now soldered to the Adafruit Feather HUZZAH, we can mountit to the back of 2.4" TFT FeatherWing. Line up the pins with the header and pressthem together until they're fully seated.Turn on TFT DisplayYou'll need to set the slide switch on the back of the display to ON.Connect Battery (Optional)If you'd like the Weather Station to be portable, you can connect a battery. Here, wehave a 2000mAh lithium ion battery. Plug in the male JST connector to the femaleJST port on the Adafruit Feather HUZZAH. Adafruit IndustriesPage 12 of 15
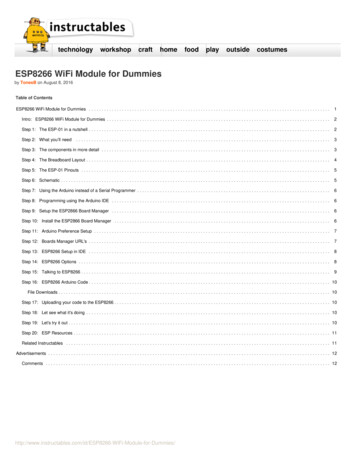
Connect Slide Switch(Optional)If you'd like to turn off the circuit withouthaving to remove the display from thecase, you can break out the slide switch.You'll need to wire up a a slide switch. Itwill need to connect to the EN and GNDlabeled pins on the 2.4" TFTFeatherWing. Here, we connected theterminals of slide switch to jumpercables. The jumpers can plug into thefemale headers on the 2.4" display.I used the tips from male jump cables tocreate a "slim" version by removing theplastic housing and trimming it short.Then, I soldered the tips to pieces of wire– This way, I can easily plug into thefemale header on the TFT display. Adafruit IndustriesPage 13 of 15
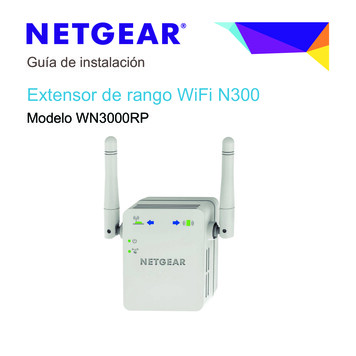
Install TFT DIsplay to Enclosure CoverThe enclosure cover has four standoffs that match up with the mounting holes on the2.4" display. Orient the display and the cover so the side with black strip lines up withthe opening in the lip.Install Cover to CaseIf you added a battery, place it in the enclosure. Notice the two openings in theenclosure. They're for the microUSB port and the microSD card. Orient the AdafruitFeather HUZZAH so the ports line up with the openings on enclosure. Lay the coverover the enclosure and press the two together. The case has two little nubs on theedge that will click into the dimples on the lip of the cover. Adafruit IndustriesPage 14 of 15
Finished Assembly!And thats it! You can mount the case in all sorts of ways. For example, you can attacha magnet to the back to stick it on metal surfaces such as your refridgerator. Adafruit IndustriesPage 15 of 15
Fusion 360 Design Archive Assembly Solder Headers onto Adafruit Feather HUZZAH Mount 2.4" TFT Display to Adafruit Feather HUZZAH ESP8266 Turn on TFT Display Connect Battery (Optional) Connect Slide Switch (Optional) Install TFT DIsplay to Enclosure Cover Install Cover to Case Finished Assembly!