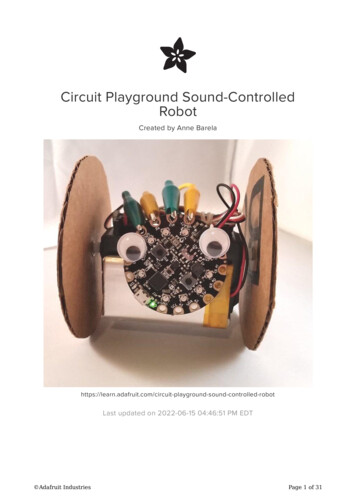
Transcription
Circuit Playground-O-PhonorCreated by Carter d-o-phonorLast updated on 2021-11-15 07:51:21 PM EST Adafruit IndustriesPage 1 of 20
Table of ContentsOverview3 Which Circuit Playground? Parts33How It Works4 Pure Tone Basics Computing Frequency From Mic Data56Frequency Basics7 Tone Test9Frequency and NeoPixels10 Circuit Playground-O-Phonor12Musical Note Basics13 Notes Test15Notes and TFT Gizmo17 Adafruit IndustriesPage 2 of 20
OverviewRemember the holophonor (https://adafru.it/Gfd) from Futurama (https://adafru.it/Gfe)?It was (will be?) a musical instrument that would project holograms depending on themood of the note played.Being a futuristic instrument, the inner workings of the holophonor are unknown.However, the basic idea of being able to detect the frequency of musical notes issomething we can possibly emulate. And that is what we'll explore in this guide usinga fairly simple technique.We'll also use the frequency detection to drive NeoPixels (our version of theholophonor) and also show how a TFT Gizmo (https://adafru.it/Gff) can be used todisplay the note information.Which Circuit Playground?The technique used here to estimate the audio frequency is fairly simple. It relies onconstantly sampling the microphone and analyzing the results. Therefore, the morepowerful the processor, the better.We've found that this works best on the Circuit Playground Bluefruit. You can alsorun it on the Circuit Playground Express.PartsThe following parts are used in this project: Adafruit IndustriesPage 3 of 20
Circuit Playground Bluefruit - BluetoothLow EnergyCircuit Playground Bluefruit is our thirdboard in the Circuit Playground series,another step towards a perfectintroduction to electronics andprogramming. We've.https://www.adafruit.com/product/4333Circuit Playground TFT Gizmo - Bolt-onDisplay Audio AmplifierExtend and expand your CircuitPlayground projects with a bolt on TFTGizmo that lets you add a lovely colordisplay in a sturdy and reliable fashion.This PCB looks just like a round.https://www.adafruit.com/product/4367USB cable - USB A to Micro-BThis here is your standard A to micro-BUSB cable, for USB 1.1 or 2.0. Perfect forconnecting a PC to your Metro, Feather,Raspberry Pi or other dev-board or.https://www.adafruit.com/product/592How It WorksThe technique we use in this guide to determine the frequency is pretty straightforward. It's sometimes called "zero crossing" or "mean crossing" as we use the timebetween crossings of a zero or mean level to estimate the frequency.Let's look at this in more detail. Adafruit IndustriesPage 4 of 20
Pure Tone BasicsA fundamental assumption of this technique is that we are dealing with a sound whichis a pure tone. That means it is a nice clean signal that just repeats over and overagain at a single frequency. If we recorded such a signal with a microphone andplotted the results, it would look something like this:This is an example of a signal with an offset, since the line is not crossing back andforth through the zero line on the graph. In this case, a zero level represents silenceand all noises will have a positive value. So we end up with a signal oscillating backand forth around some offset.There are several key features to this signal as shown below. The offset mentionedabove is called the MEAN. Adafruit IndustriesPage 5 of 20
MEAN is just another word for average, and that is how this value can be determined by averaging the entire sample. The PERIOD is the total time it takes to make onecycle of the pattern, which then repeats over and over. We are interested in thefrequency, f, of this signal, which is simply the inverse of the PERIOD.Computing Frequency From Mic DataWhen we sample the microphone, we don't get the orange line above. Instead we geta bunch of individual data points, like the black circles below. Adafruit IndustriesPage 6 of 20
These will all fall on the orange line as shown. Just keep in mind that the microphonesample data is a series of discrete data points. We can then work with these datapoints to estimate the frequency.Here's how the "mean crossing" technique works:1. Find the first point which is greater than the MEAN value plus the THRESHOLD.Set a "has crossed" flag to True.2. Find the first point after the "has crossed" flag has been set True that goesbelow the MEAN value. Store this location and clear the "has crossed" flag.3. We now repeat the process, so this is the next point like 1.4. And this is the next point like 2. Compute the delta between 2 and 4 and save it.We do the above across the entire mic sample and then take an average of thedeltas. The average delta is in terms of number of samples, N, in one cycle. Themicrophone sample rate sets the time, DT, between samples. So we can compute thePERIOD as simply N * DT. And the frequency of the mic data is then just the reciprocalof the PERIOD.Frequency BasicsOK, let's actually implement the "mean crossing" technique and see if it works. We'llstart simple and just print the computed results to the serial monitor. Here's thecomplete code:import timeimport arrayimport board Adafruit IndustriesPage 7 of 20
import audiobusio#--- User Configuration --------------------------SAMPLERATE 16000SAMPLES 1024THRESHOLD 100MIN DELTAS 5DELAY -----# Create a buffer to record intosamples array.array('H', [0] * SAMPLES)# Setup the mic inputmic audiobusio.PDMIn(board.MICROPHONE CLOCK,board.MICROPHONE DATA,sample rate SAMPLERATE,bit depth 16)while True:# Get raw mic datamic.record(samples, SAMPLES)# Compute DC offset (mean) and threshold levelmean int(sum(samples) / len(samples) 0.5)threshold mean THRESHOLD# Compute deltas between mean crossing points# (this bit by Dan Halbert)deltas []last xing point Nonecrossed threshold Falsefor i in range(SAMPLES-1):sample samples[i]if sample threshold:crossed threshold Trueif crossed threshold and sample mean:if last xing point:deltas.append(i - last xing point)last xing point icrossed threshold False# Try again if not enough deltasif len(deltas) MIN DELTAS:continue# Average the deltasmean sum(deltas) / len(deltas)# Compute frequencyfreq SAMPLERATE / meanprint("crossings: {}mean: {}freq: {} ".format(len(deltas), mean, freq))time.sleep(DELAY)The part of the code that does the main work for the mean crossing estimation offrequency is this:# Compute deltas between mean crossing points# (this bit by Dan Halbert)deltas []last xing point Nonecrossed threshold Falsefor i in range(SAMPLES-1):sample samples[i] Adafruit IndustriesPage 8 of 20
if sample > threshold:crossed threshold Trueif crossed threshold and sample < mean:if last xing point:deltas.append(i - last xing point)last xing point icrossed threshold FalseCompare that to the explanation in the previous section. You can see how it is loopingover the entire mic SAMPLES, checking for crossed threshold and storing all of the deltas.Once that loop is complete, the actual frequency computation is straight forward. Thedeltas are averaged:# Average the deltasmean sum(deltas) / len(deltas)And the frequency (freq) is then just:# Compute frequencyfreq SAMPLERATE / meanTone TestHere is a nice website that provides a pure tone generator we can use for testing:Online Tone Generatorhttps://adafru.it/GfgRun the basic frequency example program above and watch the output on the serialmonitor. Then use the website to generate some tones of various frequencies. Likethis:Here 190 is registering at about 188: Adafruit IndustriesPage 9 of 20
Here 446 is registering at about 442:Here 1500 is registering at about 1487:The results are not exact, but pretty close. Not too bad for a technique this simple.Now let's add some fun NeoPixel response based on the estimated frequency.Frequency and NeoPixelsWe'll look at determining musical notes in a bit. But for making the NeoPixels respondto the mic data, we can just work in terms of frequency. The idea is pretty simple we'll set a LOW frequency and a HIGH frequency. The NeoPixels will then light upindividually for any frequency in this range.Here's the complete boardaudiobusiosimpleioneopixel#--- User Configuration --------------------------SAMPLERATE 16000SAMPLES 1024THRESHOLD 100MIN DELTAS 5 Adafruit IndustriesPage 10 of 20
DELAY 0.2FREQ LOW 520FREQ HIGH 990COLORS ((0xFF, 0x00, 0x00) , # pixel 0(0xFF, 0x71, 0x00) , # pixel 1(0xFF, 0xE2, 0x00) , # pixel 2(0xAA, 0xFF, 0x00) , # pixel 3(0x38, 0xFF, 0x00) , # pixel 4(0x00, 0xFF, 0x38) , # pixel 5(0x00, 0xFF, 0xA9) , # pixel 6(0x00, 0xE2, 0xFF) , # pixel 7(0x00, 0x71, 0xFF) , # pixel 8(0x00, 0x00, 0xFF) , # pixel ----# Create a buffer to record intosamples array.array('H', [0] * SAMPLES)# Setup the mic inputmic audiobusio.PDMIn(board.MICROPHONE CLOCK,board.MICROPHONE DATA,sample rate SAMPLERATE,bit depth 16)# Setup NeoPixelspixels neopixel.NeoPixel(board.NEOPIXEL, 10, auto write False)while True:# Get raw mic datamic.record(samples, SAMPLES)# Compute DC offset (mean) and threshold levelmean int(sum(samples) / len(samples) 0.5)threshold mean THRESHOLD# Compute deltas between mean crossing points# (this bit by Dan Halbert)deltas []last xing point Nonecrossed threshold Falsefor i in range(SAMPLES-1):sample samples[i]if sample threshold:crossed threshold Trueif crossed threshold and sample mean:if last xing point:deltas.append(i - last xing point)last xing point icrossed threshold False# Try again if not enough deltasif len(deltas) MIN DELTAS:continue# Average the deltasmean sum(deltas) / len(deltas)# Compute frequencyfreq SAMPLERATE / meanprint("crossings: {}mean: {}freq: {} ".format(len(deltas), mean, freq))# Show on NeoPixelspixels.fill(0)pixel round(simpleio.map range(freq, FREQ LOW, FREQ HIGH, 0, 9))pixels[pixel] COLORS[pixel] Adafruit IndustriesPage 11 of 20
pixels.show()time.sleep(DELAY)This code is largely the same as the previous example. All that has been added issome NeoPixel output based on frequency. You can set the LOW and HIGH frequencyand the NeoPixel COLORS at the top of the code in these lines:FREQ LOW 520FREQ HIGH 990COLORS ((0xFF, 0x00,(0xFF, 0x71,(0xFF, 0xE2,(0xAA, 0xFF,(0x38, 0xFF,(0x00, 0xFF,(0x00, 0xFF,(0x00, 0xE2,(0x00, 0x71,(0x00, lpixelpixelpixelpixelpixel0123456789The part of the code that does the actual NeoPixel lighting is at the bottom:# Show on NeoPixelspixels.fill(0)pixel round(simpleio.map range(freq, FREQ LOW, FREQ HIGH, 0, 9))pixels[pixel] COLORS[pixel]pixels.show()It uses the simpleio.map range() function to map the computed frequency to therange of NeoPixels. So the LOW frequency will light NeoPixel #0, the HIGH frequencywill light NeoPixel #9, and any in between frequencies will light the others.Circuit Playground-O-PhonorWe can use the above sketch to make our Circuit Playground-O-Phonor. As asubstitute for a real holophonor, we'll use a very common flute like instrument called arecorder (https://adafru.it/Gfh). They look like this: Adafruit IndustriesPage 12 of 20
These come in different shapes and sizes with corresponding differences in their noteranges. You'll need to figure out what range of notes, and in what octave, yourrecorder produces. The code above has been setup to run from a 5th octave C( 520Hz) to a 5th octave B ( 990Hz). If your recorder is different, change these twolines as needed:FREQ LOW 520FREQ HIGH 990Once you've got that setup, run the code above and try playing notes on yourrecorder. You should get the NeoPixels to light up.Musical Note BasicsSo what about musical notes? The ones with letters, like ABCDEFG. Every Good BirdDoes Fly. And all that.Determining notes is essentially just a matter of mapping the computed frequency tospecific notes. This mapping is well known and you can read more about it here:Musical Notes and Frequencieshttps://adafru.it/pFOHere's the complete code that includes note detection: Adafruit IndustriesPage 13 of 20
-- User Configuration --------------------------SAMPLERATE 16000SAMPLES 1024THRESHOLD 100MIN DELTAS 5DELAY 0.2#octave 12345678NOTES { "C" : (33, 65, 131, 262, 523, 1047, 2093, 4186),"D" : (37, 73, 147, 294, 587, 1175, 2349, 4699),"E" : (41, 82, 165, 330, 659, 1319, 2637, 5274),"F" : (44, 87, 175, 349, 698, 1397, 2794, 5588),"G" : (49, 98, 196, 392, 785, 1568, 3136, 6272),"A" : (55, 110, 220, 440, 880, 1760, 3520, 7040),"B" : (62, 123, 247, 494, 988, 1976, 3951, --------# Create a buffer to record intosamples array.array('H', [0] * SAMPLES)# Setup the mic inputmic audiobusio.PDMIn(board.MICROPHONE CLOCK,board.MICROPHONE DATA,sample rate SAMPLERATE,bit depth 16)while True:# Get raw mic datamic.record(samples, SAMPLES)# Compute DC offset (mean) and threshold levelmean int(sum(samples) / len(samples) 0.5)threshold mean THRESHOLD# Compute deltas between mean crossing points# (this bit by Dan Halbert)deltas []last xing point Nonecrossed threshold Falsefor i in range(SAMPLES-1):sample samples[i]if sample threshold:crossed threshold Trueif crossed threshold and sample mean:if last xing point:deltas.append(i - last xing point)last xing point icrossed threshold False# Try again if not enough deltasif len(deltas) MIN DELTAS:continue# Average the deltasmean sum(deltas) / len(deltas)# Compute frequencyfreq SAMPLERATE / meanprint("crossings: {}mean: {}freq: {} ".format(len(deltas), mean, freq))# Find corresponding notefor note in NOTES: Adafruit IndustriesPage 14 of 20
for octave, note freq in enumerate(NOTES[note]):if note freq * 0.97 freq note freq * 1.03:print("-"*10)print("NOTE {}{}".format(note, octave 1))print("-"*10)time.sleep(DELAY)This also largely the same as our original code. The main new item is a table thatmaps NOTES at various OCTAVES to their corresponding frequency:#octaveNOTES { "C" :"D" :"E" :"F" :"G" :"A" :"B" : 123(33, 65, 131,(37, 73, 147,(41, 82, 165,(44, 87, 175,(49, 98, 196,(55, 110, 220,(62, 123, 4),5588),6272),7040),7902)}And then once we have our frequency estimate, we just figure out where it is locatedin this table (coded to be plus or minus 3%):# Find corresponding notefor note in NOTES:for octave, note freq in enumerate(NOTES[note]):if note freq * 0.97 < freq < note freq * 1.03:print("-"*10)print("NOTE {}{}".format(note, octave 1))print("-"*10)Notes TestWe can use the same website we used for the tones test to also test musical notes.Musical Note Generatorhttps://adafru.it/GfgThe simple sketch above does not have entries for sharp and flat notes. So we'll testjust the primary notes. To bring up a table of pre-defined musical note frequencies,click this button: Adafruit IndustriesPage 15 of 20
And then, with the above code running, try different notes. Here's C4:Here's A4: Adafruit IndustriesPage 16 of 20
Here's E6:Pretty good. As you get lower in octave (the number, like 4 and 6 above), you'llprobably find it doesn't work quite as well. That's mainly due to the absolutefrequency differences between the notes getting smaller in the lower octaves. Andsince our technique isn't super accurate, it has trouble distinguishing betweenconsecutive note frequencies. It should get pretty close though.Notes and TFT GizmoAll of the examples so far have outputted to the serial monitor. If you have a TFTGizmo (https://adafru.it/Gff), we can use that instead to display information. That wayyou don't need to open a terminal to watch the serial output or be attached to acomputer.Let's adapt our basic notes program to output to the TFT Gizmo. Start by first goingthrough this guide to get the TFT Gizmo setup and running:Adafruit Circuit Playground TFTGizmohttps://adafru.it/GfiWe'll also use some special fonts for the display. Here's a zip file containing the fontfiles. Both of these font files were created from the Mono MMM 5 (https://adafru.it/Gfj)font. Adafruit IndustriesPage 17 of 20
fonts.ziphttps://adafru.it/GfkDownload that zip file, unzip the contents, and add the two font files to your CIRCUITPY drive which shows up when your board is connected to your computer via aknown good data power USB cable.Here's the complete code for displaying note info to the TFT Gizmo:import timeimport arrayimport boardimport busioimport audiobusioimport displayiofrom adafruit st7789 import ST7789from adafruit bitmap font import bitmap fontfrom adafruit display text import label#--- User Configuration --------------------------SAMPLERATE 16000SAMPLES 1024THRESHOLD 100MIN DELTAS 5DELAY 0.2#octave 12345678NOTES { "C" : (33, 65, 131, 262, 523, 1047, 2093, 4186),"D" : (37, 73, 147, 294, 587, 1175, 2349, 4699),"E" : (41, 82, 165, 330, 659, 1319, 2637, 5274),"F" : (44, 87, 175, 349, 698, 1397, 2794, 5588),"G" : (49, 98, 196, 392, 785, 1568, 3136, 6272),"A" : (55, 110, 220, 440, 880, 1760, 3520, 7040),"B" : (62, 123, 247, 494, 988, 1976, 3951, --------# Create a buffer to record intosamples array.array('H', [0] * SAMPLES)# Setup the mic inputmic audiobusio.PDMIn(board.MICROPHONE CLOCK,board.MICROPHONE DATA,sample rate SAMPLERATE,bit depth 16)# Setup TFT Gizmodisplayio.release displays()spi busio.SPI(board.SCL, MOSI board.SDA)tft cs board.RXtft dc board.TXtft backlight board.A3display bus displayio.FourWire(spi, command tft dc, chip select tft cs)display ST7789(display bus, width 240, height 240, rowstart 80,backlight pin tft backlight, rotation 180)# Setup thenote font note text note text.xvarious text labelsbitmap font.load font("/monoMMM 5 90.bdf")label.Label(note font, text "A", color 0xFFFFFF) 90 Adafruit IndustriesPage 18 of 20
note text.y 100oct font oct text oct text.xoct text.yfreq font freq text freq text.xfreq text.ybitmap font.load font("/monoMMM 5 24.bdf")label.Label(oct font, text " ", color 0x00FFFF) 180 150oct fontlabel.Label(freq font, text "f 1234.5", color 0xFFFF00) 20 220# Add everything to the display groupsplash displayio.Group()splash.append(note text)splash.append(oct text)splash.append(freq text)display.show(splash)while True:# Get raw mic datamic.record(samples, SAMPLES)# Compute DC offset (mean) and threshold levelmean int(sum(samples) / len(samples) 0.5)threshold mean THRESHOLD# Compute deltas between mean crossing points# (this bit by Dan Halbert)deltas []last xing point Nonecrossed threshold Falsefor i in range(SAMPLES-1):sample samples[i]if sample threshold:crossed threshold Trueif crossed threshold and sample mean:if last xing point:deltas.append(i - last xing point)last xing point icrossed threshold False# Try again if not enough deltasif len(deltas) MIN DELTAS:continue# Average the deltasmean sum(deltas) / len(deltas)# Compute frequencyfreq SAMPLERATE / meanprint("crossings: {} mean: {} freq: {} ".format(len(deltas), mean, freq))freq text.text "f {:6.1f}".format(freq)# Find corresponding notefor note in NOTES:for octave, note freq in enumerate(NOTES[note]):if note freq * 0.97 freq note freq * 1.03:print("Note: {}{}".format(note, octave 1))note text.text noteoct text.text "{}".format(octave 1)time.sleep(DELAY) Adafruit IndustriesPage 19 of 20
With this code running, try making some musical notes. Use either a musicalinstrument, like a recorder, or the tone generator website used previously.It will display the note along with the octave (the subscript number). The actualfrequency is also shown at the bottom: Adafruit IndustriesPage 20 of 20
run it on the Circuit Playground Express. Adafruit Industries Page 3 of 20. Circuit Playground Bluefruit - Bluetooth Low Energy Circuit Playground Bluefruit is our third board in the Circuit Playground series, another step towards a perfect introduction to electronics and programming. We've.