Transcription
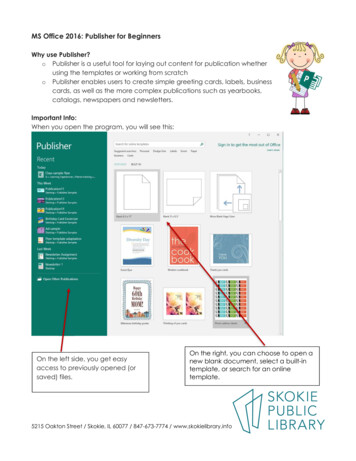
Microsoft Publisher 2016I. About PublisherA. What is it? “Publisher is a desktop publishing program that assists you in designing and producingprofessional documents that combine text, graphics, illustrations, and photographs. (Shelly,Cashman, Starks, Microsoft Office Publisher 2003 Introductory Concepts and techniques,Thompson Course Technology, 2004)B. What sets Publisher apart from Word or other programs? Publisher has additional tools such asdesign templates, graphic manipulation tools and color schemes. Publisher allows you to createthe kinds of documents that were previously the work of graphic designers. Examples includenewsletters, logos, flyers, signs and forms.C. Starting Publisher: Double-click on the Publisher icon on the desktop.II. Opening a Blank PublicationA. Getting StartedYou should see a screen that shows the different Publisher templates to choose from. First we willcreate a simple publication from scratch. You can then add text boxes, graphics, and borders withthe objects toolbar. Click on the first template option, Blank Page 8.5 x 11”B. Margin GuidesTake note of the blue rectangle within your blank publication. That is the margin guide. It keepsyou within the printable area of the page and will not show when printed. Use the horizontal scrollbar to move to the far left of the publication.Note: A shortcut to magnify your page is the F9 key. You can use F9 to toggle between the current zoomand 100%.III. Parts of the Screen and SettingsA. The RibbonThe ribbon provides easy access to commands. In order to make finding the right command easy,commands on the ribbon are broken down into categories, each located under the appropriate tab.1) Tabs include: File, Home, Insert, Page Design, Mailings, Review and View.2) Groups: Each tab is then broken down into different groups of tools.1 of 7Rev. 6-4-19
B. Scroll BarThe vertical and horizontal scroll bars can be dragged to move either up and down or side to sidein the document. You can also do this by clicking the scroll bar arrows.C. Quick Access ToolbarThe Quick Access Toolbar is located to the very top left hand corner and provides easy access tothe commands you use most frequently. The Save, Undo, and Redo/Repeat buttons appear on theQuick Access Toolbar by default, but you can personalize the Quick Access Toolbar to fit your ownneeds. To add additional commands, click on the arrow at the end of the toolbar. Select whichcommands you would like to add or remove from the toolbar.D. Navigation PaneLocated on the left of the screen, the navigation pane lets you move around your publication.E. Help ButtonThe help button is the question mark located in the top right corner of the window. Click thequestion mark to bring up a search box to look for help topics.IV. Borders and AutoShapesThis publication will be a flyer to advertise a concert. It will consist of a graphic, a heading, a text box,and a border. We will start with the border. A border is a rectangle and considered an AutoShape.AutoShapes are objects easily drawn with tools located under the insert tab.A. Creating a BorderTo draw a border you will use the small rectangle tool under the Insert Tab. Click on the insert tab. Under the illustrations group, click on shapes. Select therectangle shape. Let go of the mouse button and move your pointer to the document. We will use the blue margin lines as a guide to lay our border. Place your pointer (now a cross) on the corner and click and drag to draw a rectangleto the adjacent corner. Once you let go of your left mouse button, you should see a rectangle with thin lineslaid over your blue borderlines. Your border doesn’t have to be laid perfectly over the borderlines and can bestretched to the correct size if it is too large or too small. A new tab called Drawing Tools/Format has now opened at the top of your screen. Under the shape styles group, click the black, diagonal down arrow in the rightbottom corner, it will open a window. Under the tab Colors and Lines notice the drop down options for Color, Width, andcompound type.Note: Your shape may automatically fill with a color. Don’t worry about this yet – we aregoing to learn how to change the fill and outline settings for our shape later.2 of 7Rev. 6-4-19
B. Border ArtBelow the line weight field is a BorderArt button. BorderArt differs from the Colors and Linesfeatures, which offer only variations on line borders. Instead of lines BorderArt offers differentgraphics that can be inserted side-by-side to form a border. Click on the BorderArt button. Another box appears with a list on the left of differentborders to choose from and a box on the right to preview how the borders look. Browse through the different borders and click on various ones to see how theywould appear as a border. When you are finished select “Music Notes” and click onOK once in the BorderArt box. Under the line selection, click the color pull down menu, choose “more colors”.Choose any color you like on the hexagon. The color you have selected will show inthe lower right corner of the box so you can preview it. Under fill color, select no fill.C. Border Size or Line WeightTo change the size of your border, change the width in the Format AutoShape box. When youchange the width you will increase or decrease the thickness of your border. Borders require somefine-tuning. For uniformity, type in 30 point. Click on OK.V. Text BoxesUnder the insert tab is where you will find the tool to add a text box.A. Creating a Text Box To create the heading, click on the insert tab, select Draw Text Box located in thegroup called text. Move to the document and your pointer becomes a cross. You can create a text boxby clicking and dragging and then releasing in a blank space. Draw a text box across the top of your publication making sure not to overlap theborder.B. Resizing a Text BoxTake note of how there are small white circles and squares on the edges of the textbox. These arecalled resizing dots. Now rest your mouse over the lower left hand corner of the text box until thearrow becomes a two-pronged diagonal arrow. This is called a resizing handle.You can resize items from the top or sides, increasing height and width. If you place your pointerover one of the resizing dots on the vertical or horizontal edges your pointer becomes either avertical or horizontal resizing handle. These resizing handles are very handy when you have tosqueeze objects closely together. Practice resizing your textbox, stretch the right side out past your border, and thenput it back so that it fits snug but does not overlap the border. Now expand the heightof your text box to about two inches.Note: The dimensions of your box are shown in the status bar at the bottom of the page.3 of 7Rev. 6-4-19
Click inside your textbox and a cursor appears. You will need to zoom in on yourtextbox using the F9 key.Type Band Concert.C. TextFit- Best FitRather than having to guess the size of text needed to fill a text box, you can use the TextFit- BestFit tool. Under the new text box tools/format tab, select the Text Fit option under the text tab. Select Best Fit. Press F9 to see your publication completely.D. Fill and Font ColorThe Fill feature helps your text stand out by coloring the background of your textbox. The Fillbutton is located under the Drawing Tools Tab. You can also change the color of your font usingthe Text Box Tools tab. To use the fill feature, click on the Drawing Tools tab. Under the shape styles group, locate the picture of a bucket pouring paint. This isyour Shape Fill menu. Click on the down arrow beside the bucket to see a choice of colors. You will notice that the publication provides a preview as you move your mouse overthe different colors. Select any color you like. Click OK. To change the color of the text, highlight the text and click the Text Box Tools tab.Under font group, click the arrow beside the font color symbol and select a color. To change font type, highlight text and select type from drop down menu. You willnotice that the publication provides a preview as you move your mouse over thedifferent font styles.We will now create another text box at the bottom of the publication. Use the draw text box tool under insert tab to create a text box in a blank space. Draw your final text box in the space remaining. Zoom in using F9.Type in: 7 pm (hit enter to move to next line) Henrico Theater (hit enter to move to next line) Nine Mile Road (hit enter to move to next line) Henrico, VA Click on Text Fit under Text group, and select Best Fit. Highlight the text and click the center button under the alignment group to centeryour text.4 of 7Rev. 6-4-19
Note: You can move pictures and clip art with the arrow keys alone but to move a text box you must alsopress alt.VI. Inserting a PictureWe will now add an image, to add some interest. Pictures are added to a publication to give it more lifeand more appeal. You can add pictures from a file, through an online search, or with ClipArt. To begin, you may need to adjust your bottom text box to add a picture in the centerof the flyer. Select text box and use resize buttons to adjust size. Once you have made space for your picture, click on the Insert tab. In theillustrations group, click on Online Pictures. Search for “Band Instrument”, select an image and click Insert.A. Moving ImagesAs with other objects, if you run your arrow along the sides of the graphic your pointer will becomea four-pointed arrow. With this arrow you are able to move text, picture boxes, borders and lines. Click on the edge of the band instrument graphic and drag it to the center of yourpublication so there is an equal distance on the left and right. A pink line will appearto alert you that it is centered.B. Rotating ObjectsYou can also rotate objects. When selected by a mouse click many objects display a circularrotation handle connected to the top of the object. To tilt or rotate the object click and hold on thecircular rotation handle and move the mouse left and right. Practice rotating instrument graphic for a couple of seconds. When you are donepracticing, return the object to its original position.VII. Saving Go to File Save As. Select Computer. Double click desktop on the right.Name your file Band Concert.Go to File and close the publication.VII. Template PublicationsA. What is a template publication?“A template publication is a partially completed publication that contains formatting, text, and/orgraphics placeholders, which are dotted-line boxes that show the position of the objects in apublication’s design. (Stevens, Cindy, Getting Started with Microsoft Office Publisher 2003,Pearson 2004).When using template publications all you have to do is replace the template text, headings, orgraphics with your own text, headings or graphics. Design templates should be thought of as astarting point and are completely customizable.5 of 7Rev. 6-4-19
Open up Publisher and search for “Family Holiday Newsletter” at the top of the pagein the online templates search box. Double click on the newsletter.B. Formatting TemplatesDesign templates can be changed at any time during your work. Information added to preset textboxes and changes made will automatically be inserted into the new design. Click the Page Design tab. Under schemes group, select more arrow at the bottom of the window selections.You will notice that the publication provides a preview as you move your mouse overthe different colors. Select the “Flow” color scheme for your newsletter. Click to apply.C. Replacing TextThe document is a newsletter, but we will need to personalize and update the information. To addyour own text to a template, click in the preset text boxes and type. Select the title text box and update with “your last name” and change “holiday” towinter. Also update the year text box to the current year.D. Multiple pagesNotice in the navigation pane to the left, that there are two pages in this newsletter. Click on page two on the navigation pane to the left. Click on Insert tab, pages group, page to insert a new page into your newsletter.Notice this adds a blank page. Go back to Page and click on arrow under the Page icon. Select Insert DuplicatePage. This time you will get formatted copy of the page.E. Remove Pages Right click on duplicate page and click Delete and Yes you want to delete. Right click on the blank page and click Delete.F. Deleting Unnecessary ObjectsSince we will not be using all the text boxes, we can delete those we don’t need. Click on the text box on page two in the lower left corner titled “Our Annual Trip ”Notice the circles at the corners of the box. Hit the delete key on the keyboard.G. Moving Pictures and Text BoxesWe will fill the space emptied by text box with the beach picture. Click on the beach photo on the bottom right of page 2. Hold and drag to white spacein the center of the page. Resize the picture using the resizing buttons to fit the space. Click on the caption and move up to the right of the picture. Move the blue rectangleup behind the caption.6 of 7Rev. 6-4-19
H. Changing a PictureDefault pictures in templates serve as place holders and are meant to be replaced with a picture ofsimilar size. If you replace a preset picture with a picture that doesn’t have the same dimensions, itwill scale your picture down to size and fit it to the best of its ability in the space allowed. Yourpicture will not be skewed or stretched. Click on the beach picture on page two of the template. Right click on the picture. Select Change Picture Change Picture Search Family Ski Select a picture thenclick Insert button. Click in the caption text box and select the text. Type in an appropriate caption forthe new picture.VIII. Grouping and Ungrouping ObjectsA. Grouping ObjectsWhen working on a publication, you may work with many objects that are clustered together.Making one alteration on one object can mean rearranging all of the surrounding objects. To avoidthis, you can group objects. Grouping objects requires two steps; outlining the area you want togroup and then selecting the group icon.B. Selecting Multiple ObjectsWe will group the picture, caption and blue shape behind the caption. To group these objects useyour mouse pointer (no special tool) and draw a rectangle around the three objects. Hold down the control key (Ctrl) and left-click, the three objects, the picture, captionand blue shape behind the caption.C. Grouping and Ungrouping IconsOnce multiple items have been selected, a Drawing Tools tab will appear at the top. Under Drawing Tools Arrange group, click Group. Click on your grouped objects to select them, if they are not already selected. Hold down the left button on the mouse and practice dragging the grouped objectsaround. When done return them to their place.IX. Publisher Help SystemA.Any time while in Publisher you can use the ‘Tell Me’ System to get answers to questions. Tellme is a tool where you can enter words and phrases about what you want to do next and quicklyget to features you want to use or actions you want to performThanks for Attending!7 of 7Rev. 6-4-19
Publisher has additional tools such as design templates, graphic manipulation tools and color schemes. Publisher allows you to create the kinds of documents that were previously the work of graphic designers. Examples include newsletters, logos, flyers, signs and forms. C. Starting Publisher: Double-click on the Publisher icon on the .