Transcription
Creating a Brochure, Flyer and NewsletterUsing Microsoft Publisher 2007 forCreated: 21 February 2007Starting Publisher 2007Note: You should be competent in a word processing program before youattempt this Tutorial.Microsoft Publisher 2007 is a really neat program that allows you to create professional qualitynewsletters, brochures, flyers, postcards, calendars, award certificates, calling cards, paperairplanes, origami – and a whole lot more great “things.”This tutorial will proceed from what we think is the easiest publication to the most complex.First we’ll create a flyer using Microsoft Publisher 2007. Then, we’ll create a brochure, andfinally a newsletter. Each skill we learn in the flyer will be of use in the brochure. The flyer andbrochure techniques will also be used in the newsletter. Your abilities will grow frompublication to publication. You may save your publications on a formatted 3 ½ inch diskette, aUSB key, or on your hard drive.To load the Microsoft Publisher 2007 program, Double click on thePublisher 2007 icon on the main Windows screen, or click-on Start in thelower left corner of the screen, then click-on Programs, and then click onMicrosoft Publisher 2007.You should now be in the Microsoft Publisher 2007 main screen.On the center of your screen you should see the view below.1
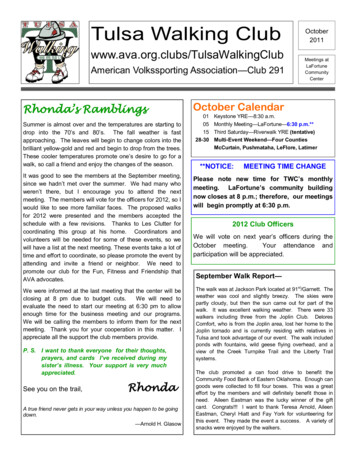
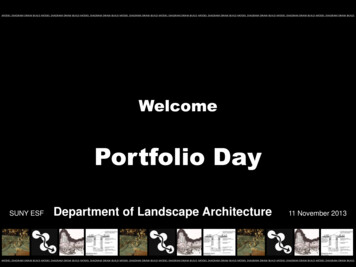
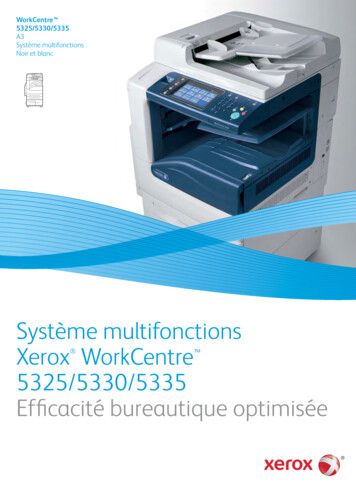
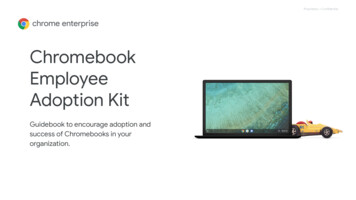
On the left side of the screen you will see the MicrosoftPublisher Task Pane (like the image on the right). We’ll usethe Publications from Print area to initially begin eachpublication.For “old” Publisher users, the Task Pane is something newin Publisher XP/2002-2007. It replaces the MicrosoftPublisher Catalog that was a part of the initial Publisher 2000screen.In the Microsoft Publisher Task Pane, you’ll see all of thedifferent Publications you can create.On the right side of the screen you will see the RecentPublications Task Pane (like the image below). This is reallyhandy if you want to return to a publication and make somechanges. All you have to do is click the publication and it willopen.In this tutorial, whenever we indicate that you need to click a mouse button, itwill mean to click the left mouse button – unless we indicate that you shouldclick the right mouse button. So, always move the cursor over the “place” weindicate and “click left” unless we tell you otherwise.2
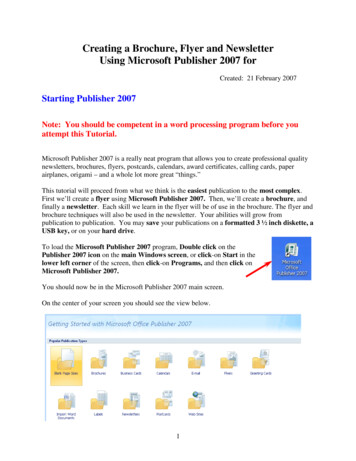
Using the Microsoft Publisher Task PaneClick-on Flyers in Microsoft Publisher Task Pane (on the leftside of your screen). On the right side of the screen you will nowsee Flyer template design styles for a number of different Flyers(Accent Box, Arcs, etc.).Elevator BarUse the “elevator bar” on the right side of the Flyers area to move up anddown to see the various Flyer design templates. Also notice that as you come to a new style thatit will be highlighted in orange. Notice, as you view the various types of Flyers, that you canhave those “little tear off things” with your phone number on the bottom. We’ll show you howto do this.Next, click-on Brochures in the Microsoft Publisher TaskPane. Notice, when you click, a number of different types ofbrochures appear below the brochure selection (Informational,Price List, Event, etc). Use the elevator bar on the right of theBrochures area, which now appears, to view the various types ofbrochures. While you are doing this, notice the differencesbetween the various types of brochures.3
When you have viewed brochures, to your satisfaction, click-onNewsletters in the Microsoft Publisher Task Pane (as you didfor Brochures and Flyers). Notice again, there are severaldifferent types of Newsletters. Use the elevator bar on theright of Newsletters to move down the various Newsletterstyles.Now, proceed down the Publication Types list and click-on anyof the publications in which you are interested – Postcards,Business Cards, Calendars, Award Certificates, Paper Airplanes– whatever you want to look at.Creating a FlyerAs indicated, at the beginning of the tutorial, we think the Flyer is the easiest publication onwhich to begin. So, click on the Flyers category under Publication Types (on the left of thescreen). Use the Elevator Bar and move down until you can see the Classic Designs Category.Your screen should look like the image below.We’ll use the “Arcs” style for all Publisher publications. It is the one above on the right(arrow). Point to the Arcs Informational Flyer and click-on it. A preview will appear, on theright side of your screen. You will see Arcs “highlighted by an orange border around theselection (like the one above)”. This indicates that you have selected the Arcs flyer. To workwith the Arcs flyer, double click twice quickly on Arcs. The screen will change and youwill see the Arc Flyer enlarged on the right side of the screen (image at the top of the nextpage).4
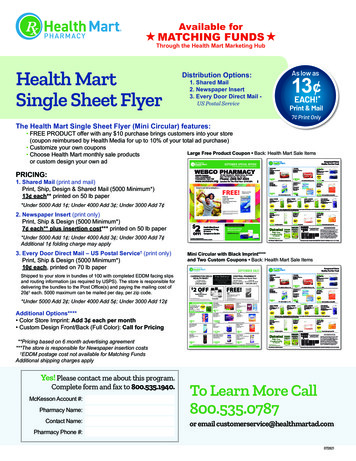
Notice that the Arcs flyer has a “default” Business Name, some phone numbers, and otherdata. Since this is the first time that you have used Publisher 2007, you will need to changethe default information to your information.As shown in the image on the right, click the Edit Tab inthe Menu Bar and a drop down menu will appear. Notice,at the bottom of the menu, a Business Information choice.Click Business Information The Business Information Menu Screen (image at top ofnext page) will appear.5
If you have used previous versions of Publisher you will notice that the Personal InformationMenu screen has been replaced by the Business Information Menu below. Now you can create“unlimited” addresses! The default information is called Custom 1 – it’s what you see in theFlyer on the last page. We’ll change this to our information and give it a new name. To getstarted, click the Edit button.When the Edit Business Information Set Menu Screen appeared we replaced the defaultinformation with “our” business information. Go ahead and enter your information, or somefun information, if you desire – you can come back and edit or remove information later – asneed be. Notice we changed the Business Information set name from Custom 1 to somethingmore logical for us. When you have finished entering your information, click the Save button.6
Your updated Business Information menu screen should look similar to the image below. If yousee any mistakes, click the Edit button. If everything is OK, click the Update Publicationbutton. Notice that the menu screen closes and all of the information you entered is now shownin the Flyer!We’ll work with you to create a new logo for your business/group later in the tutorial.Now we’ll use the Format Publication Task Pane toenhance our Flyer.Notice that the Flyer Options selection indicates that wehave chosen Arcs– since that is the Flyer Design weselected.We’ll “stick with” Arcs for this tutorial, but if you desire tochoose a different Template, you can click the ChangeTemplate button.Also notice, that you can change the Page size on withFlyer Options as well.7
Next click-on the Page Options selection. ThisTask Pane let’s you add various “objects” toyour Flyer. Notice, on our Flyer, we alreadyhave a Logo like the one on the right.Use the elevator bar (on the right side of theTask Pane) to move up and down the SuggestedObjects area. As you move, click several of theobjects. As you select the different Objects, youwill notice that the Flyer template, on the right,changes as the Objects you selected are“dropped” in the middle of your Flyer.Elevator BarDon’t worry about this – we’ll show you howto remove them in a minute.Later, as you become more accomplished withPublisher, you’ll be able to “drag” these objectsto other places on your publications.A BIG BUTTON!If you “goof-up” it’s easy to get back to whereyou were. In the Button Bar, below the MenuBar, there is a little, blue circular arrow. Thisis the undo button. If you click-on this buttonyou will undo your last “click.” Try this, if youdesire, by clicking the circular, blue undo arrow. You’ll probably need this several times aswe proceed through this tutorial. We sure did – many times.Go ahead and remove all of the objects you placed in the middle of your Flyer.8
Next we’ll choose a Color Scheme for our Flyer. Click theColor Schemes choice in the Format Publication Task Pane.Use the elevator bar (on the right side of the Task Pane) tomove up and down the Apply a color scheme area. As youmove, click-on several of the color schemes. As you select thedifferent Color Schemes, you will notice that the Flyertemplate on the right changes its Color Scheme to the one youselected in Apply a color scheme on the left.We’ll choose the Burgundy Color Scheme since these reflectour college colors.You choose a Color Scheme that you like. You can come backand change it any time you desire.Next, click-on Font Schemes. The Font Schemes Task Pane atthe left will appear. The default (original) settings for the thisFlyer’s fonts are Arial and Times New Roman.Use the elevator bar on the right of the Font Schemes area toselect a font that you like.We’ll stay with the default – Arial and Times New Roman.Now return to the Flyer Options Task Pane9
Any time that you desire to change anything we’ve covered so far, simply click-on that selectionin the Format Publications Task Pane. It’s just that simple!We’re now ready to work more “precisely” with our Flyer, but first it would be a good idea tosave our Flyer.Saving your Flyer and other Microsoft PublicationsYou can either click-on File in the Menu Bar and then on Save or Save As, or you can click-onthe little Save diskette in the button bar. Either method will bring you to the Save As screenbelow.Notice that we are saving on our Local Disk (C:) hard drive and that we have used the Filename Flyer. When you decide on a drive (on which to save), name your file and click-on Save.You can close the Flyer Options Task Pane – and make it appear again any time youdesire.If you want to “close” the Format Publication TaskPane simply point to the small “X” in the upperright corner of the Task Pane and click-on it.10
If you, at a later time desire to re-open theFormat Publication Task Pane and revise someof your choices, simply click View in the MenuBar and then click Task Pane. Your FormatPublication Task Pane will again appear on theleft. You can close and open this pane anytime.Editing the FlyerTake few minutes and look at the Flyer. At the current timeyou are able to view the entire flyer. At the top of thescreen, under the Menu Bar, you will notice an area that indicates something % (this dependson your screen resolution). This tells you the size of the Flyer you are viewing. You'll find, aswe continue through this tutorial in Microsoft Publisher 2007, that it will really be helpful toview entire Pages in the Flyer, Brochure and Newsletter. Other times, while we are editing aportion of each of these publications, it will be great if we can “zoom-in” on a specific objector area of the publication to enlarge it for editing. If we can look at some text, an object orpicture in a larger view, we will be able to edit the “thing” more easily.Editing TitlesNotice the title area at the top. We’ll start our editing here. Move your cursor over the titleobject and click-the left mouse button on the title object.Click-on the TitleNote: whenever we indicate that you are to click-on an object in apublication, this means to click-the left mouse button.11
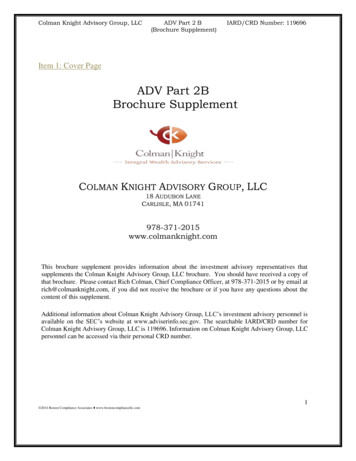
Zoom-in and Zoom-outYou will notice, when you click-on the title, small circles appear on the four corners and foursides of the Title area. We call these “grabbers.” We’ll work with these in a few moments. Tomake this task much easier, it would be really neat if we could ZOOM-IN on the title – so we’llhave a BIGGER object on which to work. Whenever you want to zoom-in or out, simply tapthe F9 Function key at the top of the keyboard! Since we clicked-on the title, we will zoomin on the title when we tap F9. Tap F9 now.You will zoom-in on your title and your title should look similar to the image below.GrabberssGroup Object PiecesNotice that the zoom percentage now indicates 100%. It will be a lot easier to work with thislarger title.First we’ll edit the title text. Point the cursor arrow just to the left of the P in Product in thetitle and click the left mouse button. You should see a vertical light-green flashing cursor. Ifyou don’t see the cursor - try again. When you see the cursor, you will be in a “word processoredit mode.” Tap the Del (Delete) key until you have erased Product/Service Information.When you have done this, you will only see the light-green flashing cursor in the center of thetitle. Now type-in a title you would like for your flyer. We’ll use Lynchburg College – sincethat’s where we’re creating this tutorial.When you have done this, look at the title and see if you still have the “grabbers” on the sidesand corners. If you do - fine. If you don’t, click-on the title again. Once you have the grabbersslowly move your mouse over the title area – do not click.click You’ll notice that as your mousemoves over this area a number of different “assistants” appear and disappear.These assistants indicate when you can move and re-size the title. The little crossedarrows indicate that if you click and hold down the left mouse button and thenmove the mouse (drag the mouse), you will see the “whole” title move. Try this. If you placethe cursor over one of the grabbers, you will see a little box with two arrows. Ifyou now click and hold down the left mouse button, and move (drag) the mousea bit you will notice that the title gets a bit larger or smaller.12
If you “goof-up” it’s easy to get back to where you were. In the Button Barbelow the Menu Bar there is a little, blue circular arrow. This is the undobutton. If you click-on this button you will undo your last “click.” Try this, ifyou desire, by clicking-on the circular, blue undo arrow. You’ll probably need thisseveral times as we proceed through this tutorial. We sure did – many times.Make sure that you can still see the grabbers. If you can’t – click-onthe title. You may have noticed that just below the title there is alittle box that looks like it has two small boxes in it (see the arrow onthe right). If you move the cursor arrow over these “boxes” and pauseyou will notice that a text help indicates “Ungroup Objects.” When you moved the title –everything moved – a group of objects. This is great if you desire to keep all of the objectstogether.If you want to move the individual objects that make up the group –then click-on the boxes. They will move apart – or ungroup (seeimage at right). You can now click and move the individual objects asyou want. Try this or don’t try this – your choice. If you do move theelliptical, colored background, or the text, you’ll notice that the Object Box disappears. Whenyou're finished, if you desire to re-group the Text Block objects, all you have to do is click-onthe Undo arrow until you have your title back the way you want it. You’ll notice at somepoint that the Object Box reappears and then groups the objects as one object. The Object Boxwill look like the upper box on the right when the title is regrouped. The Grouped andUngrouped Object boxes don’t look that much different. So, be careful as you “click” the Undobutton.If you “goof” – don’t forget the undo arrow.Changing Title and Title Text ColorsWe’ll now do some RIGHT mouse button clicking. If you place the cursor arrow over anyobject in a Microsoft product and click the RIGHT mouse button, a “tailored” drop downmenu appears with features “tailored” to the area/object on which you clicked. This is reallyneat. Many folks use this a lot – others are just discovering this feature. So, point the cursorarrow to the middle of you title text (make sure the text is highlighted) and click the RIGHTmouse button. A drop down menu (like the one below) will appear. Notice, that at exact placewhere you clicked in the title, a corner of the menu box appears. This indicates exactly“where” you clicked. We’ll use this drop down menu to change the text color.After you have right-clicked on the text, amenu box will remain on the screen until youeither click somewhere else, or click-on one ofthe menu choices. Move your mouse cursordown the menu box until it is over ChangeText (see right arrow). A group of choicesfor changing text appears (like the picture onthe right). Now move the cursor from ChangeText over Font. Click-on Font.13
The Font menu below will appear.At the beginning of this tutorial we indicated that you should be competent in a wordprocessing program. So, we will not spend a lot of time on editing and enhancing text in thistutorial. You can see from the Font menu above that the default font in this title is Ariel Black,font size 14. If you desire, you can change the font, font size, font color and add effects. To dothis, simply click-on the small down arrows to the right of each effect and select the font changesyou desire.Don’t forget, just like when you are using the word processor, you have to highlight the textyou desire to change. If you have not done this, simply return to the text box, highlight the text,click-right on the text, and return to the Font menu as you did a few moments ago.Notice, if you change the color, that the color scheme you selected is available to maintainuniformity throughout your Flyer. You may choose other colors if you desire.Don't forget - if you make a mistake you can always click-on theblue undo arrow and try again.14
Changing the Color of the Text Background BoxYou may also change the background colors in theAutoShape (the colored oval around your text), if youdesire. First – Ungroup the two objects. Carefully point tothe edge of the colored oval and click the right mousebutton. The drop down menu box to the right will appear.This right click has to be precise. You must see the menu tothe right and choose Format AutoShape. If, after several“right clicks” you do not see this menu, ungroup the objects(like we did on Page 13). Then, right click on the oval and themenu at the right will appear. When you select FormatAutoShape the menu below will appear.When the FormatAutoShape menu at the leftappears, you may change theColors and Lines, Size,Layout, etc., as you desire.In the Format AutoShape menu above, if you chooseto change the background color of the oval, you have anumber of choices. If you click-on the down arrow tothe right of Color in the Fill area, and then choose FillEffects you will be given a number of additionalchoices. Experiment with these if you desire.15
Grouping and Ungrouping Groups of ObjectsAfter you have made your text and background changes you may choose to ungroup thevarious objects that make up the title object group. We talked about this at the top of Page 13.One nice thing - if you ungroup the objects, and move them, it makes editing,coloring and sizing the individual objects easier. After you have made anychanges you desire, you can re-group the objects in any pattern you desire.Once you have done this you may again click on the group objects button.When you do, you will see the objects re-group. This new group will nowmove as a single group.If you do not see the object buttons (above to the right), we’ll now explain how to group objectsthat are not grouped.Grouping Objects that are not GroupedYou should be “zoomed-in” on the title object at thispoint. If you are, tap the F9 function key to “zoom-out”so that you can again see the whole Flyer. If you canalready see the Flyer, do not zoom-out. Look at thelower right corner of the Flyer. You will see whatappear to be several small text boxes. Click-on one ofthe boxes, and tap the F9 key to zoom-in on them.You should now see an image similar to the one on theright. The information you view was created by thedata you entered in your Business Information at thebeginning of the tutorial. If you did not enter yourchanges to the default information, you will see thedefault information that was displayed in the BusinessInformation “box.” If you now desire to enter or change information in the BusinessInformation menu screen, click-on Edit in the Menu Bar, then click-on Business Information.Edit as you desire then click-on Update. This will change your information in this and futurePublications. Neat! If you desire to change the information in this Flyer you may also do soin each text box. Notice that the information appears to be in three separate text boxes. Clickon each of these boxes. As you do, you will see sizing grabbers appear on each box. The topbox has a title, the middle box has name and address information and the bottom box containsphone and e-mail information.16
When you click on the top box, you will see a title. This title normally “fits” in the box and isOK. Some folks enter long titles and you may see a little box with an A and three periodsalong the bottom edge of the text box. This did not occur in our top box.However, when we clicked–on our middle box, thelittle box with an A and three periods appeared.This little box indicates a “text overflow,” whichsimply means that the box is too small for our addresstext. To fix this, we’ll have to enlarge our middlebox. If you decide to make the middle box larger,you’ll have to be careful. If you enlarge it into eitherthe top or bottom boxes, you may “cover the text” inthese boxes. So, it’s normally best to “drag” the topbox up a bit, by clicking on it, letting the “crossedarrows” appear, then holding down the left mouse button, and dragging it up a bit. You canthen drag it down when you are finished. Notice, in our box, that we don’t have the last part ofour address. So, we’ll enlarge the box and complete the address.We noticed, in the above image, that our address“wrapped” some of the “lines” of the Address(USA in the bottom line). So, after completingthe address, we “widened” the text box so that thelines would not wrap. The image at the left is theenlarged image with all of the text showing.When we did this we noticed that our text box “crossed over” the thin blue line that goesaround the border on all four sides of the Flyer Page. This blue line represents the defaultborders (margins) that Microsoft Publisher places on each of its publications as a guide. Sincewe are a bit outside these lines, we might get an error message when we print this Flyerindicating that we are outside the borders. This is no big deal, as the Flyer will print fine.However, just to be safe we move our text box a bit to the left so all three boxes were inside theblue line.Note: you may see some spell check errors in each of the three text boxes. This is simplyPublisher (through Microsoft Word) telling you that these words are not in the Word Dictionary.You will see a “wavy red underline” under each word that the dictionary does not recognize. Aswith Microsoft Word, you can simply right click-on the underlined word and see if the spellchecker has the word in the dictionary. If it does, click-on the word. If not, you can choose toignore the error or add the word to the dictionary.Now click-on each box and drag it until the three boxes are aligned the way you want them.17
Grouping Ungrouped Text BoxesWhen you are satisfied that everything is OK (all theboxes are “lined-up” like the image on the left), thenyou’re ready to group them. To create a single groupfrom these three boxes (so that when you click-on any ofthe boxes the whole group will move), do the following.Make sure you can see all three boxes (like the imageon the left). If you can’t, use the elevator bars on theright and bottom of the screen until all three boxes arevisible. Again make sure that the boxes are alignedexactly like you want them. Then click the left mousebutton lightly-on the first box. You will see thegrabbers. Now – this is important – HOLD DOWNone of the Ctrl keys (next to the space bar on thekeyboard). With the Ctrl key held down,down move thecursor over the middle box and click the left mousebutton again. You should now see both the top and middle boxes with grabbers aroundthem. You should also see the little box with the two object pieces at the bottom right cornerof the middle box. The object pieces should be apart indicating that the top and middle boxesare not grouped. Don’t do anything yet – we’ll come back to the object pieces after we haveadded the bottom box. Hold down the Ctrl key again and click-on the bottom box. Now allthree boxes should have grabbers around the sides.If they do not, repeat the above instructions untilthey do. You should now see the ungrouped objectpieces box at the bottom right corner of the bottomtext box.Click left the ungrouped object pieces box. Theobjects should now join into a single object. Theobject grouping box, at the bottom of the boxes,should now look like the imageon the right. You will now seegrabbers around the “entire”three text boxes. This indicatesthat when you move the single box, all threesmaller text boxes will move together. Pretty neat.Microsoft Publisher was thinking ahead of you whenit saw you “Ctrl click” each text box. It assumed youwanted to join them.18
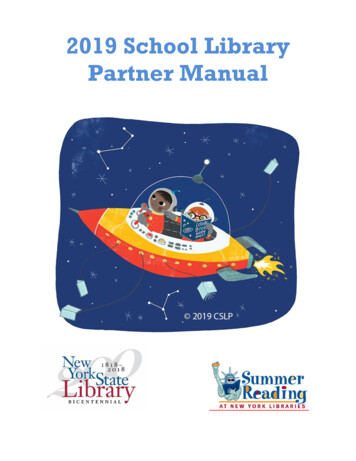
Changing and Editing Images and PhotographsYou should now be in the zoomed-in view on the grouped objects that you just worked with(on the last Page). Tap the F9 key to zoom-out so that you can view the entire Flyer. Whenyou can see the entire Flyer you will see a photograph in the lower left portion of the Flyer.Click-on the photograph, then tap the F9 key to zoom-in again. Your image should look likethe one below.Let’s assume we desire to change the image to something more appropriate with our Flyertopic. Point somewhere in the image, and click the LEFT mouse button. This will “mark” or“identify” the picture above – as the image we desire to replace.Click-on Insert in the Menu Bar, and thenselect Picture, and then Clip Art.The Insert Clip Art Task Pane (at the top of the next Page) will appear on the left side of yourscreen.19
We’ll only deal with Clip Art in this tutorial. When youbecome more advanced you can import your images directlyfrom a scanner, digital camera or a file on your computer.Notice, at the top of the Clip Art Task Pane (at the left),there is a Search for: area. We typed computer in the areabelow Search text and then clicked-on the Go button.The bottomof the ClipArt TaskPane is now“filled withcomputer clipart the imagesyou see on the left. If we like one of the images, all we haveto do is move our mouse cursor over the right edge of theimage, and we’ll see a small down arrow appear (like theone above – we chose the student working on the computer)If we click-onthe down arrowthe menuscreen on theright willappear. Wehave a numberof choices. Fornow, we’ll clickInsert.Notice, at the top of the next Page, that our computer lab is now on top of the old image.20
Oh my goodness! The image weselected is now too big for our Flyerand the old image is still there!All we have to do to remove the oldpicture is to click the left mouse buttonon the old picture (don’t click-on yourimage), and tap the Delete Key on thekeyboard. When you do, you’ll see thatyour image is now the only image and thatyou can re-size and move it as you desire(as shown on Page 12).If you don’t like the image you choseand desire to do another Search, simplyrepeat the instructions on the last twopages. This will take you back to theoriginal Clip Art Task Pane so that you can try another search on a different topic.Don't forget - if you make a mistake you can always click-on theblue undo arrow and try again.Clips OnlineNow we’ll try something really neat – Clips Online.Click-on the Clip art on Office Online button/linkat the bottom of the Clip Art Task Pane.21
You may see an information screen similar to the one below, or you may go directly to theClips Online Microsoft web Page.If you do see this screen, it issimply reminding you that youneed to be on the Internet. Whenyou click-on OK the browser youare using will go to the MicrosoftOffice Online web Page.It will take a few moments, but the Clips Online screen (below) will load – it changes every day.Notice that one of the arrows (in theimage at the right) points to Search.We left the default set to All mediatypes (you can choose the individualmedia types from the drop down boxif you choose). To search forcomputer images we filled-in theClip Art Search box as indicated.We then clicked on the Down Arrow to the right of Search.22
When we clicked-on the down arrow, we received many “pages” of computer images! Thetop of the Microsoft Office Online web Page should look something like the image below.You can view each Page by clicking on the Next arrow at the top right of the Page.Notice the small “boxes” below each image. If you see an image that you would like to savefor your “image collection,” click-in the small box and a check mark will appear.We chose a “girl at the computer” for our selection. When we clicked-inthe little box our screen looked like the image at the right. When weclicked-in the box a check mark appeared and it indicated Download 1item at the top of the screen.If you select (click) several images, you will see the Download itemincrease as you click-on each box.In addition to the Download items at the top of the screen,there is also a Review Basket with download items on the leftside of the screen.When you have selected all of the clips that you desire, click-on one of the Download itemlinks. The below Microsoft Office Template and Media Control screen may appear. If it does,read the screen and the click-on Continue.23
You may go directly to the Download screen.Your monitor screen should nowbe similar to the one on the left.It indicates how many clips youselected, how much disk spacethey require, and how long it willtake to download them over amodem.Click-on Download Now!A File Download screen, similarto the one on the right will nowappear. Read over the screenand click-on Open.When you click the Open button, adownload screen
Publisher Task Pane (like the image on the right ). We'll use the Publications from Print area to initially begin each publication. For "old" Publisher users , the Task Pane is something new in Publisher XP/2002-2007 . It replaces the Microsoft Publisher Catalog that was a part of the initial Publisher 2000 screen.