Transcription
PEOPLESOFTCreating PeopleSoft Reports Using XML Publisher
Creating PeopleSoft Reports using XML PublisherTable of ContentsBEFORE YOU BEGIN .3INTENDED AUDIENCE .3HOW THIS GUIDE IS ORGANIZED .3SYMBOLS AND CONVENTIONS .3CHAP TER STRUCTURE .8COURSE CONTENT.8COURSE OBJ ECTI VES .9CHAPTER 1: Introduction to BI Publisher . 10CHAPTER 2 –Install Oracle XML Publisher Desktop . 11CHAPTER 3 – Create or Modify an Existing Query. 17Practice: Modifying an Query- Step-by-step example . 17CHAPTER 4 – Create and Register a Data Source . 23Understanding Data Generation . 23Understanding Data Source Registration . 23Registering Data Sources . 23CHAPTER 5 – Create Report Templates . 28Using RTF Templates . 28Creating RTF Templates . 28Load XML Data in a Word Template. 28Create a Pie Chart and a Bar Chart . 29Create a Table . 32CHAPTER 6 – Define a New Report Definition . 41CHAPTER 7 - Run and View the XML Publisher Report . 47Appendix A - Incorporating Sub-Templates . 52Creating Sub-Templates . 53Importing Sub-Templates . 53Calling Sub-Templates . 53Testing a Sub-Template in Microsoft Word . 53Appendix B: Including Images. 55Page 1
Creating PeopleSoft Reports using XML PublisherInserting Images . 55Importing Images. 55Appendix C: Changing Default Template Font . 56Appendix D: Using Drilling URL in RTF Template . 57Page 2
Creating PeopleSoft Reports using XML PublisherBEFORE YOU BEGIN Use this guide during class to follow the topics as presented. The instructor may also provideadditional materials to support the training outlined in this guide. After class, use this guide as areference document for completing tasks within the PeopleSoft system.INTENDED AUDIE NCEThis guide is intended for personnel who are responsible for creating reports for thePeopleSoft system. BI Publisher training assumes the trainee has attended a Basic and AdvancedQuery class and/or has basic query writing skills.HOW THIS GUIDE IS ORG ANI ZE DThis guide is organized into chapters that contain the topics your instructor will cover in class. Somechapters may have corresponding practices that follow the instructor‘s presentation and individualexercises for you to complete on your own.SYMBOLS AND CONVENTIONSThe following conventions are used in this guide to help you distinguish between various types ofinformation:SYMBOLS AND CONVENTIONSSYMBOLbold textHOW IT IS USEDCommand and toolbar buttons that you click.Menus, text and radio buttons that you select. Check boxesyou turn on or off.Text you type.Bold italictext (red) bold text Function keys on your keyboard that you press.Italics text Identifies a Page name.Identifies a Field name.Hyperlink Indicates a link to another page.(blue)Procedural information.Warnings and cautions that require careful attention.Appears inPeopleSoft information – definitions, helpful hints. Appears inthe page margin.Page 3
Creating PeopleSoft Reports using XML PublisherSYMBOLS AND CONVENTIONSSYMBOLYou areencouraged to askyour instructorquestionsthroughout thecourse.HOW IT IS USEDNote – Noteworthy comments or important additional information—generally about the item immediately preceding the note. Appearsin the main body of the document.Noteworthy comments or important additional information—generally used to call out specific client-related information about aseries of steps or the topic being discussed. Appears in the pagemargin.CH A P T E R ST R U C T U R EMost chapters are structured the same way and generally consist of the following: Objectives are found at the beginning of the chapter and describe the material to bepresented.Topics explain the various concepts. Some topics contain practices and exercises.Procedures are step-by-step instructions for completing a procedure that the instructor andclass participants walk-through together.Exercises are scenarios for you to work through on your own during class time.COURSE CONTENTThe guide includes five chapters and four appendices:Chapter 1, “Introduction to BI Publisher”, explains the course objectives. Provides a brief review of BIPublisher.Chapter 2, “Install Oracle BI Publisher Desktop”, shows the steps in installing the BI Publisher forWord Add-In.Chapter 3, “Create or Modify and Existing Query”, explains the method to create or modify queries.Chapter 4, “Create and Register a Data Source”, shows how to register the query and create sampledata or the schema.Chapter 5, “Create an RTF Template”, reviews the creation of an RTF template in Microsoft Word.Chapter 6, “Define a New Report”, explains linking the RTF template to the data source withinPeopleSoft.Chapter 7, “Run and View the XML Publisher Report”, shows how to run a BI Publisher report inPeopleSoft.Page 8
Creating PeopleSoft Reports using XML PublisherCO U R S E OB J E C T I V E SThe purpose of this course is to provide the skills needed to effectively use BI Publisher. This coursecovers how to: Define Data SourcesCreate and Update RTF TemplateUpload Report DefinitionsRun and Review BI Publisher ReportsPage 9
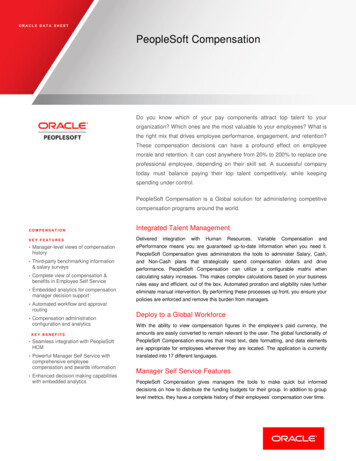
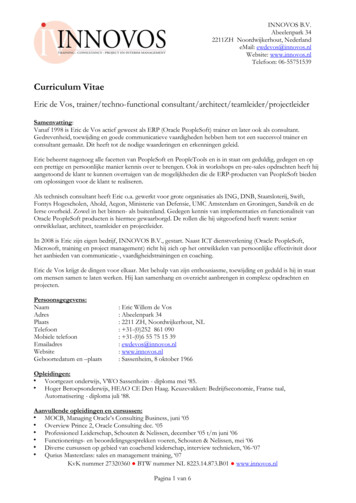
Creating PeopleSoft Reports using XML PublisherCHAPTER 1: Introduction to BI PublisherOracle Business Intelligence Publisher (BI Publisher, formerly XML Publisher) is an enterprise reportingsolution that streamlines report and form generation. A primary feature of Oracle's BI Publisherproduct is the separation of the data extraction process from the report layout. BI Publisher enablesyou to design and create report layout templates with the more common desktop applications ofMicrosoft Word and Adobe Acrobat, and renders XML data based on those templates. With a singletemplate, it can generate reports in many formats (PDF, RTF, Excel, HTML, and so on) in manylanguages. This approach to reporting can dramatically reduce report maintenance, enabling powerbusiness users to adjust report templates without involvement of IT resources.The following diagram illustrates the concept of BI Publisher.Select features of Oracle's BI Publisher product have been integrated into and enhanced for use withPeopleTools. Within PeopleSoft applications, this is referred to as XML Publisher (XMLP).There are four phases to creating BI Publisher Reports:1.2.3.4.Create and Register Data SourceCreate Report TemplateDefine BI Publisher ReportRun and View BI Publisher ReportThis guide will review each step.Page 10
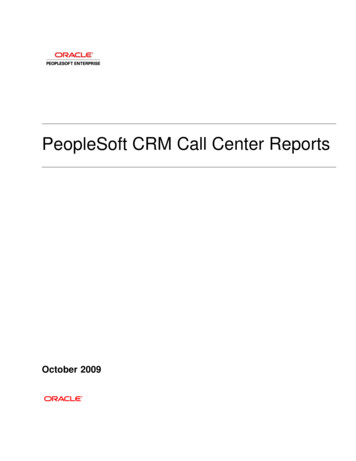
Creating PeopleSoft Reports using XML PublisherCHAPTER 2 –Install Oracle XML Publisher DesktopThe XML Publisher Desktop/Template Builder is shipped with PeopleTools. You can also download thesoftware from the PeopleSoft XML Publisher page.1. From the left navigation bar in PeopleSoft Applications, select Reporting Tools XMLPublisher Setup Design Helper to download the Template Builder.2. Download the Template Builder by clicking the Plug-in link. You can save the downloadanywhere (for example, in c:\temp).3. After the download is complete, install XML Publisher Desktop. Open File Explorer and navigateto the download directory (for example, c:\temp). The following example shows the expandedfiles under c:\temp\xmlp desktop. Double-click setup.exe to start the installation process. Aset of installation wizard pages guide you through the installation process.Page 11
Creating PeopleSoft Reports using XML Publisher4. Select English, and then click Next.5. Ensure that no previous version of XML Publisher Desktop is installed. Click Next.Page 12
Creating PeopleSoft Reports using XML Publisher6. The XML Publisher Desktop requires the installation of Java Runtime Environment (JRE) version1.4 (or later versions). Enter the location for Java Runtime Environment and click Next.7. Deselect Open the Word Template Builder Tutorial file and click Next. Enter the name of thefolder where you will install XML Publisher Desktop and click Next.Page 13
Creating PeopleSoft Reports using XML Publisher8. Click Install for the installation to start.9. When the installation is complete, click Finish.Page 14
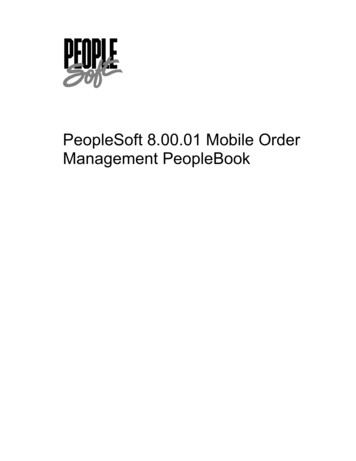
Creating PeopleSoft Reports using XML Publisher10. After XML Publisher Desktop is installed, open Microsoft Word. Notice a menu item namedTemplate Builder in the menu bar and a new toolbar. (NOTE: The template builder may alsobe in ‘Add-In’.Page 15
Creating PeopleSoft Reports using XML PublisherPage 16
Creating PeopleSoft Reports using XML PublisherCHAPTER 3 – Create or Modify an Existing QueryBI Publisher uses Query and Connected Query as data sources for creating reports. As users usuallyhave queries already created, these can be used in BI Publisher.Practice : Modifying an Query- Step-by-step exampleInitially you modify an existing query, PERSONAL DATA PAY, and apply criteria on DEPTID to reducethe volume of data. To modify the query, perform the following steps:1. Log in to your PeopleSoft Application. Then, from the left menu, select Reporting Tools Query Query Manager. Enter PERSONAL DATA PAY in the ‘begins with’ field. The queryPERSONAL DATA PAY will return.2. To modify the query, click the Edit link under the Edit column. All the fields in the query aredisplayed.Page 17
Creating PeopleSoft Reports using XML Publisher3. Because the filter will be on DeptID, click the filter icon on DeptID.4. On the Edit Criteria Properties page, select in list from the Condition Type drop-down list.Page 18
Creating PeopleSoft Reports using XML Publisher5. Click the search icon for List Members in the Edit List box.6. Enter 0103 and click Add Value.Page 19
Creating PeopleSoft Reports using XML Publisher7. Similarly, add the departments 0104 and 0106. When all the departments are entered for thecriteria, click OK.8. On the Edit Criteria Properties page, click OK.Page 20
Creating PeopleSoft Reports using XML Publisher9. Click the Run tab and run the report. Make sure only three departments (ADMIN, ADMISSION,and ALL DEPTS) are returned. The query should return rows.Page 21
Creating PeopleSoft Reports using XML PublisherNotesPage 22
Creating PeopleSoft Reports using XML PublisherCHAPTER 4 – Create and Register a Data SourceUnderstanding Data GenerationIn BI Publisher, the data extraction is separate for the data presentation. Sample data can be used todesign your RTF template and map your PDF templates. Data schema was used in previous releases forthe bursting feature and is still available for backwards compatibility and bursting. If PeopleSoft queriesare used for data extraction, the system will generate the schema; for all other data sources, you mustcreate the data schema using tools outside of the PeopleSoft system.XML Publisher can register PS/Query, Connected Query, and XML files as a data source, but you cangenerate XML data using any means including PS/Query, SQR, Application Engine, PeopleCode, FileLayout, and so forth.For RTF template-based reports, design your data source XML structure using groupings that resemblethe groupings needed for the output report. This improves runtime performance by preventingunnecessary grouping by the formatting engine.Understanding Data Source RegistrationA data source registers the schema and sample data design files. The extracted application fields fromthe data source files are placed into the template files to create the final report.The data source can be PS Query, Connected Query, or XML files.Benefits of data source registration include the ability to: Reuse previously registered data sources with multiple report definitions.Take advantage of built-in bursting features.Registering Data Sources1. Log in to your PeopleSoft Application. Then, in the left navigation bar, expand Reporting Tools XML Publisher Data Source.Page 23
Creating PeopleSoft Reports using XML Publisher2. Because you will use a PS query, click Add a New Value. Select PS Query as the Data Sourcetype and click the Look Up Query search icon for Data Source ID.3. Enter P in the begins with field and click the Lookup button.4. Scroll down and click PERSONAL DATA PAY.Page 24
Creating PeopleSoft Reports using XML Publisher5. Click the Add button on the Data Source page.6. On the Data Source page, in the Data Source Properties section, enter the Description asDepartmental Annual Salary. Click Generate under the Generate File column for Sample DataFile and Schema File.Page 25
Creating PeopleSoft Reports using XML Publisher7. After the data source is generated, an XML file for PERSONAL DATA PAY is created. Click theSave button.Page 26
Creating PeopleSoft Reports using XML Publisher8. Click the PERSONAL DATA PAY.XML file. The browser appears and displays the XML data inthe file. Save the XML file in the C:\temp folder.Page 27
Creating PeopleSoft Reports using XML PublisherCHAPTER 5 – CREATE REPORT TEMPLATESUsing RTF TemplatesRTF templates support most XSL functionality and can be designed with robust processing andformatting code.Creating RTF TemplatesYou use a Microsoft Word plug-in to build an RTF template. You use a preexisting RTF template filenamed Personal Data Pay.rtf. Load XML Data in a Word TemplateCreate a Pie Chart and a Bar ChartCreate a TableLoad XML Data in a Word TemplateYou open a base template and load the XML data. To load the XML data, perform the following steps:1. Open the file named Personal Data Pay.rtf in Microsoft Word2. Click Data and select Load XML Data.Page 28
Creating PeopleSoft Reports using XML Publisher3. In the Please select XML data dialog box, select the PERSONAL DATA PAY.xml file and clickOpen.4. When the "Data loaded successfully" message appears, click OK.Create a Pie Chart and a Bar ChartIf you do not want to create a pie chart or a bar chart, skip this section.To create a pie chart and a bar chart, perform the following steps:1. From the first cell in the table, delete the text insert a pie chart here . From the menu, selectInsert Chart.Page 29
Creating PeopleSoft Reports using XML Publisher2. In the Chart window, select Row and enter the details as shown below.3. Click OK. Resize the pie chart to fit within the width of the cell.Page 30
Creating PeopleSoft Reports using XML Publisher4. Similarly insert a bar chart. Delete the text insert a vertical bar chart here . SelectInsert Chart from the menu. In the Chart window, select Row and enter the details as shown.5. Click OK. Resize the bar chart.Page 31
Creating PeopleSoft Reports using XML Publisher6. Save the template and preview in PDF format. Click Preview and select PDF from the dropdown list.Create a TableYou create a tabular report for which you have already loaded the data. To create a table, perform thefollowing steps:1. Move the cursor below the table for the charts, add some blank lines, and insert a new table.Click Insert and select Table/Form. from the drop-down list.Page 32
Creating PeopleSoft Reports using XML Publisher2. The Insert Table/Form window appears. Select Row from the Data Source list on the left.3. Drag Row from the left to the Template column and select Drop all Nodes.Page 33
Creating PeopleSoft Reports using XML Publisher4. Delete the following fields by selecting the field and clicking the delete button: @rownumberPosition NbrAcct CdMonthly RtHourly RtAs a result, you should have four fields.5. Provide grouping details. Select Row in the template column and, from the properties window,select DEPTID from the drop-down list for the Grouping property.Page 34
Creating PeopleSoft Reports using XML Publisher6. Click OK. You are returned to Word. Resize the table to match the image below by dragging thesizing handles for the columns.7. Use Word features and select the G DEPTID field and cut and paste above the table.8. Select the inner table and the control character E (as shown).9. Cut and paste the selected area a few lines below the outer table.Page 35
Creating PeopleSoft Reports using XML Publisher10. Delete the outer table. Select the outer table and, from the menu, select Table Delete Table.11. Enter a new row at the end of the table to display the department average annual rate. Placethe cursor inside the row of the table and, from the menu, select Table Insert Rows Below.Enter Average Rate for the first column in the new row.12. Change the column headings as shown.Page 36
Creating PeopleSoft Reports using XML Publisher13. Add a department average rate field to the last row in the Annual Salary Rate column. Clickanywhere in the empty Annual Salary Rate column of the Total row to position your cursor.Select Insert Field.14. In the Field window, select Annual Rt and average for Calculation. Select the On Groupingcheck box. Click Insert and then click Close.Page 37
Creating PeopleSoft Reports using XML Publisher15. Your table should look like the image below:16. Change the format of the column data for Annual Salary Rate. Double click ANNUAL RT. TheText Form Field Options window appears. Change Type to Number. Select the Number format #,##0.00 and edit it as shown. Enter 999 in the Default number field. Click OK.Page 38
Creating PeopleSoft Reports using XML Publisher17. Similarly change the format for average ANNUAL RT.18. Save the template and preview in PDF format. Select Preview PDF. The preview reportdisplays dummy data.You can add other Word features to the template.Page 39
Creating PeopleSoft Reports using XML PublisherNotesPage 40
Creating PeopleSoft Reports using XML PublisherCHAPTER 6 – DEFINE A NEW REPORT DEFINITIONUnderstanding Report DefinitionsReport definitions associate a data source with template files. A data source registers the schema andsample data design files. The extracted application fields from the data source files are placed into thetemplate files to create the final report.A report can include multiple templates. A template is used to associate different layout formats asrequired by different countries and regions or as required by different channels (web posting, printer,fax, and so on).The defined output options from the report definition are reflected on the output type and formatprompts on the Process Scheduler request page when the application process that runs the report isassigned the process type of XML Publisher. Security settings for a report definition determine who canview the report when it has been run.Report properties can be set to control formatting of the report.With the advanced bursting feature, report generation results in separate output files when burstedreports are run through Process Scheduler.Report definition access is based on user permission list security and roles. For example, bursting isread-only for XML Publisher power users, because only developers can set up bursting, and the pageonly appears when settings exist.XML Publisher power users can start to define a report to download the sample data files to createtheir templates.Create Report DefinitionsYou now define a report with the RTF template that you created. To define the report, perform thefollowing steps:1. Select XML Publisher Report Definition.Page 41
Creating PeopleSoft Reports using XML Publisher2. On the Report Definition page, click Add a New Value. Enter the report name PERSONAL PAY.3. For Data Source ID, click the Look up Datasource icon.4. Enter P in the begins with field and click the Lookup button.Page 42
Creating PeopleSoft Reports using XML Publisher5. From the list, select PERSONAL DATA PAY as the data source. Click the Add button.6. On the Definition tab, enter a description for the report. Select Active as the Report Status.7. Click the lookup icon for Report Category ID.Page 43
Creating PeopleSoft Reports using XML Publisher8. Select the ALLUSER category.9. On the Template tab, upload the RTF template. Set the template Status to Active.Page 44
Creating PeopleSoft Reports using XML Publisher10. Click the Upload button. Browse for the Personal Data Pay.rtf template and click Upload.11. On the Output tab, select PDF as the default output. Click Save. You can now view the report inthe Report Viewer.Page 45
Creating PeopleSoft Reports using XML PublisherPage 46
Creating PeopleSoft Reports using XML PublisherCHAPTER 7 – RUN AND VIEW THE BI PUBLISHER REPORT1. From the left navigation bar in PeopleSoft Applications, select Reporting Tools XML Publisher Query Report Viewer.2. On the Query Report Viewer page, click the Search button.3. From the list of reports, select PERSONAL PAY and then click View Report.4. While the report is being processed, the word Processing appears at the top. After processing iscomplete, a three-page PDF report is displayed with charts and a table.Page 47
Creating PeopleSoft Reports using XML PublisherCongratulations! You just created a report in PeopleSoft Applications using XML Publisher!Page 48
Creating PeopleSoft Reports using XML PublisherNotesPage 49
Creating PeopleSoft Reports using XML PublisherNotesPage 50
Creating PeopleSoft Reports using XML PublisherNote51
Creating PeopleSoft Reports using XML PublisherAppendix A - Incorporating Sub-TemplatesUnderstanding Sub-TemplatesYou may have text, images, or logic in your templates that you want to reuse acrossmany report templates. Examples include company headquarter address informationor standard legal language. Rather than replicate this text, code in every template, orboth, you can store sub-template files that include the reusable content. These subtemplate files are referenced with standard XSL commands in the primary templatefile. Sub-template functionality is available for use only with primary RTF and XSLtemplates.Sub-templates are secondary RTF or XSL templates that are imported by primary RTFor XSL report templates. The primary template accesses the sub-template throughthe XSL import style sheet feature. You can import any XSL style sheets or other RTFor XSL templates using standard XSL import and call functions. PeopleTools simplifiedsub-template syntax is also supported.Primary templates calling nonexistent or inactive sub-templates causes an errormessage to be issued indicating the reason for the problem. This error information isincorporated into Process Scheduler error handling as well as into online viewing orpreviewing of the report.The sub-template files are independently stored and are not registered in associationwith a data source or primary template. This being the case, if any form fields existinside the sub-template, the report in which the sub-template is placed must have arelated data source that supplies those fields, or the data must be passed in asruntime parameters.The Content Library is a component provided for the registration of reusable subtemplate files. The metadata is similar to that of primary template files and includesthe sub-template ID, sub-template description, language, object owner ID, reportcategory, effective date, and status. As with Report Definition security, sub-templateeditor registration security is applied through report categories. Because ReportCategory secures the data in the component, you can assign select users read-onlyaccess for a report category. These users can browse, view, and download subtemplate files but not add them. This facilitates the offline design of primarytemplates for users who can access the library of existing sub-templates but whocan’t alter them.Sub-template names are not exposed to the end user at either report design time orruntime. The complete template (primary and sub-templates) is systematicallyassembled by the XML Publisher engine during report generation. The same occurs52
Creating PeopleSoft Reports using XML Publisherduring online previewing as long as the sub-template file exists.When designing a template, you can incorporate one or more sub-templates intoyour primary template.You must use specific syntax to: Create sub-templates.Import sub-templates.Call sub-templates.Creating Sub-TemplatesWithin a single sub-template file, multiple sub-template components can be available. Startand end template indicators must exist to distinguish these various components. ?template:component name? ?end template? For example, syntax of a sub-template file containing two components could be: ?template:peoplesoft? Pleasanton Campus500 Oracle LanePleasanton, CA 94488 ?end template? ?template:logo2x.5? Oracle Logo ?end template? where ?template:peoplesoft? is the start template indicator of the component peoplesoftand ?template:logo2x.5? is the start template indicator of the component logo2x.5. Each ?endtemplate? tag indicates the end of its respective component.Importing Sub-TemplatesTo import a sub-template file that is stored in the Content Library, place the following syntaxat the top of the primary template file: ?import:psxmlp://sub-template NAME? where sub-template NAME is the registered sub-template ID in the Content Library, forexample: ?import:psxmlp://STDHEADER? . This syntax must be in Normal text.Calling Sub-TemplatesPlace the following syntax in the primary template file in the location where the desired text orXSL instructions from the sub-template file should appear: ?call-template:peoplesoft? In the preceding sample code peoplesoft is the name of the component that you want to usein the sub-template file.Testing a Sub-Template in Microsoft WordYou should test your template and sub-template using Template Builder before uploading toPeopleTools to make your sub-template is accessible to your template on the file system.53
Creating PeopleSoft Reports using XML PublisherUse the following syntax when importing: ?import:file:C:///Template Directory/subtemplate file.rtf? Notice the triple slashes and the use of the actual file name instead of template ID.When your design is complete, you can change the import statement back to make the subtemplate available to the main template in PeopleTools environment:54
Creating PeopleSoft Reports using XML PublisherAppendix B: Including ImagesBI Publisher supports a number of methods for including images in your reports: Inserting images. Importing images.Inserting ImagesTo directly insert a .jpg,
PeopleTools. Within PeopleSoft applications, this is referred to as XML Publisher (XMLP). There are four phases to creating BI Publisher Reports: 1. Create and Register Data Source 2. Create Report Template 3. Define BI Publisher Report 4. Run and View BI Publisher Report . This guide will review each step.