Transcription
Introduction to RobotC and Tetrix with Lego MindstormsThese lessons will introduce writing autonomous robot programs in RobotC using the Tetrix Building systemand the Lego Mindstorms Robotics Kit. Topics will cover: Selecting the Type of Robotics Platform Configuring the Motors, Servos, and Sensors using the RobotC Setup Option. Basic Forward and Reverse Program using Motor Blocks and Wait commands. How to create methods (reusable sections of Code) Creating Methods with Sensors and using While Loops: TouchStop with Touch Sensor NearStop with UltraSonic Sensor Dark Stop with Light Sensor Using the Timer More advanced methods: (Application) Minimum Distance Seeker Proportional Wall Following with UltraSonic Proportional Line Following 2011 Mr. Michaud / www.nebomusic.net1
Lesson 1: Setting up the Robot Platform and Configuring the Motors, Servos, and Sensors.This tutorial uses the "ICEBot" frame with the left and right drive wheels being on the front of the robot. TheNXT Brick is configured as follows:Sensor Ports:1 Motor and Servo Controller for the Tetrix motors and servos2 NXT Touch Sensor3 NXT Light Sensor4 NXT UltraSonic SensorMotor Ports:C NXT Motor to control the "Hand"ICEBot with Michaud Modifications Images: 2011 Mr. Michaud / www.nebomusic.net2
2011 Mr. Michaud / www.nebomusic.net3
2011 Mr. Michaud / www.nebomusic.net4
2011 Mr. Michaud / www.nebomusic.net5
When you start programming in RobotC, you will need to define all the motor, servo, and sensorconnections. This is like defining the "objects" in a program before you start creating instructions andmethods. RobotC has two menu driven tools to accomplish this configuration.Steps:1. Start RobotC and Select File-New to start a new program.2. Select "Robot- Platform Type" from the menu bar and select "NXT Tetrix".3. Select "Robot- Motors and Sensors Setup" 2011 Mr. Michaud / www.nebomusic.net6
4. Select the "TETRIX Controllers" tab and select the second option: "Standard Configuration. One motorcontroller, one servo controller on sensor port S1."(Though in more advanced robot designs, you can set up your own configuration)5. Click "Apply" 2011 Mr. Michaud / www.nebomusic.net7
6. Click the "Motors" tab. Name the motors as shown below. Note that I used the name "Hand" for"motorC." By convention, motors "A, B, and C" are the NXT motors. Motors "D and E" are the Tetrix DCmotors. (12V). Make sure you select "Reversed" for motorE. This allows motors to rotate "forward" and"backward" in vehicle type robots. Note that you can give the Motors names. Choose names that makesense for the robot's purpose. This will make your Code easier to understand later.7. Click "Apply." 2011 Mr. Michaud / www.nebomusic.net8
8. Click the "Servos" tab. Name servo1 "Arm" and select "Standard Servo". Note that I also have servo2named "Sonic."9. Click "Apply." 2011 Mr. Michaud / www.nebomusic.net9
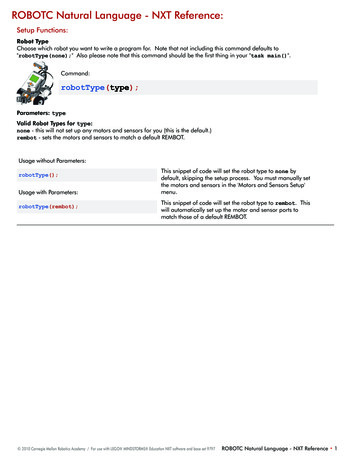
10. Click the "Sensors" tab. Set Sensors S2, S3, and S4 as shown below. Make sure to select "Touch","Reflected Light", and "Sonar." in "Type."11. Click "Apply."12. Click "OK."13. Note that the first 10 lines of your program now contain auto generated code that configures the Hubs,Sensors, Motors, and Servos. (The "pragma config") These define the robot objects in the program.14. Save your program as “Tetrix Train” 2011 Mr. Michaud / www.nebomusic.net10
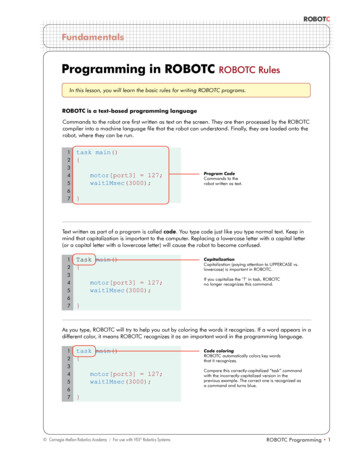
Lesson 2: Beginning to Drive: The "Forward - Stop"The most basic element of robot programming follows the format of"Start the Task - Wait for a condition - Stop the Task"In this program, we will:1. Start the motors2. Wait for 2 seconds3. Stop the motorsIn your program - type the following code:To run your program:1. Save your Program (File- Save). Name it “Tetrix Training.”2. Select "Robot - Compile and Download Program." Then close the "Debugger" and select and Run theprogram on the NXT Brick.A few notes of Caution:1. Always run your robot on the floor or a walled table. Tetrix robots are heavy and can do some seriousdamage to you or other objects.2. Keep your fingers away from the metal gears.All RobotC programs start with the "task main." Inside the curly brackets are the instructions:Here is a breakdown: 2011 Mr. Michaud / www.nebomusic.net11
Now try the following program "Out and Back"Extras:There are two types of Turns:1. Swing Turn: One wheel rotates and the other stays still2. Point Turn: One wheel turns forward while the other wheel turns backward.How would you program the robot to do Swing and Point turns? 2011 Mr. Michaud / www.nebomusic.net12
Lesson 3: Setting the Servo PositionsThe Tetrix Servos act like motors that you can lock in positions ranging from 0 to 255. You set thesepositions like setting a variable.Example: (Moves the Front Arm Up and Down with 1 second delays)I suggest in each of your programs, put a "servo[servo1] 0;" before each program to lift up your arm. 2011 Mr. Michaud / www.nebomusic.net13
Lesson 4: Making methodsOne of the main goals of programming is to create re-usable pieces of directions that make sense to thehuman reading your Code, and save time and space (not having to re-type long series of commands over andover again.) Thus we are going to start making a series of "Methods" that do common tasks.A "Method" is a block of instructions that you can call in the Main Task over and over again. We will maketwo methods: "driveStraight" and "stopMotors."Type the following above your "task main()":Note:1. We use the term "void" before the Method because the method does not return a value. (It only directsaction.)2. The "int power" is a parameter for the driveStraight method. This allows the programmer to define howmuch power will go to the motors. The "int" means "integer."Type the following into the task main() to run these methods:Note that the main task now uses three lines of code to do what took us 5 lines earlier. 2011 Mr. Michaud / www.nebomusic.net14
Exercises:1. Make the Robot Drive Forward and Backward using the driveStraight and stopMotors methods. Hint:Negative numbers will make the motors turn backwards.2. Create a Method for Turning the Robot Left and Right. Then program your Robot to Drive in a Square. 2011 Mr. Michaud / www.nebomusic.net15
Lesson 5: Methods using Sensors and While LoopsBecause Tetrix DC motors do not have encoders or rotation sensors, we will need to use other Sensors suchas Touch, Light, and Sonar to help guide the robot through the world. These series of methods follow thisbasic robot pattern:"While a Condition is True: Do an Action. When the Condition is not true: Stop the motors or Action"Add the following method and edit the main task in your program for "TouchStop." Save, Compile and testthe program: (Remember, you will need to keep the Methods “driveStraight” and “stopMotors” in yourprogram.Notes:1. We use the parameter "int power" again to let the programmer define how fast the robot should go.2. The "while loop" tells the program to run the "driveStraight" method until the touch sensor is touched.3. "SensorValue[Touch] ! 1" means: "Touch Sensor does not equal 1" or "Touch Sensor Not Pressed."4. Translation of method: "While the Touch Sensor is not pressed, Drive Straight. When the Touch sensor ispressed, stop the motors." 2011 Mr. Michaud / www.nebomusic.net16
Try these methods for UltraSonic Stop and Light Stop:Notes:1. In the "nearStop" method, note the two parameters: "distance" and "power." This allows the user to definethe distance in centimeters for the stop and the speed of the robot.2. In the "darkStop" program the parameters "dark" and "power" allow the user to specify the darkness therobot is looking for and the speed of the motors.We can also reduce the basic Forward for Time type program with this method: 2011 Mr. Michaud / www.nebomusic.net17
Exercise:1. Using the “nearStop” method, create a program that will allow your robot to drive straight and stop if itnears any obstacle. Then direct the robot to turn to a new direction and keep moving. 2011 Mr. Michaud / www.nebomusic.net18
Lesson 6: More Advanced Programs - using variables and methods we have already created.Example 1: The Nearest Object program. This example spins the robot around. While the robot isspinning, it is seeking out the nearest object using the UltraSonic Sensor. When it is finished spinning, itpoints back to the nearest object and travels up to the object and stops.Extras: Make the back up and then seek the next nearest object 2011 Mr. Michaud / www.nebomusic.net19
Example 2: Proportional Line FollowingVariables for Line FollowingNotes:1. Kp is the Constant of Proportion. Multiply the "error" to increase the "sensitivity" of the Line follower.2. offset is the threshold value for dark. Where the robot will travel straight.3. Tp is the Constant for Power. This is the baseline power for the Left and Right wheels.Method for Line Following:Main Task for Line Following: 2011 Mr. Michaud / www.nebomusic.net20
Example 3: Wall Following.Using a proportional type algorithm, have the robot track along the wall and maintain a distance of about 40centimeters.Use a timer and a while loop similar to Line Following to have the Wall Follow work in the main method.Extras: Make the robot stop and scan forward to check for walls and corners. 2011 Mr. Michaud / www.nebomusic.net21
Lesson 1: Setting up the Robot Platform and Configuring the Motors, Servos, and Sensors. This tutorial uses the "ICEBot" frame with the left and right drive wheels being on the front of the robot. The NXT Brick is configured as follows: Sensor Ports: 1 Motor and Servo Controller for the Tetrix motors and servos 2 NXT Touch Sensor 3 NXT .
