Transcription
FTC-Iowa 3-day Coaches WorkshopJune 13th to 15th, 2010 – University of IowaSupplemental Guide forROBOTC ProgrammingUsing an ORTOP Tetrix Try-It demo robot1
Contents:ABOUT THIS GUIDE . 3STARTING UP ROBOTC FOR THE FIRST TIME . 4STARTING A NEW FILE . 7DRIVE CONTROL . 10Bare Minimum. 10Testing . 11Basic . 15Better . 17MANIPULATOR CONTROL . 19Using Servo Debug Window . 19Arm Control . 21Gripper Control. 22Enhancing the Servo Control Code . 23SOME TIPS & ADVICE . 29REFERENCES/RESOURCES . 31APPENDIX / FULL CODE EXAMPLES . 33Getting Started . 33Drive Control . 33Manipulator Control . 352
About this GuideThis guide is a supplementary aide for those attending the 3-day FTC coaches trainingcamp at the University of Iowa. It does not contain all the material needed to jump intoROBOTC, but rather it contains step-by-step references for the example code used in theworkshop. It is the intent that this guide be used in conjunction with a training class orother materials in order to explain the reasoning and fundamentals behind many of theexamples.The code examples are specific to the demo robot design exceptionally well-documentedin ORTOP’s Tetrix Try-It instructions which can be found here courtesy of OregonRobotics Tournament and Outreach Program:http://www.ortop.org/ftc/res.htm#TT3
Starting up ROBOTC for the first timeThe first time you fire up the ROBOTC IDE, there are a few quick things you will wantto do before you begin programming a FTC robot.1. Set menu level from basic to “Expert”.a. Window, Menu Level, Expert2. Set platform type to “LEGO Mindstorms NXT TETRIX”.a. Robot, Platform Type, LEGO Mindstorms NXT TETRIX3. Download latest firmware to NXT brick.* Note that this only needs to be done the first time you setup a new NXT brickwith ROBOTC and when you upgrade your version of ROBOTC.** Also note that the battery level must be high enough on the NXT before it willallow you to download new firmware.a. Make sure NXT is connected via USB and turned on.b. Open Link Setup dialogi. Robot, NXT Brick, Link Setup4
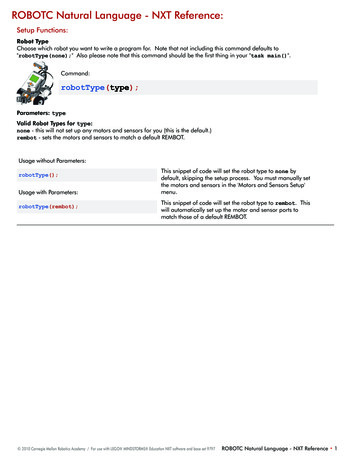
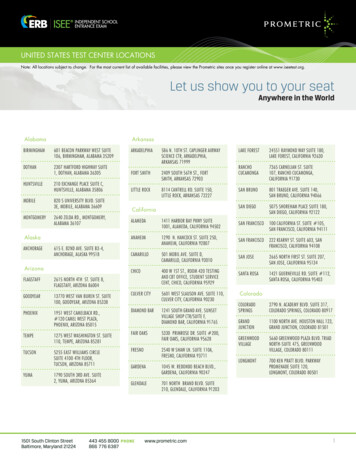
c. Select NXT in top left corner and press “F/W Download” button.d. Select .rfw file in default firmware directory in popup and press “Open”.i. For ROBOTC v2.03, the firmware file should be: “NXT798.rfw”.5
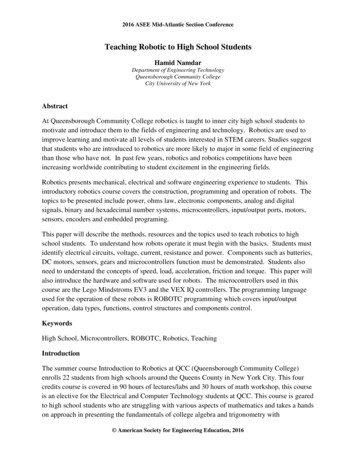
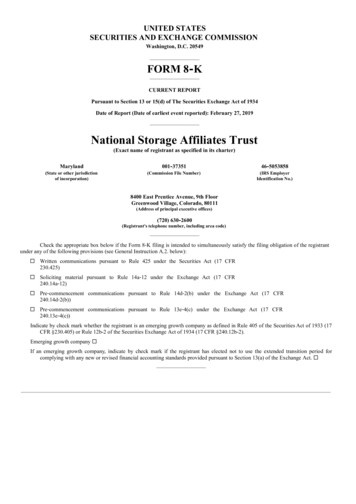
e. After a few moments, the Link Setup dialog box will display someverbose information in the Message Log and your NXT should beepseveral times and restart. When complete, you should see a series ofmessages similar to below in the Message Log:6
Starting a new file1. Open a new file.a. File, New , File2. Configure motors.a. Robot, Motors and Sensors Setupb. Select the TETRIX Controllers tab.c. Select the Standard Configuration in the bullet list. This will defaultyour motor controller to be the first device on sensor port 1 and yourservo controller as the second device.d. Select the Motors tab.e. Give the drive motors more meaningful names.i. Rename motorD to “rightMotor”7
ii. Rename motorE to “leftMotor”f. Select the Reversed checkbox next to the right motor (mtr S1 C1 1).g. Click “Apply” and then “OK”.h. You should now see a set of pragma statements auto-generated at thetop of your file. To edit these, use the Motors and Sensors Setup byaccessing it the previously described method or by double clicking onthe pragma statements.3. Create a main task.Every ROBOTC program needs a main task. It is the code which is initiallyexecuted by the runtime and is the starting point for any program.a. Below the pragmas, define a main task using the following syntax:task main(){}b. Add an infinite loop inside the main task to keep your programrunning until you want to manually stop it.while(true){}8
4. Import JoystickDriver.ca. Add the following import statement below the pragmas, but beforeyour main task:#include “JoystickDriver.c”;5. Compile your code and save.a. To compile, select Robot, Compile Program, or simply press F7.i. You should not receive any errors, but may see a compilerwarning about the infinite loop which you can safely ignore atthis time.b. Save your file by selecting File, Save, or click the save icon, or simplypress Ctrl s.i. Make sure to give your file a meaningful name.9
Drive ControlFor this tutorial, we will use a simple tank drive approach, also known as a skid-steer.We will use the two analog sticks on a single joystick to control the left and right drivemotors respectively.In ROBOTC, motors are typically controlled by setting the desired power output to theglobal motor[] array.motor[motorName] power;where motorName is the name of the motor you want to set and power is an integervalue between -100 and 100. A power setting of zero will stop the motor.Bare MinimumTo do this, we will directly set the output power to the motors from -100 to 100 basedon the input value from the joysticks.1. Get current joystick values.a. Each time the code loops through, we want to read the most recent andcurrent state of the joystick. To do this, we need to add the following lineof code inside the infinite loop inside the main task:getJoystickSettings(joystick);2. Get left analog stick values and pass them to the left drive motor.a. Here we are setting the output to the left motor equal to the value of theleft analog stick on the joystick. Add the following line of code below thegetJoystickSettings() function call.motor[leftMotor] joystick.joy1 y1;b. Repeat the same syntax for the right motor:motor[rightMotor] joystick.joy1 y2;This is all you need to drive the robot around a little. At this time you should downloadand test driving your robot.10
TestingTo test and run your code, we will have to first compile and download the code to theNXT and then use various debug windows to control and test the robot.1. Establish connection with NXT (if not already connected).a. Make sure NXT is turned on and is connected via USB or you have yourBluetooth dongle connected.b. Open Link Setup dialogi. Robot, NXT Brick, Link Setupc. If using USB, select the NXT brick from the top left and click “Select”and then “Close”.d. If you want to use Bluetooth, you will need to eitheri. Enable Bluetooth searching by checking the “Include Bluetooth inBrick Search” checkbox in the lower left of the window and click“Refresh Lists”.1. You should now be able to select the NXT brick from themiddle left Bluetooth list. Select the NXT brick, click“Select via BT”, then click “Close”.Or:ii. First connect via USB, select the NXT brick from the top left andclick “Select via BT” instead of the normal “Select” button. Thenclick “Close”.* Note that this is the preferred method of connecting viaBluetooth as the search function can take too long and becomesunreliable if there are many other NXT bricks around (such as atFTC events).11
iii. If you are connecting via Bluetooth to a NXT for the first time, youmay need to press the orange button on the NXT when prompted toaccept the new device pairing.**Note that once you have connected to the NXT at least once using yourpreferred method (USB or Bluetooth), you should not need to manuallyestablish the connection for subsequent downloads. Simply pressing the F5shortcut will attempt to connect using the most recent method/settings.2. Compile and Downloada. Robot, Compile and Download Programb. It is easiest to use the F5 shortcut.3. Open up debug windowsa. Open the Simple Joystick debug windowi. Robot, Debug Windows, Joystick Control – Simpleii. Note that you will want to use the Game Joystick debug windowwhen programming for a FTC competition using the template. Ithas some additional controls for simulating match start/stop andautonomous/tele-op flags that are used by the FMS/FCS.12
b. Open the NXT Remote Screen debug window.i. Robot, Debug Windows, NXT Remote Screenc. Open the NXT Devices debug windowi. Robot, Debug Windows, NXT Devices4. Start the program.a. If you have not already done so, make sure the power switch for the 12Vbattery has been turned on.b. The Program Debug window should have automatically opened when youcompiled and downloaded.c. Click the “Start” button.5. Drive!a. At this point you should be able to see anything you do to the joystickreflected in near real-time in the joystick debug window. The joystickdebug window will show you the raw values for the analog sticks andbuttons pressed which is very useful for debugging. These are the samevalues that you will be reading in the code.13
b. When you move the analog sticks up and down, you should see the yvalues from them passed to the two dc motors. Inside the NXT Devicesdebug window, you should see the Speed for motors D and E (namedrightMotor and leftMotor in our code) change in value with the movementof the analog sticks on the joystick.c. When you’re done testing, click the “Stop” button on the Program Debugwindow which is where the “Start” button was previously. You can thenhide all the debug windows by only closing the Program Debug windowusing the little red X at the top right-hand corner.i. Note than the next time you press F5 to compile and download,ROBOTC will open all the debug windows you previously hadopen.14
** You can test your code at any point at which is successfully compiles. It isrecommended to do this often as programming is a pragmatic and iterative process. Theremaining sections of this guide will not explicitly indicate to test, but you shouldcompile and download at the end of each section which adds functionality to yourprogram.Improving the Drive CodeAlthough the code we have written so far will drive the robot around, it has a few issues.While the Tetrix motors accept an output power range of -100 to 100, the analog stickson the joystick return values between -128 to 127. This means if the analog stick is inthe range under -100 or over 100, the value passed to the motor is simple transformed to-100 or 100. This is less than ideal because it reduces the usable range of the analogstick by about 20%.There is another issue related to deadzones within the physical joysticks themselves. Dueto inaccuracies and tolerances within the manufacturing process, the analog sticks onmost FTC joysticks will rarely return to a perfect zero when released. This has atendency to cause a robot to slowing spin in a circle when no one is touching the analogsticks. A simple code solution is to account for a deadzone at low values for the analogsticks which can then be treated as zero.Better approaches to scaling the joystick values to the motor output are described below.BasicHere we will apply a simple proportional scale to get to full range of the analog sticks.The basic formula we want to use is: joystickVa lue motorOutput max motorValue max joystickVa lue 1. Below the import for JoystickDriver.c, but before your main task, create anew function to accept the joystick value and return a scaled value for themotor.15
int scaleForMotor(int joyValue){}2. The new function will need to apply a basic proportional scale knowing themaximum ranges of the inputs and outputs.a. Define constants for the max ranges inside the function block as such:const int MAX MOTOR VAL 100;const float MAX JOY VAL 127.0;i. Note that the second constant was defined as a float instead of aninteger. This is because we will use it as a divisor where we wanta floating point result.b. Calculate the ratio of the value of the analog stick to its max range andmultiply that by the max range of the motor output:float ratio joyValue / MAX JOY VAL;int scaledVal ratio * MAX MOTOR VAL;c. Finally, return the scaled value.return scaledVal;3. Now that we have a function to scale the joystick value to the desired ratio topass to the motors, we need to change the code which is passing the joystickvalue directly to the motors to use the new function.motor[leftMotor] scaleForMotor(joystick.joy1 y1);motor[rightMotor] scaleForMotor(joystick.joy1 y2);6. There is still the issue of the deadzone for the joystick. We can add a few lines ofcode to our new scaling function to take care of this.16
f. First, define another constant for the deadzone range. Note that the actualvalue here is very specific to each joystick, but we will use 5 for thisexample.const int DEADZONE 5;g. Now we need to check if the joystick value is less than the deadzone rangeand return zero if it is. This should be done before calculating the scaledvalue inside the method. We can use the built in absolute value functionin ROBOTC to simply this:if(abs(joyValue) DEADZONE) {return 0;}BetterHere we will apply a logarithmic scale to get fine grain control at lower speeds for agreater range of the analog sticks and quickly scale the power up at the end of the range.The basic formula for this will be: joystickValue 2 max motorValuemotorOutput 2 max joystickValue 1. We can modify our proportional scaling function by squaring the values used tocalculate the ratio. The simplest way to accomplish this in ROBOTC is to justmultiply them with themselves:float ratio ((joyValue * joyValue) / (MAX JOY VAL *MAX JOY VAL));2. There is a problem if we stopped here though. Because we are squaring thejoystick value, we are losing sign if the value is negative. Since we still want tobe able to drive in reverse, we need to calculate the direction and feed it back intothe result.17
a. An easy method of capturing the sign of the variable is to divide it by theabsolute value of itself which should give you -1 or 1:int direction joyValue / abs(joyValue);b. To feed the direction back into the result of the scaled calculation, simplymultiply the result with the -1 or 1 we calculated above:int scaledVal (ratio * MAX MOTOR VAL) *direction;18
Manipulator ControlThe Tetrix Try-It demo robot has two servos, one which raises and lowers the arm andone which opens and closes the gripper. The HiTechnic servos included with the FTC kitof parts have just over 180º of movement and operate with position values between 0 and255.It is therefore important to know what position values we want to set to have the arm upor the gripper open. Although we could code a guess, test, adjust, and repeat, theROBOTC IDE offers a much easier solution.In ROBOTC, servos are controlled by setting the desired position to the setServoTarget()function.setServoTarget(servoName) position;where servoName is the name of the servo you want to set and postion is aninteger value between 0 and 255.Using Servo Debug WindowWe will use the Servo Debug dialog to find the ideal values for the positions for eachservo. But first, we need to configure the servos in the Motor and Sensor Setup.1. Configure the servosa. Open the Motor and Sensor Setupi. Robot, Motor and Sensor Setup or simply double-click the existingpragmas at the top of your program.b. Click the Servo tabc. Name the first servo (srvo S1 C2 1) to “gripper” and set the Type to“Standard Servo”.d. Name the second servo (srvo S1 C2 2) to “arm” and set the Type to“Standard Servo”.e. Click “Apply” and then “OK”.f. You should now see two additional pragma lines auto-generated for you.19
2. Run existing code to test.a. Make sure NXT and robot 12V switch are turned on.b. Use the F5 shortcut to compile and downloadc. Click “Start” button on the Program Debug window.3. Open Servos debug windowa. Robot, Debug Windows, Servos4. Test servo positions.a. By default, the servos will be disabled and set to 128 (center).b. Click the “-“ and “ ” buttons next to the Target box for the gripper andarm servos to see what physical position the values actually correspond to.20
c. Raise and lower the values for the gripper servo until you find the desiredvalues for open and closed positions.i. Note that you do not want target values that force the servosbeyond their movable range. For example, if the gripper servoshuts the gripper at 200, you may want a target of 210 to keep thegripper a little open rather than 190 which squeezes it extra tightand can wear down the servo’s internal gears.ii. Write down the open and close position values. We will use thesein the code later on.d. Repeat the process for the arm servo to find the values for the arm beingraised up and lowered down.i. Write down the up and down position values as well.5. Stop the program and close the debug windows via the Program Debug window.6. Now that we know the desired servo targets, we can define these values asconstants in our code.a. Below the import for the JoystickDriver.c and before the scaleForMotor()function, define four constants, one for each servo target using the valueswritten down from step 4 above.const int ARM UP POSITION 128;const int ARM DOWN POSITION 210;const int GRIPPER OPEN POSITION 255;const int GRIPPER CLOSE POSITION 200;Arm ControlNow that we have constants defined for our servo targets, we just need to code up ourjoystick buttons to pass them to the servo controller.Before writing any control code, you should have a control scheme in mind. For thisexample, we will extend/lower the arm using button 4 on the joystick and raise it using21
button 2. If you do not like this configuration, feel free to use whichever buttons you likeinstead.1. Code arm down block.a. Inside of the main task, inside of the infinite loop, and below the drivemotor code, create an if condition which evaluates to true if button 4 ispressed.if(joy1Btn(4)){}b. Inside of the if block, set the target for the arm servo to the down positionusing the constant defined earlier.servoTarget(arm) ARM DOWN POSITION;2. Code the arm up blocka. Below the if condition for button 4, add an ‘else if’ block for button 2.else if(joy1Btn(2)){}b. Inside of the ‘else if’ block, set the target for the arm servo to the upposition using the constant defined earlier.servoTarget(arm) ARM UP POSITION;Gripper ControlFor the gripper control, we will use button 1 on the joystick to close the gripper andbutton 3 to open it.3. Code gripper close block.a. Inside of the main task, inside of the infinite loop, and below the armcontrol, create an if condition which evaluates to true if button 1 ispressed.if(joy1Btn(1)){}22
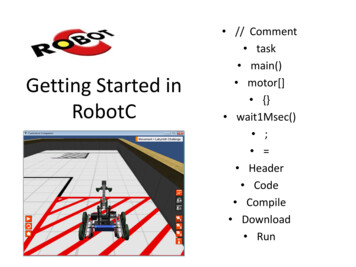
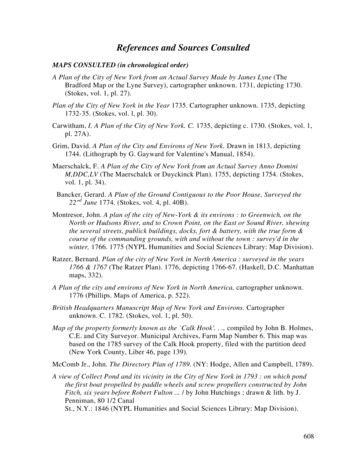
b. Inside of the if block, set the target for the gripper servo to the closedposition using the constant defined earlier.servoTarget(gripper) GRIPPER CLOSE POSITION;4. Code the gripper open blocka. Below the if condition for button 1, add an ‘else if’ block for button 3.else if(joy1Btn(3)){}b. Inside of the ‘else if’ block, set the target for the gripper servo to the openposition using the constant defined earlier.servoTarget(gripper) GRIPPER OPEN POSITION;Enhancing the Servo Control CodeAt this point, you should be able to control your arm and gripper using the four primarybuttons on the joystick. The main task should look something like this:23
The main task is starting to get filled up with low level control details. Let’s move theservo control code to a new function.1. Move servo code to a new servo control functiona. Create a new function named “armAndGripperControl” below thescaleForMotor() function and the main task .void armAndGripperControl(){}b. Cut and paste servo code from main task to the new function.24
c. Add a call to the new function from the main task where we cut thecontrol code from:armAndGripperControl();Now that we have isolated the servo control code, we can add to it without crowdingthe main task up with more low level code. Here we want to allow the driver tooperate the arm and gripper with a more fine-grained incremental control using theshoulder buttons on the joystick.2. Add code to increment arm servo downa. Add ‘else if’ condition below ‘else if’ condition for button 2 to check forbutton 8.else if(joy1Btn(8){}25
b. Add max constraint to condition prevent the arm servo from overextending the arm down.else if(joy1Btn(8) && ServoValue(arm) ARM DOWN POSITION)c. Add code to increment the servo target inside of condition block.servoTarget(arm) ServoValue(arm) 1;3. Add code to decrement arm servo upa. Add ‘else if’ condition below ‘else if’ condition for button 8 to check forbutton 6.else if(joy1Btn(6){}b. Add min constraint to condition to prevent the arm servo from overextending the arm up.else if(joy1Btn(6) && ServoValue(arm) ARM UP POSITION)c. Add code to decrement the servo target inside of condition block.servoTarget(arm) ServoValue(arm) - 1;4. Add code to decrement gripper servo shuta. Add ‘else if’ condition below ‘else if’ condition for button 3 to check forbutton 5.else if(joy1Btn(5){}b. Add min constraint to condition to prevent the gripper servo from overextending the gripper closed.else if(joy1Btn(5) && ServoValue(gripper) GRIPPER CLOSE POSITION)c. Add code to decrement the servo target inside of condition block.servoTarget(gripper) ServoValue(gripper) - 1;5. Add code to increment gripper servo open26
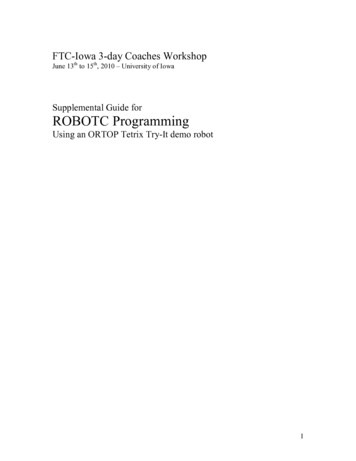
a. Add ‘else if’ condition below ‘else if’ condition for button 5 to check forbutton 7.else if(joy1Btn(7){}b. Add max constraint to condition to prevent the gripper servo from overextending the gripper open.else if(joy1Btn(7) && ServoValue(gripper) GRIPPER OPEN POSITION)c. Add code to increment the servo target inside of condition block.servoTarget(gripper) ServoValue(gripper) 1;The arms and gripper should not be able to be operated using the quick targets withbuttons 1-4 or manually/incrementally using the shoulder buttons 5-8. The completedservo control function should look something like this:27
There is one last enhancement to be concerned with for this example. When the programfirst starts, there is currently no default position being set properly for the servos. Tomake sure the robot starts with the arm up and the gripper closed, we want to add someinitialization code.6. Initialize servos to default positions.a. Inside of the main task, before the infinite loop, set the arm to the upposition:servoTarget(arm) ARM UP POSITION;b. Below the call to default the arm up, set the gripper to the closed positionservoTarget(gripper) GRIPPER CLOSE POSITION;*Note that there is an initialization function pre-defined in the official FTCcompetition template. When using the template, you should place anyinitialization code within that function.28
Some Tips & AdviceCompile, compile, compileThe ROBOTC IDE will not compile in the background, you need to press F7 to compileand update the code structure in the IDE memory. It only takes one key press to compile,so feel free to wail on F7 as you code. The worst that can happen is you find syntaxerrors and other compile time bugs sooner than later.Be wary of BluetoothA lot of FTC coaches and students have lost a bit of sleep, patience, and even sanitytroubleshooting why Bluetooth suddenly stopped working for them. This is a knownissue beyond ROBOTC and includes the underlying phantom.dll, Windows, and theprotocol itself. I could easily dedicate an entire guide to troubleshooting Bluetoothconnectivity issues, but with FIRST’s adoption of a new WiFi based wirelesscommunication system for the upcoming 2010-2011 season, I am hopeful that those darkdays are behind us.If ROBOTC gets too messed up, clear the registry valuesOn occasion, a team has lost the menu bar or some other key component of ROBOTC. Inthese cases, the only proven fix has been to clear out all registry entries for ROBOTC.!Do not use regedit unless you are experienced and already comfortable with its useand risks!There is a built in option for this in the IDE if you need to reset things. You can find itunder View, Delete All Registry Values.*Note that this menu option won’t save you if you’ve lost the menu. In that case, findsomeone familiar with regedit to help you out.Use good programming processesApplying some simple best practices upfront will make coding in ROBOTC much easierand a lot less work. Try to apply some simple things such as:29
Develop your code iteratively. Divide and conquer complex problems byattacking them individually and coding solutions through testing in a constantcycle. Don’t try to program an entire large autonomous routine in one go; get thefirst core part to work, then the second, and so forth. Constantly compiling andtesting is part of this.Use some style. A much wiser programmer than I once stated that any fool canwrite code a computer can understand, but a good programmer writes code otherprogrammers can understand. This is a fundamental truth I’ve come to realizeand it will serve you well if you ever want to get help with your code or pass theprogramming torch to another student. Use good variable names that instantlyindicate what they are for. Keep functions short and readable. Use comments.Use whitespace and indentations to keep your code clean and readable. There aretoo many best practices for good coding style to list here, but I highly recommendlooking some up and applying them.Save regularly and version your files. Far too often a student will lose all thecode they’ve been working on for a season in the blink of an eye because theydidn’t properly back up their code. It is generally not enough to simply back up acopy of your code; you generally want to version it so that you can go back andreference why you changed something or undo/redo something. Also rememberthat compiling and downloading doesn’t save, so you must do this consciously toavoid losing changes if the ROBOTC IDE crashes when programming andtesting. Lastly, give your files meaningful names.Keep learningROBOTC is not exactly ANSI-C, but it is close enough for you to apply a lot of what youlearn about general C programming to ROBOTC. ROBOTC does not support pointers orrecursion. It does however support more rare/useful constructs such as booleanprimitives and union typedefs. There is lot of power in ROBOTC that requires just alittle effort on the programmers part to learn and understand some basic fundamentals.Reading a good introductory book on C programming will take you far. Reading a goodintroductory book on computer science basics (data structures, algorithms, etc.) will takeyou even further.I also recommend reading through or at least familiarizing with as much of the referencematerials linked below.30
References/ResourcesThe following is a list of resources for learning more or helping you troubleshoot issues.IDE help files & Sample ProgramsThe help files contain a lot of good information and usage examples. The includedsample files do a good job illustrating the use of various functions and features inROBOTC.You can access them through the IDE by going to File, Open Sample Program.ROBOTC.netThe main website for ROBOTC is one of the best resources for getting help or interactingwith other members of the ROBOTC community. You can email their technical supportif you have a technical issue with the software/IDE itself or if you want to report a bug.But often more useful are the forums. There is a sub-forum dedicated to FTC and mostposts there are responded to the same day. I personally make an effort to visit the forumdaily during the build season as do a number of other mentors. It may be the best place toget help and feedback from a largest number of smart folks familiar with ROBOTC.Main nder’s 3rd Party DriversXander Soldaat is a regular contributor to the NXT community who maintains a set ofexcellent third party drivers for NXT compatible sensors. These drivers offer enhancedfunctionality for using just about any sensor with ROBOTC and I highly recommendthem; particularly so if you are using the IR Seeker or Sensor Multiplexer.3rd Party t/http://mightor.wordpress.com/Robotics Academy CurriculumRobotics Academy, the non-profit affiliated with Carnegie Melon University who createdROBOTC, offer a number of training resources. Note that some of these are not free.31
Main Website:http://www.rob
ROBOTC, but rather it contains step-by-step references for the example code used in the workshop. It is the intent that this guide be used in conjunction with a training class or other materials in order to explain the reasoning and fundamentals behind many of the examples.