Transcription
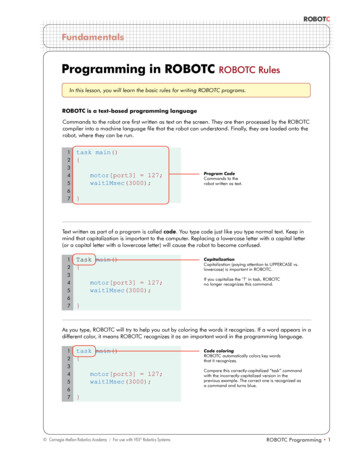
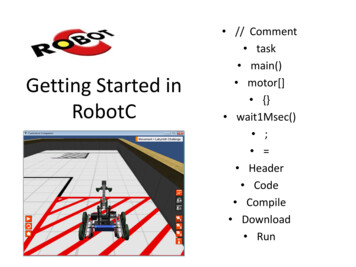
Getting Started inRobotC // Comment task main() motor[] {} wait1Msec() ; Header Code Compile Download Run
Learning Objectives Understand Motion– Motors: How they work and respond.– Fuses: Understand why they keep blowing Understand how to control Motors with a programincluding– Setting up the motors– Reading the basic outline of a program– Using commands for controlling motors motor[port1] motor[rightMotor] wait1Msec(); Be able to write programs for a Robot to complete rvirtual challenges.
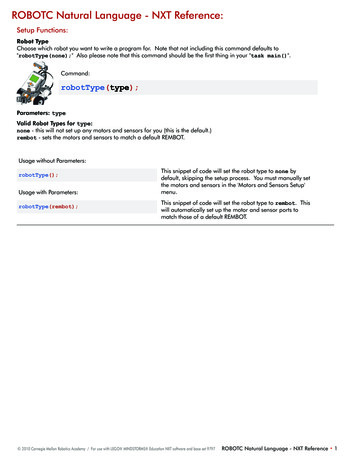
VEX Motion: Motors 2-Wire Motor 393 100 RPM No load Torque peaks at 13.5 in-lbs at 0 RPM 3.6 amp draw Continually at 3.375 in-lbs /- 77 RPM 0.9 amp draw
High Speed Gears High Speed Gearing: 60% faster Unscrew the motor and replaceinternal gearing. 160 RPM No Load Torque 8.4 in-lb in bursts 0 RPM 3.6 AMP Continually at 2.1 in-lbs /- 123 RPM 0.9 amp draw
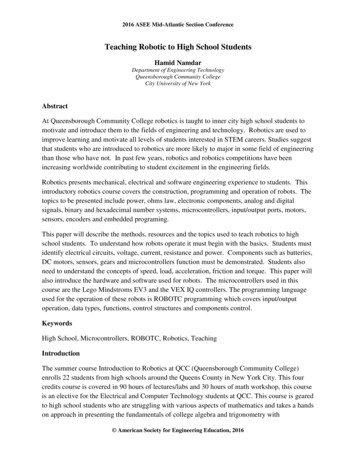
Motor Controller MotorController: 2Wire to 3-Wire Not needed formotor ports 1and 10
What happens when you floor it? Fuses you canblow Motor: 3.6 Amp– One Motor Stops Controller: 3 AmpCurrent (Amps) inYellow– One motor stops Cortex Port: 4amps combinedwith four otherports. Robot StopsSignal in Blue
Getting Started Open RobotC Select VEX 2.0 CortexPlatform– Robot- Platform - VEX 2.0Cortex Make the robot compile toVirtual Worlds– Robot- Compiler Target - Virtual Worlds Select Virtual World– Window- Select VirtualWorld to Use - CurriculumCompanion
Your Robot
Configuring the Robot:Focus on Motors Robot - Motors and Sensors SetupSelect the motor– Currently can only purchase 393 Motors, also modify for internalgearing (high speed, turbo speed)Naming Convention–Rules –Style –Start with a letterNo spaces, punctuation or reserved words (blue)Describes what it representsFirst letter is lowercaseotherWordsStartWithUppercaseLettersFor these motors leftMotorclawMotorarmMotorrightMotor
1) Select the‘Motors’ tab.Motors and Sensors Setup3) Use the pull downPagemenus to select themotor.4) The left motor will need tobe reversed so the robotdoes not go in circles.2) Name themotor in thedesired port.5) Select the sidefor drive motors.Naming Conventions6) Complete the setup forthe remaining motors.RulesStyleStart with a letterNo spaces, punctuation or reserved words (blue)Describes what it representsFirst letter is lowercaseotherWordsStartWithUppercaseLetters7) Click onApply torememberthe changes.
Code the setup creates‘pre-processor directives’
Now we can start looking atRobotC motor[motorName] motorPower; wait1Msec(milliseconds); wait10Msec();
}wait10Msec(); HeaderCodeCompileDownloadRun{}Marksthebeginandend ofa blockof codewait1Msec(2000);The robot continues what itwas doing for (2000)milliseconds.Two seconds in this case.The Header// In front of the linemakes this line acomment/* */ for multipleline comments.What do you think thiscode will do?task main()Marks the beginning of theinstructions for the Robot.RobotC Is CaSe SeNsItIvE!; is used to mark the end of a command.Code Break. OpenRobotC, configure themotors and enter theabove code.motor[motorB] 127;motor[] Used to selectthe motor.rightMotor Thisrepresents the placewhere the motor isattached.motor[port10] 127;does the same thing. 127;127 full power-127 Reverse0 stop
Testing the Program Compile the program– Changes into machine code that the robot understands. Download the program– Moving the machine language to your Virtual or PhysicalRobot Virtual Robot––––Log inSelect RobotSelect ChallengeStart Activity
Compiling the Program
Oops!The compilercatches syntax(typing) errors andgives some hints onhow to fix them.
ErrorsRed X errorYellow X WarningAny guesses onhow to fix thesemistakes?Errors and hintson the bottom ofthe page. If youclick on an errorit will highlightthe line of theerror.
Corrected and Compiled
Download the programSince we set it up to map to VirtualWorlds it will download to a VirtualRobot.
Set up and Account with CS2N. It will track progress.Can log in locally as a guest without tracking.
Information for CS2N
Select Your Robot1) Robots Tab2) We will be using theClawbot for discussionNote: This shows the motors and sensorsattached to this robot
Robots TabDifferentRobotsAvailablePhysicalpropertiesof RobotMotorsandSensors onthe Robotselected.
ChallengesClick iesallow youSummary of theactivity with a pdfthat includes detailsabout the challenge.Click on ‘StartActivity’ to begin
We’ll Test Our Program in theUtility - Imperial Distance Utility1) Utility Tab2) ImperialDistance Utility3) Start Activity
Select Camera and Go1) Follows RightScroll: ZoomPlay: Run the programResetHome2) TopDownView3) FreeMovement:Scroll: ZoomClick-Drag:Rotate ViewShow SensorsToggle
Enter the SampleprogramYour Turn– Motors and SensorsSetup– task main() and code Compile and correcterrors Download to thevirtual robot Run the program Can you modify thisprogram to Write the letter Z? S?Reference ortex video trainer/Click on Movement for much of the material covered
Teaching Strategy:Grading Student ProgrammingMovement: Basketball DrillsProgramming (10 Points 100%)Program compiles (4 points)Header complete with names, description and date (2 points)Code is properly indented (2 points)Comments in the program describing the code (2 points)Performance (10 points 100%)Completed
Online Time:Movement Challenges Basketball DrillsSentry Simulation 1Sumo BotLabyrinth Challenge
Basketball Drill ProgrammingAlternatives Using the Basketball Drills Activity tointroduce: Variables For loop Functions
Looking at Potential Solutions to Basketball Drills Pseudo Code Go forward long enoughto cross the first line Come back Go forward long enoughto cross the second line Come back Go forward lone enoughto cross the third line Come backWith enough guessing and checking,you can get the correct values for thewait1Msec()
Using aVariable to helpwith changesIf only there wasa tool in RobotCthat would letthe code repeat.
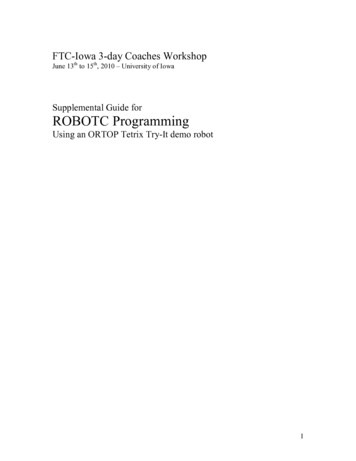
For loop in RobotC When to use it– When you want to repeat something a set number oftimes SyntaxDeclaresan integervariablecalled lineand gives itan initialvalue of 1If the line variableis less than orequal to 3 when itreaches this, it willdo the loopanother time.for(int line 1; line 3; line ){//Code repeated}After completing theloop, it will add 1 to thevariable line.In this example it will repeat thecode inside the {} three times.Once when line 1Once when line 2AndOnce when line 3
No loop vs. forloop
For loopexampleSince line 1 the first time throughthis loopline*timeToLine is the same as1*2400 2400the first time through this loop.Then2*2400 4800the second time and3*2400 7200the third time.RobotC does the math inside the ()before executing the wait1Msec()command
Using Functions to make the mainbody easier to readDefine the Functionsabove the main body.Main Body
FunctionDetailsThe function ‘Header’void – It will not return a valuemoveForward – The name ofthis function. You get to pickthe name of you function aslong as:-Starts with a letter-No spaces or punctuation-Not a reserved WordAnd it should describe what itis doing.// moveForwardComments added tomake the programeasier to read. Youcan add details, int timeToMoveint – Sets an integer variabletimeToMove – An integervariable that will store thevalue sent to the function inthe call statement.The code for the function goesbetween {}. When the functionis finished the program willreturn to the line after the callstatement.
Dry Run: Reading the ProgramtimeToMovetimeToMovelineMainBody
Online Time:Movement Challenges Basketball DrillsSentry Simulation 1Sumo BotLabyrinth ChallengeWhen you complete theactivities, incorporatevariables, loops, andfunctions
References http://education.rec.ri.cmu.edu/products/cortex video trainer/
Open RobotC Select VEX 2.0 Cortex Platform - Robot- Platform - VEX 2.0 Cortex Make the robot compile to Virtual Worlds . World to Use - Curriculum Companion. Your Robot. Configuring the Robot: Focus on Motors Robot - Motors and Sensors Setup Select the motor - Currently can only purchase 393 Motors, also modify for .