Transcription
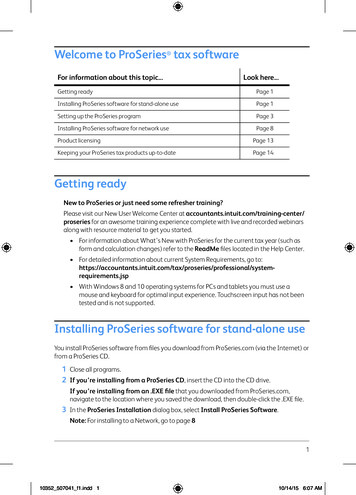
Welcome to ProSeries tax softwareFor information about this topic.Look here.Getting readyPage 1Installing ProSeries software for stand-alone usePage 1Setting up the ProSeries programPage 3Installing ProSeries software for network usePage 8Product licensingPage 13Keeping your ProSeries tax products up-to-datePage 14Getting readyNew to ProSeries or just need some refresher training?Please visit our New User Welcome Center at accountants.intuit.com/training-center/proseries for an awesome training experience complete with live and recorded webinarsalong with resource material to get you started. For information about What’s New with ProSeries for the current tax year (such asform and calculation changes) refer to the ReadMe files located in the Help Center. For detailed information about current System Requirements, go ofessional/systemrequirements.jsp With Windows 8 and 10 operating systems for PCs and tablets you must use amouse and keyboard for optimal input experience. Touchscreen input has not beentested and is not supported.Installing ProSeries software for stand-alone useYou install ProSeries software from files you download from ProSeries.com (via the Internet) orfrom a ProSeries CD.1 Close all programs.2 If you’re installing from a ProSeries CD, insert the CD into the CD drive.If you’re installing from an .EXE file that you downloaded from ProSeries.com,navigate to the location where you saved the download, then double-click the .EXE file.3 In the ProSeries Installation dialog box, select Install ProSeries Software.Note: For installing to a Network, go to page 8110352 507041 f1.indd 110/14/15 6:07 AM
Tip: If you’re installing from a ProSeries CD and the ProSeries Installation dialog boxdoesn’t appear automatically, go to the Windows taskbar, select Computer, then locateyour CD drive containing the ProSeries CD. Double click on the drive to browse the fileson the ProSeries CD. Now locate and double click the CDSetup to start the ProSeriesinstallation.4 Follow the instructions on the screen. Specific dialog boxes are discussed next.5 If a System Warning dialog box appears, select Cancel, correct the situation identifiedin the dialog box, then start the installation procedure again.6 In the Software License Agreement dialog box, select I accept the terms of thelicense agreement if you agree to accept all the terms of the ProSeries LicenseAgreement, then select Next.Important: If you find the terms of the License Agreement unacceptable, do notinstall the software.7 In the Select an Installation Type dialog box, select Stand Alone, then select Next.8 In the Select Destination Directory dialog box, select Next to install ProSeriessoftware in a \PROWINyy directory (where “yy” represents the last two digits of the taxyear) on the drive that’s shown in the dialog box.Tip: If you want to install ProSeries software to a different drive or directory, clickBrowse. In the Select Folder dialog box, select the drive you want, type the folder name\ProWinyy in the Folder name field (where “yy” represents the last two digits of the taxyear) after the drive you selected, then select OK.9 In the Product Selections dialog box, select every ProSeries tax products that youexpect to use, then select Next.Tip: If you used ProSeries software last year, products that were installed last yearmight already be selected. Products you haven’t purchased as unlimited will be installedas pay‑per‑return. You can install additional products later, as described in “Keeping yourProSeries tax products up-to-date” on page 14.These check boxes are for federalproducts. The check boxes to the rightof the Federal Productssection are for state products.Tip: At least one federal product mustbe selected. If you select a stateproduct, be sure to select thecorresponding federal product.Tip: Being selective on this screen willeliminate the need for unnecessarynotifications that do not apply to you.This will reduce the storage space foryour platform and the number ofdownload updates. It is easier to addadditional tax modules and/or statesto your platform than it is to uninstallunnecessary products.210352 507041 f1.indd 2ProSeries Quick Reference Guide10/13/15 6:30 AM
10 If any of the products you selected aren’t available, you’ll see the Installation Notedialog box. Review the list of products that will be installed later, then click OK.Note: Products that are not available will automatically be installed by the ProSeriesTask Scheduler when they become available. If you choose to not to use the ProSeriesTask Scheduler, you will need to manual check for updates.11 Review the information in the Installation Details dialog box, then click Next to installthe ProSeries tax products you selected that are available.Important: If you see the Installation Failed dialog box, click Help to find a possiblesolution, then click Exit to exit the installation program.12 Restart Windows message. If you are prompted to restart your computer, do so. If theinstallation program doesn’t resume, double-click the ProSeries shortcut icon on yourWindows desktop to start the ProSeries program.13 Setup Complete. If you leave the check mark in the Launch ProSeries option in theSetup Complete dialog box, the Connected Customer Wizard begins when you selectFinish.Tip: If you see the ProSeries Installation dialog box, select Exit to return to theWindows desktop, then start ProSeries program by double-clicking the ProSeriesshortcut icon. The Connected Customer Wizard will begin.Troubleshooting suggestionsIf you have difficulty installing or starting the ProSeries program: Start your Internet browser, then go to my.proseries.intuit.com/support to search foradditional troubleshooting solutions. If you have an issue requiring ProSeries Technical Support, go to my.proseries.intuit.com/contact us to review all available support options. To save time, gather as muchinformation as possible, including any error messages, before contacting chat or phonesupport.Setting up the ProSeries programThe first time you start the ProSeries program, the Connected Customer Wizard helps you setup the program if there’s a valid Internet connection. Firm information. Retrieves the name and address of your firm. Product licensing. Licenses your ProSeries tax software to your firm. Product updates. Downloads and applies the updates for installed products, if any. New products. Downloads and installs not-yet-installed products, if any.Tip: If the computer doesn’t have a valid Internet connection, a dialog box asks if you wantto start the Internet Connection Setup Wizard. Select Yes to establish an Internet connection,or select No to establish a valid Internet connection at a later time.Setting up the ProSeries program10352 507041 f1.indd 3310/7/15 6:24 AM
Using the Connected Customer Wizard1 In the Connected Customer dialog box, select Next.2 Enter or verify your Customer Number and the ZIP code in the Customer Information dialogbox, then select Next.These numbers should match theCustomer Number and ZIP codethat are printed in the Sold To:area of your packing slip. If you donot have a packing slip you canverify your customer number bylogging in to your My Accounton www.taxpro.intuit.com/proseries.A different Customer Number andZIP code might appear in the ShipTo: area of your packing slip.3 Select Next after the Connected Customer Wizard finishes the setup tasks.4 Review the information in the Verify Firm Information dialog box carefully. ProSeriesprogram prints this information on all returns prepared by your firm.If the information is correct, select Yes. If the information isn’t correct, select No. SelectNext, then go to Step 8 if you selected Yes or go to Step 5 if you selected No.5 Enter or edit your firm’s name and address in the Enter Firm Information dialog box,then select Next.6 The wizard transmits the updated information to an Intuit server, or a dialog boxinstructs you to call Customer Service. Select OK to continue.7 Review the firm and product information in the Product Licenses dialog box.8 If the ProSeries Update program downloads and installs products and product updates,review the status of each product ProSeries Update dialog box, then select Close.When the Connected Customer Wizard or ProSeries Update program finishes, the ProSeriesprogram starts. The first time the ProSeries program starts, the Prior Year SettingsTransferred dialog box appears if the program was able to transfer the preferences andsettings you used with last year’s program.Important: The ProSeries Login dialog box opens if (and only if) you used the AccessRights feature in last year’s ProSeries program and last year’s Access Rights information wastransferred. Enter a valid User Name and Password, then click OK to proceed.410352 507041 f1.indd 4ProSeries Quick Reference Guide10/7/15 6:24 AM
Using the Options Setup WizardogThe Options Setup Wizard usually automatically runs the first time the program starts. If itdoes not automatically start, click the Help button on the ProSeries toolbar then click OptionsSetup Wizard. The Options Setup Wizard helps you set up ProSeries options. Most OptionsSetup Wizard dialog boxes are self‑explanatory. Note the following:e The Options Setup Wizard dialog boxes will display options you need to set beforeyou complete any returns.do When the Congratulations dialog box appears, select Finish to save the options thatyou selected.dipYou can set up E-File options and Bank Products Enrollment/Registration Information usingthe Options Setup Wizard.For more information about offering bank products use the Search Help feature on thetoolbar or in the Help Center.The next sections discuss “Entering firm and preparer information” and “Entering globalbilling information” in some detail.Tip: For information about a field in a dialog box, right mouse click the field, then selectAbout Field on the pop-up menu.sctx,Entering firm and preparer informationIf you completed the Connected Customer Wizard, you’ll see your firm’s name and address inthe gray area of the Firm Information section.Enter other information about your firm in the fields below the gray area. If the firm will befiling returns electronically, enter the firm’s Electronic Filing Identification Number (EFIN)and the name of the person that ProSeries Technical Support can contact if necessary.es,sDuring the product licensing procedure,your firm’s name and address areretrieved from an Intuit Internet server,select your firm name to enter informationabout your firm.Select an existing preparer or click to add anew preparer to enter information aboutthe preparers in your firm.To move to new fields, press ENTER or TAB,or use your mouse.Setting up the ProSeries program10352 507041 f1.indd 5510/7/15 6:32 AM
If your firm will be filing returns electronically, enter ERO Information about each EFIN.Important: When an Electronic Filing Identification Number (EFIN) is entered for eitherthe firm or a preparer, you will also berequired to verify the Electronic ReturnOriginator name and address that areregistered with the IRS. Intuit uses thisinformation to verify IRS Authorizede-file providers so the informationprovided must match the IRS EROrecords.Tip: If the ProSeries programtransferred preparer information fromlast year’s program, just edit theinformation as necessary.Entering global billinginformationUse the Global Billing Options dialog box to set the billing options that you want to use forall clients. If the ProSeries program transferred global billing information from last year’sprogram, just edit the information as necessary.This dialog box helps you set up:1 Tax Preparation Fees2 Hourly Charges3 Per Form Charges4 Other Billing OptionsImportant: To complete additionalGlobal Billing set-up such as Rates PerForm and to edit the invoice go toTools, Billing from within an openreturn.Transferring data from last year’s ProSeries client filesThe first time you start the ProSeries program, you can transfer relevant data from last year’sclient files to new ProSeries client files for this year. If you used ProSeries software last year,select Yes to go to the Transfer window, then do the five steps listed on the left side of theTransfer window.Electronic filing. If last year’s return was marked for electronic filing, that selection istransferred to this year’s return.610352 507041 f1.indd 6ProSeries Quick Reference Guide10/7/15 6:25 AM
1. Select the type of transfer you want toperform from the list of alternatives.2. Select the location of your existingclient files.3. Select a location for the new client files.4. Select the client files that you want totransfer data from, or click the SelectAll button.5. After you’ve selected one or moreclients, click Transfer.The Transfer Log dialog box opens when the ProSeries program finishes transferring clientdata. Review the information, then select Close to go to HomeBase.Filing returns electronicallyProSeries/Electronic Filing is installed with ProSeries Tax products that support e-filing. To e-filereturns in ProSeries, you must be an Authorized IRS e-file Provider with a valid IRS issued EFIN.We only accept and transmit returns from Authorized IRS e-file Providers, set forth in IRSPublications 3112 and 1345. Select one of the options below for more details about e-filing.1.Use the Search Help feature in the tax program located in the Help Menu2.Click the User’s Guide icon in tax program tool bar, then go to chapter 20,“Electronic Filing.”Establishing an Internet connectionTo e-file, the computer on which the ProSeries program is installed must be able to connect tothe Internet. If you don’t have an Internet connection, you must first sign up for service withan Internet Service Provider (ISP). Once you have an ISP, go to the Help menu, selectInternet Connection Setup, then follow the on-screen instructions.Filing returns electronically10352 507041 f1.indd 7710/14/15 6:09 AM
Installing ProSeries software for network useInstalling and setting up ProSeries software for network use involves the following three steps:Step 1: Install to this computer (ADMIN workstation)Step 2: Complete Licensing (Connected Customer)Step 3: Install to other network computers (USER workstations)Note that certain details vary from system to system. If you have additional questions aboutnetwork installation:1 Start your Internet browser, then go to proseries.com.2 From the ProSeries.com home page, select Support.3 Type a question in the Ask ProSeries field, then select Search.Tip: If you want help optimizing ProSeries software on your network, go toaccountants.intuit.com/contact/proseries.jsp to review all available support options.Prepare your networked computer systemBefore you can install ProSeries software, you must prepare your networked computer system.The specific steps appropriate for your system depend on the type of network and the way it’sset up. The table below explains some network-related terms.TermExplanationClient-server networkA network setup where only one computer (the server) shares resourcesused by one or more workstations (the clients).Peer-to-peer networkUp to 10 computers that are linked together. One or more systems mayshare resources.Mapped driveAny drive or shared resource that has a drive letter assigned to it.ProSeries ADMINworkstationThe computer from which ProSeries software is installed to the server orserving computer. You can designate any computer to be the ProSeriesADMIN workstation (including the network administrator’s computer),but once you choose a ProSeries ADMIN workstation, it should remainthe ProSeries ADMIN workstation throughout the tax season.ProSeries UserworkstationA computer that runs the ProSeries program and accesses the ProSeriesnetwork components from the shared folder.Shared folderThe folder that is set up by the Network Administrator to be shared in thenetwork system. The ProSeries shared folder is the location whereProSeries network components and client files reside.)Primary file locationThis is the location where the program stores all current-year client files.This location can be set only from the ProSeries ADMIN workstation.810352 507041 f1.indd 8ProSeries Quick Reference Guide10/13/15 6:30 AM
For instructions related to shared folders, mapped drives, rights, and permissions, refer to thedocumentation for your operating system and/or network software. If you have additionalquestions about preparing your networked system for the network version of ProSeries, go toproseries.com, select Support, type a question in the Ask ProSeries field, then select Search.Take the following steps before you begin the ProSeries installation procedure.1 Decide which drive on the server (if a client-server network) or the serving computer(if a peer-to-peer network) you will install ProSeries shared network components.2 On the drive you chose, create a folder named ProSeries.3 Make the ProSeries folder a shared folder, and assign it the name “ProSeries.”4 Within the ProSeries folder, create a folder named ProNetyy (where “yy” representsthe last two digits of the tax year).5 Decide which computer will be the ProSeries ADMIN workstation. Use the followinginformation to help you decide. Internet access. An Internet connection is required. If a client-server network. You install ProSeries software from the ProSeries ADMINworkstation to the server’s hard drive. The ProSeries ADMIN workstation and theserver are two different computers. The ProSeries ADMIN workstation can be used asa workstation, but the server is not used as a workstation because doing so candegrade network performance. If a peer-to-peer network. You install ProSeries software on the ProSeries ADMINworkstation’s hard drive. The ProSeries ADMIN workstation can be used as aworkstation. Rights. The ADMIN workstation is the only computer that has rights to at least someaspects of the following features: Product Updating, Customer Information, PrimaryFile Location, Firm Name and Address, Master Password, Electronic Filing Password,Bank Products Registration Information, Database Maintenance, and HomeBaseTune-up.6 Make sure a drive is mapped to the ProSeries folder on the server or serving computer.Make sure the ProSeries ADMIN workstation has the appropriate rights and permissions.7 Go to each computer that will serve as a ProSeries User workstation, then make sure adrive is mapped to the ProSeries folder on the server or serving computer. Make sureeach User workstation has the appropriate rights and permissions.Map drive factors to considerWe recommend you use mapped drives (rather than UNC), and that the drive with theProSeries shared network components be mapped to the same drive letter for all workstations.Mapped to same drive letter. If you’re an existing ProSeries network user and have allcomputers mapped to the same drive letter, you don’t have to change anything. InstallProSeries software as you did in prior yearsInstalling ProSeries software for network use10352 507041 f1.indd 9910/13/15 6:30 AM
Mapped to different drive letters. If all of your workstations are mapped to a networkshared folder using different drive letters, you don’t have to re-map the workstations.New computers. If you’re an existing ProSeries network user and you’ve added newcomputers to your network, we recommend you set them up the same way as the existingworkstations on your network.New user. If you are installing ProSeries software for the first time, you can install ProSeriesshared network components directly to a shared folder without mapping drives. You can runthe workstation installation and setup from all other computers by accessing this sharedfolder.UNC instead of mapped drives. UNC stands for “Universal Naming Convention” or “UniformNaming Convention.” UNC uses the following format:\\server-name\shared-folder-pathIf you use UNC instead of mapped drives, the shared folder doesn’t have to be mapped to anetwork letter as long as all workstations can access the shared folder. However, if you useUNC instead of mapped drives, you must use UNC exclusively.Step 1 and Step 2: Install and set up ProSeries softwarefrom the ADMIN workstationInstalling ProSeries software from the ADMIN workstation for network use is similar toinstalling ProSeries software for stand-alone use with the following exceptions:1 In the Select an Installation Type dialog box, select Network, then select Next.2 When the Review Network Installation Steps dialog box appears, review thesummary of the three steps required for network installation, then click Next.3 In the Computer Name dialog box, enter a name for the current workstation (such asthe name of the person who typically uses the workstation), then click Next.4 In the Choose Destination Location dialog box, accept the recommended locationsfor the Local Folder and Network Folder unless: Local Folder. You want the ProWinYY folder (where “YY” represents the last twodigits of the tax year) on a local drive other than C:\. Network Folder. If the suggested location isn’t appropriate or the Network Folderfield is blank, select the ProNetYY folder (where “YY” represents the last two digits ofthe tax year) within the ProSeries folder that you created on the server or servingcomputer.1010352 507041 f1.indd 10ProSeries Quick Reference Guide10/7/15 6:25 AM
If you accept:* The locationshown in theLocal Folderfield, and* The locationshown in theNetwork Folderfield (if a locationis shown), thenClick Next.If you want toselect adifferent locallocation, clickthis Changebutton.If you want toenter or selecta differentnetworklocation, clickthis Changebutton.If you accept the recommended folders, click Next and proceed to Step 5 .If you don’t accept the Local Folder:a. Select the local drive where you want to install the ProSeries program.b. Go to the Path field, type ProWinYY (where you type the last two digits ofthe tax year in place of “YY”) after the drive that you selected, then click OK.If you are prompted to create the ProWinYY folder, click Yes.c. Continue with Step 5 .If you don’t accept the Network Folder:a. Select the drive where you want to install the ProSeries shared networkcomponents.b. Go to the Path field, then type “ProSeries\ProNetYY” (where you type thelast two digits of the tax year in place of “YY”) after the drive you selected,then click OK. If you are prompted to create the ProSeries or ProNetYYfolder on the drive that you’ve selected, click Yes.c. Continue with Step 5 .5 When the Step 2: Complete Licensing (Connected Customer) dialog box appears,review the summary of the next steps, then click Next.6 Connected Customer Wizard. If the product licensing information that wasdownloaded by the Connected Customer Wizard didn’t include a Network License.You’ll see the Your Network License is Missing dialog box. Select License Now then call Customer Service to resolve the issue, or Select Continue without licensing then click OK.7 User workstation installation instructions. Click Print so you can refer to a printedcopy of the instructions while you are installing the software and setting up each userworkstation.Installing ProSeries software for network use10352 507041 f1.indd 111110/7/15 6:25 AM
Step 3: Set up each ProSeries User workstationInstalling ProSeries software to each workstation is similar to installing ProSeries software forstand-alone use with the following exceptions:From each ProSeries User workstation:1 Go to the Windows taskbar, click Start, select Run, enter the path that’s identified in theUser workstation installation instructions, then click OK.Tip: That path will probably be x:\ProSeries\ProNetYY\WKSTN\setup.exe, where xrepresents a drive on your system (but not necessarily Drive X), and “YY” represents thelast two digits of the current tax year.This example shows a path that starts withDrive N.This field is not case sensitive.Letters can be upper-case or lower-case.2 Follow the instructions on the screen.3 In the Choose Destination Location dialog box, accept C:\ProWinYY as therecommended location for the Local Folder, or select a different local drive for theProWinYY folder (where YY represents the last two digits of the tax year).4 In the Computer Name dialog box, enter a name for the User workstation (such as thename of the person who typically uses the workstation), then click Next.5 The HomeBase Reconciliation dialog box appears if the ProSeries program detectsthat the HomeBase database on the User workstation needs to be updated with thelatest information in the client files stored with the shared network components.This progress bar keeps youinformed about status of theHomeBase Reconciliationoperation.6 Network License. If the product licensing information that was downloaded by theConnected Customer Wizard didn’t include a Network License, follow the instructions inthe Network License Missing dialog box to resolve the situation.Important: You can’t print or e-file returns until your ProSeries software is licensed.1210352 507041 f1.indd 12ProSeries Quick Reference Guide10/7/15 6:25 AM
orhexeProduct licensingProduct licensing is a system that licenses your ProSeries tax software to your firm. Productlicensing is required before you can print returns, file returns electronically, or create PDF filesthat contain returns. Products that aren’t licensed for unlimited use can be used on apay‑per‑return basis.Product licensing uses your Customer Number and ZIP code with information in Intuit’srecords to deliver the following to your ProSeries tax software: An unlimited-use license for each ProSeries tax product and ProSeries electronic filingproduct that you’ve purchased for unlimited use—even if those products haven’t beeninstalled yet Your firm’s name and address A network license (if you purchased ProSeries/Network Version)Tip: You can make minor changes to your firm’s name and address (such as changing “Dr.” to“Drive”) after ProSeries product licensing has occurred.ProSeries product licensing can be performed using the Online method or the Manualmethod. For most ProSeries users, product licensing occurs online automatically.Automatic, Online product licensingThe Connected Customer Wizard performs product licensing automatically when:he You install ProSeries tax software for stand-alone use on a computer that has an Internetconnection You install ProSeries tax software for network use from a computer (referred to as theProSeries Admin workstation) that has an Internet connectionImportant: When ProSeries is installed for network use, product licensing must be initiatedfrom the ProSeries Admin workstation. Product licensing information is shared by allcomputers that have been set up as ProSeries workstations.Be sure to read “Keeping your ProSeries tax products up-to-date” on page 14 of this guide.Product licensing with multiple, non-Internet computersinIf you installed ProSeries for stand-alone use on computers that don’t have an Internetconnection and you don’t want to perform product licensing for each computer using theManual method, here’s a convenient way to copy your firm’s product licensing informationfrom one computer to other computers.1 From the computer with your firm’s product licensing information, go to the File menu,select Copy Product License, then use the dialog box to save the product license file toa network location or removable media (such as a flash drive).Product licensing10352 507041 f1.indd 131310/7/15 6:25 AM
2 From each computer that requires product licensing, go to the File menu, selectRetrieve Product License, then use the dialog box to retrieve the product license filethat you copied to the network location or removable media.Tip: Repeat this procedure if you update the firm’s product licensing information.Updating your firm’s product licensing informationUpdate your firm’s product licensing information when: You purchase additional ProSeries tax products or additional ProSeries electronic filingproducts for Unlimited use, or You purchase ProSeries/Network Version, or The software or an Intuit ProSeries representative instructs you to update your productlicense informationIf either of these situations occur, go to the Tools menu, select License Products, selectOnline, select OK, then simply wait for the product licensing procedure to conclude.Tip: If the computer isn’t connected to the Internet, go to the Tools menu, select LicenseProducts, select Manual, select OK, then follow the instructions in the License Productsdialog box shown on page 12.For more information about product licensing: Use the Search Help feature on the Help toolbar or in the Help Center, or Click the Help button on the toolbar, select User’s Guide in the Help Center,then go to chapter 4, “Setting Up ProSeries Features.”Keeping your ProSeries tax products up-to-dateAs soon as a ProSeries tax product or tax product update becomes available, it is posted to aProSeries Internet server. Getting products and updates via the Internet helps you have themost up‑to‑date versions of the tax products you use.Network: Most product updating activities must be performed from the ProSeries ADMINworkstation.Task SchedulerUse the Task Scheduler to Save time and never miss a critical update by scheduling selectedtasks to run automatically. Your computer must be running and connected to the Internetwhen tasks are scheduled to run.1410352 507041 f1.indd 14ProSeries Quick Reference Guide10/7/15 6:25 AM
Using the Task Scheduler program1 In ProSeries, go to the Tools menu, select Options, then select Task Scheduler.2 Make sure the Download New/Update Existing Products task is enabled.3 To change the Task Scheduler schedule, select Modify.Using the ProSeries Update menu1 In ProSeries, go to the Update menu and select Update Installed Products if youdon’t want to select additional products for installatio
Setting up the ProSeries program 5 Using the Connected Customer Wizard 1 In the Connected Customer dialog box, select Next. 2 Enter or verify your Customer Number and the ZIP code in the Customer Information dialog box, then select Next. 3 Select Next after the Connected Customer Wizard finishes the setup tasks. 4 Review the information in the Verify Firm Information dialog box carefully.