Transcription
3022872 504801 f1.indd (p1)New for Tax Year 2013More client e-files in more states:Get more of the states and forms you askedfor, making it easier to stay in compliance. TX LLC e-file for 1040 NY City e-file for 1040 for returnsand extensions KS 1120/1120S/1065 IA 1120/1120S/1065 MT 1120/1120S/1065 OK 1120/1120S UT 1120/1120S/1065 and extensions NJ 1120/1120S VA 1065/1120SMore of the most requested forms: IN 1041 returns for print KY 1041 returns for print AL 1041 returns for printEnhanced Data EncryptionWe’ve stepped up our data encryptiontechnology to help add more protectionfor your information.Helpful tools to simplifyand automate tasks:2 Quick Employer Forms: Create 1099 andW-2 forms for your clients in 3 easy steps.Just answer a few questions, review yourforms, and you’re ready to e-file to the IRSor Social Security Administration. ProSeries QuickCollect: End collectionhassles by giving your clients the optionto pay you out of their refund. Automatic Data Import: Use ProSeriesTax Import to automatically import datafrom scanned tax form pdfs and financialinstitutions directly into the 1040 returnin ProSeries.Expanded Federal 1041 forms contentto support modernized e-fileImproved! Print Preview and Printed PDFs Document Management: Let ProSeriesDocument Management Systems makeit easy to electronically store and retrieveany type of client data for you.Now you can see a print preview of Forms thatare selected for printing, as well as for entirereturns. Plus, you can open and view your PDFdirectly from within ProSeries.New! Password protected filesHave greater security by emailing passwordprotected client files.ProfessionalGetting Started GuideTax Year 2013Top time savers:2 Tax Research: ProSeries Tax Research willallow you to find the best possible answerquickly using Google search on contentby BNA.Beginning in Tax Year 2013 Federal 1041returns will now support year round andmulti-year e-file.1ProSeries Tax Software Client Management Utilities:2Use ProSeries Plus to keep your tax clientscoming back. These three client-focusedtools are designed to help you collaboratemore effectively with clients—and help showthem your true value as a tax professional.1. Customers with an active tax year 2013 license can e-file Individual and Business federal and state returns for current and prior years supported,up to 3 years, in accordance with the IRS guidelines. (For tax year 2013, file Individual returns for tax year 2012, and Business returns for 2010,2011, and 2012). Subject to blackout periods by the IRS.2. Sold separately. Additional fees apply. 2013 Intuit Inc. All Rights Reserved. Intuit, the Intuit logo, ProSeries, Quicken, QuickBooks, among others, aretrademarks and/or registered trademarks of Intuit Inc. in the United States and other countries. Other parties’trademarks and/or service marks are the property of their respective owners and should be treated as such.ASM PN 504800Save more time this season withexpanded e-filing, more formsand new and improved features.PN 504801CYANMAGENTAYELLOWBLACKPANTONE2727 C
3022872 504801 f1.indd (p1)New for Tax Year 2013More client e-files in more states:Get more of the states and forms you askedfor, making it easier to stay in compliance. TX LLC e-file for 1040 NY City e-file for 1040 for returnsand extensions KS 1120/1120S/1065 IA 1120/1120S/1065 MT 1120/1120S/1065 OK 1120/1120S UT 1120/1120S/1065 and extensions NJ 1120/1120S VA 1065/1120SMore of the most requested forms: IN 1041 returns for print KY 1041 returns for print AL 1041 returns for printEnhanced Data EncryptionWe’ve stepped up our data encryptiontechnology to help add more protectionfor your information.Helpful tools to simplifyand automate tasks:2 Quick Employer Forms: Create 1099 andW-2 forms for your clients in 3 easy steps.Just answer a few questions, review yourforms, and you’re ready to e-file to the IRSor Social Security Administration. ProSeries QuickCollect: End collectionhassles by giving your clients the optionto pay you out of their refund. Automatic Data Import: Use ProSeriesTax Import to automatically import datafrom scanned tax form pdfs and financialinstitutions directly into the 1040 returnin ProSeries.Expanded Federal 1041 forms contentto support modernized e-fileImproved! Print Preview and Printed PDFs Document Management: Let ProSeriesDocument Management Systems makeit easy to electronically store and retrieveany type of client data for you.Now you can see a print preview of Forms thatare selected for printing, as well as for entirereturns. Plus, you can open and view your PDFdirectly from within ProSeries.New! Password protected filesHave greater security by emailing passwordprotected client files.ProfessionalGetting Started GuideTax Year 2013Top time savers:2 Tax Research: ProSeries Tax Research willallow you to find the best possible answerquickly using Google search on contentby BNA.Beginning in Tax Year 2013 Federal 1041returns will now support year round andmulti-year e-file.1ProSeries Tax Software Client Management Utilities:2Use ProSeries Plus to keep your tax clientscoming back. These three client-focusedtools are designed to help you collaboratemore effectively with clients—and help showthem your true value as a tax professional.1. Customers with an active tax year 2013 license can e-file Individual and Business federal and state returns for current and prior years supported,up to 3 years, in accordance with the IRS guidelines. (For tax year 2013, file Individual returns for tax year 2012, and Business returns for 2010,2011, and 2012). Subject to blackout periods by the IRS.2. Sold separately. Additional fees apply. 2013 Intuit Inc. All Rights Reserved. Intuit, the Intuit logo, ProSeries, Quicken, QuickBooks, among others, aretrademarks and/or registered trademarks of Intuit Inc. in the United States and other countries. Other parties’trademarks and/or service marks are the property of their respective owners and should be treated as such.ASM PN 504800Save more time this season withexpanded e-filing, more formsand new and improved features.PN 504801CYANMAGENTAYELLOWBLACKPANTONE2727 C
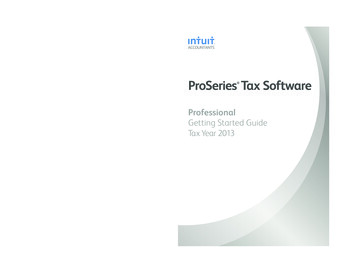
Welcome to ProSeries tax softwareFor information about this topic.Look here.Getting readyPage 1Installing ProSeries software for stand-alone usePage 1Setting up the ProSeries programPage 3Filing returns electronicallyPage 6Installing ProSeries software for network usePage 8Product licensingPage 12Keeping your ProSeries tax products up-to-datePage 14Getting ready For assistance and current information about all aspects of getting started with ProSeries software, clickthe Help button on the ProSeries toolbar to open the Help Center or go to my.proseries.intuit.com/support. For information about What’s New with ProSeries for the current tax year (such as form and calculationchanges) refer to the ReadMe files located in the Help Center. Reminders regarding ProSeries System Requirements:---------Windows Vista requires Service Pack 1 for minimum system requirements.Windows 7 requires Service Pack 1 for minimum system requirements.Windows XP requires Service Pack 3 for minimum system requirements.Windows 8.1, Windows 2008 Server, and Server 2012 Standard operating systems are supported asrecommended operating systems.64-bit operating systems are supported.High-speed Internet connection is required for both recommended and minimum requirements.Excel 2003 or later is required for Client Presentation/Client Advisor and ProSeries Tax Import add-on.Internet Explorer 7.0 or later must be present in Windows, but does not need to be the default browser. For detailed information about current System Requirements, go to:my.proseries.intuit.com/system req Windows 8 is only supported for PCs with a mouse and keyboard. Touchscreens will NOT be supported.Installing ProSeries software for stand-alone useYou install ProSeries software from files you download from ProSeries.com (via the Internet) or from a ProSeries CD.1 Close all programs.2 If you’re installing from a ProSeries CD, insert the CD into the CD drive.If you’re installing from an .EXE file that you downloaded from ProSeries.com, navigate to the locationwhere you saved the download, then double-click the .EXE file.3 In the ProSeries Installation dialog box, select Install ProSeries Software.Tip: If you’re installing from a ProSeries CD and the ProSeries Installation dialog box doesn’t appearautomatically, go to the Windows taskbar, select Computer, then locate your CD drive containing the13022859 504802 f1.indd 110/10/13 8:26:58 PM
ProSeries CD. Double click on the drive to browse the files on the ProSeries CD. Now locate and double click theCDSetup to start the ProSeries installation.4 Follow the instructions on the screen. Specific dialog boxes are discussed next.5 If a System Warning dialog box appears, select Cancel, correct the situation identified in the dialog box,then start the installation procedure again.6 In the Software License Agreement dialog box, select I accept the terms of the license agreement if youagree to accept all the terms of the ProSeries License Agreement, then select Next.Important: If you find the terms of the License Agreement unacceptable, do not install the software.Select I do not accept the terms of the license agreement, then contact ProSeries Customer Service for arefund instead.7 In the Select an Installation Type dialog box, select Stand Alone, then select Next.8 In the Select Destination Directory dialog box, select Next to install ProSeries software in a \PROWINyydirectory (where “yy” represents the last two digits of the tax year) on the drive that’s shown in the dialog box.Tip: If you want to install ProSeries software to a different drive or directory, click Browse. In the SelectFolder dialog box, select the drive you want, type the folder name \ProWinyy in the Folder name field (where“yy” represents the last two digits of the tax year) after the drive you selected, then select OK.9 In the Product Selections dialog box, select every ProSeries tax products that you expect to use, then selectNext.Tip: If you used ProSeries software last year, products that were installed last year might already be selected.Products you haven’t purchased as unlimited will be installed as pay‑per‑return. You can install additionalproducts later, as described in “Keeping your ProSeries tax products up-to-date” on page 13.This section explains how touse this dialog box.These check boxes are forfederal products.The check boxes to the right ofthe Federal Products sectionare for state products.Tip: At least one federalproduct must be selected. Ifyou select a state product, besure to select thecorresponding federal product.10 If any of the products you selected aren’t available, you’ll see the Installation Note dialog box. Review thelist of products that will be installed later, then click OK.11 Review the information in the Installation Details dialog box, then click Next to install the ProSeries taxproducts you selected that are available.Important: If you see the Installation Failed dialog box, click Help to find a possible solution, then clickExit to exit the installation program.12 Restart Windows message. If you are prompted to restart your computer, do so. If the installation programdoesn’t resume, double-click the ProSeries shortcut icon on your Windows desktop to start the ProSeriesprogram.23022859 504802 f1.indd 2ProSeries Quick Reference Guide10/10/13 8:27:04 PM
13 Setup Complete. If you leave the check mark in the Launch ProSeries option in the Setup Complete dialogbox, the Connected Customer Wizard begins when you select Finish.Tip: If you see the ProSeries Installation dialog box, select Exit to return to the Windows desktop, thenstart ProSeries program by double-clicking the ProSeries shortcut icon. The Connected Customer Wizard willbegin.Troubleshooting suggestionsIf you have difficulty installing or starting the ProSeries program: Start your Internet browser, then go to my.proseries.intuit.com/support to search for additionaltroubleshooting solutions. If you have an issue requiring ProSeries Technical Support, go to my.proseries.intuit.com/contact us toreview all available support options. To save time, gather as much information as possible, including anyerror messages, before contacting chat or phone support.Setting up the ProSeries programThe first time you start the ProSeries program, the Connected Customer Wizard helps you set up the program ifthere’s a valid Internet connection. Firm information. Retrieves the name and address of your firm. Product licensing. Licenses your ProSeries tax software to your firm. Product updates. Downloads and applies the updates for installed products, if any. New products. Downloads and installs not-yet-installed products, if any.Tip: If the computer doesn’t have a valid Internet connection, a dialog box asks if you want to start the InternetConnection Setup Wizard. Select Yes to establish an Internet connection, or select No to establish a valid Internetconnection at a later time.Using the Connected Customer Wizard1 In the Connected Customer dialog box, select Next.2 Enter or verify your Customer Number and the ZIP code in the Customer Information dialog box, then selectNext.These numbers should match theCustomer Number and ZIP code thatare printed in the Sold To: area of yourpacking slip. If you do not have a packingslip you can verify your customer numberby logging in to your My Account onwww.proseries.com.A different Customer Number and ZIPcode might appear in the Ship To: areaof your packing slip.3 Select Next after the Connected Customer Wizard finishes the setup tasks.Setting up the ProSeries program3022859 504802 f1.indd 3310/10/13 8:27:07 PM
4 Review the information in the Verify Firm Information dialog box carefully. ProSeries program prints thisinformation on all returns prepared by your firm.If the information is correct, select Yes. If the information isn’t correct, select No. Select Next, then go to Step8 if you selected Yes or go to Step 5 if you selected No.5 Enter or edit your firm’s name and address in the Enter Firm Information dialog box, then select Next.6 The wizard transmits the updated information to an Intuit server, or a dialog box instructs you to callCustomer Service. Select OK to continue.7 Review the firm and product information in the Product Licenses dialog box.8 If the ProSeries Update program downloads and installs products and product updates, review the status ofeach product ProSeries Update dialog box, then select Close.When the Connected Customer Wizard or ProSeries Update program finishes, the ProSeries program starts. The firsttime the ProSeries program starts, the Prior Year Settings Transferred dialog box appears if the program was ableto transfer the preferences and settings you used with last year’s program.Important: The ProSeries Login dialog box opens if (and only if) you used the Access Rights feature in lastyear’s ProSeries program and last year’s Access Rights information was transferred. Enter a valid User Name andPassword, then click OK to proceed.Using the Options Setup WizardThe Options Setup Wizard usually automatically runs the first time the program starts. If it does not automaticallystart, click the Help button on the ProSeries toolbar then click Options Setup Wizard. The Options Setup Wizardhelps you set up ProSeries options. Most Options Setup Wizard dialog boxes are self‑explanatory. Note thefollowing: The second dialog box asks you to select Express Setup or Custom Setup. If you select Express Setup, you see the Options Setup Wizard dialog boxes for the ProSeries options youneed to set before you complete returns. If you select Custom Setup, you select the areas of the program you want to set up, then you see dialogboxes for those areas of the program. When the Congratulations dialog box appears, select Finish to save the options that you selected.You can set up E-File options and Bank Products Enrollment/Registration Information using the Options SetupWizard.For more information about offering bank products through Santa Barbara Bank & Trust or Refund Advantage: Use the Search Help feature on the toolbar or in the Help Center.The next sections discuss “Entering firm and preparer information” and “Entering global billing information” in somedetail.Tip: For information about a field in a dialog box, right mouse click the field, then select About Field on thepop-up menu.Entering firm and preparer informationIf you completed the Connected Customer Wizard, you’ll see your firm’s name and address in the gray area of theFirm Information section.Enter other information about your firm in the fields below the gray area. If the firm will be filing returnselectronically, enter the firm’s Electronic Filing Identification Number (EFIN) and the name of the person thatProSeries Technical Support can contact if necessary.43022859 504802 f1.indd 4ProSeries Quick Reference Guide10/10/13 8:27:11 PM
During the product licensing procedure,your firm’s name and address areretrieved from an Intuit Internet server,then entered here.Enter other information about your firmhere.Enter preparer and ERO information inthis section.To move to new fields, press ENTER orTAB, or use your mouse.Enter information about each of the firm’s preparers in the Preparer / Electronic Return Originator (ERO)Information section of the dialog box. If preparers will be filing returns electronically, also enter the EROPractitioner PIN in this section.Important: When an Electronic FilingIdentification Number (EFIN) is entered for eitherthe firm or a preparer, you will also be required toverify the Electronic Return Originator name andaddress that are registered with the IRS. Intuit usesthis information to verify IRS Authorized e-fileproviders so the information provided must matchthe IRS ERO records.Tip: If the ProSeries program transferred preparerinformation from last year’s program, just edit theinformation as necessary.Entering global billing informationUse the Global Billing Options dialog box to set the billing options that you want to use for all clients. If theProSeries program transferred global billing information from last year’s program, just edit the information asnecessary.This dialog box helps you set up:1 Tax Preparation Fees2 Hourly Charges3 Per Form Charges4 Miscellaneous Fees and Adjustments5 Discounts6 Sales Taxes7 Standard ParagraphsSetting up the ProSeries program3022859 504802 f1.indd 5510/10/13 8:27:14 PM
Transferring data from last year’s ProSeries client filesThe first time you start the ProSeries program, you can transfer relevant data from last year’s client files to newProSeries client files for this year. If you used ProSeries software last year, select Yes to go to the Transfer window,then do the five steps listed on the left side of the Transfer window.Electronic filing. If last year’s return was marked for electronic filing, that selection is transferred to this year’sreturn.Important: If your firm will be filing returns electronically from more than one stand‑alone computer, and eachcomputer is using the same EFIN, change the starting number in the DCN counter in the Electronic Filing sectionof the Options dialog box in the ProSeries program on all but one computer before opening any returns. See “Ifmore than one computer will be using the same EFIN” on page 7.1Select the type of transfer you want toperform from the list of alternatives.2Select the location of your existing clientfiles.3Select a location for the new client files.4Select the client files that you want totransfer data from, or click the Select Allbutton.5After you’ve selected one or more clients,click Transfer.The Transfer Log dialog box opens when the ProSeries program finishes transferring client data. Review theinformation, then select Close to go to HomeBase.Filing returns electronicallyProSeries/Electronic Filing is installed with ProSeries tax products that support e-filing. To e-file returns in ProSeries,you must be an Authorized IRS e-file Provider with a valid IRS issued EFIN. We only accept and transmit returnsfrom Authorized IRS e-file Providers, set forth in IRS Publications 3112 and 1345. For more details about e-filing: Got to my.proseries.intuit.com/efile resource center, or Use the Search Help feature on the Help toolbar or in the Help Center, or Click the Help button on the toolbar, select User’s Guide in the Help Center, then go to chapter20, “Electronic Filing.”Establishing an Internet connectionTo e-file, the computer on which the ProSeries program is installed must be able to connect to the Internet. If youdon’t have an Internet connection, you must first sign up for service with an Internet Service Provider (ISP). Onceyou have an ISP, go to the Help menu, select Internet Connection Setup, then follow the on-screen instructions.63022859 504802 f1.indd 6ProSeries Quick Reference Guide10/10/13 8:27:18 PM
Setting up the ProSeries program for electronic filingTake the following steps to set up the ProSeries electronic filing options.1 Go to the Help menu and select Options Setup Wizard.2 In the first Options Setup Wizard dialog box, select Express Setup.3 EFINs. In the Firm/Preparer Information dialog box, enter the firm’s Electronic Filing IdentificationNumber (EFIN) in the Firm Information section.After you enter an EFIN, complete the corresponding Efile Contact Name fields.PINs. PINs (Personal Identification Numbers) are used as electronic signatures. Enter each preparer’s PIN in theERO Practitioner PIN field. A Practitioner PIN is any five‑digit code (except all zeros) chosen by each preparer.Important: The IRS requires that tax practitioners e-file individual income tax returns with PractitionerPINs or taxpayer Self‑Select PINs. Tax practitioners can’t submit a paper signature for e-filed returns by usingForm 8453 anymore. A redesigned Form 8453 is used only to transmit required supporting paper documents.Enter the firm’s EFIN and ERO contactinformation here.Enter the preparer’s PIN here.4 In the Filing Client Returns Electronically dialog box, select Yes,some returns may be filed electronically.5 Complete the Electronic Return Originator Info screen byproviding the ERO Name and address that are registered withthe IRS for each EFIN entered in ProSeries.6 Complete the remainder of the Options Setup Wizard.Filing returns electronically3022859 504802 f1.indd 7710/10/13 8:27:22 PM
Installing ProSeries software for network useInstalling and setting up ProSeries software for network use involves the following three steps: Step 1: Install to this computer (ADMIN workstation) Step 2: Complete Licensing (Connected Customer) Step 3: Install to other network computers (USER workstations)Note that certain details vary from system to system. If you have additional questions about network installation:1 Start your Internet browser, then go to http://www.proseries.com.2 From the ProSeries.com home page, select Support.3 Type a question in the Ask ProSeries field, then select Search.Tip: If you want help optimizing ProSeries software on your network, go to http://www.proseries.com/contact usto review all available support options.Prepare your networked computer systemBefore you can install ProSeries software, you must prepare your networked computer system. The specific stepsappropriate for your system depend on the type of network and the way it’s set up. The table below explains somenetwork-related terms.TermExplanationClient-server networkA network setup where only one computer (the server) shares resources used by one or moreworkstations (the clients).Peer-to-peer networkUp to 10 computers that are linked together. One or more systems may share resources.Mapped driveAny drive or shared resource that has a drive letter assigned to it.ProSeries ADMINworkstationThe computer from which ProSeries software is installed to the server or serving computer. Youcan designate any computer to be the ProSeries ADMIN workstation (including the networkadministrator’s computer), but once you choose a ProSeries ADMIN workstation, it shouldremain the ProSeries ADMIN workstation throughout the tax season.ProSeries UserworkstationA computer that runs the ProSeries program and accesses the ProSeries network componentsfrom the shared folder.Shared folderThe folder that is set up by the Network Administrator to be shared in the network system. TheProSeries shared folder is the location where ProSeries network components and client filesreside.)Primary file locationThis is the location where the program stores all current-year client files. This location can beset only from the ProSeries ADMIN workstation.For instructions related to shared folders, mapped drives, rights, and permissions, refer to the documentation foryour operating system and/or network software. If you have additional questions about preparing your networkedsystem for the network version of ProSeries, go to http://www.proseries.com, select Support, type a question in theAsk ProSeries field, then select Search.Take the following steps before you begin the ProSeries installation procedure.1 Decide which drive on the server (if a client-server network) or the serving computer (if a peer-to-peernetwork) you will install ProSeries shared network components.83022859 504802 f1.indd 8ProSeries Quick Reference Guide10/10/13 8:27:25 PM
2 On the drive you chose, create a folder named ProSeries.3 Make the ProSeries folder a shared folder, and assign it the name “ProSeries.”4 Within the ProSeries folder, create a folder named ProNetyy (where “yy” represents the last two digits of thetax year).5 Decide which computer will be the ProSeries ADMIN workstation. Use the following information to help youdecide. Internet access. An Internet connection is required. If a client-server network. You install ProSeries software from the ProSeries ADMIN workstation to theserver’s hard drive. The ProSeries ADMIN workstation and the server are two different computers. TheProSeries ADMIN workstation can be used as a workstation, but the server is not used as a workstationbecause doing so can degrade network performance. If a peer-to-peer network. You install ProSeries software on the ProSeries ADMIN workstation’s harddrive. The ProSeries ADMIN workstation can be used as a workstation. Rights. The ADMIN workstation is the only computer that has rights to at least some aspects of thefollowing features: Product Updating, Customer Information, Primary File Location, Firm Name andAddress, Master Password, Electronic Filing Password, Bank Products Registration Information, DatabaseMaintenance, and HomeBase Tune-up.6 Make sure a drive is mapped to the ProSeries folder on the server or serving computer. Make sure theProSeries ADMIN workstation has the appropriate rights and permissions.7 Go to each computer that will serve as a ProSeries User workstation, then make sure a drive is mapped to theProSeries folder on the server or serving computer. Make sure each User workstation has the appropriaterights and permissions.Map drive factors to considerWe recommend you use mapped drives (rather than UNC), and that the drive with the ProSeries shared networkcomponents be mapped to the same drive letter for all workstations.Mapped to same drive letter. If you’re an existing ProSeries network user and have all computers mapped to thesame drive letter, you don’t have to change anything. Install ProSeries software as you did in prior years.Mapped to different drive letters. If all of your workstations are mapped to a network shared folder usingdifferent drive letters, you don’t have to re-map the workstations.New computers. If you’re an existing ProSeries network user and you’ve added new computers to your network,we recommend you set them up the same way as the existing workstations on your network.New user. If you are installing ProSeries software for the first time, you can install ProSeries shared networkcomponents directly to a shared folder without mapping drives. You can run the workstation installation and setupfrom all other computers by accessing this shared folder.UNC instead of mapped drives. UNC stands for “Universal Naming Convention” or “Uniform NamingConvention.” UNC uses the following format:\\server-name\shared-folder-pathIf you use UNC instead of mapped drives, the shared folder doesn’t have to be mapped to a network letter as longas all workstations can access the shared folder. However, if you use UNC instead of mapped drives, you must useUNC exclusively.Installing ProSeries software for network use3022859 504802 f1.indd 9910/10/13 8:27:29 PM
Step 1 and Step 2: Install and set up ProSeries software from theADMIN workstationInstalling ProSeries software from the ADMIN workstation for network use is similar to installing ProSeries softwarefor stand-alone use with the following exceptions:1 In the Select an Installation Type dialog box, select Network, then select Next.2 When the Review Network Installation Steps dialog box appears, review the summary of the three stepsrequired for network installation, then click Next.3 In the Computer Name dialog box, enter a name for the current workstation (such as the name of theperson who typically uses the workstation), then click Next.4 In the Choose Destination Location dialog box, accept the recommended locations for the Local Folderand Network Folder unless: Local Folder. You want the ProWinYY folder (where “YY” represents the last two digits of the tax year) ona local drive other than C:\. Network Folder. If the suggested location isn’t appropriate or the Network Folder field is blank, selectthe ProNetYY folder (where “YY” represents the last two digits of the tax year) within the ProSeries folderthat you created on the server or serving computer.If you accept:If you want tose
2 If you're installing from a ProSeries CD, insert the CD into the CD drive. If you're installing from an .EXE file that you downloaded from ProSeries.com, navigate to the location where you saved the download, then double-click the .EXE file. 3 In the ProSeries Installation dialog box, select Install ProSeries Software.