Transcription
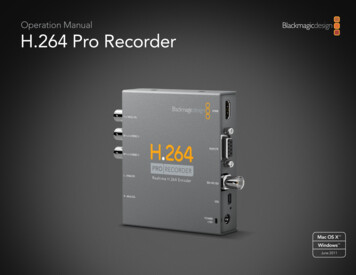
Operation ManualH.264 Pro RecorderMac OS X Windows June 2011
ContentsH.264 Pro Recorder Operation Manual0427How to InstallComponent Analog Video Connections 28S-Video Analog Connections 29Composite Analog Video Connection 30Betacam SP analog deck 31SDI digital deck 32Sony HDCAM SR deck in 4:2:2 33HDMI camera 34Installation 5H.264 Pro Recorder product diagram 5Pre-installation overview and planning 6Installing the software on Mac OS X 7Installing the software on Windows 8Updating the firmware 910SoftwareBlackmagic Media Express Media Express overview Device Menu Preferences Media List Capture Playback 2111111314151619Helpful InformationSupport 22Which connections should I use for best quality video? 22Consumer Level Analog Audio Signals 24RS-422 remote device control 25Help 26Connection Diagrams35WarrantyWarranty Terms and Conditions 36
3 WelcomeWelcome to Blackmagic H.264 Pro Recorder!Thank you for purchasing H.264 Pro Recorder. Now you can easily convert your videos to H.264 in real timefor the web, iPhone, iPad, Apple TV, YouTube and more!Previously, H.264 encoding was either a very slow software process or required fast, expensive computerhardware. H.264 Pro Recorder has a built-in high quality H.264 hardware-encoding engine and imageprocessor so you get amazing quality H.264 video in real time.H.264 Pro Recorder produces stunning quality digital video from the highest quality SDI, HDMI andcomponent analog video as well as regular composite analog video. It can even work with S-Video via athird party S-Video breakout cable (not included) and supports 2 channels of professional balanced audioinput. With all these connections supported, you can encode from practically any device out there. It evenhas an RS-422 remote control port so you can batch capture H.264 video from your decks just as you wouldwith normal video!We think it should take you approximately 5 minutes to complete the installation. Before you install H.264Pro Recorder, please check our website at www.blackmagic-design.com/support/ and click the supportpage to download the latest updates to this manual and H.264 Pro Recorder software.Lastly, please register your H.264 Pro Recorder when downloading software updates. We would loveto keep you updated on new software updates and new features for your H.264 Pro Recorder. We areconstantly working on new features and improvements, so we would love to hear your suggestions forimprovements to the software!Grant PettyCEO Blackmagic Design
4How to Install
5 InstallationBlackmagic H.264 Pro RecorderY or NTSC/PALAnalog video inputB-Y or S-VIDEO YRS-422 Deck ControlR-Y or S-VIDEO CAnalog audio inputon 1/4” TRS jacksAudio LeftAudio Right3G/HD/SD-SDI InputUSB 2.0 ConnectionPower
6 InstallationPre-installation overview and planningH.264 Pro Recorder features an SD/HD-SDI input with a BNC input for connection to broadcast andprofessional, digital video sources. An HDMI input is also included for use with professional and consumervideo sources with HDMI output, such as modern video cameras. Three BNC ports provide analog videoinput which can be switched between component, S-Video and composite analog video. These BNCports are designed for connecting to legacy broadcast and professional, analog video sources such asa Sony Betacam SP deck. Consumer video sources can easily use these same connections by addinginexpensive BNC to RCA adapters or a dual-BNC to S-Video adapter cable. Two channels of professional,balanced, analog audio input is also supported using 1/4 inch jack connections. Remote control of videodecks is also supported by the built-in RS-422 port. A USB 2.0 port and Media Express capture software forMac OS X and Windows is also included.The SDI, HDMI and component input connections are switchable between SD and HD video. S-Video andcomposite analog video are standard definition formats which only support NTSC and PAL video.H.264 Pro Recorder requires QuickTime be installed for Mac OS X or Windows. QuickTime can bedownloaded from Apple’s website at c Media Express capture software requires a computer display resolution of 1280 x 800 or higher,and preferably 1920 x 1080 or 1920 x 1200.Blackmagic Media Express software must be used to record video with the H.264 Pro Recorder hardware.Third party software applications cannot currently be used to record video with the H.264 Pro Recorderhardware. Once you have recorded your video to MP4 files with H.264 Pro Recorder, you should be able toplay back your H.264 movies with almost any software which supports QuickTime.Blackmagic Media Express software runs on Mac OS X and Windows computers and uses a USB 2.0connection to H.264 Pro Recorder. You will need to provide a USB 2.0 type A to mini B male cable. Thissame USB cable can be used for applying occasional firmware updates downloaded from the BlackmagicDesign website. Programmable firmware can provide new features, compatibility with new hardware andsupport for new formats.H.264 Pro Recorder requires mains power and includes a universal power supply with international powersocket adapters for all countries. To stop power from being accidentally disconnected, a cable tie point isincluded next to the power socket to lock down the power connection. You will need to provide a mainspower socket for the universal power supply.
7 InstallationInstalling the software for Mac OS XContentsThe Desktop Video software installer will install the following components which are used by H.264 ProRecorder: Blackmagic Desktop Video drivers Blackmagic Media ExpressThe Desktop Video software installer will also install the following components which are used by otherBlackmagic Design capture products when installed on the same computer: Blackmagic Design system preference Blackmagic Disk Speed Test Blackmagic LiveKey Blackmagic Multibridge Utility Adobe presets and plug-ins Apple Final Cut Pro Easy Setups, presets and enablers QuickTime codecsNote: Before installing any software or hardware you will need administrator privileges.Desktop Video software1.The CD supplied with the H.264 Pro Recorder contains the Desktop Video software. Before youinstall, ensure you have the very latest driver. Visit www.blackmagic-design.com/support2.Open the “Desktop Video Installer” folder and launch the “Desktop Video Installer”.3.Click Continue, Agree and Install buttons and the drivers will be installed on your system.4.Now restart your machine to enable the new software drivers.Follow the Desktop Video installer prompts.
8 InstallationInstalling the software for WindowsContentsThe Desktop Video software installer will install the following components which are used by H.264 ProRecorder: Blackmagic Desktop Video drivers Blackmagic Media ExpressThe Desktop Video software installer will also install the following components which are used by otherBlackmagic Design capture products when installed on the same computer: Blackmagic Design Control Panel Blackmagic Disk Speed Test Blackmagic LiveKey Blackmagic Multibridge Utility Blackmagic AVI and QuickTime codecs Adobe presets and plug-insFollow the Desktop Video Setup Wizard promptsDesktop Video softwareClick “Yes”.Restart your PC!1.The CD supplied with the H.264 Pro Recorder contains the Desktop Video software. Before youinstall, ensure you have the very latest driver. Visit www.blackmagic-design.com/support2.Open the “Desktop Video” folder and launch the “Desktop Video” installer.3.The drivers will now be installed on your system. An alert will appear: “Do you want to allowthe following program from an unknown publisher to make changes to this computer?”Click Yes to continue.4.You will see a dialog bubble saying “found new hardware” and the hardware wizard will appear.Select “install automatically” and the system will find the required Desktop Video drivers. You willthen receive another dialog bubble saying “your new hardware is ready for use.”5.Now restart your machine to enable the new software drivers.
9 InstallationHow to update the H.264 Pro Recorder software!Blackmagic Design will release new software for your H.264 Pro Recorder with new features, bug fixes andincrease compatibility with third party software and devices.To update your H.264 Pro Recorder with new software, simply connect it to your computer via USB and yourcomputer will let you know if a new software update for your H.264 Pro Recorder is available. This message will appear if a software update is required.Once the software installation has been completed and H.264 Pro Recorder is powered on, connect it to aUSB 2.0 port on your computer. The Desktop Video driver software will automatically check the H.264 ProRecorder software if it is up to date. Software updates can provide new features, compatibility with newhardware and support for new formats.If the software version does not match, the software will offer to update the firmware. This isautomatic and all you need to do is click Update now to start the process. The update will take about1 minute to complete. If no software update is required, no message will appear. Please skip the rest of thesteps in this section as your H.264 Pro Recorder is already up to date.The update will take about 1 minute to complete.The following message should appear at completion of the update: “Software Update Complete. Thefirmware on your H.264 Pro Recorder was updated successfully. Please unplug both power and USB cablesto restart it.” Click OK to dismiss the message and then unplug the power and USB cables from H.264 ProRecorder and then reconnect them again.H.264 Pro Recorder is now ready to be used.When the update has completed, unplug the power andUSB cables from H.264 Pro Recorder and then reconnectthem again.
10Software
11 BlackmagicWelcome Media ExpressMedia Express overviewBlackmagic Media Express is a sophisticated software application which enables H.264 Pro Recorder users tocapture video and audio to industry standard MP4 files with frame accurate RS-422 device control. It automaticallydetects whether the video source is HD1080, HD720, NTSC or PAL and also automatically detects the frame rate.Capture from progressive and interlaced video sources is supported and the captured file is stored in a progressiveformat for maximum compatibility with media player software on Mac OS X, Windows and portable video players.Media Express has an intuitive interface and requires a 1920 x 1200, 1920 x 1080 or 1280 x 800 pixel computerdisplay to compliment its uncluttered appearance. The capture view is the main view used with H.264 ProRecorder. The master view is not used by H.264 Pro Recorder but may be used with other Blackmagic Designcapture and playback products. The capture, playback and master views are color-coded so you will know at aglance which mode is being used.Media Express uses many of the same keyboard shortcuts which are standard in the video industry so there islittle to learn. Use j, k, l to shuttle backwards, pause and shuttle forwards, or use i and o to mark in andout points when batch capturing. Hold down the control and shift keys to reveal a jog wheel and then use yourmouse, with the jog wheel, for precision control of your video deck.VITC timecode is supported via RS-422 and RP188 timecode is supported via SDI.H.264 Pro Recorder users can use the Media List feature to log multiple clips for batch capture.Blackmagic Media Express is not NLE software and does not have a timeline. It is a great tool when you don’tneed the complexity of NLE software but simply want to capture old or new programming content into the samefile format used on the web, iPad , iPod , iPhone , Apple TV , YouTube and more.
12 BlackmagicWelcome Media ExpressBlackmagic Media Express 2 InterfaceDevice MenuMedia ListSearch fieldRemote indicatorVTR / deck timecodeVideo PreviewTransport ControlMark In / Mark OutTrack enable/disableProject name, video formatand frame rate
13 BlackmagicWelcome Media Express – Device MenuBlackmagic Media Express can be used with all professional capture products from Blackmagic Design. If youhave more than one Blackmagic capture product installed, it is necessary to select which one will be used byMedia Express. If H.264 Pro Recorder is the only Blackmagic capture device connected to your computer, thenyou can safely skip the rest of this section.The Device menu in Media Express is used to select thedesired Blackmagic capture device. Choose H.264 ProRecorder.If you have more than one Blackmagic capture product installed, go to the Device menu in Media Expressand select H.264 Pro Recorder. In the example pictured on this page, a DeckLink card and a H.264 ProRecorder are both installed in the same computer. Selecting H.264 Pro Recorder will change the preferencesdisplayed in Media Express, so you can choose suitable H.264 settings for your project.
14 BlackmagicWelcome Media Express – PreferencesMedia Express preferences are accessed from Media Express Preferences on Mac OS X orEdit Preferences on Windows. Any settings which are grayed out are only used with other BlackmagicDesign capture products and are not required by H.264 Pro Recorder.Project Video FormatProject Video Format defines the frame size of the current H.264 project. Choose “Native (Progressive)” forfull resolution encoding of your video or select from a number of popular device presets including iPad andYouTube. H.264 Pro Recorder automatically detects the frame rate of your video.Capture File FormatThe Capture File Format always sets the video codec to H.264, and the file format to MP4, when using H.264 ProRecorder. Other choices appear in this menu when using other Blackmagic Design capture products.The Quality button provides access to the H.264 encoding settings and is only available when H.264 ProRecorder has detected a valid video input signal. We recommend leaving the maximum bit rate unchanged fromthe default setting.Other preferencesPreferences in Mac OS XVideo formats are provided for popular devices as well as fullresolution, Native (Progressive) video.The Quality button provides access to the H.264 encodingsettings.Other preferences for H.264 Pro Recorder include defining the storage location for your video and still framecaptures, stopping the capture if dropped frames are detected, setting widescreen standard definition toanamorphic, and also pre-roll and timecode offset settings for tape decks with an RS-422 connection.
15 BlackmagicWelcome Media Express – Media ListThe Media List holds a list of clips used in a project. When in Capture view, the Media List can be a list of clips tobe batch-captured. Media List becomes a playlist when used in Playback view. These views are explained laterin the manual.The Media List is a project which can contain clips of the same frame size and frame rate.The list can be sorted by each column heading. Columns can be rearranged and widened if desired.The order of the clips in the list can be sorted manually by dragging and dropping within the list. Single ormultiple clips can be dragged and dropped together.The film strip icon on the left of the list shows whether a clip has linked media. If a clip has no linked media,the film strip icon displays a red “X” and selecting the clip will show a “Media Offline” message in the VideoPreview Window.Clips can be added to the list by: double-clicking on an empty area in the list selecting File Import Media Files right-clicking on the list and selecting ‘Import Media Files’ capturing a clip from tape, camera, disk recorder some other video source.Right-clicking in the Media List will open a contextual menu to perform operations such as “Batch Capture”.Depending upon the menu item chosen, Media Express will switch to the appropriate Capture or Playback viewthat fits the operation.Contextual menuMedia List showing an untitled clip which is not linked to any media. Right-clicking on the missing media icon will reveal acontextual menu from where Batch Capture can be selected.
16 BlackmagicWelcome Media Express – CaptureCapture View showing the contextual menu, in the Media List, can be used to start a Batch Capture. This performs the same function as clicking the Get Clip button.
17 BlackmagicWelcome Media Express – CaptureCapture operations are performed in the Capture view (ctrl-1, cmd-1)Capturing on the fly with H.264 Pro Recorder.Ensure the Project Video Format is set to the format of video you wish to capture.Connect a video source to an input of the H.264 Pro Recorder. Only connect one video source to H.264 ProRecorder so that it can auto-detect which source to use, e.g. SDI, HDMI, component, S-Video or compositeanalog video.If deck control is required, ensure an RS-422 serial cable is connected and “remote” has been selected on thedeck. If an RS-422 cable is not connected, or “remote” is not selected on the deck, the transport controls will begrayed out and “No Remote” will be displayed in the top right corner of the Video Preview Window.Enter Reel and Name information into the information area. The Name will be applied to the clip(s) which areabout to be captured.Before capturing, the audio channels to be captured can be switched on or off via the track enable/disablebuttons. The video track cannot be turned off.Click on the gray “Capture” button to commence capturing. The button will highlight in red.To end capture, click on the “Capture” button again. Alternatively, if you decide you don’t wish to save thecaptured clip, press the “Esc” key and a message will appear with an option to delete the clip.Logging Clips for future batch capture with H.264 Pro Recorder.Click the Mark In button to mark the In point, or use the shortcut key i.Click the Mark Out button to mark the Out point, or use the shortcut key o.Click the Log Clip button to log the clip, or use the shortcut key p. The entry should now appear in the MediaList window.Continue logging other clips.When logging is completed, select the clips in the Media List and either: Click on the ‘Get Clip(s)’ button. Right-click on the selection and select ‘Batch Capture’.
18 BlackmagicWelcome Media Express – CaptureCapturing a clip with precise In and Out timecode with H.264 Pro Recorder.Click on the Mark In button to mark the In point or use the shortcut key i.Click on the Mark Out button to mark the Out point or use the shortcut key o.Click on the Get Clip button.Media Express will cue the tape and precisely capture the clip from the In to the Out timecode points, includingany handles specified in the application preferences.While capturing, if the file name (Name) of a clip already exists on the selected capture drive, the user will beprompted if they want to over-write the file or not. If ‘No’ is selected, the file name will be auto-incrementedwith a number.
19 BlackmagicWelcome Media Express – PlaybackCapturePlayback View
20 BlackmagicWelcome Media Express – PlaybackCapturePlayback operations are performed in the Playback tab (ctrl-2, cmd-2)Playing back captured clipsYou can play back H.264 files in the Video Preview Window of Media Express, and monitor audio via the defaultsound output of your computer. Alternatively QuickTime Player, iTunes, Windows Media Player and VLC can allbe used to play back your H.264 files in full screen.Importing clips into the Media ListImport media into the Media List using one of the following methods: Double-click on an empty area of the list. Select File Import Media Files. Right-click on the list and select ‘Import Media Files’. Capture a clip from a video source such as camera or tape.Any of these actions will reveal an Open Video Clip window where one or more files can be selected.If the files being imported match the frame rate and size of those in the Media List, the import will be successful.If the files being imported do not match the frame rate and size of existing clips in the Media List, the user will beprompted to create a new project and to save the current project.If the current project has had no changes, and has already been saved, the user will only be prompted to start anew project as there is no need to save the existing project.Playing back a single clipSelecting a clip (single click) on the list will load it into the Video Preview Window.To play back a single clip in the Media List, double click the clip and it will start playing in the Video Preview Window.To loop the playback of the clip, click on the loop button in the transport control. The selected clip will now playback and loop until the user clicks on the pause button or presses the spacebar.Playing back multiple clipsTo play back multiple clips, select the clips in the Media Library and click the Play button or press the spacebar.Selected clips in the playlist will be played back in sequence. Unselected clips will not be played.If no clips are selected, the whole playlist is played back, starting from the last-played clip.Clicking on the loop button will cause the playback to loop.During playback, the audio channels being monitored can be switched on or off via the track enable/disablebuttons. The video track cannot be turned off.
21Helpful Information
22 SupportWhich connections should I use for best quality video?Choosing the best video connections to use with cameras, decks, capture cards and other video equipmentcan be confusing but it’s easy with H.264 Pro Recorder. Simply choose the best quality uncompressedoutput connection provided by each piece of video hardware. For example, H.264 Pro Recorder cancapture composite analog video, from an old field deck, but can also capture HDMI from the latest DSLRcameras and even HD-SDI digital video and audio from an ARRI ALEXA camera or HDCAM SR deck.If you are capturing from analog video equipment, you will also need to connect the left and right analogaudio cables in addition to any video cables. By contrast, HDMI and SDI digital connections only need asingle cable to carry both digital video and digital audio.Composite — Good analog videoComposite is the oldest and most common analog video format and is often regarded as “regular video”.You are likely to find it on almost any video device. Broadcast and professional video equipment will usuallyhave a single BNC connector for composite video whereas consumer equipment will usually use a single,yellow RCA connector. An inexpensive BNC-RCA adapter can be used to connect composite video fromconsumer equipment to the BNC connector on H.264 Pro Recorder.S-Video — Better analog videoS-Video is higher quality than composite video and became a mainstream consumer standard in thelate 1990s. It can also be found on some professional video hardware. Professional video equipment willsometimes have dual BNC connectors for S-Video labelled “Y” and “C”, whereas consumer equipmentwill use a single, multi-pin S-Video connector. “Y” and “C” ports connect directly to the S-Video Y and S-Video C ports on H.264 Pro Recorder usingBNC cables. When connecting a multi-pin S-Video port to H.264 Pro Recorder, an inexpensive third party, breakoutcable (not included) is required. The breakout cable adapts a single, S-Video connector to two BNCconnectors on the H.264 Pro Recorder.Component — Best analog videoComponent is the highest quality analog video connection. It appeared on broadcast and professionalvideo equipment during the 1990s and finally became popular on consumer equipment during the 2000s.It uses three cables to transmit all of the color information. On broadcast and professional video equipment,BNC connections are usually used. On consumer equipment, RCA connectors are used on three cableswhich are usually colored red, green and blue. Inexpensive BNC-RCA adapters can be used to connectcomponent video from consumer equipment to the three BNC connectors on H.264 Pro Recorder.
23 SupportHDMI and SDI — Digital video is the best!HDMI and SDI are digital protocols which provide the highest quality video to H.264 Pro Recorder.A single cable is used to transmit all of the color and audio information.If you have a choice of using analog or digital connections, always choose digital for the best quality videoand audio.HDMI provides the same uncompressed, digital quality as high-end SDI digital video but at a much lowercost. It is designed to be used over short distances and standard cables are typically only 6 feet or 2 metersin length. HDMI is often found on consumer equipment as well as on some professional equipment. TheHDMI cable can be directly connected to the HDMI port on H.264 Pro Recorder.SDI and HD-SDI provide industrial grade connections for uncompressed, digital video. SDI cablessupport transmission of uncompressed digital video over at least 300 feet or 100 meters. SDI and HD-SDIconnections are found on high-end broadcast and professional video hardware. An SDI or HD-SDI cablecan be directly connected the SDI / HD-SDI port on H.264 Pro Recorder.How does H.264 Pro Recorder know which input connections to use?H.264 Pro Recorder auto-detects the video input you wish to use, i.e. SDI, HDMI, component, S-Video orcomposite analog video. For this reason, only connect one video source to H.264 Pro Recorder so it canauto-detect which source to use. If you are using analog video, you can also connect analog audio at thesame time as expected. The RS-422 remote connection does not affect video input auto-detection.
24 SupportConsumer Level Analog Audio SignalsCan I use H.264 Pro Recorder with consumer level analog audio signals?Yes and no! H.264 Pro Recorder is designed to work with professional, balanced, analog audio equipment.It does not work directly with unbalanced, consumer level analog audio. In order to capture unbalancedaudio from consumer equipment, a line level converter can be used.It is not necessary to buy an expensive line level converter. Low cost models exist and do a great job.Please refer to the support note Working with Consumer Level Analog Audio Signals which containsmore detailed information including any, inexpensive line level converters that we have tested and havefound to work well.
25 Support5432RS-422 remote device control1H.264 Pro Recorder features an industry standard, Sony compatible, RS-422 deck control port which hasthe correct pin connections for a direct connection to any deck.987You can use pre-manufactured 9 pin cables as long as each end of the cable are wired “pin for pin”where the same pin number on each end of the cable are connected together. If you would like to makecustom cables, e.g. for extra length, please refer to the accompanying wiring diagram.6Receive(–)Receive( )Transmit(–)Transmit( )GroundPins27831, 4, 6, 9Remote pin connections.
26 SupportThere are four steps to getting help.Step 1. Check out the Blackmagic Design web site www.blackmagic-design.com and click on the“Support” page for the latest support information.Step 2.Call your dealer.Your dealer will have the latest technical updates from Blackmagic Design and should be ableto give you immediate assistance. We also recommend you check out the support options yourdealer offers as they can arrange various support plans based on your workflow requirements.Step 3.The next option is to email us with your questions using the web form atwww.blackmagic-design.com/support/contactStep 4.Phone a Blackmagic Design support office. Check our web site for current support phonenumbers in your area. www.blackmagic-design.com/company.Please provide us with as much information as possible regarding your technical problem andsystem specifications so that we may try to respond to your problem as quickly as possible.
27Connection Diagrams
28 Connection DiagramsComponent Analog Video ConnectionsH.264 Pro Recorder’s analog video BNC connectors can be used for component analog video capture,in high definition or standard definition.YComponent video inputB-YR-Y
29 Connection DiagramsS-Video Analog ConnectionsH.264 Pro Recorder’s analog video BNC connectors can be used for S-Video analog video capturein standard definition. While some analog decks provide S-Video Y and C ports using two BNCconnectors, other analog equipment uses a single S-Video connector. A simple S-Video to dual BNCadapter cable (not included) can be used for S-Video capture as illustrated below.
30 Connection DiagramsComposite Analog Video ConnectionH.264 Pro Recorder’s analog video BNC connectors can be used for NTSC/PAL capture in standard definition.Composite video input
31 Connection DiagramsBetacam SP analog deckThis example shows H.264 Pro Recorder connected to an analog deck for component analog videoand audio capture from the deck.VIDEO INPUTVIDEO OUTPUTREF. VIDEOAUDIO INPUTVIDEOCOMPONENT 2S VIDEOCH-1CH-2COMPONENT 2VIDEOS VIDEOCOMPONENT 1AUDIO OUTPUTCOMPONENT 1CH-1TIME CODEINOUTCH-2MONITORAUDIOREMOTETBC REMOTE
32 Connection DiagramsSDI digital deckThis example shows H.264 Pro Recorder connected to a standard definition digital deck for capturefrom the SDI deck.ANALOG VIDEO I/OREF VIDEODIGITAL AUDIO I/O (AES/EBU)INVIDEO ININSDI OUTPUTSDI INPUTOUTOUTAUDIO INVIDEO OUTOUT1COMPONENT VIDEOINOUTVIDEO CONTROLTIME CODEIN2OUT3CH-1CH-2CH-3CH-4CH-1CH-2CH-3CH-4CONTROL PANELAC INREMOTE - INAUDIO OUTS VIDEOREMOTE - OUTINOUTMONITOR AUDIO
33 Connection DiagramsSony HDCAM SR deck in 4:2:2This example shows H.264 Pro Recorder connected to a Sony HDCAM SR series digital deck in YUV4:2:2 HD mode for capture from the HD-SDI deck.ANALOG I/ODIGITAL I/O (AES/EBU)AUDIO OUTPUTCH1CH2CH3MONITOR CH5/6CH7/8CH5/6CH7/8CH9/10CH11/12CH9/10CH11/12HD SDI INPUTFC OUT BINPUTMONITORA1B INPUTB(OPTION) MONITOR2OUTHD REF OUT1ININPUT2TIME CODEINDIGITAL I/OREF INPUT12AMONITORASD OUTSYNCREMOTE 2 PARALLEL I/O (50P)OUT2HD SDI OUTPUT1ACOMPOSITE(MONITOR)REMOTE
11 WelcomeBlackmagic Media Express Media Express overview Blackmagic Media Express is a sophisticated software application which enables H.264 Pro Recorder users to capture video and audio to industry standard MP4 files with frame accurate RS-422 device control. It automatically