Transcription
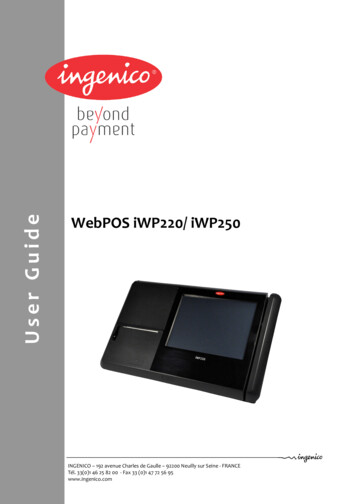
User GuideWebPOS iWP220/ iWP250INGENICO – 192 avenue Charles de Gaulle – 92200 Neuilly sur Seine - FRANCETél. 33(0)1 46 25 82 00 - Fax 33 (0)1 47 72 56 95www.ingenico.com
Contents1. Introduction 32. Unpacking 33. Recommendations 43.1. Security 43.2. Security of your terminal 43.3. CE standard compliance marking 43.4. FCC compliance 53.4.1. FCC Statement 53.4.2. FCC RF Radiation Exposure Statement 53.5. Main Characteristics 64. Installation and connection 74.1. Positioning the terminal 74.2. Support foot assembly 74.3. Three position available 74.4. Connections 84.5. Installing the iWP220/iWP250 – Cable fixing 84.5.1. Connect cables 84.5.2. Close the shield cover 94.5.3. Remove the shield cover 94.6. Installing Micro SD Memory and SIM 94.7. Reset button location. 105. Installing a paper roll 115.1. Open the cover paper compartment 115.2. Installing a paper roll 116. Installing a second screen 126.1. Following steps 127. Daily use 147.1. Using card 147.1.1. Reading a magstripe card 147.1.2. Contactless (optional) 147.2. Led Indicators 157.3. Login sequence 168. Maintenance 178.1. Paper roll 178.2. Cleaning of the terminal 188.3. Transport and storage 188.4. Troubleshooting 188.5. End of life 19WebPOS iWP220/ iWP250 user guide 9000002528 R11 000 01/9262/20Copyright 2009 IngenicoAll rights reserved
1. IntroductionThank you for choosing a Web Point Of Sale IngenicoWe recommend you to read carefully this installation guide: It gives you the necessaryinformation about safety precautions, unpacking, installation, and maintenance of yourterminal.WARRANTY / SECURITYTo benefit from the guarantee-related product, and to respect the security, we ask you touse only the power supply delivered in box with the product, entrusting maintenanceoperations only to an authorized person.Failure to comply with these instructions will void the manufacturer’s responsibility.2. UnpackingADVICECarefully preserve the packaging of the iWP220/iWP250. It must be reused whenever theterminal is shipped.According to the model, the following items are included in the iWP220/iWP250 box(including optional accessories): The iWP220/iWP250 terminalThe desktop power supply with its cable connection (according to the nationalneeds).Paper rollShield CoverThis installation guideShield CoverUser guideiWP220/iWP250terminaldesktop power supplyCAUTIONThe power supply unit provided with your equipment is specially designed for IngenicoiWP220/iWP250 terminals. Do not use any other power supply.WebPOS iWP220/ iWP250 user guide 9000002528 R11 000 01/9263/20Copyright 2009 IngenicoAll rights reserved
3. Recommendations3.1.SecurityPower on/Power downTo power on or power down the iWP220/iWP250 connect or disconnect the power supplyfrom the electric outlet.Lithium batteryThe iWP220/iWP250 is fitted with a lithium battery, which is not accessible to the user. Onlya qualified technician may be authorized to open the unit and change this component.Electrical power supply networkProvide an electrical outlet:- located near the equipment and easily accessible- which meets the standards and regulations in the country of use.- The terminal iWP can be connected to a power distribution system of the IT type.Cable shield coverThe cable shield cover is located under the terminal (see chapter “4.5 Installing theiWP220/iWP250 – Cable fixing”) must be in place during normal operation of the terminal.3.2. Security of your terminalUpon receipt of your terminal you should check for signs of tampering of the equipment. Itis strongly advised that these checks are performed regularly after receipt. You shouldcheck, for example: that there is no evidence of unusual wires that have been connected toany ports on your terminal or associated equipment, or any other part of your terminal.Such checks would provide warning of any unauthorized modifications to your terminal,and other suspicious behavior of individuals that have access to your terminal.You are strongly advised to ensure that privileged access to yours is only granted to staffthat have been independently verified as being trustworthy.3.3. CE standard compliance markingCE standard compliance marking certifies that the product stipulated below: iWP. complies with the basic requirements of European Directive 1999/5/CE, known as the«R&TTE Directive» concerning Radio Frequency equipment and telecommunicationsterminals with respect to:– Health and safety protection of the user and all other persons– EMC protection conforms to the following harmonized standards :– IEC/EN 60950-1: Electrical safety of data processing equipment including electricaloffice equipment. Issue dec 2001– EN 55022: Data processing equipment – Radioelectric disturbance characteristics Limits and measurement methods. Issue 1998 / A1-2000/A2-2003– EN 55024: Data processing equipment – Immunity characteristics - Limits andmeasurement methods. Issue 1998 A1- 2001 A2- 2003 complies with the following specification:– EN 301511 : Harmonized stand for mobile– EN 300328 : (BT WLAN) Electromagnetic compatibility and Radio Spectrum– EN 300330 : NFC Electromagnetic compatibility and Radio SpectrumWebPOS iWP220/ iWP250 user guide 9000002528 R11 000 01/9264/20Copyright 2009 IngenicoAll rights reserved
3.4. FCC complianceThe FCC IDs for this model are: iWP220 : XKBIWP220 iWP250 : XKBIWP2503.4.1. FCC StatementThis equipment has been tested and found to comply with the limits for a class B digitaldevice, pursuant to part of the FCC rules. These limits are designed to provide reasonableprotection against harmful interference in a residential installation. This equipmentgenerates uses and can radiate radio frequency energy and, if not installed and used inaccordance with the instructions, may cause harmful interference to radio communications.However, there is no guarantee that interference will not occur in particular installation. Ifthis equipment does cause harmful interference to radio or television reception, which canbe determined by turning the equipment off and on, the user is encouraged to try tocorrect the interference by one or more of the following measures: Reorient or relocate the receiving antenna Increase the separation between the equipment and receiver Connect the equipment into an outlet on a circuit different from that to which thereceiver is connected Consult the dealer or an experienced radio/TV technician for helpThe device complies with part 15 of the FCC rules. Operation is subject to the following twoconditions: This device may not cause harmful interference This device must accept any interference received, including interference that maycause undesired operation of the device.Part 68 of FCC RulesThis equipment complies with Part 68 of the FCC rules and the requirements adopted bythe ACTA. On the bottom of this equipment is a label that contains, among otherinformation, a product identifier in the format US: AAAEQ##TXXXX. If requested, thisnumber must be provided to the telephone company.3.4.2. FCC RF Radiation Exposure StatementADVICEThis chapter concern only the model: iWP250 XKBIWP250This transmitter must not be co-located or operating in conjunction with any other antennaor transmitter.This equipment complies with FCC RF radiation exposure limits set forth for an uncontrolledenvironment. This equipment should be installed and operated with a minimum distance of20 centimeters between the radiator and your body.CAUTION: The user is cautioned that any changes or modification not approved byINGENICO could void user’s authority to operate the equipment.WebPOS iWP220/ iWP250 user guide 9000002528 R11 000 01/9265/20Copyright 2009 IngenicoAll rights reserved
3.5. Main CharacteristicsTerminalWeightabout 1,700 kg without paper rollSize (with foot in middle position)345 x 210 x 160 mm (l x w x h)Serial link2USB A (Host)4USB B (Device)1RJ45 - Lan1RJ11 – Cash Register1Desktop power supply unitWeightapprox 450 g (without mains cable)Sizeapprox 133 x 59 x 35 mm (L x w x h)Class II equipmentPSU2 pole socket 3 AElectrical mains network100-240VAC/50-60 HzMax consumption2.5 A RMSCable lengthPower block cableapprox 1,3 mDisplayTypeGraphical TFT colorDisplay area (active zone)Number of pixelsTechnologyLandscape 8”800 x 600TFT transmissiveBacklightBrightnessContrastLED 150 cd/m²1:450Number of colors262kOnly on iWP250WiFIBluetoothWiFi 802.11 b /gBluetooth v2.0, EDRGPRSContact lessAuto cutterMobile Class B Multi slot Class 10 ( 4 1, 3 2)Type A & Type BYesCAUTION: Do not use metal to touch the screen.WebPOS iWP220/ iWP250 user guide 9000002528 R11 000 01/9266/20Copyright 2009 IngenicoAll rights reserved
4. Installation and connection4.1.Positioning the terminalInstall the terminal on a flat surface, with an easy access to an electrical outlet. Place theterminal away from any heat source and protected from dust, vibrations andelectromagnetic radiations (away from video terminals, PC, anti-shoplifting barriers .).Operating conditionsAmbient temperaturefrom 5 C to 40 CMax relative humidity85% at 40 CStorage conditionsStorage temperature-20 C, 55 CMax relative humidity85% at 55 C4.2. Support foot assembly Insert the foot in the foot support slot of iWP terminal (see slots on connections sketch4.4)And translate the foot with horizontal direction to lock position4.3. Three position available Insert the foot in one of the 3 foot support slots of iWP terminal (see slots onconnections sketch 4.4)WebPOS iWP220/ iWP250 user guide 9000002528 R11 000 01/9267/20Copyright 2009 IngenicoAll rights reserved
4.4. ConnectionsAll connections are on the rear of the terminal protected by a shield cover.4.5. Installing the iWP220/iWP250 – Cable fixing4.5.1. Connect cables2 x RS2323x USBEthernetCash drawer1x USB1x USBSlave fortestingAudio in/outSD/MMCSuspend SIMbutton cardPowersupplySlot for supportfootPerform the following operations : WebPOS iWP220/ iWP250 user guide 9000002528 R11 000 01/9268/20connect the jack to the terminal powersupply connection (see sketch ofconnection above).; Plug cable for the mainpower supply to the main power supplynetwork;Insert the cable in the Locking MechanismCopyright 2009 IngenicoAll rights reserved
4.5.2. Close the cable cover 1To close the cable cover, start by inserting the clips of the cable cover in theirhousing respectively first, as shown on the figure here below, and close the cablecover as indicated by arrow on the figure below.1Profil view4.5.3. Remove the cable cover 1Remove the cable cover by drawing on the clips .Lift the cable cover rearward to remove it, as shown by arrows on the figure.Profil view14.6. Installing SD/MMC Memory and SIM SD/MMC Memory and SIM slots are located under the terminalInsert completely the SD/MMC memory card or SIM in their slot,To remove the SD/MMC Card or SIM card, push on it with your nails.SIMWebPOS iWP220/ iWP250 user guide 9000002528 R11 000 01/9269/20SD/MMCCopyright 2009 IngenicoAll rights reserved
4.7. Reset button location. Reset button is located under the terminal.This button is hidden to avoid unexpected action. Please use a stick to push it.ResetWebPOS iWP220/ iWP250 user guide 9000002528 R11 000 01/92610/20Copyright 2009 IngenicoAll rights reserved
5. Installing a paper rollCAUTIONUse only paper approved by the manufacturer (diameter 80 mm). Use of unsuitable paperis likely to damage the printer of your terminal (see characteristics in “Maintenancechapter”).5.1. Open the cover paper compartmentOpen the paper compartment by pushing the button on the front face and pull thecover to the rear of the terminal.CAUTIONDo not force the cover against end stop edge.5.2. Installing a paper roll Open the cover compartmentInsert the paper roll in the compartment following the directions shown on thefigure below.Unroll the paper out of the compartment and hold it in bottom position.Maintain the paper and close the cover.Press in the middle of the cover to close it.PaperButtonWebPOS iWP220/ iWP250 user guide 9000002528 R11 000 01/92611/20Copyright 2009 IngenicoAll rights reserved
6. Installing a second screen6.1. Following stepsRemove the rubber cap, located in the rear side of the device.Open the paper compartment by pushing the button on the front face and pull thecover to the rear of the terminal.CAUTIONDo not force the cover against stop edge. Introduce the cable and the foot through the hole and rotate the footLock the screen in position.CAUTIONIt is impossible to remove the screen after locking. The next pictures seen the final position.WebPOS iWP220/ iWP250 user guide 9000002528 R11 000 01/92612/20Copyright 2009 IngenicoAll rights reserved
Connect the cable as shown below (1).Place correctly the cable into its different location (2) to avoid paper jam.1222CAUTIONYou have to double check that the paper is free in its location.WebPOS iWP220/ iWP250 user guide 9000002528 R11 000 01/92613/20Copyright 2009 IngenicoAll rights reserved
7. Daily useCAUTIONThese cards are not used for secure payment.7.1.Using card7.1.1. Reading a magstripe cardInsert the card manually in the driver, magnetic stripe facing right.Swipe the card at appropriate speed, to maximize the reading and avoid annoyingrepetitions.7.1.2. Contactless (available on iWP250)Bring the card firmly up to the active zone above the display (at about 1cm). Keep thecard close to the Cless area during the operation.Contactlessactive areaWebPOS iWP220/ iWP250 user guide 9000002528 R11 000 01/92614/20Copyright 2009 IngenicoAll rights reserved
7.2. Led IndicatorsPower indicatorPrinter errorEthernetON indicates that the product is poweredBlinking indicates an error: Cover paper not closed Out of paper Internal printer defaultON indicates LAN connectedBlinking indicates data transfertWiFiON indicates WiFi activatedBluetoothON indicates Bluetooth activatedGPRSON indicates GPRS activatedBlinking indicates data transfertWebPOS iWP220/ iWP250 user guide 9000002528 R11 000 01/92615/20Copyright 2009 IngenicoAll rights reserved
7.3. Login sequenceAfter powering on the device (connect the power supply to the mains) the followingscreens are chained: CAUTIONDo not press the green key until password and username are entered.A username and a password should be introduce (hit the sensitive area)Default username : adminDefault password : adminDo not forget to change the password after first login.If you are the administrator, the following screen is displayed:If no user name and password are entered, the productreverts into user mode.Default screen (no application selected) – no operation isavailable from this screen. User shall then contact theadministrator.Once the final application selected by the administrator is installed, this application isautomatically launched at device power up.WebPOS iWP220/ iWP250 user guide 9000002528 R11 000 01/92616/20Copyright 2009 IngenicoAll rights reserved
8. MaintenanceCAUTIONBefore making any operations of maintenance in the terminal, make sure thatthe power supply is disconnected.8.1. Paper ter80 mm80 mm max. The thermal paper can be deteriorated by poor storage conditions, so werecommend you to avoid:– storage in hot wet places (near to air-conditioner, humidity higher than 85%)– exposure to sunlight or ultraviolet for long periods– contact with organic solvents (solvent type adhesive)– direct contact with materials containing plasticizers (PVC transparentfolders or envelopes)– direct contact with «diazo» papers– direct contact with water– Rubbing or pressing the paper too stronglyManufacturer: NPI (Nippon Paper Group)http://www.np-g.com/e/index.htmlModel: TF50K-R79*80*12 (58g/m²)Manufacturer: Controle Graphique SAModel: Mitsubishi F5041, code 017001182380*80*12 (55g/m²)CAUTIONIn order to benefit from the complete guarantee of the product, only heat sensitized paperapproved by the manufacturer can be used.WebPOS iWP220/ iWP250 user guide 9000002528 R11 000 01/92617/20Copyright 2009 IngenicoAll rights reserved
8.2. Cleaning of the terminalFirst of all, unplug all the wires from the terminal.Good rules for proper cleaning of the terminal are: Use a soft cloth that is very slightly soaked with soapy water to clean the outside ofthe terminal.Do not clean the electrical connections.Do not use in any case, solvents, detergents or abrasive products:Those materials might damage the plastic or electrical contacts.Avoid exposing the terminal to the direct rays of the sun.8.3. Transport and storage Use the original packaging for any unit or stored.Disconnect all cables from the terminal during the transport.8.4. TroubleshootingThe terminal does not turn on or does not connect: Check the power supply cable Check for electrical power networkMagnetic Cards are not read Check that the magnetic card is passed correctly (with magnetic banddirected to the exterior of the terminal) Swipe again the card with the magnetic stripe movement constant and rapid Verify that the magnetic stripe is not damaged, grooved or crackedThe ticket is not printed Check the presence and proper positioning of the paper roll.Possibly adjust the paper roll following instructions present in this manual Check the type of paper used (thermal paper must be used)WebPOS iWP220/ iWP250 user guide 9000002528 R11 000 01/92618/20Copyright 2009 IngenicoAll rights reserved
8.5. End of lifeThe product belongs to the family of electrical and electronic equipment. Therefore, it issubjected to the WEEE directive which requires the collection and the recycling at the endof life product.The Ingenico products present the symbol for the marking of electrical and electronicequipment as required by the WEEE Directive.The crossed-out wheeled bin printed on the product gives the information aboutthe requirement not to dispose of WEEE as unsorted municipal waste and tocollect such WEEE separately.To assure that the product is collected and recycled with respect to the environment, youmust contact your supplier (in defect, contact the Ingenico local office or the commercialhead office in charge of your country on www.ingenico.com, « contact us » page).The abandonment or uncontrolled disposal of waste can cause harm to environment and tohuman health. So, by recycling your product in a responsible manner, you contribute to thepreservation of natural resources and to the protection of human health.WebPOS iWP220/ iWP250 user guide 9000002528 R11 000 01/92619/20Copyright 2009 IngenicoAll rights reserved
“This Document is Copyright 2009 by INGENICO Group. INGENICO retains full copyright ownership,rights and protection in all material contained in this document. The recipient can receive thisdocument on the condition that he will keep the document confidential and will not use its contentsin any form or by any means, except as agreed beforehand, without the prior written permission ofINGENICO. Moreover, nobody is authorized to place this document at the disposal of any third partywithout the prior written permission of INGENICO. If such permission is granted, it will be subject tothe condition that the recipient ensures that any other recipient of this document, or informationcontained therein, is held responsible to INGENICO for the confidentiality of that information.Care has been taken to ensure that the content of this document is as accurate aspossible. INGENICO however declines any responsibility for inaccurate, incomplete or outdatedinformation. The contents of this document may change from time to time without prior notice, anddo not create, specify, modify or replace any new or prior contractual obligations agreed upon inwriting between INGENICO and the user.INGENICO is not responsible for any use of this device, which would be non consistent with thepresent document.All trademarks used in this document remain the property of their rightful owners.”*295011219*Your contactIngenico192 avenue Charles de Gaulle92200 Neuilly sur Seine - FranceTél.: 33 1 46 25 82 00 - Fax: 33 1 47 72 56 95www.ingenico.com
INGENICO - 192 avenue Charles de Gaulle - 92200 Neuilly sur Seine - FRANCE Tél. 33(0)1 46 25 82 00 - Fax 33 (0)1 47 72 56 95 www.ingenico.com
