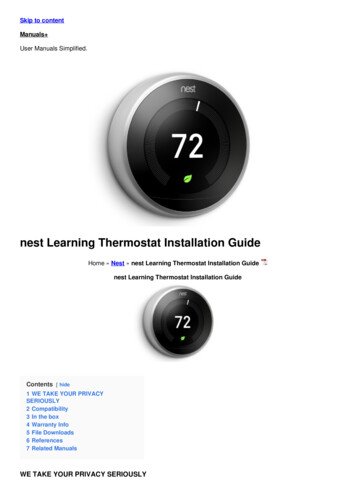
Transcription
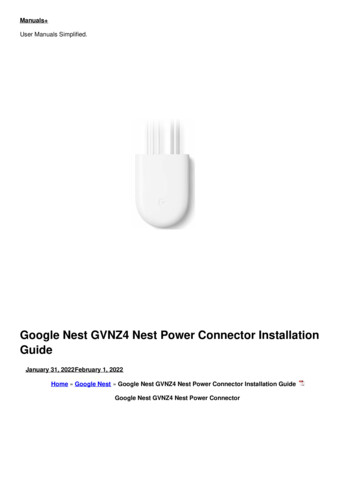
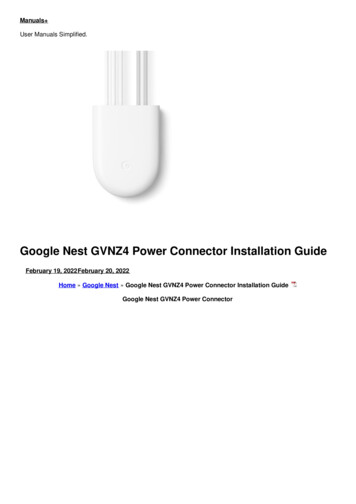
Manuals User Manuals Simplified.Google Nest GVNZ4 Power Connector Installation GuideFebruary 19, 2022February 20, 2022Home » Google Nest » Google Nest GVNZ4 Power Connector Installation GuideGoogle Nest GVNZ4 Power Connector
Contents [ hide1 Basic safety1.1 Technical specifications2 Setup process2.1 Compatibility3 Before you start3.1 Professional installation recommended4 What’s included5 Install your Nest thermostat6 Update your thermostat7 Turn off the power at the circuit breaker8 Open the HVAC equipment cover9 Find the HVAC control board10 Label the thermostat wiring10.1 How to use wire connectors11 Install the power connector12 Close the HVAC cover and turn on thepower13 Confirm power connector installation14 Documents / Resources14.1 Related Manuals / ResourcesBasic safetyRead all installation instructions and the safety and warranty guide before installation.High voltages may be present! Be sure to turn off the power at the breaker panel or unplug your heaterand/or air conditioning unit before attempting installation or disconnecting any wires.Use caution when accessing your heater and/or air conditioning unit. Call a pro if you are not comfortable installingthis product. Installation will require access to wiring, and may require the use of ladders or working in locations withlittle space. Use a helper if possible and avoid installing the device when home alone.Technical specificationsOperating temperature:-22 to 140 F (-30 to 60 C)Voltage rating:20-30 VACIngress protection:IP51Setup process1.2.3.4.5.6.7.Install your Nest thermostatUpdate your thermostatTurn off the power at the circuit breakerOpen the HVAC equipment coverFind the HVAC control boardLabel the thermostat wiringInstall the power connectora. Cooling and heating systemb. Heating-only systemc. Cooling-only systemd. No C-terminal8. Close the HVAC cover and turn on the power
9. Confirm power connector installationCompatibilityNest Thermostat, Nest Thermostat E, Nest Learning Thermostat 3rd gen. 24V VAC systems only. Millivolt or highvoltage systems are incompatible.Before you startWatch an install video at g.co/nest/powerconnectorinstallProfessional installation recommendedConnect with an independent installer who’s trained to install Google Nest products at g.co/nest/installGet advanced instructions at g.co/nest/powerconnectoradvancedWhat’s includedInstall the power connector at your HVAC equipment, not your thermostat. If you have multiple thermostats, install atyour zone controller.*
Box where wires from multiple thermostats connectInstall your Nest thermostatInstall your thermostat before the power connectorUpdate your thermostatNest Thermostat
Go to Settings Version Update and get version 1.1 or laterTroubleshootingYou may see a wiring error. This’ll go away after installing the power connector.Adjust your thermostat target temperature so your system isn’t heating or cooling. This can prevent someerrors.Replace thermostat batteries if promptedNest Learning Thermostat 3rd gen and Nest Thermostat E No need to updateFind additional instructions at g.co/nest/nestpowerconnectorupdateTo check which thermostat you have, visit g.co/nest/whichthermostatTurn off the power at the circuit breakerThis protects you and your equipmentOpen the HVAC equipment cover
Find the HVAC control boardThis is the main circuit board in your HVAC that is wired to your thermostat. If you don’t have a control board, find thethermostat wires.
Label the thermostat wiringTake a photo of the wiring. Your wiring may look different.If your HVAC terminals aren’t labeled, see advanced instructions at g.co/nest/powerconnectoradvanced
How to use wire connectors1. Lift the levers to 90 degrees. The levers are stiff2. Insert the wires and snap down the levers3. Pull gently on the wires to check that they’re secure
Install the power connectorA. Cooling and heating systemWire the power connector to YYour system may have extra wires, like a G wire (to the thermostat) and C and Y wires (to the compressor). Keepthem connected.
Properly terminate any loose wiresOptional: Use the sticky pad to attach the power connector to the panelB. Heating-only systemYour system may have extra wires, like a G wire (to the thermostat). Keep them connected.Properly terminate any loose wiresOptional: Use the sticky pad to attach the power connector to the panel7C. Cooling-only system
Your system may have extra wires, like a G wire (to the thermostat) and C and Y wires (to the compressor). Keepthem connected.Properly terminate any loose wiresOptional: Use the sticky pad to attach the power connector to the panelD. No C-terminalProfessional installation recommendedConnect with an independent installer who’s trained to install Google Nest products at g.co/nest/installFind advanced instructions at g.co/nest/powerconnectoradvancedClose the HVAC cover and turn on the powerTo turn on your power and thermostat, the HVAC cover must be closed. Your system may not turn on with the coveropen.Confirm power connector installationFor Nest Thermostat, go to Settings Equipment to check that your power connector is installedFor Nest Learning Thermostat 3rd gen and Nest Thermostat E, there’s no need to checkFor help, visit g.co/nest/checkpowerconnector
We’re here to helpFor online help and support,visit g.co/nest/helpFor help with accessibility,visit g.co/disabilitysupportDocuments / ResourcesGoogle Nest GVNZ4 Power Connector [pdf] Installation GuideGVNZ4, Power Connector, GVNZ4 Power Connector, ConnectorRelated Manuals / ResourcesGoogle Nest GVNZ4 Nest Power Connector Installation GuideGoogle Nest GVNZ4 Nest Power Connector Safety considerations Warning:High voltages may be present! Be sure to turn Google Nest G953 Doorbell Socket User GuideGoogle Nest G953 Doorbell Socket User Guide Let’s get started Plug yourGoogle Nest Doorbell into a socket. Google GA01317-US Nest Camera with Base User GuideLet's get started Set up your Google Nest Cam Plug your camera into anoutlet Get the Google Google GA01318-FR Nest Smart Doorbell Cameras User GuideGoogle GA01318-FR Nest Smart Doorbell Cameras User Guide Let’s get started Plug your Google Nest Doorbellinto a
Manuals ,homeprivacy
Install your Nest thermostat 2. Update your thermostat 3. Turn off the power at the circuit breaker 4. Open the HVAC equipment cover 5. Find the HVAC control board 6. Label the thermostat wiring 7. Install the power connector a. Cooling and heating system b. Heating-only system