Transcription
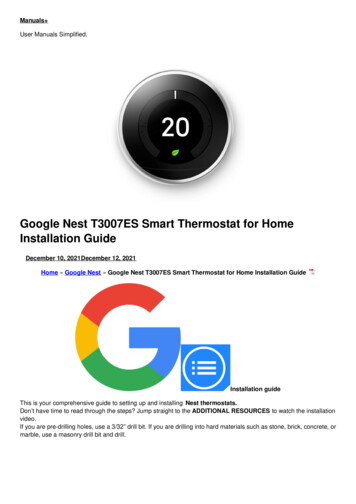
Manuals User Manuals Simplified.Google Nest T3007ES Smart Thermostat for HomeInstallation GuideDecember 10, 2021December 12, 2021Home » Google Nest » Google Nest T3007ES Smart Thermostat for Home Installation GuideInstallation guideThis is your comprehensive guide to setting up and installing Nest thermostats.Don’t have time to read through the steps? Jump straight to the ADDITIONAL RESOURCES to watch the installationvideo.If you are pre-drilling holes, use a 3/32” drill bit. If you are drilling into hard materials such as stone, brick, concrete, ormarble, use a masonry drill bit and drill.
Contents [ hide1 Step 1: Switch off the power2 Step 2: Remove the cover of the existingthermostat3 Step 3: Check the system and get a wiring diagram4 Step 4: Remove jumper wires and save them5 Step 5: Label the wires6 Step 6: Disconnect the wires and remove the base7 Step 7: Mark where screws will go8 Step 8: Attach the Nest base9 Step 9: Connect the wires10 Step 10: Attach the Nest display11 Step 11: Switch power back on12 Step 12: Set up the Nest thermostat13 Entering your Nest Pro ID14 Documents / Resources14.1 Related Manuals / ResourcesStep 1: Switch off the powerBefore exposing any wiring, make sure the power to the system is turned off.An HVAC system can have multiple breakers so make sure to turn them all off.To check that it’s off, change the temperature on the thermostat appropriately for heating or cooling by 5 degrees andwait 5 minutes to see if the system turns on.Step 2: Remove the cover of the existing thermostatOnce you’re sure the power is off, remove the thermostat cover.Some pop off, others need to be unscrewed.Important: Take this opportunity to also take a picture of the current wiring.
Step 3: Check the system and get a wiring diagramLet’s confirm this setup is compatible with a Nest thermostat by visiting the Compatibility Checker. Here you willalso get a customized wiring diagram to show where to install the wires.Incompatible wiring:High voltage wiresIf the thermostat is labeled 120V or 240V or has thick wires with wire nuts, the system is high voltage and isn’tcompatible with the Nest thermostat.Do not connect the Nest thermostat to high-voltage wires. Learn more.Stranded wiresNest thermostats are not compatible with stranded wires. Do not connect the Nest thermostat to stranded wires.Learn more.Step 4: Remove jumper wires and save themRemove the jumper wires and save them. The Nest thermostat doesn’t need them.Have the customer keep the current thermostat, the photo of the wiring, and any jumper wires the current thermostatuses in a safe place. This is in case they move and can reinstall the previous thermostat and take their Nest withthem.Step 5: Label the wiresIf you see two sets of labels on each connector on the old thermostat’s backplate, visit here for assistance.Peel off the labels from the installation guide and attach them to the matching wires on the thermostat. You can alsouse the white labels for additional wires if needed.
Troubleshooting wire labelsIf you have labels like W, Y, or R, use the wiring diagram that you created earlier to choose which labels to attach tothese wires. If you have different wire labels not covered, visit here.Step 6: Disconnect the wires and remove the baseImportant: It’s important that the power to the system is off to avoid blowing a fuse of the equipment. If you blow afuse, the Nest thermostat won’t turn on or may display a power error after installation.After removing the base, gently wrap the wires around a pen or pencil to ensure they don’t fall back into the hole inthe wall.Ask the customer if they’d prefer to patch the wall themselves or if they would rather use the included trim plate (soldseparately for the Nest Thermostat) to help hide scratches or screw holes.Step 7: Mark where screws will go
Use the built-in bubble level to make sure the Nest thermostat is level.Step 8: Attach the Nest baseIf the customer is going to use the optional trim plate, place it on the wall before installing the Nest base.Tip: The Nest trim plate can be painted to match the color of the wall. If the customer wants this, make sure it’spainted before installation. This is to avoid getting paint on the wiring, Nest base, or the thermostat display.Pull the wires through the center of the base, then attach them to the wall with the screws.Important: Use a screwdriver, not a power drill to drive in screws for the Nest base. Drills can easily over-tighten thescrews and crack the base and damage its electronics.Use the bubble level to make sure the Nest thermostat is leveled.The Nest screws are self-tapping, so there’s no need to drill into soft materials.If you need to drill into harder things like wood, use a 3/32” or 2.5mm drill bit.
Step 9: Connect the wiresConnect the wires to the Nest thermostat base by following the wiring diagram that you got from the NestCompatibility Checker.Press down on the connector button and insert the wire as far as it will go in, then release the button.The connector button should stay down. This confirms that the wire is properly seated.If the button doesn’t stay down, take the wire out, straighten it, and put it back in as far as it will go. You may need tostrip the end of the wire to make sure enough copper is exposed.Important: Do not put more than one wire in each connector on the Nest base.Important: Do not connect any “spare” wires to your Nest thermostat that were not connected to your old thermostat.Only use the wires on your Nest wiring diagram.
After all the wires are securely connected, push them down toward the wall to make sure they’re flush with the base.If your wires stick out too far, they can keep your thermostat display from connecting properly.Step 10: Attach the Nest displayHold the display so the Nest logo is right-side up. Line up the pin connector on the back of the display and push itonto the base until it clicks into place.Tip: If you don’t hear the display click, use your thumb to push the wires further into the wall. This will make sure thewires aren’t stopping the display from connecting to the base.Step 11: Switch power back on
After turning the power back on, the Nest thermostat should power on automatically. If it doesn’t turn on, you mightsee a blinking red light to indicate that the battery is charging.Wait for the battery to charge or check this article for troubleshooting steps.Step 12: Set up the Nest thermostatAfter it’s finished starting up, the Nest thermostat will guide the customer through setup. With the Nest LearningThermostat and Nest Thermostat E, setup is completed through the Nest app, while the Nest Thermostat uses theGoogle Home app.Customers use the app to tell the thermostat a few basics about their home and their heating and cooling system so itcan start working efficiently for them immediately.For more on setting up visit here for the Nest Learning Thermostat and Nest Thermostat E or visit here for the NestThermostat.Entering your Nest Pro IDAdding your Nest Pro ID to the customers’ thermostats gives them easy access to you if they ever need help.When installing a Nest thermostat, the Pro Setup section will ask you if you’d like to enter your Nest Pro ID. SelectPRO when asked if you are a PRO or HOMEOWNER, and follow the onscreen or in-app instructions.*If you’re not already signed up as a Nest Pro, go to g.co/nest pro to sign up.If the thermostat is already installed, on the Nest Learning Thermostat and the Nest Thermostat E, press the ring toaccess the main menu, turn to SETTINGS and press the ring again to select. Then turn the ring to NEST PRO andpress to select. The thermostat will ask if you want to add your information.
2020Confidential and ProprietaryDo not distributeDocuments / ResourcesGoogle Nest T3007ES Smart Thermostat for Home [pdf] Installation GuideT3007ES, Smart Thermostat for Home, T3007ES Smart Thermostat for Home, Thermostat forHome, Smart ThermostatRelated Manuals / Resourceshama 00181531 Wall Holder for Google Home/Nest Mini InstructionManualhama 00181531 Wall Holder for Google Home/Nest Mini Instruction ManualPackage Contents Speaker Wall Mount Installation kit (A1) SALUS MS600 Smart Home Motion Sensor User GuideSALUS MS600 Smart Home Motion Sensor Introduction MS600 is a batterypowered motion sensor that can detect movement. HomeSeer HS4-Pi HomeTroller Pi Smart Home Hub Installation GuideHomeSeer HS4-Pi HomeTroller Pi Smart Home Hub Installation GuideHomeSeer HS4-Pi Install Guide This guide will allow you ezlo 850010800127 Smart Home Hub with ZWave User GuideSuperior home control, sleek design & cutting-edge techonology. Resetbutton & LED Behavior guide Details The reset button Manuals ,
homeprivacy
compatible with the Nest thermostat. Do not connect the Nest thermostat to high-voltage wires. Learn more. Stranded wires Nest thermostats are not compatible with stranded wires. Do not connect the Nest thermostat to stranded wires. Learn more. Step 4: Remove jumper wires and save them Remove the jumper wires and save them.