Transcription
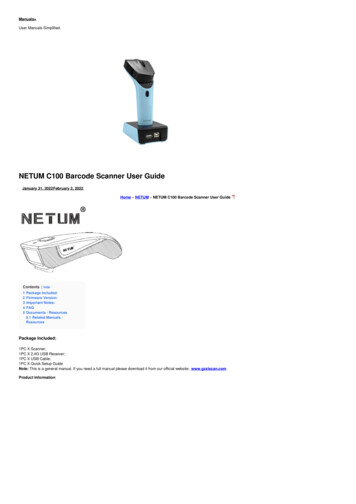
Manuals User Manuals Simplified.NETUM C100 Barcode Scanner User GuideJanuary 31, 2022February 2, 2022Home » NETUM » NETUM C100 Barcode Scanner User GuideContents [ hide12345Package Included:Firmware Version:Important Notes:FAQDocuments / Resources5.1 Related Manuals /ResourcesPackage Included:1PC X Scanner;1PC X 2.4G USB Receiver;1PC X USB Cable;1PC X Quick Setup GuideNote: This is a general manual. If you need a full manual please download it from our official website: www.gzxlscan.comProduct Information
Firmware Version:The firmware version will be displayed by scanning “ SW#VER”.Barcode ProgrammingNotum barcode scanners are factory programmed for the most common terminal and communications settings. If you need to change these settings, programming is accomplished byscanning the bar codes in this guide. An asterisk (*) next to an option indicates the default setting.Important Notes :Many command barcodes only work with scanners in a particular connection mode. Please pay attention to the below symbol when you scan the command barcodes.Command barcodes only apply to scanner work via Bluetooth connection.Command barcodes only apply to scanner work via Wireless Connection.Command barcodes only apply to scanner work via USB Wired ConnectionConnection WayThe scanner can be connected to your device via Bluetooth, USB receiver, or USB cable, you can choose one of the connection ways to connect the scanner with your device.Working Via USB CableGet Started: Connect the scanner with your device via USB cable. If you use a US keyboard, it’s plug-and-play. If you use other types of keyboard, please refer to “keyboard language” toconfigure the keyboard language before you use it.Working Via USB Dongle (Wireless Mode)Get Started: Plug the USB dongle on your computer. If you use a US keyboard, it’s plug-and-play. If you use another type of keyboard, please refer to “keyboard language” to configure thekeyboard language before using it.Working Via BluetoothGet Started: Scan “Working via Bluetooth”, pairing the Bluetooth. US Keyboard is set by default if you use other types of keyboards please configure keyboard language before you useit.Important Notes:Make sure the device is in range with Bluetooth turned on.Pressing the scan button will initiate the attempts to connect.If a connection is made, the blue light will stop blinking and turn solid.If a connection is not made after several attempts, the scanner will emit a long beep (and the blue light will turn off).Bluetooth working channel is not set by default. If you want to work via Bluetooth, you have to scan the command barcode of “Working via Bluetooth” before pairing. If you want to shiftfrom Bluetooth working channel to RFWireless channel, you have to scan “ RF Wireless Transmit” then plug the USB receiver into your device.Basic Mode (HID) (default)NO software installation is neededConnects to most devices
Scanner interacts with host device like a keyboardApplication Mode (Apple Speciic Serial Profile)For Android or WindowsSoftware installation is requiredIf you have an application that supports this is the mode recommendedApplication Mode (Serial Port Pro ile)For iOS DevicesIf you have an iOS application that supports our Scanners this is the mode to useImportant Notes:If you want to shift from HID to SPP or BLE just scan the Corresponding command barcode. If you want to shift from SPP or BLE to HID mode,Bluetooth” turn off the Bluetooth scan command barcode of HID Open the Bluetooth re‐pair it.first ignore (or delete) “NetumTransmission Speed Via Bluetooth ConnectionScanning the appropriate barcode below will change the Bluetooth transmit speed.USB DONGLE AS HID‐KBWWhen you plug the USB dongle to your device, the USB HID‐KBW feature will be enabled by default. Then scanner’s transmission will be simulated as USB keyboard input. It works on aPlug and Play basis and no driver is required.USB DONGLE AS VIRTUAL COMUSB COM Port EmulationIf you connect the scanner to the Host via a USB dongle, scanning “USB COM ort Emulation” will allow your device to receive data in the way as a serial port does.USB HID‐KBWWhen the scanner is connected to your device via USB cable, the USB HID‐KBW feature will be enabled by default. Then scanner’s transmission will be simulated as USB keyboard input. Itworks on a Plug and Play basis and no driver is required.USB COM Port EmulationIf you connect the scanner to your device via USB cable, scanning “USB COM Port Emulation” will allow your device to receive data in the way as the serial port does.
Keyboard LanguageFor example, If you use a French Keyboard, scan the command barcode of “French keyboard ”. If you use a US keyboard you can ignore this step.Working ModeIf you are heading for a working area that lies outside the Bluetooth signal range, you may activate the scanner’s store mode, following the steps described below. Under this mode, allscanned data will be stored directly into the buffer memory of the device. Furthermore, data entries will be permanently saved in the buffer memory prior to the manual upload into theworking station, so that you may upload them when you are near your working device.Idle TimeThe time period set for the scanner from idle to sleep
Beep gethebeepvolume.Function Key MappingWhen Function Key Mapping is enabled, function characters are sent over the keypad.LED Activity/Beep Pattern/Indication under different Connections2.4G RF Wireless ConnectionBluetooth LED ActivityBeep PatternRead indicator LED Activity (Square Shape)IndicationWorking ModeNo beepOFFBeep OnceBlue LED ON and then OFF White LEDBeep OnceON and then OFF OFFBeep OnceOFF3 BeepsOFFBlue LED ON and then OFFBlue LED ON and then OFFBlue LED ON and then OFFRed LED Flash Three Times and Then OFFSleeping/Power OFFWake up from Sleep Mode successfulscanGo to sleepData transmit failedNormal ModeWhite LED ON and then OFFBlue LED ON and then OFF, Green LED Flashingsuccessful scanStore ModeBeep OnceBluetooth ConnectionBluetooth LED ActivityBeep PatternRead indicator LED Activity (Square Shape)IndicationWorking ModeOFFBlue LED ON and then OFF Blue LEDONBlue LED FlashingSolid Blue LED (No Flashing)No beepBeep OnceBeep OnceBeep OnceBeep OnceOFFBlue LED ON and then OFFBlue LED ON and then OFFOFFBlue LED ON and then OFFSleeping/Power OFF Go tosleep Modesuccessful scanNormal ModeBlue LED Flashing3 Beeps 1Red LED Flashing 3 times and then OffData transmit failedBlue LED ON and then OFFBeep OnceBlue LED ON and then OFF, Green LED Flashingsuccessful canCharge PowerBluetooth PairingBluetooth PairedStore Mode
Bluetooth LEDActivityBeep PatternRead indicator LED Activity (Square Shape)IndicationOFF5beepsRED LED flashing 5 timesLow power warningOFFNo beepRED LED ONCharging PowerOFFNo beepGreen LEDONfull chargeWorking ModeDownloadsThis is a general quick setup guide applying for Model C750, C990 and C740. Full manual for above models are available to be downloaded from our oficial website.https://gzxlscan.com/downloads/FAQ1. Some barcodes cannot be read, why?a. Dirty or unclear barcodes might not be read.b. The possible reason is that the setting for some barcode types not commonly used is off by default. You need to activate a specific barcode type to get it to work. Please contact us forhelp or you may go to our official website ”www.gzxlscan.com” to download the complete manual and then refer to the section of “Symbologies”.2. How to change terminator to TAB?Please refer to the section of “Terminator configuration” from the full manual downloaded from our official3. Are there any barcodes for applying or removing prefixes www.gzxlscan.com”website.suffixes?Yes, you may go to our officialwebsite” www.gzxlscan.com” to download the complete manual, refer to the section of“ prefix and4. How to solve the messy code problem encountered while using other foreign languages?The default language is English. Please refer to “Keyboard Language” to change the language.5. Why scanner can not read the Italy Pharmacy code?5. Why scanner can not read the Italy Pharmacy code?suffix” or turn to customer service for help.Download the full manual from our oficial website according to the scanner’s model number, refer to the section of Code32 then scan “Enable Code32” to enable the scanner to readItaly pharmacy code.6. Why scanner can not read add-on 2 or 5 codes?Download the full manual from our oficial website according to the scanner’s model number, refer to the section of ADD-On code and scan the appropriate command barcode to enablethe scanner to read it.7. Why scanner can not read DataMatrix GS1 in the correct format?Scan “Enable Function Key Mapping” from this manual will enable the scanner to output a group separator.FCC WarningThis device complies with Part 15 of the FCC Rules. Operation is subject to the following two conditions:(1) This device may not cause harmful interference, and (2) this device must accept any interference received, including interference that may cause undesired operation.NOTE 1: This equipment has been tested and found to comply with the limits for a Class B digital device, pursuant to part 15 of the FCC Rules. These limits are designed to providereasonable protection against harmful interference in a residential installation. This equipment generates uses and can radiate radio frequency energy and, if not installed and used inaccordance with the instructions, may cause harmful interference to radio communications. However, there is no guarantee that interference will not occur in an articular installation. If thisequipment does cause harmful interference to radio or television reception, which can be determined by turning the equipment off and on, the user is encouraged to try to correct theinterference by one or more of the following measures:‐ Reorient or relocate the receiving antenna.‐ Increase the separation between the equipment and receiver.‐Connect the equipment into an outlet on a circuit different from that to which the receiver is connected.‐Consult the dealer or an experienced radio/TV technician for help.NOTE 2: Any changes or modifications to this unit not expressly approved by the party responsible for compliance could void the user’s authority to operate the equipment.Note:Please do not hesitate to contact us if you need any other configurations.Contact InformationFor customization or price inquiry:Tel. 86‐20‐6626‐0708Whatsapp: 86‐188‐2626‐1132Email: netum004@gzxlscan.comWebsite: www.gzxlscan.comFor aftersales service:Tel. 86‐20‐6626‐0708Whatsapp: 86‐188‐2626‐1132Email: service@gzxlscan.comWebsite:wwwgzxlscan.comUnit 137, The Paciic Industry Park, Xintang Town, Zengcheng District,Guangzhou, China/511340Documents / ResourcesNETUM C100 Barcode Scanner [pdf] User GuideC100, 2ANYC-C100, 2ANYCC100, C100 Barcode Scanner, Barcode Scanner, ScannerRelated Manuals / ResourcesAdvanced Barcode Readers T500 User GuideAdvanced Barcode Readers T500 CONFIGURATION GUIDE T500 www.codecorp.com YouTube.com/codecorporationConfiguration barcodes generated based on current firmware versions D036897 EPSON Document Scanner User GuideEPSON Document Scanner User Guide 1 Connect your computer to the scanner with the USB cable. If an
SOCKET Barcode Scanner User GuideSOCKET Barcode Scanner User Guide CHARGE THE SCANNER Use an electrical wall outlet to charge the scanner.The socket mobile BARCODE SCANNER User GuideGET STARTED WITH YOUR BARCODE SCANNER Set up your scanner with Socket Mobile Companion App EasyPairing Check Manuals ,homeprivacy
NETUM C100 Barcode Scanner User Guide January 31, 2022February 2, 2022 Home » NETUM » NETUM C100 Barcode Scanner User Guide Contents [ hide 1 Package Included: 2 Firmware Version: 3 Important Notes: 4 FAQ 5 Documents / Resources 5.1 Related Manuals / Resources Package Included: 1PC X Scanner; 1PC X 2.4G USB Receiver; 1PC X USB Cable; 1PC X .