Transcription
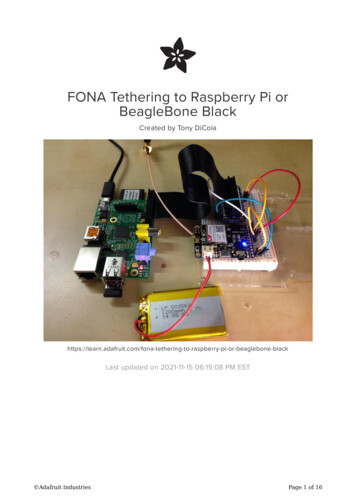
FONA Tethering to Raspberry Pi orBeagleBone BlackCreated by Tony -raspberry-pi-or-beaglebone-blackLast updated on 2021-11-15 06:15:08 PM EST Adafruit IndustriesPage 1 of 16
Table of ContentsOverview3 Terminology Requirements33Wiring4 Raspberry Pi BeagleBone Black45Setup6 6778Raspberry PiBeagleBone BlackSoftware SetupPPP ConfigurationUsage11 Automatic PPP Connection On Boot15 Adafruit IndustriesPage 2 of 16
OverviewDo you need the freedom to access the internet from almost anywhere with yourRaspberry Pi or BeagleBone Black? Perhaps you're building the next great internet ofthings hack but need that crucial link to the internet, what do you do? Why not use thesame cellular phone data network that smartphones use to access the internet! WithAdafruit's FONA (http://adafru.it/1946) you can tether your Raspberry Pi orBeagleBone Black to the internet through a GPRS cellular data connection and accessthe internet from anywhere with cell phone reception!TerminologyFirst some quick definitions so you can be familiar with the terminology in this guide: GSM (https://adafru.it/dFt) or 'Global System for Mobile Communications' is astandard for second generation or 2G cellular phone networks. The GSMstandard replaced the 1st generation analog cell phone networks a number ofyears ago (remember those classic 'brick' analog cell phones (https://adafru.it/dFu)?). Although GSM is now an old standard (most smartphones you buy todaysupport 4th generation 4G or LTE networks), GSM networks are still prevalentand available almost anywhere around the world. GPRS (https://adafru.it/dFv) or 'General Packet Radio Service' is a standard forsending data over a GSM cellular network. FONA supports a 2G GPRS dataconnection such as that offered by the T-Mobile network in the United States(unfortunately AT&T doesn't support 2G GPRS anymore). PPP (https://adafru.it/dFw) or 'Point-to-Point Protocol' is an old standard forconnecting a computer to a network through a serial link. You might have usedPPP to connect your computer to the internet through a serial modem or DSLconnection years ago! With FONA a PPP connection can be created to talk tothe GPRS network through FONA's serial connection with your hardware. APN (https://adafru.it/dFx) or 'Access Point Name' is a name to identify thegateway between a GPRS network and the internet. You will need to find theAPN for the cellular network you're using with FONA. Check the cell provider'swebsite, material that came with the SIM card, or even call the provider'ssupport line to get the APN value.RequirementsNext make sure you have the following before following this guide: FONA (http://adafru.it/1946) and supporting hardware including antenna andbattery. Adafruit IndustriesPage 3 of 16
Raspberry Pi or BeagleBone Black NOTE: Make sure your Pi is running the Raspbian (https://adafru.it/dpb) orOccidentalis (https://adafru.it/dvg) operating system. For the BeagleBoneBlack you must be running the Debian (https://adafru.it/dvh) or Ubuntuimage. SIM card with 2G GSM service including access to your cell provider's 2G GPRSdata network. Access to data is typically an extra cost on top of your cellprovider's voice service. Also be aware that your provider must support a 2GGPRS network--some providers only support 3G EDGE or faster connections,when in doubt ask the provider! APN used by your cell provider's data network. Ask your provider for this value ifit wasn't given to you. Typically the APN is a short string like 'internet'. For the cell network I'm using the APN is 'web.omwtoday.com' (https://adafru.it/dFy). Breadboard and hookup wires to connect the FONA to your hardware.Be sure to read the FONA guide (https://adafru.it/dFz) for an overview of theassembly, connections, and usage of FONA before getting started.Be very aware of the costs and policies involved with accessing your cellularprovider's data network! Some providers charge very high fees at the kilobyte ormegabyte level which can quickly add up to expensive phone bills! Beabsolutely sure you won't incur expensive roaming data charges. Also be awarethat not all providers allow tethering the data connection to a computer, and youmight be kicked off their network. When in doubt ask your provider what is andisn't allowed!WiringConnect FONA to your Raspberry Pi or BeagleBone Black by following theappropriate steps below.Raspberry PiWire FONA to the Raspberry Pi as follows. If you aren't familiar with the pinout of theRaspberry Pi, see this page for an image of the header pins and their functionality (https://adafru.it/cbG). FONA GND to Raspberry Pi ground. FONA Vio to Raspberry Pi 3.3 volt power. Adafruit IndustriesPage 4 of 16
FONA GND to FONA Key. Note that this wiring will force FONA to stay active all the time theRaspberry Pi has power. FONA TX to Raspberry Pi RXD. FONA RX to Raspberry Pi TXD.BeagleBone BlackWire FONA to the BeagleBone Black as follows. If you aren't familiar with the pinout ofthe BeagleBone Black, see the Headers section of this page (https://adafru.it/dvk) forimages of the pins. FONA GND to BeagleBone Black ground. FONA Vio to BeagleBone Black 3.3 volt power VDD 3V3 pin. FONA GND to FONA Key. Note that this wiring will force FONA to stay active all the time theBeagleBone Black has power. FONA TX to BeagleBone Black UART4 RX pin P9 13. If you aren't familiar with pin numbers on the BeagleBone Black, read theGPIO guide (https://adafru.it/dCI). FONA RX to BeagleBone Black UART4 TX pin P9 11. Adafruit IndustriesPage 5 of 16
SetupFirst you will need to do a little setup specific to your development board. Follow thesteps below that are for your specific board. Note: You will need to have your boardconnected to the internet for the following steps so software and configuration can bedownloaded.Raspberry PiOn the Raspberry Pi you will need to disable the kernel's use of the hardware serialconnection. By default when the Raspberry Pi boots it will use the serial connection toprint messages from the kernel which will confuse FONA. However it's easy to disablethis serial usage by running Andrew Scheller's handy serial console script (https://adafru.it/dFA). Connect to your Raspberry Pi's command terminal and execute:sudo wget ster/rpi-serial-console-O /usr/bin/rpi-serial-console && sudo chmod x /usr/bin/rpi-serial-consolesudo rpi-serial-console disableOnce the commands above are run, reboot your Raspberry Pi and connect again tothe command terminal.For reference, when you're done using FONA and wish to enable the kernel serialconsole again you can run the script with:sudo rpi-serial-console enable Adafruit IndustriesPage 6 of 16
BeagleBone BlackOn the BeagleBone Black you'll need to enable a serial UART in the device tree. Bydefault the BeagleBone Black uses its serial UART ports for GPIO and other uses.However by loading a device tree overlay (https://adafru.it/dp6) you can enable aserial UART.The BeagleBone Black supports up to 4 serial UARTs (https://adafru.it/dvk). In thisguide I found it's easiest to use UART4 and will describe its usage below.The best way to enable UART4 is to modify the uEnv.txt file so the UART4 device treeoverlay is loaded automatically at boot. With the BeagleBone Black connected to yourcomputer through its USB mini connection, open the 'boot' USB storage device. Editthe file uEnv.txt on this device and add the following line at the bottom on a new line:capemgr.enable partno BB-UART4NOTE: Don't edit uEnv.txt from a Windows machine as it can change line endings andcause the BeagleBone Black to require an operating system reinstall! Instead connectto the BeagleBone Black's command terminal and edit uEnv.txt by following the stepsat the end of the exporting an overlay guide page (https://adafru.it/dEK).Once uEnv.txt has been updated, reboot your BeagleBone Black and verify you cansee a /dev/ttyO4 (that's an upper case O, not a zero) device.Software SetupOn both the Raspberry Pi and BeagleBone Black perform the steps below to installand setup the PPP software (https://adafru.it/dFB).First make sure software is installed by executing the following in a commandterminal:sudo apt-get updatesudo apt-get install ppp screen elinksYou can ignore any warnings about software already being installed.Once the commands above are executed you can test communication with FONA.The screen tool will be used to open the serial connection to FONA and verify FONAresponds to commands. Make sure FONA is wired to your device and turned on (theblue LED is solidly lit and the red LED periodically flashes). Then on a Raspberry Pi Adafruit IndustriesPage 7 of 16
execute:screen /dev/ttyAMA0 115200Or on a BeagleBone Black execute:screen /dev/ttyO4 115200Screen will open the serial port and should show a blank screen. If you see aconnection error double check FONA is wired correctly to your board and turned on,then try again.Now type AT and press enter (you might not see the AT characters echoed back asyou type, don't worry that's ok). You should see FONA respond with OK. If you see theOK response then communication with FONA is working great and you can closescreen. To close screen press Ctrl-A and type :quit and press enter.If you did not see the OK response, double check FONA is wired correctly to yourserial port and is turned on (solid blue LED lit, periodic red flash), then try again. Don'tmove on until you've confirmed you can connect to FONA and get a response from it!PPP ConfigurationNext you can configure PPP by following the steps below to create a new PPP peerconfiguration. The steps below were adapted from Ubuntu's ADSL PPPoE guidemanual configuration by hand (https://adafru.it/dFC) section.In a command terminal execute the following commands to login as root and navigateto the /etc/ppp/peers/ directory:sudo -icd /etc/ppp/peers/Inside the peers directory there are configuration files which define how each PPPconnection is setup. Download an example FONA configuration file called fona byexecuting:wget https://raw.githubusercontent.com/adafruit/FONA PPP/master/fonaNow open the file fona in a text editor by executing:nano fona Adafruit IndustriesPage 8 of 16
You should see a file that looks like the following:# Example PPPD configuration for FONA GPRS connection on Debian/Ubuntu.# MUST CHANGE: Change the -T parameter value **** to your network's APN value.# For example if your APN is 'internet' (without quotes), the line would look like:# connect "/usr/sbin/chat -v -f /etc/chatscripts/gprs -T internet"connect "/usr/sbin/chat -v -f /etc/chatscripts/gprs -T ****"# MUST CHANGE: Uncomment the appropriate serial device for your platform below.# For Raspberry Pi use /dev/ttyAMA0 by uncommenting the line below:#/dev/ttyAMA0# For BeagleBone Black use /dev/ttyO4 by uncommenting the line below:#/dev/ttyO4# Speed of the serial line.115200# Assumes that your IP address is allocated dynamically by the ISP.noipdefault# Try to get the name server addresses from the ISP.usepeerdns# Use this connection as the default route to the internet.defaultroute# Makes PPPD "dial again" when the connection is lost.persist# Do not ask the remote to authenticate.noauth# No hardware flow control on the serial link with FONAnocrtscts# No modem control lines with FONA.localThis configuration file controls the options that will be set by PPPD when the FONAPPP connection is created. You can find a description of all the options in the PPPDman page (https://adafru.it/dFD) if you're curious.Notice the two sections at the top that say MUST CHANGE. The first section controlswhich script is called by PPPD to tell FONA to set up a GPRS connection. This sectionuses the chat command (https://adafru.it/dFE) to send and expect certain strings whencommunicating with FONA.The only thing you must change is the APN value on the connect line. You need tochange the -T **** option at the end to be -T APN value. For example if your APN is"internet" (without quotes), you would change the line to read:connect "/usr/sbin/chat -v -f /etc/chatscripts/gprs -T internet" Adafruit IndustriesPage 9 of 16
The second thing you must change is the configuration of the serial port connected toFONA. Uncomment (remove the preceding #) the /dev/ttyAMA0 line if you're using aRaspberry Pi, or uncomment the /dev/ttyO4 line if you're using a BeagleBone Black.The rest of the settings in the file do not need to be modified. Save the file (press CtrlO then enter in nano), then quit the editor (press Ctrl-X in nano).You might have noticed that the connect line in the PPP peers configurationreferences a specific chat script. To see this configuration open the /etc/chatscripts/gprs file in a text editor to see what it contains. For example execute:nano /etc/chatscripts/gprsYou should see a file like the following:# You can use this script unmodified to connect to cellular networks.# The APN is specified in the peers file as the argument of the -T command# line option of chat(8).# For details about the AT commands involved please consult the relevant# standard: 3GPP TS 27.007 - AT command set for User Equipment (UE).# "NO CARRIER""NO DIALTONE""NO DIAL TONE""NO ANSWER""DELAYED""ERROR"# cease if the modem is not attached to the network yetABORT" CGATT: 0"""TIMEOUTOKOKAT12ATHATE1# CPIN provides the SIM card PIN#OK"AT CPIN 1234"# CFUN may allow to configure the handset to limit operations to# GPRS/EDGE/UMTS/etc to save power, but the arguments are not standard# except for 1 which means "full functionality".#OKAT CFUN 1OKOKTIMEOUTCONNECTAT CGDCONT 1,"IP","\T","",0,0ATD*99#22""You probably don't need to modify this file, but it's good to be aware of its contents incase you need to customize how the GPRS connection is created. The format of thefile is described in the chat man page (https://adafru.it/dFE), but in general the Adafruit IndustriesPage 10 of 16
structure is text to send on the serial connection, followed by whitespace, and then aresult to expect to receive on the serial connection.One thing to note is the commented line ' CPIN provides the SIM card PIN'. If yourSIM card requires a PIN to unlock, uncomment this line and set the PIN value.Save the file if you've made changes, and exit the text editor. You are now doneconfiguring the PPP connection and can exit the sudo interactive root shell byrunning:exitYou should be brought back to a command terminal on your Raspberry Pi orBeagleBone Black as the user you originally connected to the device. You're nowready to test and use the GPRS connection in the next section of the guide.UsageIf you've followed the guide this far you should be at a point where you're ready toenable the GPRS connection. Just to recap, make sure you've connected FONA toyour Raspberry Pi or BeagleBone Black, that you've verified FONA can communicatewith your serial connection, and that you've installed the PPPD software andconfigured it. If you've missed any of these steps make sure to go back to theprevious pages and complete them.Before you test the GPRS connection, first disconnect any wired or wirelessnetworking connections you might already have with your hardware and restart thedevice. This will help ensure there are no issues or confusion over accessing the PPPinterface vs. other network interfaces. You might need to connect a monitor andkeyboard to your hardware to access it when all the network connections aredisconnected (however on a BeagleBone Black you can connect the USB connectionto a computer and access it through its private network connection I found in mytesting).To bring up the FONA GPRS connection and setup a PPP connection, run thefollowing command:sudo pon fonaThe command should exit with no response. Don't worry, behind the scenes PPPDshould be setting up the connection. You can check the system log file to see what Adafruit IndustriesPage 11 of 16
PPPD is doing and if it hit any errors. Execute the following command to show the logfor PPPD:cat /var/log/syslog grep pppdIf the PPP connection was successfully created you should see something like this atthe end of the log file:Jul 8 03:47:40 raspberrypiJul 8 03:47:40 raspberrypiJul 8 03:47:40 raspberrypiJul 8 03:47:40 raspberrypiJul 8 03:47:41 raspberrypiJul 8 03:47:42 raspberrypidefaulting to 10.64.64.64Jul 8 03:47:42 raspberrypiJul 8 03:47:42 raspberrypiJul 8 03:47:42 raspberrypiJul 8 03:47:42 321]:pppd[2321]:pppd[2321]:pppd 2.4.5 started by root, uid 0Serial connection established.Using interface ppp0Connect: ppp0 <--> /dev/ttyAMA0PAP authentication succeededCould not determine remote IP ]:local IPremote IPprimarysecondaryaddress 21.144.145.193address 10.64.64.64DNS address 10.177.0.34DNS address 10.168.185.116You might need to wait a few seconds for the PPP connection to be setup beforechecking the PPPD log.One thing to look for is the flashing of the red LED on FONA--if the GPRS connectionis established the red LED will flash quickly (about twice a second).If you see an error in the PPPD log then there was likely a problem setting up theGPRS connection. You can examine the raw serial communication with FONA bylooking at the chat command log. Execute the following to view the chat log:cat /var/log/syslog grep chatThe most recent lines will be at the end of the file. Look for any kind of error messagethat might indicate something unexpected has happened, like a PIN being required,APN being incorrect, etc. For reference here's what I see when a PPP connection issuccessfully setup with my cell 3:47:4003:47:4003:47:4003:47:4003:47:40 Adafruit [2323]:chat[2323]:chat[2323]:chat[2323]:abort on (BUSY)abort on (VOICE)abort on (NO CARRIER)abort on (NO DIALTONE)abort on (NO DIAL TONE)abort on (NO ANSWER)abort on (DELAYED)abort on (ERROR)abort on ( CGATT: 0)send (AT M)timeout set to 12 secondsexpect (OK)AT M MOK-- got itPage 12 of 16
Jul 8 03:47:40 raspberrypi chat[2323]: send (ATH M)Jul 8 03:47:40 raspberrypi chat[2323]: expect (OK)Jul 8 03:47:40 raspberrypi chat[2323]: MJul 8 03:47:40 raspberrypi chat[2323]: ATH M MJul 8 03:47:40 raspberrypi chat[2323]: OKJul 8 03:47:40 raspberrypi chat[2323]: -- got itJul 8 03:47:40 raspberrypi chat[2323]: send (ATE1 M)Jul 8 03:47:40 raspberrypi chat[2323]: expect (OK)Jul 8 03:47:40 raspberrypi chat[2323]: MJul 8 03:47:40 raspberrypi chat[2323]: ATE1 M MJul 8 03:47:40 raspberrypi chat[2323]: OKJul 8 03:47:40 raspberrypi chat[2323]: -- got itJul 8 03:47:40 raspberrypi chat[2323]: send(AT CGDCONT 1,"IP","web.omwtoday.com","",0,0 M)Jul 8 03:47:40 raspberrypi chat[2323]: expect (OK)Jul 8 03:47:40 raspberrypi chat[2323]: MJul 8 03:47:40 raspberrypi chat[2323]: AT CGDCONT 1,"IP","web.omwtoday.com","",0,0 M MJul 8 03:47:40 raspberrypi chat[2323]: OKJul 8 03:47:40 raspberrypi chat[2323]: -- got itJul 8 03:47:40 raspberrypi chat[2323]: send (ATD*99# M)Jul 8 03:47:40 raspberrypi chat[2323]: timeout set to 22 secondsJul 8 03:47:40 raspberrypi chat[2323]: expect (CONNECT)Jul 8 03:47:40 raspberrypi chat[2323]: MJul 8 03:47:40 raspberrypi chat[2323]: ATD*99# M MJul 8 03:47:40 raspberrypi chat[2323]: CONNECTJul 8 03:47:40 raspberrypi chat[2323]: -- got itJul 8 03:47:40 raspberrypi chat[2323]: send ( M)You can see the log roughly mirrors the commands to send and expect in the /etc/chatscripts/gprs configuration. Notice my network's APN, 'web.omwtoday.com', is sentin the AT CGDCONT command--you should see your APN on that line.Unfortunately cellular providers might have specific restriction or requirements forsetting up a GPRS connection so it's difficult to troubleshoot all possible failures inthis guide. If you're running into errors try to search the web for details on configuringPPP with your provider.If you don't see any errors in the PPPD or chat logs, congratulations your FONA'sGPRS connection should be tethered to your Raspberry Pi/BeagleBone Black! Tocheck that there is a new ppp network interface run the following command:ifconfigYou should see a few interfaces, but in particular there should be a 'ppp0' interface.For example I see:ppp0Link encap:Point-to-Point Protocolinet addr:21.144.145.193 P-t-P:10.64.64.64 Mask:255.255.255.255UP POINTOPOINT RUNNING NOARP MULTICAST MTU:1500 Metric:1RX packets:6 errors:0 dropped:0 overruns:0 frame:0TX packets:7 errors:0 dropped:0 overruns:0 carrier:0collisions:0 txqueuelen:3RX bytes:72 (72.0 B) TX bytes:111 (111.0 B) Adafruit IndustriesPage 13 of 16
If you don't see a ppp0 interface, carefully check the PPPD and chat logs above tomake sure there isn't some error setting up the GPRS connection.Now test pinging adafruit.com with the GPRS connection by executing:ping adafruit.comMake sure you disconnected all other network connections before attempting theping command or else you might actually be sending the ping through your wired/wireless network connection!If the ping is successfull you should see a result like:PING adafruit.com (207.58.139.247) from 21.144.145.193 ppp0: 56(84) bytes of data.64 bytes from vps3.ladyada.net (207.58.139.247): icmp req 1 ttl 45 time 316 ms64 bytes from vps3.ladyada.net (207.58.139.247): icmp req 2 ttl 45 time 275 ms64 bytes from vps3.ladyada.net (207.58.139.247): icmp req 3 ttl 45 time 773 ms64 bytes from vps3.ladyada.net (207.58.139.247): icmp req 4 ttl 45 time 293 msPress Ctrl-C to stop the ping command.If you receive an error like 'unknown host adafruit.com' then your cell provider didn'tprovide a DNS configuration. Try manually adding OpenDNS servers to yourresolve.conf by following these steps (https://adafru.it/dFF).If you receive no response with the ping command, check that your SIM and cellularprovider allows you to access the internet. If possible, try using the SIM in a GSMphone with access to data to check it can access the internet.If the ping command succeeded, now try accessing adafruit.com in a text-based webbrowser. Execute the following command:elinks http://www.adafruit.com/The elinks text-based web browser should open and load adafruit.com. Note thatbecause the browser is text-based you will see a stripped down and minimal versionof Adafruit's web site.Notice the maximum speed of the internet connection is quite slow. Over a 2G GPRSconnection you will only see about 5-10 kilobytes/second of download speed! Thisconnection is far too slow to transfer large amounts of data, however it's perfect fortalking to web services, sending emails, tweets, running a simple server, etc.Press q and enter to close elinks. Adafruit IndustriesPage 14 of 16
Once you've verified you can ping and access adafruit.com then your FONA GPRSconnection should be ready to use however you desire!Remember, your cell phone provider might put limits or extra charges on your datausage so be careful before heavily using the GPRS connection! Also be extra careful ifyour provider charges extra for international or roaming data access--don't be thenext person to rack up a 20,000 cell phone bill (https://adafru.it/dFG)!When you're done with the GPRS connection it's easy to stop it by executing:sudo poff fonaAgain no response will be written to the output, but you can confirm PPPD hasstopped by checking its log file and running ifconfig to confirm the ppp0 interface isgone.Automatic PPP Connection On BootIf you'd like to configure your device to automatically bring up the PPP connectionwith FONA on boot, it's easy to do so by updating the network configuration. Firstmake sure you've verified you can manually bring up the PPP connection in theprevious steps. Also be sure you've disabled the kernel serial console on theRaspberry Pi, or updated uEnv.txt with the BB-UART4 device tree overlay on theBeagleBone Black--skipping either of those steps will fail to bring up the PPPconnection on boot!Edit the /etc/network/interfaces file by executing:sudo nano /etc/network/interfacesAt the bottom of the file add a new interface configuration with the following text:auto fonaiface fona inet pppprovider fonaThis configuration will tell your device to bring up the FONA PPP peer automaticallyon boot. The configuration in /etc/ppp/peers/fona will be used to set up the PPPconnection.Save the file, exit the editor, and reboot your device. As the device boots up, watchthe FONA LEDs to see that the red LED starts flashing quickly to indicate a GPRSconnection is activated. Once the device has finished booting, log in and check the Adafruit IndustriesPage 15 of 16
ppp0 interface is up by running ifconfig. You can also check the PPPD and chat logswith the commands from earlier in the setup. If there are errors, check the logs to seewhat issues might be occuring.If there are no errors, congratulations your device is now configured to automaticallyconnect to the internet through FONA's GPRS connection! Enjoy accessing theinternet from anywhere there is a 2G GPRS cellular connection! Adafruit IndustriesPage 16 of 16
the BeagleBone Black, see the Headers section of this page (https://adafru.it/dvk) for images of the pins. FONA GND to BeagleBone Black ground. FONA Vio to BeagleBone Black 3.3 volt power VDD_3V3 pin. FONA GND to FONA Key. Note that this wiring will force FONA to stay active all the time the BeagleBone Black has power.