Transcription
Raspberry Pi#raspberrypi
Table of ContentsAbout1Chapter 1: Getting started with Raspberry Pi2Remarks2Examples2SD card Setup2Raspberry Pi Installation - Windows2Raspberry Pi Introduction - Hello World in C5Pretext5Hello World - My first program5Login with IPv66Proxy Configuration7Raspberry Pi v2 and v3 Arch Linux Installation --- from Mac or Linux7Chapter 2: Create a scan station with scanbd (Raspbian)ExamplesIntroduction and installation999Configure sane to scan from the network10Configure scanbd to poll the local scanner10Identify the local scanner10Confirm that the local scanner is found by scanbd11What if "found device" doesn't appear ?12Configure xinetd to make scanbm listening on the network12Trigger actions from the scanner buttonsChapter 3: Enable SSH on e SSH using a Windows computer15Use Raspberry Pi as headless system16Chapter 4: Operating systemsIntroduction1818
Examples18Raspbian18Yocto based operating systems18Windows 10 IoT Core18OSMC18LibreELEC18Kali19Credits20
AboutYou can share this PDF with anyone you feel could benefit from it, downloaded the latest versionfrom: raspberry-piIt is an unofficial and free Raspberry Pi ebook created for educational purposes. All the content isextracted from Stack Overflow Documentation, which is written by many hardworking individuals atStack Overflow. It is neither affiliated with Stack Overflow nor official Raspberry Pi.The content is released under Creative Commons BY-SA, and the list of contributors to eachchapter are provided in the credits section at the end of this book. Images may be copyright oftheir respective owners unless otherwise specified. All trademarks and registered trademarks arethe property of their respective company owners.Use the content presented in this book at your own risk; it is not guaranteed to be correct noraccurate, please send your feedback and corrections to info@zzzprojects.comhttps://riptutorial.com/1
Chapter 1: Getting started with Raspberry PiRemarksThis section provides an overview of what raspberry-pi is {it may also be described on StackExchange with the shortened term of "RPi"}, and why a developer might want to use it.It has its own dedicated Stack Exchange site here at: http://raspberrypi.stackexchange.com/.This section provides an overview of why a developer might want to use it.It should also mention any large subjects within raspberry-pi, and link out to the related topics.Since the Documentation for raspberry-pi is new, you may need to create initial versions of thoserelated topics.ExamplesSD card SetupStart by installing the OS on the MicroSD card, either NOOBS or Raspbian, both provided by theRaspberry Pi foundation, available on their site. NOOBS, which stands for New Out Of BoxSoftware, is designed for beginners, and is the easiest to install on your SD card. You can eitherfollow their official instructions, or see below.Format the SD card with a single partition of FAT32, using either the system drive managementtool or a third party tool, such as the SD Association's SD Formatter 4.0, or GParted. Downloadthe NOOBS ZIP file and unzip it. next, copy the files over to the partition that you just created.Ensure that you eject it before disconnecting it.Raspberry Pi Installation - WindowsPretext:These are detailed instructions on how to set up a Raspberry Pi with the Raspbian operatingsystem.These instructions are somewhat Windows specific.Some installation steps may apply to other operating systems as well, but keep the former in mind.Contents RequirementsChoosing an OSInstalling the OSBasic ConfigurationRequirementshttps://riptutorial.com/2
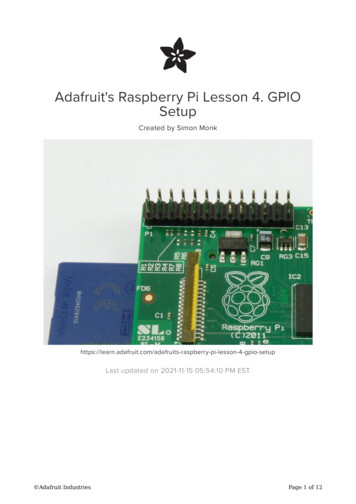
1. Raspberry Pi (version 1, 2 or 3 - any model)2. Power supply (5V, 2000mAh usb adapter - recommended)3. MicroSD card (Class 10 recommended with at least 8GB - see list of compatible cards here:eLinux)4. Computer with SD Card reader (or a USB SD Card reader)5. Monitor / TV with HDMI Port6. HDMI Cable7. USB Keyboard8. Win32 Disk ImagerChoosing an Operating System NOOBSA collection of different operating systems for the Raspberry Pi, it contains Raspbian. Inaddition to Raspbian, NOOBS also includes Pidora, LibreELEC, OSMC, RISK OS, ArchLinux, Windows 10 IOT Core, and a few other choices. It is important to note that not all ofthese choices are available on every model of Raspberry Pi (for example, Windows IOTCore is only available on Raspberry Pi 2 and newer) . Installing any other OS than Raspbianwill require an ethernet connection on your Raspberry Pi. RaspbianThe officially supported OS for the Raspberry Pi, it is a port of the OS known as Debian. Preinstalled with educational software and with a large community - this is the recommendedOS for the Raspberry Pi Windows 10 IOT Core A simplified version of windows specifically designed for IOT (InternetOf Things) devices. It is important to note this is not a full version of windows, and does nothave things user might expect, such as a start menu and the ability to run most Windowsapplications.Installing the Operating SystemSD card1. Connect your SD Card to your computer2. Download the Operating System you have chosen in .img format(It might be compressed in a .zip file, which should be extracted after download)3. Open Win32DiskImager4. Select your SD Card5. Select your OS .img file6. Click WriteRaspberry Pi1. Insert the SD Card into the Raspberry Pi2. Connect your USB Keyboard3. Connect your Monitor/TV4. Connect an Ethernet cable (optional: but recommended!)https://riptutorial.com/3
5. Plug in the USB Power cable in the Raspberry PiOperating SystemIf the OS was written correctly to the SD Card and the OS is a valid ARM Operating System, itshould be installed automatically to the Raspberry Pi - with little to no interaction.(This does however depend greatly on what kind of OS that has been chosen)If you chose NOOBS an interface will show up and you will be able to choose what to install.Basic ConfigurationCommand Line:The command sudoraspi-configgives you access to the Raspberry Pi configuration.Setup Options:1 Expand FilesystemOS2 Change User Password3 Enable Boot to Desktop/Scratchor the command line4 Internationalisation Options5 Enable Camera6 Add to Rastrack7 Overclock8 Advanced Options9 About raspi-config Ensures that all of the SD card storage is available to theChange password for the default user (pi)Choose whether to boot into a desktop environment, Scratch,Set up language and regional settings to match your locationEnable this Pi to work with the Raspberry Pi cameraAdd this Pi to the online Raspberry Pi Map (Rastrack)Configure overclocking for your PiConfigure advanced settingsInformation about this configuration tool After a new and clean installation you are recommended to choose the first option: ExpandFilesystem If you're European and not familiar with the English keyboard layout you can go toInternationalisation Options and change the keyboard language and more. It is recommended to avoid the Overclock menu as a beginner. Especially if you have theRaspberry Pi 3. The RPI 3 is known to get very hot, even if it is not overclocked.If you are thinking of overclocking the RPI 3, please obtain heatsinks or a fan for your board,to keep it from overheating. Enabling SSH access can be done in the Advanced Options menu, the credentials will be thedefault username and password.GUI:Installing Raspbian Jessie automatically boots into a graphical user interface, the aforementionedoptions are presented in the Options menu in the top left corner.It is recommended for beginners to keep using the GUI, but if you bought a Raspberry Pi to learnthe command line. The option to boot into the command line can be found in the Settings menu.NoteChanging settings on the Raspberry Pi usually prompts a restart which happens when you acceptthe changes you've made.https://riptutorial.com/4
Extra InfoDefault Username: piDefault Password: raspberryShutting down your Raspberry Pi is done by pulling the USB power plug.(Choosing shutdown in the Raspbian GUI will simply put the Raspberry Pi in a diminished state,still using power - but less)Restarting the Raspberry Pi is done by simply plugging in the cable after unplugging it.(Unless the reboot option is chosen in the GUI or sudo reboot in the command line.Raspberry Pi Introduction - Hello World in CPretextThis is an introduction to the Hello World program example on the Raspberry Pi written in C.The following example makes use of the command line interface and is set up as a step-by-stepguide.Along with creating a Hello World program, the reader will be introduced to simple linux commandline commands.Note: This introduction was written for beginners.Hello World - My first programFirst step:Making a directory that will contain source code. Locate your home directory by writing the following command cd Make a new folder for your source code mkdir programs(Tip: Linux is case sensitive when managing file and directory names) Change to your new directory cd programsSecond step:Writing your first program.Linux systems offer a great variety of text editors, natively you will find Vim or Nano.This example will make use of the Nano text editor. Create your source code file nano helloworld.c This will open an editor - exiting and saving will create the file in your folder.The following code is the source code for the Hello World program:/* My first program */https://riptutorial.com/5
#include stdio.h int main(){printf("Hello World\n");} After writing the code hit ctrl x to exit the editor, hit y and then enter to save the changes. Write the command ls to check if the file is present in your directory.Third step:Compiling your first program. To compile our source code file helloworld.c we need to use a compiler, we will use theGNU Compiler Collection - also known as GCC. The following command compiles the source code to an executable binary programgcc helloworld.c -o myfirstprogram.binThe source code file is offered as an argument to the GCC compiler and -o defines anotherargument expressing that we would like the compiler to output something.In this case we want it to output a .bin file that we named ourselves.There is several other arguments you can use when compiling with GCC, an example would be-wall which enables all warnings. This gives you information about any error GCC mightencounter.Fourth step:Running your first program. Running a program on the Raspberry Pi is done by adding ./ in front of the name of theprogram that you want to run. We can run our program by writing ./myfirstprogram.binThe command should execute the program and produce HelloWorldin the console window.Login with IPv6Usually we struggle through the process of making login in the Raspberry Pi using ssh or othersimilar tools. But we can make the process more pleasent.Once your Raspberry Pi is connected to a network it gets an IPv4 address and an IPv6 address,that is based on the NIC's MAC address. The good thing about this is that the IPv6 addressdoesn't change even if the network has a DHCP service.That being said, let's discover our IPv6 address. You only need to login once using IPv4 or using amonitor (HDMI or VGA). Open a terminal and type:ifconfighttps://riptutorial.com/6
You will see something like:eth0Link encap:Ethernet HWaddr 00:1C:C0:AE:B5:E6inet addr:192.168.0.1 Bcast:192.168.0.255 Mask:255.255.255.0inet6 addr: fe80::21c:c0ff:feae:b5e6/64 Scope:LinkUP BROADCAST RUNNING MULTICAST MTU:1500 Metric:1RX packets:41620 errors:0 dropped:0 overruns:0 frame:0TX packets:40231 errors:0 dropped:0 overruns:0 carrier:0collisions:0 txqueuelen:1000RX bytes:21601203 (20.6 MiB) TX bytes:6145876 (5.8 MiB)Interrupt:21 Base address:0xe000As you can see your IPv4 would look like 192.168.0.1 and your IPv6 would befe80::21c:c0ff:feae:b5e6 (notice the line that starts with inet6 addr).So, with this information you can login using the ssh command with the following syntax:ssh -6 pi@fe80::21c:c0ff:feae:b5e6%eth0This approach seems more complicated, but the IPv6 address is defined as the link local, and,as it is based on the MAC address, unless you change it yourself, this will always work regardlessof your IPv4 address.Proxy ConfigurationIf you are behind a proxy and need to connect to the internet, you can use:export http proxy "http://username:password@host:port/"For configuring the proxy inside apt-get:cd /etc/apt/apt.conf.dCreate a file named 10proxy:sudo nano 10proxyWithout authentication add the following line:Acquire::http::Proxy s::Proxy "http://yourproxyaddress:proxyport/";With authentication:Acquire::http::Proxy rt/";The / at the very end was important. Without it it does not work.Raspberry Pi v2 and v3 Arch Linux Installation --- from Mac or Linuxhttps://riptutorial.com/7
One of the best Linux distributions currently for Raspberry Pi (from now on, "RPi") is Arch Linux.This web shows the installation for: RPi2. ARMv7 architecture (32 bits). RPi3. There are two options: ARMv7 architecture (32 bits) orAArch architecture (64 bits).This tutorial advices you not to install the AArch option --- "Some of the hardware on the boardmay not work, or it may perform poorly".Read Getting started with Raspberry Pi online: com/8
Chapter 2: Create a scan station with scanbd(Raspbian)ExamplesIntroduction and installationThe purpose of this documentation is to use a scanner without any user interface. A common useis to upload a PDF scanned file directly to Google Drive or Dropbox just by pressing scannerbuttons.scanbd permits to trigger actions from the scanner buttons, it uses sane.What make things a little bit trickier is that by polling the scanner, scanbd locks the device. As wealso need to scan from local tools (like scanimage), we need to set a proxy that's going to interruptscandb from polling when needed. This is the job of scanbm, which monitors the network and givepriority over scanbd to any local access to the scanner.Thus, we need to : Set up the local sane configuration to only scan from the network (through scanbm) Configure scanbd to have access and poll the local scannerAs root:apt-get updateapt-get install libconfuse-dev libsane-dev libudev-dev libusb-dev xinetdThe latest version of scanbd can be find here eases/# Download the latest version of **scanbd**.wget ases/scanbd-1.4.4.tgz/download# Uncompresstar xvzf scanbd-1.4.4.tgz && cd 1.4.4# Configure with the installation path in /etc/./configure --disable-Werror# install itmakemake install# Add a dbus policy to authorize "saned" user to manage scanbd :cp integration/scanbd dbus.conf /etc/dbus-1/system.d/# Add the init script to manage the daemon :cp integration/scanbd.debian /etc/init.d/scanbdhttps://riptutorial.com/9
scanbd is now installed but not yet configured.Configure sane to scan from the networkThe local configuration of sane is inside dll.conf - Configuration file for the SANE dynamic backend loaderBackends can also be enabled by configuration snippets under/etc/sane.d/dll.d directory -- packages providing backends should dropa config file similar to dll.conf in this directory, named after the package.# The next line enables the network backend; comment it out if you don't need# to use a remote SANE scanner over the network - see sane-net(5) and saned(8)netdll.confcontains only the net backend./etc/sane.d/net.conf :# This is the net backend config file.## net backend options# Timeout for the initial connection to saned. This will prevent the backend# from blocking for several minutes trying to connect to an unresponsive# saned host (network outage, host down, .). Value in seconds.connect timeout 3## saned hosts# Each line names a host to attach to.# If you list "localhost" then your backends can be accessed either# directly or through the net backend. Going through the net backend# may be necessary to access devices that need special privileges.localhostAt this point, scanbm is not yet configured, no scanner can be reached from the network. Weneed to set up scanbm along with scanbd to test the set up.Configure scanbd to poll the local scannerIdentify the local scannerBy using lsusb, identify the productId (1909 here) :pi:# lsusbpi:# Bus 001 Device 005: ID 04a9:1909 Canon, Inc. CanoScan LiDE 110https://riptutorial.com/10
With that productId, grep the correct configuration file (it depends of your scanner model, for me itis genesys.conf) :pi:# grep 1909 /etc/sane.d/*confpi:# /etc/sane.d/genesys.conf:usb 0x04a9 0x1909Copy the file inside your scanbd configuration folder:cp /etc/sane.d/genesys.conf /usr/local/etc/scanbd/cp /etc/sane.d/dll.conf /usr/local/etc/scanbd/Edit /usr/local/etc/scanbd/dll.conf and replace net with the correct scanner backend:######/etc/sane.d/dll.conf - Configuration file for the SANE dynamic backend loaderBackends can also be enabled by configuration snippets under/etc/sane.d/dll.d directory -- packages providing backends should dropa config file similar to dll.conf in this directory, named after the package.# The next line enables the network backend; comment it out if you don't need# to use a remote SANE scanner over the network - see sane-net(5) and saned(8)genesysConfirm that the local scanner is found by scanbdNow we are ready to test :scanbd -d7 -fAvoid as much as you can to manipulate the env var SANE CONFIG DIR. It canbreak things, the default value is already configured in/usr/local/etc/scanbd/scanbd.conf and in the init script.Output should be similar to canbd:foregroundreading config file /usr/local/etc/scanbd/scanbd.confdebug on: level: 7dropping privs to uid saneddropping privs to gid scannergroup scanner has member:sanedpidrop privileges to gid: 110Running as effective gid 110drop privileges to uid: 110Running as effective uid 110dbus initdbus match type 'signal',interface 'org.freedesktop.Hal.Manager'SANE CONFIG DIR m/11
scanbd: sane version 1.0scanbd: Scanning for local-only devicesscanbd: found device: genesys:libusb:001:005 Canon LiDE 110 flatbed scannerThe most important here isfounddevice.What if "found device" doesn't appear ?You should check again your configuration, especially the identification part of thisdocumentation and clear any eventual SANE CONFIG DIR env var wrongly set bytyping : unset SANE CONFIG DIRConfigure xinetd to make scanbm listening on the networkCreate /etc/xinetd.d/sane-port which contains :service sane-port{portsocket typewaitusergroupserverserver argsdisable} bm -c /usr/local/etc/scanbd/scanbd.confno/!\ Double-check the path of scanbm with whichscanbmThen, restart xinetd and start scanbd :service xinetd restart/etc/init.d/scanbd startscanimage -Lshould now display the scanner.Most issues at this stage concern the permissions. Ensure that scanimagewhen you are logged as saned by doing sudo -u saned -s.If not, check USB permissions : ls-Lworks-al /dev/bus/usb/***Trigger actions from the scanner buttonsActions are located in /usr/local/etc/scanbd/scanbd.conf. I have 4 buttons that are scan, copy,email and file.The default config file doesn't include all actions per default, you will probably have toadd the block manually. You can have less or more buttons depending of your scannerhttps://riptutorial.com/12
model.For each action, we will set a custom path for the script option.action scan {filter " scan.*"numerical-trigger {from-value 1to-value 0}desc "Scan to file"# script must be an relative path starting from scriptdir (see above),# or an absolute pathname.# It must contain the path to the action script without arguments# Absolute path example: script "/some/path/foo.scriptscript "/home/pi/scan.sh"}Don't forget to comment any other default action at the end of scanbd.conf :# devices# each device can have actions and functions, you can disable not relevant pscan.conf)#include(scanner.d/canon.conf)You can now create your custom script to handle each action :Each line relative to /sys/class/leds/led0/trigger are for controlling the LED to monitorwhat's going on. You can do whatever you want, cat /sys/class/leds/led0/triggergives you all different pattern of lights./home/pi/scan.sh#!/bin/bash# don't forget to create the folderscan dir /home/pi/scanned-filesdatetime date %F %H%M%S echo none /sys/class/leds/led0/triggercase SCANBD ACTION inscan)filename file- datetimelogger -t "scanbd: 0" " SCANBD DEVICE SCANBD ACTION - scanning --resolution 150 --modeColor --depth 8 --format tiff to scan dir/ filename.jpg"echo timer /sys/class/leds/led0/triggerscanimage -d SCANBD DEVICE --resolution 150 --mode Color --depth 8 --format tiff -brightness 5 --contrast 20 convert tiff:- -compress jpeg scan dir/ filename.pdfecho none /sys/class/leds/led0/triggerlogger -t "scanbd: 0" "Finished scanning";;https://riptutorial.com/13
email)logger -t "scanbd: 0" "Emailing scan dir/file-*pdf"echo heartbeat /sys/class/leds/led0/trigger# here are the lines to send the fileecho none /sys/class/leds/led0/triggeresacRead Create a scan station with scanbd (Raspbian) online: iptutorial.com/14
Chapter 3: Enable SSH on RaspbianIntroductionPrevious versions of Raspbian (prior to November 2016) had SSH enabled by default. They alsohad a default username (pi) and password (raspberry) this was done to make first time setup fornew users easier. But this obviously represents a large security hole. The new release (November2016) disables SSH by default, and will also display a warning if SSH is enabled without changingthe the default password.RemarksThe contents of the ssh file do not matter - you can create an empty file like we did above.During boot up the Pi will look for this file. If it exists SSH will be enabled and the file deleted.ExamplesEnable SSH using a Windows computerTo enable SSH create a file called ssh in the /boot directory of your SD card.1. Identify the drive letter associated with your SD card.2. Open a command prompt (press Win R on your keyboard to open the Run window. Then,type cmd)3. Enter the following at the command prompt (replacing DriveLetter with the letter youidentified in step 1):echo. DriveLetter:/ssh4. Press EnterVerify that your SD card contains a file called ssh.1. Enter the following at the command prompt (again replacing DriveLetter with the letter youidentified in step 1)dir DriveLetter:2. Press EnterYou should see an ssh file in the directory listing.To avoid the security warning mentioned above (re: SSH enabled with the default password)change the default password for the Pi user. This can be done either from the command line withhttps://riptutorial.com/15
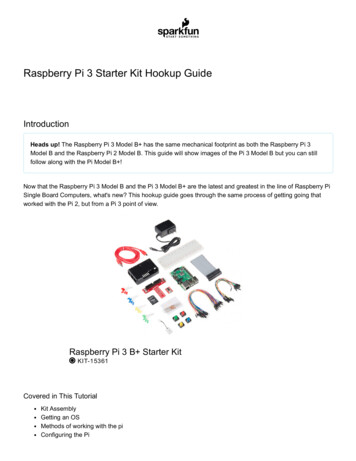
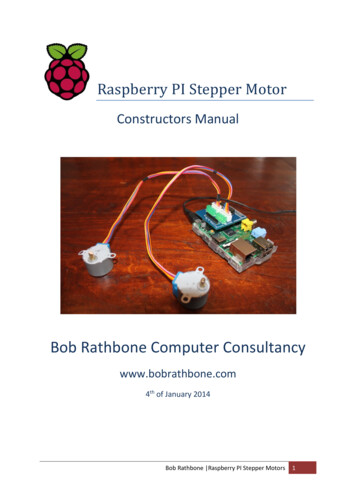
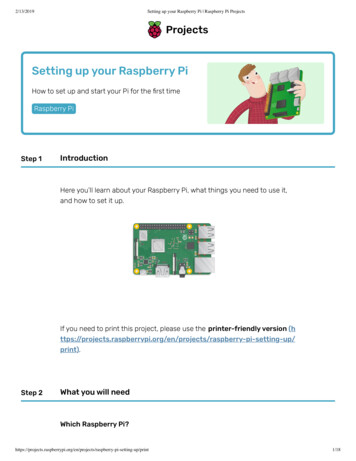
the passwd, the raspi-config script, or settings menu in the Pixel desktop.Use Raspberry Pi as headless systemAbove example helps us how to turn on SSH on Pi. This example is the prerequisite of aboveexample.For Linux OS: Open the terminal and write down this sshneed to provide the password.pi@your local IP address.Then you willNote: Here pi: your raspberry pi username and your local IP address: the IP address of yourdevice. You will get this IP address from your router, DHCP client list. However, this topic is out ofscope.For Windows OS: We can use Putty to login via ssh. At Host Name write your Raspberry pi IPaddress.After pressing Open. You should provide your username and password. After the successfulattempt, you will get this screen.https://riptutorial.com/16
Read Enable SSH on Raspbian online: able-sshon-raspbianhttps://riptutorial.com/17
Chapter 4: Operating systemsIntroductionThis section contains information about various operating systems available for the RaspberryPi's.ExamplesRaspbianThe most popular operating system for the Raspberry Pi is a Debian based Raspbian.It is officially supported by the Raspberry Pi Foundation.Raspbian can be downloaded from official Raspberry Pi site in one of two variants: With desktop environment Lite- Minimal imageStarting September 2016 Raspbian is shipped with PIXEL desktop environment ("Pi ImprovedXwindows Environment, Lightweight")Yocto based operating systemsIt is possible to create own Linux distribution using Yocto Project.For Raspberry Pi- there is a specific layer meta-raspberrypi that needs to be used to create animage.Windows 10 IoT CoreWindows 10 IoT Core is available only for Raspberry Pi 2 and 3. It is important to note that this isnot a full version of windows as one might expect, it is designed specifically for IoT (Internet ofThings) applications. It will not run most standard windows applications, and does not have a startmenu. It boots to a page with some example code and videos, and has a command line interface.OSMCOSMC is a free and open source media player based on Linux.LibreELECLinux distribution with features required to run Kodi.https://riptutorial.com/18
KaliA fully featured OS designed around penetration testing.Download -arm-images/Requirements:1. 8GB Class 10 SD Card Minimum2. 16GB Class 10 SD Card RecommendedDefault Login:Username: rootPassword: toorNotes1. Install gparted and expand partition to full size2. Run apt-get install kali-linux-full to get all the standard tools available3. Runs XFCE Desktop EnvironmentRead Operating systems online: erating-systemshttps://riptutorial.com/19
CreditsS.NoChaptersContributors1Getting started withRaspberry PiAn Epic Person, andpei, atilacamurca, Cicero, Community,ctafur, Patrick L, RvT, S.Spieker, SlySven2Create a scan stationwith scanbd(Raspbian)Pierre Maoui3Enable SSH onRaspbianM Hornbacher, Saiful Azad, Steve Robillard4Operating systemslewiatan, M Hornbacher, Patrick Lhttps://riptutorial.com/20
these choices are available on every model of Raspberry Pi (for example, Windows IOT Core is only available on Raspberry Pi 2 and newer) . Installing any other OS than Raspbian will require an ethernet connection on your Raspberry Pi. Raspbian The officially supported OS for the Raspberry Pi, it is a port of the OS known as Debian. Pre-