Transcription
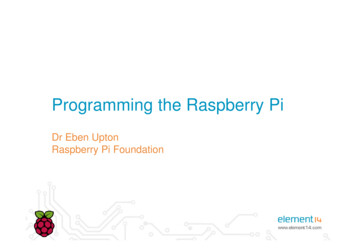
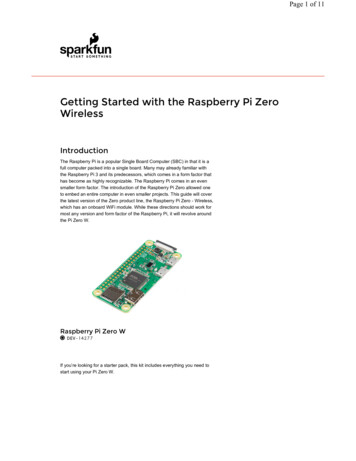
Raspberry Pi 3 Starter Kit Hookup GuideIntroductionHeads up! The Raspberry Pi 3 Model B has the same mechanical footprint as both the Raspberry Pi 3Model B and the Raspberry Pi 2 Model B. This guide will show images of the Pi 3 Model B but you can stillfollow along with the Pi Model B !Now that the Raspberry Pi 3 Model B and the Pi 3 Model B are the latest and greatest in the line of Raspberry PiSingle Board Computers, what's new? This hookup guide goes through the same process of getting going thatworked with the Pi 2, but from a Pi 3 point of view.Raspberry Pi 3 B Starter Kit KIT-15361Covered in This TutorialKit AssemblyGetting an OSMethods of working with the piConfiguring the Pi
Resources for working with the GPIOMaterials RequiredYou'll need a mouse, keyboard, and monitor to begin with. Once configured, the pi can be operated from its ownperipherals or another computer connected over the internet.Note: The serial port still has a few bugs, so it's not recommended to use for configuration. Raspbian can behacked to get it to work but it's not covered by this guide. This Pi forum post talks about the serial port inmore depth.As a desktop, these materials are required:Pi 3 Starter kit -or- Pi 3/2 Accessory Kit and your own PiUSB MouseUSB KeyboardHDMI monitor/TV/adapted VGAAfter configuration, 'headless' operation over Telnet/SSH requires:Pi 3 Starter kit -or- Pi 3/2 Accessory Kit and your own Pi2nd computer connected via internetTelnet/ssh terminal softwareYou'll also need an internet connection to get resources! This link can be wired or wifi and must be availablefor the Pi. For wireless connections, you can use the on board WiFi antenna.Suggested Reading and ViewingYou may want to check out the following tutorials and videos before continuing.Serial Terminal BasicsRaspberry gPIo -- Also linked-in laterPi Wedge Hookup GuideGetting Started With The Raspberry Pi -- video seriesPart 1Part 2Part 3AssemblyThe Pi is straight-forward and easy to put together, but in the event that something doesn't seem right, this sectionwill give you an idea of what it is supposed to look like.
Unbox and gather these components before beginning the assembly1. Snap the Pi into the base of the 'tin', then snap the top into place.Fit the Pi into the base of the tin. Make sure the Pi is fully seated. Check that the PCB is evenly recessedabout the perimeter.Click the two halves together //center 2. Add the SD card
Installing an SD card -- make sure the microSD card is flush with the side of the case when insertedproperly. The Pi 3 microSD slot doesn't have a spring as the previous pis did, so if it's flush with the labeloutward, it is seated correctly.3. Connect the ribbon cable to the Pi -- notice that the pin 1 marking is very subtle. Orient the red stripe on thecable towards the SD card. Alternately, pin 1 can be identified by finding the missing/beveled corner of theheader's silkscreen on the pi.The pin 1 location and silkscreen is the same between the Pi B and Pi B. This image shows a partiallyinserted ribbon cable without the case in the way. The ribbon cable is oriented with the red "pin 1" markingpointing towards the SD card slot.4. Attach the ribbon cable to the wedge. Pin 1 is pointing towards the FTDI adapter.Socket the end of the ribbon cable into the Wedge. It is keyed, but each end of the cable is different. Makesure the ribbon extends away from the breadboard connection.5. Socket the Wedge into your breadboard
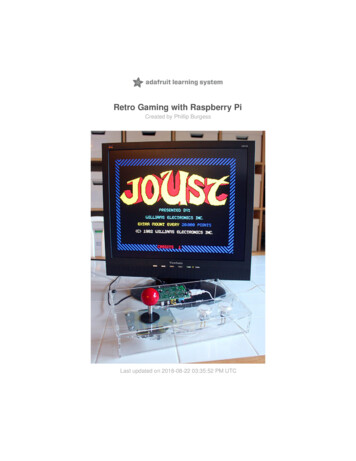
Wedge inserted in breadboard.6. Attach the FTDI connector matching "GRN" to "GRN" and "BLK" to "BLK" between the boards.The FTDI serial adapter is connected matching GRN and BLK connections7. Attach desired consumer computer equipment.The fully assembled kit. Additional to the kit, user supplied monitor, mouse, and keyboard are shown. ThisPi is now a desktop computer.Getting an OSNote: At the time this was written, the kit comes with a 16GB card loaded with the Noobs OS installationimage, version 1.9.0. This card should be ready to boot right out of the box.Getting a New Image
If something didn't work, or the installation has been corrupted (messing around in the file system were you?),getting a new copy is easy.Obtain the Noobs OS from raspberrypi.org.Format the card to erase all the files.Unzip the contents of the Noobs zip file to the empty, formatted microSD card.That's it! You're ready to go. For other imaging, check out this tutorial on sd cards and writing images:SD Cards and Writing ImagesHow to upload images to an SD card for Raspberry Pi,PCDuino, or your favorite SBC.You can also check out this guide from the Raspberry Pi foundation.The First BootBefore you apply power for the first time, run through this pre-flight checklist.Is the microSD card installed and seated firmly?Is the HDMI attached and the monitor powered?Are the mouse and keyboard plugged in?Are the mouse and keyboard standard USB, not wireless? -- Some wireless keyboards have troubleenumerating, so use one you trust.Is the whole setup secure on your desk and not liable to jump onto the floor at the first touch?Ok, you're ready to apply the power to the Pi.Power Adapter Requirement! Make sure the power being supplied is from the included 5.24V, 2.4A powersupply and not your USB connection. The USB most likely won't have enough current supplying capacity andwill result in a brown-out of the Pi that can damage it, and it will likely mess up the files on your SD card.First, you should see a color chart appear on your screen that indicates the Pi has power and is doing somethingbut doesn't have software loaded yet.Next, Noobs asks if the raspbian distro should be installed. Check the box to select it, and choose yourlanguage/keyboard layout here (can also be changed later).Noobs will take a few minutes to manage the partitions and install the OS.When it's done, it should report that the OS was installed successfully. Click OK, the Pi will reboot into a graphicalinterface.The Noobs default configuration is to auto-log in as user pi , password raspberry .
Performing a Full System UpgradeOnce connected to the Internet (see the Configuring the Pi section), it can be a good idea update all the packagesthat are currently installed. Usually, new packages replace old ones that are faulty, but sometimes new packageshave bugs of their own. If your current system is stable and all the functions are good, maybe don't upgrade. Ifyou're starting a fresh project though, get everything up-to-date before you start putting in the work.Enter the following commands in the shell (process takes about 10 minutes).sudo apt-get update -- go fetch the latest package information.sudo apt-get upgrade -- And answer Y. Upgrades all the packages. This stage will take a while.sudo shutdown -r now -- Reboot the machine.Methods of Working with the PiOnce the Pi is configured, there are a few methods of using it depending on if you want to use it like a desktop ormanage it remotely.This section covers using the Pi in the following waysUsing HDMI-out -- Operate your Pi like a desktop computer.Using the serial terminal -- some functionality but buggy in the latest Raspbian release.Using SSH -- Operate through a network linked to another computer.Using HDMI-outNoobs 1.8.0, with Raspbian, automatically logs in and starts a graphical user interface.If configured to boot to shell, log in with pi as the user name and raspberry as the password. Then, enterstartx in the command line to enter a graphical environment where you are presented with a desktop-typemenu-driven operating system.If you need to get back to text land, you can eitherlog off through the Task Bar Menu -- drops back to the shell, closing down the X window systemopen xterm from the Task Bar -- opens a shell in a graphical windowUse CTRL-ALT-1 through CTRL-ALT-8 -- gives you a number of shells, with 7 being the graphicenvironment (if loaded).Remember, shutdown with the menu item or enter sudo shutdown -h now from a shell, and wait for the system tohalt before removing power.Using the Serial Terminal without a MonitorConnect the FTDI (or any USB-to-serial converter) to the mini-usb cable and plug into a usb port on yourcomputer.Set the terminal settings to 72000 baud, 8 bit, no parity, 1 stop and no flow control. This is an odd rate that is 1.6times slower than before. Also, CPU frequency effects the symbol rate so be careful if using this interface, andplan for administering by a different method.Using SSHA good way to operate a Pi is to attach it to the local network somewhere, then manage it from another computerconnected to that same network.
Note: This method relies on a local Internet connection. Work through the configuration process with themonitor/mouse/keyboard or serial terminal (described below), then come back here.To do this, download PuTTY or a similar SSH terminal for your system and connect to the Internet port used by thepi. The TTY interface gives you a serial-like interface but with colors that make it a little nicer to use.A PuTTY terminal looks nicer than serial and can be used over networksTo obtain your IP address, get to a terminal, and use the command ifconfig . Alternately, hover the mousepointer over the network icon on the task bar.With Ethernet and wireless attached, ifconfig returns something like the following:pi@raspberrypi: ifconfigeth0Link encap:Ethernet HWaddr b8:a8:3b:56:1a:f7inet addr:14.7.3.188 Bcast:14.7.3.255 Mask:255.255.255.0UP BROADCAST RUNNING MULTICAST MTU:1500 Metric:1RX packets:3026 errors:0 dropped:0 overruns:0 frame:0TX packets:462 errors:0 dropped:0 overruns:0 carrier:0collisions:0 txqueuelen:1000RX bytes:229516 (224.1 KiB) TX bytes:60888 (59.4 KiB)loLink encap:Local Loopbackinet addr:127.0.0.1 Mask:255.0.0.0UP LOOPBACK RUNNING MTU:65536 Metric:1RX packets:8 errors:0 dropped:0 overruns:0 frame:0TX packets:8 errors:0 dropped:0 overruns:0 carrier:0collisions:0 txqueuelen:0RX bytes:1104 (1.0 KiB) TX bytes:1104 (1.0 KiB)wlan0Link encap:Ethernet HWaddr 74:df:21:5b:a3:9cinet addr:32.8.0.142 Bcast:32.8.0.255 Mask:255.255.255.0UP BROADCAST RUNNING MULTICAST MTU:1500 Metric:1RX packets:120 errors:0 dropped:40 overruns:0 frame:0TX packets:12 errors:0 dropped:4 overruns:0 carrier:0collisions:0 txqueuelen:1000RX bytes:20955 (20.4 KiB) TX bytes:9956 (9.7 KiB)If it looks similar but the IP addresses aren't present, that network link hasn't been established.
In this example, we know our Ethernet is on IP 14.7.3.188 and our wireless on 32.8.0.142. These can be enteredinto the PuTTY configuration window to begin the session. From here, it just works like the serial link!Configuring PuTTYConfiguring the PiThis section goes over configuring the keyboard, wired, and wireless internet.Configuring the Keyboard LayoutThe Raspbian distribution comes defaulted to European hardware. With US keyboards, the " (quotation mark)symbol is replaced by @ (commercial at) and our number sign # is replaced by the European pound sign . Thiscan make it aggravating when trying to #define things. Invoke the config tool with "sudo raspi-config," and take thefollowing actions:Set the default locale for the systemSelect "Internationalisation Options"Select "Change Locale"Deselect en GB.UTF-8 UTF-8Select en US.UTF-8 UTF-8, (Ok)Set default to en US.UTF-8, (Ok)Change the keyboard layout -- from the Internationalisation Options menu,Change Keyboard LayoutLeave set as: Generic 105-key (Intl) PC (Ok)Select Other (Ok)Select English (US) (Ok)Select English (US) (Ok)Select default (Ok)Select No compose key (Ok)Set Ctrl Alt Bksp function (Ok)Finish with the dialog and get back to the shellTry the " and # keys at the prompt. It may be necessary to restart the pi at this point.
Configuring the Internet InterfacesAutomatic ConfigurationRaspbian does a good job of configuring wireless networks automatically. By default, DHCP is configured so thatthe Pi will receive an IP address when a network cable is plugged it to the Ethernet port or when a wirelessnetwork is connected.To use the graphical network tool, right click on the icon on the right side of the task bar, and click "WiFi Networks(dhcpcdui) Settings". Then, select the interface desired (wlan0 or eth0) to disable the DHCP and set your own IP, ifnecessary.To connect to a wireless network, click on the icon, select the desired network, and enter the password.Hovering over the icon will bring up a status of wlan0 and eth0 that also shows the IP address.Manual (text-based) ConfigurationAt this time, the network configuration works out of the box so there's really nothing to configure, but in casesomething goes awry, here's the basics of what can be played with and a known-working configuration to comparewith.A configuration file, interfaces , configures both wired and wireless devices. Enter the following command into aterminal to edit the interfaces file.sudo nano /etc/network/interfacesReplace "nano" with "leafpad" if you prefer graphics. Here's what our Pi 3 is using:# interfaces(5) file used by ifup(8) and ifdown(8)# Please note that this file is written to be used with dhcpcd# For static IP, consult /etc/dhcpcd.conf and 'man dhcpcd.conf'# Include files from /etc/network/interfaces.d:source-directory /etc/network/interfaces.dauto loiface lo inet loopbackiface eth0 inet manualallow-hotplug wlan0iface wlan0 inet manualwpa-conf /etc/wpa supplicant/wpa supplicant.confallow-hotplug wlan1iface wlan1 inet manualwpa-conf /etc/wpa supplicant/wpa supplicant.confBy default, this file is set up to get its configuration from /etc/wpa supplicant/wpa supplicant.conf , which isreally the proper place for wifi information. Here are the contents:
ctrl interface DIR /var/run/wpa supplicant GROUP netdevupdate config 1network {ssid "myNetworkSSID"psk "mySuperSecurePassword"key mgmt WPA-PSK}A note on network configuration: Try the gui tool first, and only modify the files as a last resort. If you findthe tool doesn't work, save your configuration files as a backup, and don't be afraid to try your hand at amanual configuration.Applying the ChangesSometimes the link should be cycled for a new configuration to take. Rather than shutting down the pi andrestarting, use 'ifdown' and 'ifup' to bring the link down and back up.For wireless connections, usesudo ifdown wlan0andsudo ifup wlan0For wired connections, usesudo ifdown eth0andsudo ifup eth0Reading Inputs and Toggling the LEDsThis section contains instructions for getting the software necessary to compile programs that use the GPIO, thenredirects to our Raspberry gPIo tutorial.Getting WiringPi for Using C The WiringPi library is required to operate the GPIO with C . There are two methods to get it, mentioned below.Either way, it will have to be built before use.Get From the WiringPi WebsiteThe first way to obtain it is to download from a direct link to the WiringPi website: http://wiringpi.com/downloadand-install/.Get Using Git (Preferred)Another way to obtain it is using apt-get to obtain git, then by using git to get the repository.Install Git -- Enter sudo apt-get install git-core (may be installed by default)Git the wiringPi repo -- Enter sudo git clone git://git.drogon.net/wiringPi
This will make a folder in your current directory called WiringPi.Build WiringPiHowever it was obtained, the first step is to build the WiringPi library. The source comes with a script to do all thisfor you.Go to the WiringPi directory -- Enter cd wiringPibuild the WiringPi resources -- Enter sudo ./buildThis builds the helper files, modifies some paths in Linux and gets WiringPi ready to rock.At this point, the library should work. Try it outEnter gpio readallAn Ascii table of pins and states should appear.Getting PythonRaspbian comes with Python pre-installed. Continue to the gPIo tutorial to find out how to use it.Using the GPIO.This excellent tutorial covers all the INs, OUTs, and PWMs of GPIO with the Pi platform.Raspberry gPIoOCTOBER 29, 2015How to use either Python or C to drive the I/O lines on a Raspberry Pi.Resources and Going FurtherRaspberry Pi AccessoriesIf you are looking to add additional features, check out the accessories to power your Raspberry Pi remotely, builda homemade motion-activated security system, or go retro by building your own arcade controller to emulateclassic video games!
PiJuice HAT - Raspberry Pi Portable PowerPlatformRaspberry Pi Camera Module V2 DEV-14028 PRT-14803Raspberry Pi LCD - 7" TouchscreenSparkFun PiRetrocade LCD-13733 KIT-14007CLICK TO BROWSE MORE RASPBERRY PI ACCESSORIESWith the Pi 3 reading buttons and toggling LEDs, you're sure to be the coolest kid on the block, but what else canit do? Let us know how you use your Pi 3 in the comments! Otherwise, ere are some links to our other Piresources.Raspberry Pi Forums: Is Your Pi Not Booting? - Troubleshooting tips and solutions for a Raspberry Pi that isnot booting up.The gPIo tutorialThe SPI and I2C tutorialNeed some inspiration? Check out these tutorials and projects.
SparkFun Blocks for Intel Edison - Pi BlockRaspberry Pi SPI and I2C TutorialTutorial on setting up and using the Pi Block for IntelEdison.Learn how to use serial I2C and SPI buses on yourRaspberry Pi using the wiringPi I/O library for C/C and spidev/smbus for Python.Python Programming Tutorial: Getting Startedwith the Raspberry PiQwiic Joystick Hookup GuideThis guide will show you how to write programs on yourRaspberry Pi using Python to control hardware.Looking for an easy way to implement a joystick to yournext Arduino or Raspberry Pi project? This hookupguide will walk you through using the Qwiic Joystickwith the Arduino IDE on a RedBoard Qwiic and inPython on a Raspberry Pi.Or check out some of these blog posts for ideas:Enginursday: Time-lapse with the Raspberry PiNOVEMBER 21, 2013Enginursday: Monitor Twitter With a RaspberryPiDECEMBER 5, 2013Enginursday: Time-lapse with the Raspberry PiPt. 2Raspberry Pi 3FEBRUARY 29, 2016
FEBRUARY 13, 2014T³: Raspberry Pi and the Stereo ArcanaT³: IoT Smart Pantry (Part 1)JULY 19, 2016SEPTEMBER 27, 2016Friday Product Post: In Vivid 1080piTaking Your PiRetrocade to the Next LevelOCTOBER 7, 2016NOVEMBER 10, 2016Enginursday: Fun with SocketsEnginursday: Mort and Mary Present.Fun withSockets, Part Deux - Old Products Never DieDECEMBER 22, 2016DECEMBER 29, 2016
Enginursday: Eniac, The Data-Logging WebServerIoTuesday: New Year's Resolution #2 –Healthier EatingJANUARY 26, 2017JANUARY 31, 2017IoTuesday: Web-Style GUIs for your RaspberryPi Hardware ProjectHardware Hump Day: Cloning your RaspberryPiFEBRUARY 21, 2017MARCH 8, 2017Enginursday: Home-Brew Alexa EndpointAutomated Conference Room SignageMARCH 30, 2017NOVEMBER 8, 2017Swarming to Space on the Wings of XBee, RPi
NOVEMBER 9, 2017Mort and Mary Present: The Mind-ControlledLight SwitchJANUARY 25, 2018Raspberry Pi Python IDE ComparisonFriday Product Post: Power up your Pi!JUNE 12, 2018AUGUST 17, 2018Hackbot in the MorningNOVEMBER 13, 2018
Raspberry Pi 3 Starter Kit Hookup Guide Introduction Heads up! The Raspberry Pi 3 Model B has the same mechanical footprint as both the Raspberry Pi 3 Model B and the Raspberry Pi 2 Model B. This guide