Transcription
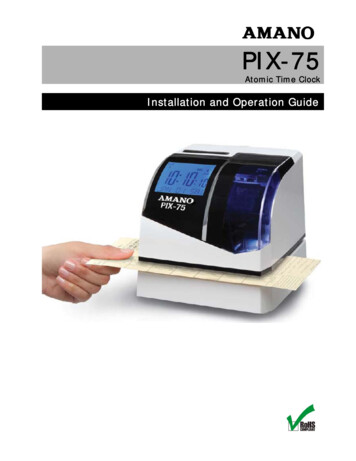
PIX-75Atomic Time ClockInstallation and Operation Guide
Proprietary NoticeThis document contains proprietary information and such information maynot be reproduced in whole or part without written permission from AmanoCincinnati, Inc., 140 Harrison Avenue, Roseland, New Jersey 07068-1239.Amano Cincinnati, Inc. reserves the right to make equipment changes andimprovements, which may not be reflected in this document. Portions of thisdocument may have been updated to include the latest hardware orfirmware version, if applicable. We recommend that this document be readin its entirety before any attempt is made to operate the equipment.Thank You .For purchasing another fine product fromAmano Cincinnati, Inc.ΙImportant! Do not return this clock to the retailer. Ifyou have any questions or need assistance, pleasecall us toll free at 1-800-253-9836Need Ribbons, Keys and Accessories?Visitwww.amano.com/timeOr call 1-800-253-9836Why PIX-75The PIX-75 Atomic Time Clock recognizes and responds to your AmericanEnglish voice commands. Set the time, Daylight Saving, Print Direction, PrintLanguage, Print Method, Atomic Clock, Display Format and even select aPrint Format using only your voice. Say “Hello Clock” and the clock respondsWelcome, to the Amano time clock, what would you like to change? Thensimply speak your command, for example “Time” to set the time and thePIX-75 will respond appropriately.
Table of ContentsChapter 1 - Quick-Start Instructions . 1-1Step 1 – Remove the Cover & Packing Material . 1-1Step 2 - Setting the Time. 1-2Step 3 - Changing the Print Format (P4) . 1-3Voice Programming . 1-4Voice Commands . 1-5Voice Programming Print Format Example . 1-6Voice Programming Hints . 1-6Button Programming . 1-8Setting the Time (P1) . 1-8Setting the Date [Month/Date/Year](P2) . 1-8Enabling or Disabling Daylight Saving Time (P3) . 1-9Enabling/Disabling Auto Print (P508) . 1-10Wall Mounting (Optional) . 1-11Chapter 2 – Operation. 2-1PIX-75 Views . 2-1PIX-75 View Description . 2-2Auxiliary Display . 2-3Advanced Button Programming . 2-4Setting Custom Print (Symbol Printing) (P501) . 2-4Set Print Year Format (P502) . 2-9Set Print Hours Format (P503) . 2-9Set Print Minutes Format (P504) . 2-10Set Print Leading Zero (P505) . 2-12Set Print Language (P506) . 2-12Set Print Direction (P507) . 2-14Set Paper Detection (P509) . 2-14Changing Begin Date for Daylight Saving Time (P510). 2-15Changing End Date for Daylight Saving Time (P511) . 2-16Set Time Zone (P513) . 2-18Set Display Hour Format (P514) . 2-18Set Display Contrast (P515) . 2-19Set LCD Backlight (P516) . 2-19Set Auxiliary Display (P517) . 2-20Set Clock Voice Mode (P518) . 2-21Set Clock Voice Volume (P519) . 2-21Acceptable Print Media . 2-22Adjusting the Print Margin . 2-23Atomic Clock Feature (Not available in HI and AK) . 2-23Enable/Disable Atomic Clock Feature (P5 12) . 2-24PIX-75www.amano.com/time 1-800-253-9836i
Ribbon Cartridge Replacement . 2-25Table of ContentsParts . 2-26Error Messages. 2-27PIX-75 Support . 2-29PIX-75 Cleaning . 2-30Resetting Clock After Extended Loss of Power . 2-30PIX-75 Power Modes . 2-30PIX-75 Time Display Modes . 2-30Wall Mounting Template . 2-31PIX-75 Programable Features Summary . 2-31Warranty Notice . 2-33Specifications . 2-34Cover RemovalNote – See www.amano.com/tkb for videos and/or the latestinformation about the PIX-75, etc. The printed time format can bedifferent than display format!!During the programming modes the clock will not have all featuresavailable to the user. To exit programming (Setup) mode simply puton the clock cover.iiwww.amano.com/time 1-800-253-9836PIX-75
Chapter 1 - Quick-Start InstructionsStep 1 – Remove the Cover & Packing Material1. Insert the key provided into the keyhole on top of the clock, turnclockwise ¼ turn to unlock the cover and lift the cover to remove (seeFigure on previous page).2. Remove the cardboardspacer located abovethe ribbon cartridge bypulling straight out(see right-handFigure).3. Lift up the printercarriage by placingyour fingers under themetal motor on theleft-hand side andremove the foamspacer (white) locatedunder the print head(see right-handFigures). Release theprinter carriage.4. After removing thefoam spacer with thecover off plug in theclock!5. The clock will announce “Voice mode enabled” and displaySetup (see right-hand Figure) on the bottom line.Note –Should the clock not power up, verify that the AC Adapter isplugged into the rear of the clock. See Figure 2 on page 1-11 andFigure 8 on page 2-30 for AC Adapter plug-in location.PIX-75www.amano.com/time 1-800-253-98361-1
Step 2 - Setting the TimeUsing this method does not zero the seconds as the seconds continue to rollduring setting the hours and/or minutes.1. Press the HOUR button to advance hour by increments of one (1) untilthe correct hour appears.2. Press the MINUTE button to advance minutes by increments of one (1)until the correct minute appears.Figure 1: Programming Button Locations.3. The default print format is Format-1 (YEAR, MONTH, DATE and TIME withAM or PM).If this format is acceptable replace the cover and the clock is ready foruse. If you need to change the print format proceed to Step 3 on the nextpage.Note – If your PIX-75 is located in an area that cannot receive theAtomic time signal, DO NOT be concerned. The PIX-75 willaccurately keep the time using its Quartz mechanism (plus orminus three seconds per week).When you first receive the clock, it may be necessary to adjust thetime so the test printout may not show the accurate time.However, under normal conditions upon power up, the PIX-75 willautomatically search for and synchronize with the atomic timesignal.1-2www.amano.com/time 1-800-253-9836PIX-75
Step 3 - Changing the Print Format (P4)1. With the cover removed, press the PROGRAM button to begin buttonprogram mode andP1 TIME will appear.2. Press the button to change the current programming modeuntil the display showsP4 PRint FORMAT.3. Press the ENTER button once and the clock will flash thecurrent print format. The default setting FORMAT-1.4. Press the or – button to increase or decrease the print format value to1, 2, 3, 4, 5, or 6. See the following for examples of Print Format:5. Press the ENTER button once to accept the current value.6. Replace the cover for normal operation.There are six (6) print formats pre-configured to select [Format 1 thruFormat 6]. Each print format has its own pre-configured print content. Seethe previous illustration or the following:Format 1 [default]2 Digit YearSpaceMonthSpaceDateSpace12 Hour60th MinutesSpaceMonthSpaceDateSpace24 Hour60th MinutesFormat 22 Digit YearPIX-75www.amano.com/time 1-800-253-98361-3
Format 32 Digit YearSpaceMonthSpaceDateSpace24 Hour100th MinutesSpaceMonthSpaceDateSpace24 Hour10th MinutesSpace24 HourFormat 42 Digit YearFormat 5Day100h MinutesFormat 62 Digit YearSpaceMonthSpaceDateSpace24 Hour60 thMinutesSecondsNote – when the print format is changed, the following settings areoverridden: The custom symbol printing is overridden by the selected format. There will only be one line printed for the selected format. The “Print Year”, “Print Minute”, and “Print Hour” settings will beoverridden by the selected pre-defined print format. However,these settings can be changed after selecting the pre-defined printformat.Should you want to change anything else, the clock can now be programmed usingvoice commands (see next page) or through the program buttons (see startingpage 1-8 and page 2-4).Voice Programming1. Unlock and remove the cover to activate the programming mode and theclock will announce, “Voice mode enabled”.“Hello2. Say “Hello Clock” to begin voice programmingClock”the clock. The clock will respond by saying“Welcome, to the Amano time clock, whatwould you like to change?” and the clockwill BEEP.“Welcome , whatYou must wait for the BEEPbefore saying command!!would you like tochange?” followedby a BEEP.Only valid commands will be accepted by the clock.3. Voice commands can be entered in any order. See voice commands onthe following page.1-4www.amano.com/time 1-800-253-9836PIX-75
Voice CommandsMUST wait for the BEEP before saying commands!At any time say “EXIT”, or replace the cover to stop voiceprogramming.PIX-75www.amano.com/time 1-800-253-98361-5
Voice Programming Print Format ExampleThe following table lists the typical pattern of announcement messages thatthe clock might play for changing print format.Voice Message PromptReason“Welcome to the Amano time Clock”“What would you like to change?”To greet the user and promptfor command.The User says “Print Format”Request the clock to changethe print format.“The current print format is” followed by“Please tell me the new print format”followed by a BEEP.To announce the current printformat, request the new printformat and prompt with BEEP.The User says “Format Three”Request the clock to set theprint format Format 3.“The new print format is format three”followed byTo announce the new printformat set by the user andinquire for the next possiblechange.“What would you like to change?”The User says “Exit”Request the clock to quit thevoice programming mode.“Good Bye”To acknowledge exit.During a typical voice command, the clock might say; “Sorry, Command not recognized”To inform the user that it could notunderstand the command so the user can repeat the command again. “Sorry, data not recognized”To inform the user that it could notunderstand the verbal value from the user for the current setting so theuser can repeat the value again.Voice Programming Hints Wait for the clock to complete any voice prompt question followed by aBEEP before speaking a command.Speak as clearly as possible towards the clock within 3 – 4 seconds afterthe clock announcement, “Please tell me the new ” followed by a BEEP.Say the entire voice command. Do not use partial commands. Forexample, say “Print Language”, not just “Language” or “Print”. See chartfor list of valid commands on page 1-5.Complete the voice command within the 3- 4 seconds after a clockannouncement. Failure to do so may result in the clock failing torecognize the command.1-6www.amano.com/time 1-800-253-9836PIX-75
If the clock fails to recognize the time requested, it will cancel the timecommand after 3 attempts and ask you “What would you like to change?”If the clock fails to recognize the command and/or data the followingannouncements may occur;“Sorry, command not recognized”“Sorry, data not recognized”“Invalid data”If this occurs, wait for the announcement to complete and simply speakthe desired command again.Say “Cancel” to exit the current voice request.Say “Exit” to quit voice programming and the clock will acknowledge bysaying “Good Bye”. Must say“Hello Clock” to return back to voice programming.To set some parameters such as Date [Month/Date/Year] you must usethe buttons on top of the clock for button programming mode. Seeappropriate following section.Sequence for Time Entry with Voice Commands1. Say “Time” to enter into the set time mode.2. The clock will announce, “Current time is ” followed by, “Please tell methe new time” followed by a BEEP.3. After the BEEP, say the desired time, i.e., “Two Twenty PM” to set thecurrent time as 2:20 PM. The user must end the sentence with “AM” or“PM” to complete time entry. When entering a time for the top of the houryou must say the hour followed by o’clock. For example, for 7:00 AM,please say, “seven o’clock AM”. In another example, for 10:02 PM, pleasesay “ten o’ two PM”.Upon acceptance of the voice entry, the clock will announce “New timeis ”Note – If the clock does not accept the new setting, it will announcean error message and keep asking the user every 3 - 4 seconds tospeak the new value until the new value is accepted. During voiceprogram mode the buttons on top of the clock will be ignored.4. Say “Exit” to quit all voice programming or say new voice command (seechart on page 1-5). When quitting voice programming the clock willrespond by announcing, “Goodbye”.PIX-75www.amano.com/time 1-800-253-98361-7
Button ProgrammingThe following paragraphs must be performed with the clock cover removedand the voice mode off.Setting the Time (P1)Using this way to set time will set the seconds to zero, and the seconds willnot start until you press the ENTER button to return toP1 TIME on thedisplay (see step 6).1. With the cover removed, press the PROGRAM button andP1 TIME will appear and the voice mode will bedisabled.2. Press the ENTER button and the hours will start flashing.3. Press the or – button to increase or decrease the hours to the desiredvalue.4. Press the ENTER button once to accept the current hours and go to theminutes setup mode and the minutes will start flashing.5. Press the or – button to increase or decrease the minutes. The secondswill automatically start at zero when entering minutes.6. Press the ENTER button once to accept the current minutes, complete theset time mode, and go back to the previous menu.7. Replace the cover for normal operation.Note – During button programming the time will always be setdepending on the mode the display is currently set in [either 12hour or 24-hour].During voice programming the time will always be set in the 12hour format despite what mode the display format is set in.Setting the Date [Month/Date/Year](P2)1. With the cover removed, press the PROGRAM button to begin buttonprogram mode andP1 TIME will appear.2. Press the button to change the current programming mode until thedisplay showsP2 DATE.3. Press the ENTER button once and the clock will display thecurrent date on the 2nd line (see right-hand Figure). Themonth will start flashing. Press the or – button to1-8www.amano.com/time 1-800-253-9836PIX-75
increase or decrease the month value.4. When the desired month is reached, press the ENTER button once toaccept the current month and go to the date setup mode.5. The date of the month will start flashing. Press the or – button toincrease or decrease the date to the desired value.6. Press the ENTER button once to accept the current displayed date of themonth and go to the year setup mode.7. The year will start flashing. Press the or – button to increase ordecrease the year to the desired value.8. Press the ENTER button once to accept the current displayed year andcomplete the set date mode and return to the previous menu.9. Replace the cover for normal operation.Enabling or Disabling Daylight Saving Time (P3)Note – when this setting is set to ENABLED, the clock’s time willautomatically change for Daylight Saving. When this setting is set toDISABLED, the clock’s time will not change for Daylight Saving.1. With the cover removed, press the PROGRAM button to begin buttonprogram mode andP1 TIME will appear.2. Press the button to change the current programmingmode until the display showssaving.P3 Daylight[The second line will scroll].3. Press the ENTER button and the clock will begin flashingthe current Daylight Saving setting.4. Press the or – button to change the Daylight Saving setting to thedesired value of Enabled or Disabled. The default setting Enabled [ON].5. Press the ENTER button to set [save] the current value and go back tothe previous menu.6. Replace the cover for normal operation.PIX-75www.amano.com/time 1-800-253-98361-9
Enabling/Disabling Auto Print (P508)1. With the cover removed, press the PROGRAM button to begin buttonprogram mode andP1 TIME will appear.2. Press the or – button to change the current programming mode untilthe display showsP5 others.3. Press the ENTER button once and the clock will display the submenu forother settings such asP501.4. Press the or – button until the display showsP508Print method. [The second line will scroll]5. Press the ENTER button once and the clock will startflashing the current print method format. The defaultsetting AUTO. The mode choices are:ModeDescriptionAutoWill automatically print a single print when media isinserted.ManualRequires you to use the PRINT button when printing.CombinationRequires you to insert media to trigger and press thePRINT button.Caution – when the clock is in the manual print mode print mediashould be inserted in the clock before the print button is pressed toprotect the print head.6. Press the or – button to change the value.7. Press the ENTER button once to accept the current displayed value and goback to the previous menu.8. Replace the cover for normal operation.Note – when the clock is in the manual or combination print mode,the print buttons ( and – buttons –see Figure 1 on page 1-2) areenabled when the cover is on. Pressing either of these buttons willcause the clock to print. When 2 print lines are configured, pressingthe button will print line 2, while pressing the Minus (-) button willprint line 1.1-10www.amano.com/time 1-800-253-9836PIX-75
Wall Mounting (Optional)Avoid the following:1. Using the supplied mounting template (see last page of this guide), markthe two (2) mounting slots on the wall. A 3rd mounting slot can be used toprovide security (see Figure 2).2. Verify that the cable for AC Power Adapter is plugged into the back of thePIX-75 before hanging on the wall.3. Hang the PIX-75 on the wall level using #10 wood screws [not included]or equivalent in the two mounting slots without removing the cover.4. If security is an issue for removing the PIX-75 from the wall, remove thecover, and use the upper mounting slot (see Figure 2 and Figure 8 onpage 2-30) to firmly secure the back of the PIX-75 to the wall. Secure tothe wall using #10 wood screw (or equivalent).5. Replace the cover for normal operation.PIX-75www.amano.com/time 1-800-253-98361-11
Figure 2: PIX-75 Rear View for Wall Mounting.This page intentionally left blank.1-12www.amano.com/time 1-800-253-9836PIX-75
Chapter 2 – OperationPIX-75 ViewsFigure 3: External View.Figure 4: Internal View.PIX-75www.amano.com/time 1-800-253-98362-1
PIX-75 View DescriptionInternal ViewThe 7 function buttons are used to navigate through the Setup Mode tochange the clock’s settings. The PROGRAM button is used to enter/exit the Program Mode and exit anysub-program menu. The and - buttons are used to change the information on the displaythrough programmable areas and possible inputs. By pressing andreleasing these buttons, the selectable option will be displayed or thenumber values will be increased or decreased by 1. These buttons (seeillustration on previous page) can be pressed and held for 3 seconds orgreater for faster change. The ENTER button is used to accept the information shown on the displayand save it in memory. The HOUR button advances the hour in the display by increments of 1. The MINUTE button advances the minutes in the display by incrementsof 1. The RESET button will restart the clock with no change to user settings,time, and ink capacity.LCD Display ViewThe LCD display contains an INK indicator. The PIX-75 calculates the inkcapacity of the ribbon cartridge from the number of imprints made. As theink capacity decreases, the amount of ink in the drop [indicator] willdisappear. This shows the amount of ink remaining in the ribbon cartridgeusing 3 drop segments, from empty, to half-full, to full.indicator will flash when the print counter reaches a VERYThe emptyLOW level. The drop indicator and “INK” segment will continue to blink untilthe print counter is reset.Need Ribbons, Keys and Accessories?Visitwww.amano.com/timeOr call 1-800-253-9836Note – Reset the INK indicator by pressing the ENTER button andholding for three (3) seconds only in the “Setup Mode” [must seeSETUP in display] and the PIX-75 will display the message“INK RESET” to confirm. Whenever the cover is removed youare automatically in the “Setup Mode”.2-2www.amano.com/time 800-253-9836PIX-75
The Atomic Time Synchronization Indicator in theLCD Display indicates the status of the signal. Whenyou first receive the clock, it may be necessary to adjustthe hour and minute. This Atomic TimeSynchronization feature is not available in Hawaiiand Alaska.Whenever the time is changed on the clock by the user the “Signal Found”Atomic Time Synchronization Indicator will be turned off and just the“Searching for Signal” indicator will be displayed. The clock will automaticallyresynchronize the time (minutes and seconds) by searching for the AtomicTime signal.Note – The atomic clock feature must be enabled for this timesynchronization process. Amano recommends facing the front ofthe clock (display side) either in the South or North direction toincrease potential atomic time signal reception.Auxiliary DisplayThe PIX-75 backlit LCD display has the bottom line of 10 characters that canbe configured to display different items as;DateWhen configured with the Date option [this default], theclock will display the Month, Date, and Day of the week inthe auxiliary display bottom line (see right-hand figure).PIX-75www.amano.com/time 1-800-253-98362-3
Line NumberWhen configured for this feature if custom printing hasbeen selected, the clock will display the next line numberto be printed when the user inserts a piece of paper in theclock for printing. If the user has selected a pre-definedprint format, it will display that format (see right-handfigure).Note – Two lines must be configured for symbol printing whenusing the auto print method, or the display will show “LINE-1”.If custom printing is selected but no line-1 is configured, the clockwill display “LINE-1 ERR” as long as the LINE NUMBER hasbeen configured to be displayed withP517 AUX display(see page 2-20).Advanced Button ProgrammingThe following paragraphs must be performed with the clock cover removedand the voice mode off.Setting Custom Print (Symbol Printing) (P501)1.With the cover removed, press the PROGRAM button to begin buttonprogram mode and2.will appear.Press the or – button to change the current programming mode untilthe display shows3.P1 TIMEP5 others.Press the ENTER button once and the clock will displaythe submenushowingP501for custom print with the displayCUSTOM PRINTon the 2nd line [scrolling].4.Press the ENTER button once and the clock will displayLine – 1 and the number of currently programmedsymbols (see right-hand Figure which indicates 5symbols for line 1). (See Symbol Table on page 2-8).5.If you do not want to change Line – 1, press the button to move to line 2 for line 2 programming.2-4www.amano.com/time 800-253-9836PIX-75
6.From either Line – 1 or Line – 2, press the ENTERbutton once to begin programming that line. Note – ifline 1 is not programmed, it must be programmedbefore line 2 can be programmed. Line 2 does not haveto be programmed. The 2nd line [auxiliary display line]will flash each symbol item (see right-hand Figure).7.Press the or – button until the desired symbol item isdisplayed and press the ENTER button once to acceptthe flashing symbol value. Once a symbol item has beenselected the number of symbols shown on the right willincrement by one (1). See right-hand Figure for exampleshowing MONTH for 02 [second] symbol for Line -1.Note – You can use the 1 HOUR or 1 MINUTE buttons toscroll up or down through the custom programmed line to seewhat symbols are currently chosen for the line.8.Repeat the process described in step 7 to enter each element for line 1.Select the “END” symbol followed by pressing the ENTER button onceto complete custom programming of line 1.9.If desired, press the button once to advance toLine – 2 for custom programming (see right-handFigure).10. Press the ENTER button again to begin symbolprogramming for line 2 and follow the same procedure as described insteps 7 and 8. The first symbol to appear will be the“END” symbol (see right-hand Figure).11. Press the PROGRAM button to end custom print linesymbol programming and/or replace the cover for normaloperation.To delete a Whole Line of Symbol Printing1. Press the ENTER button once from theP501submenufor custom print and the clock will display Line – 1 andthe number of programmed symbols (see right-hand Figurefor example of line-1 with 5 symbols).2. If desired, press the button once to advance toLine – 2.3. Press the ENTER button once and use the or – buttons to navigate tothe “END” symbol. With this symbol flashing on the Auxiliary DisplayLine, press the ENTER button once to save the “END” symbol at thebeginning of the symbol line. This will terminate/delete that line ofsymbol printing.PIX-75www.amano.com/time 1-800-253-98362-5
To Add a Symbol to a Custom Print Line1. Press the ENTER button once from theP501submenuand the clock will display Line – 1 and the number ofprogrammed symbols (see right-hand Figure for exampleof a line-1 with 5 symbols).2. If desired, press the button once to advance toLine –2.3. Press the ENTER button once and use the HOUR or MINUTE buttonsto navigate through the print line of symbols to the symbol you want toinsert before [the new symbol will always be inserted before the flashingsymbol]. When this symbol is flashing on the Auxiliary Display Line usethe or – buttons to navigate to the “add” symbol to perform the addfunction to the line. Press the ENTER button once to begin the addfunction.4. Press the or – button to navigate to and display the desired symbol tobe added [by default “2D YEAR” symbol will always be the first symbolshown for insertion]. Then press the ENTER button once to accept theflashing symbol value.5. Keep pressing the ENTER button until you see the flashing “END”symbol to finish the symbol line. Press ENTER to save the “END” andcomplete the line 1 or line 2 of symbol printing.Failure to finish a line 1 or line 2 of symbol printing without entering the“END” symbol will cause the entire line not to be saved.Note – Pressing the PROGRAM button while performing customprint line setup with symbol printing will end the custom printsubmenu without altering the program.To Delete a Symbol from a Custom Print Line1. Press the ENTER button once from theP501submenuand the clock will display Line – 1 and the number ofprogrammed symbols (see right-hand Figure for exampleof a line-1 with 5 symbols).2. If desired, press the button once to advance toLine – 2.3. Press the ENTER button once and use the HOUR or MINUTE buttonsto navigate through the print line of symbols to the symbol you want todelete [the symbol will always be deleted at the flashing symbol]. Withthe symbol to be dele
Set the time, Daylight Saving, Print Direction, Print Language, Print Method, Atomic Clock, Display Format and even select a Print Format using only your voice. Say "Hello Clock" and the clock responds Welcome, to the Amano time clock, what would you like to change? Then simply speak your command, for example "Time" to set the time and the
![PIX-55 Operation Manual [AJR-224503]](/img/55/amano-pix55.jpg)