![PIX-55 Operation Manual [AJR-224503]](/img/55/amano-pix55.jpg)
Transcription
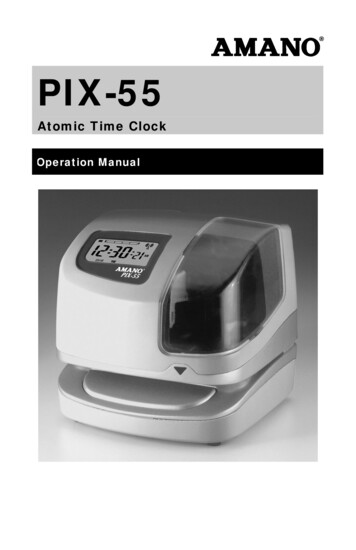
PIX-55Atomic Time ClockOperation Manual
Proprietary NoticeThis document contains proprietary information and such information may not bereproduced in whole or part without the written permission from AmanoCincinnati, Inc. 140 Harrison Ave., Roseland, New Jersey 07068.Amano Cincinnati, Inc. reserves the right to make equipment changes andimprovements, which may not be reflected in this document. Portions of thisdocument may have been updated to include the latest hardware or firmwareversion, if applicable. We recommend that this document be read in its entiretybefore any attempt is made to operate the equipment.Thank You .For purchasing another fine product fromAmano Cincinnati, Inc. Important! Do not return this clock to the retailer. If you haveany questions or need assistance, please call us toll free at1-800-253-9836Need Ribbons, Keys and Accessories?Visitwww.amano.com/timeOr call 1-800-253-9836
Warranty NoticeAny claim for warranty, express or implied, due to the clock’s failure to properlyreceive the radio signal because of interference, whatever the source of thisinterference may be, are hereby expressly excluded.For more information about the WWVB radio signal, actual signal coverage in NorthAmerica visit NIST’s website at: http://tf.nist.gov/stations/radioclocks.htmFor actual signal coverage in North America overage.htmSpecificationsPower RequirementsFor Clock Input:For AC Adapter:Battery:Ambient Temperature:Ambient Humidity:Dimensions:Weight:Environment:External View16.5 VDC, 60Hz, 0.6A (Max.)100 VAC 10%, 50/60Hz120 VAC 10%, 60Hz230 VAC 10%, 50/60HzLithium Battery for Memory Backup in case of powerfailure (factory installed).-10 C to 45 C (14 F to 113 F)10% to 90% (non-condensing)6-11/16"(170 mm) Wide X 6- 7/16”(163 mm) High X6-5/8"(168 mm) Deep.Approximately 3.6 lbs. (1.63 kg)Indoor use only; dust-free environment. Keep out ofdirect sunlight.Internal View The PROGRAM button is used to enter and exit the Program Mode. The CHANGE button is used to change the information on the display. The ENTER button is used to accept the information shown on the display andsave it in memory. The HOUR button advances the hour in the display by increments of 1. The MINUTE button advances the minutes in the display by increments of 1.PIX-55www.amano.com/time 1-800-253-98361
Display ViewThe LCD Display contains an Ink Capacity gauge. This gauge indicates theamount of ink remaining in the ribbon cartridge using four bar segments, from E(Empty) to F (Full).The PIX-55 calculates the ink capacity of the ribbon cartridge from the number ofimprints made. As the ink capacity decreases, the bars in the gauge willdisappear. When the ribbon capacity drops below 25%, the “E”, “F” and “INK”characters will blink until the ribbon is replaced and the ink counter is reset.Removing the Cover and Packing Material1.Insert the key provided and turn clockwise to unlock the cover.2.Lift the cover to remove.3.Remove the spacer between the Ribbon Cartridge and the Printer Carriage.Making a Test Print1. Make sure the PIX-55 is plugged in.2. Insert a piece of paper or time card into the PIX-55. The clock willautomatically print YEAR, MONTH, DATE and TIME with AM or PM.3. If the imprint is satisfactory, the PIX-55 is ready for use.2www.amano.com/time 1-800-253-9836PIX-55
Setting the Time (If Displayed Time is Incorrect or InDifferent Time Zone)1. Unlock and remove the cover.2. Press the HOUR advance button until the correct hour appears.3. Press the MINUTE advance button until the correct minute appears.Note – You must follow this procedure if you are installing the PIX-55in a different Time Zone from where it is currently programmed.Setting the Month and Date1. Press the PROGRAM button until dA E PI appears,then release. Next press the ENTER button.2. Press the CHANGE button until the correct yearappears, then press the ENTER button.3. Press the CHANGE button until the correct dateappears, then press the ENTER button.4. Press the CHANGE button until the correct monthappears, then press the ENTER button.5. The display should now be flashing the correctmonth, date and year. Press the ENTER button tosave.6. Press the PROGRAM button to exit.PIX-55www.amano.com/time 1-800-253-98363
Changing the Print Style1. Press the PROGRAMbutton until dA E PIappears.2. Press the CHANGEbutton until Prn P4flashes in the display.Press the ENTERbutton.3. The display will flashthe current setting.Press the CHANGEbutton until the desiredprint style codeappears (see diagram).4. When the displayflashes the correctsetting, press theENTER button andpress the PROGRAMbutton to exit.Changing the Print Direction41.Press the PROGRAM button until dAappears.2.Press the CHANGE button until 0 hr P5flashes in the display. Press the ENTER button.3.Press the CHANGE button until Prdr I 3 flashesin the display. Press the ENTER button.4.Press the CHANGE button until the desiredprint direction r9h (Right Side) or LEf (LeftSide) flashes in the display, then press theENTER button.5.Press the PROGRAM button to exit.www.amano.com/time 1-800-253-9836E PIPIX-55
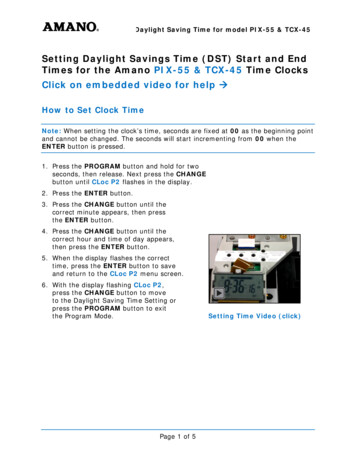
Enabling or Disabling Daylight Saving TimeNote – when this setting is set to ON, the clock’s time willautomatically change for DST. When this setting is set to OFF, theclock’s time will not change for DST.(To program the dates for the begin and end DST, refer to the Other OptionsMenu sections, below.)1.Press the PROGRAM button for two seconds, thenpress the CHANGE button until dL S P3 flashes inthe display.2.Press the ENTER button.3.Press the CHANGE button to alternate between ONand OFF.4.When the display flashes the correct setting, pressthe ENTER button.5.When the display flashes dL S P3, press thePROGRAM button to exit the Program Mode.Changing the Begin Date for DST: Other Options MenuNote – the government standard for DST is subject to change. Yourclock is factory set for correct DST based upon when it wasmanufactured, but any revision to DST begin or end dates mayrequire updating the system-set DST calendar.The steps below change the begin date for DST. Updating the begin date forDST needs to be done just one time, since the clock’s rolling calendar functionwill auto-calculate the begin date for each year thereafter. To change the enddate for DST, refer to the next section.PIX-551.Press the PROGRAM button for two seconds, then theCHANGE button until 0 hr P5 flashes in the display.2.Press the ENTER button.3.Press the CHANGE button until bdL 16 (begin Daylight SavingTime Date) flashes in the display.4.Press the ENTER button.5.The display shows the current month, date and year for thebeginning of DST (year 2009 shown). The year flashes,indicating the year is the first part of the DST Begin Date thatcan be adjusted.6.Press the CHANGE button until the year shows the correctyear for the beginning year for the DST modification.7.Press ENTER. The date flashes.www.amano.com/time 1-800-253-98365
8.Press the CHANGE button until the date shows the correctdate for the beginning date for the DST modification.9.Press ENTER. The month flashes.10. Press the CHANGE button until the month shows the correctmonth for the beginning month for the DST modification.11. Press ENTER.12. When the display flashes the correct selection, press theENTER button, then the PROGRAM button, to save changesand exit the DST function.Changing the End Date for DST: Other Options MenuNote – the government standard for DST is subject to change. Yourclock is factory set for correct DST based upon when it wasmanufactured, but any revision to DST begin or end dates mayrequire updating the system-set DST calendar.The steps below change the end date for DST. Updating the end date for DSTneeds to be done just one time, since the clock’s rolling calendar function willauto-calculate the end date for each year thereafter. To change the begin datefor DST, refer to the previous section.1.Press the PROGRAM button for two seconds, then theCHANGE button until 0 hr P5 flashes in the display.2.Press the ENTER button.Press the CHANGE button until EdL 17 (end Daylight SavingTime Date) flashes in the display.4. Press the ENTER button.5. The display shows the current month, date and year for theend of DST (year 2009 shown). The year flashes, indicatingthe year is the first part of the DST End Date that can beadjusted.6. Press the CHANGE button until the year shows the correctyear for the beginning year for the DST modification.7. Press ENTER. The date flashes.8. Press the CHANGE button until the date shows the correctdate for the beginning date for the DST modification.9. Press ENTER. The month flashes.10. Press the CHANGE button until the month shows the correctmonth for the beginning month for the DST modification.11. Press ENTER.12. When the display flashes the correct selection, press theENTER button, then the PROGRAM button, to save changesand exit the DST function.3.6www.amano.com/time 1-800-253-9836PIX-55
Enabling or Disabling Auto Print1.Press the PROGRAM button until dAappears.2.Press the CHANGE button until 0 hr P5 flashes inthe display. Press the ENTER button.3.Press the CHANGE button until A Pr I 4 flashesin the display. Press the ENTER button.4.Press the CHANGE button until the desired codeappears on the display, then press the Enterbutton. The Auto Print codes are as follows:CodeModeDescriptionP onAutoPrintWill automatically print asingle print when media isinserted.OFFManualPrintP:5 on5.E PIRequires you to use thePRINT button whenprinting.DO NOT USEPress the PROGRAM button to exit.Wall MountingPlacement considerations:1.Remove the Cover and then remove theBack Plate by pressing the tab on thebottom of the clock as shown in the righthand figure.PIX-55www.amano.com/time 1-800-253-98367
2.Using the Back Plate as a template, markthe lower mounting hole on the wall.3.Mount the plate using a #10 wood screw(or equivalent) in the center mounting hole.4.Level the Back Plate and mark the locationof the two upper mounting holes. Secure tothe wall using #10 wood screws (orequivalent).5.Feed the cable of AC Power Adapterthrough one of the holes in the Back Plate.6.Align the clock with the two upper tabs onthe back plate. Tilt the back of the clockupwards to fully insert the back plate tabsinto the clock. Be careful not to pinch thepower cord with the bracket.7.Once the tabs are inserted, tilt the clockback down and push it against the wall.The tabs will snap into place.8.Replace the cover and lock it in place usingthe supplied key.Atomic Clock FeatureThe Amano atomic clock receives time signals on longwave radio (60 kHz) from the National Institute ofStandards and Technology (NIST) radio station WWVB,located in Fort Collins, Colorado, which is coupled withthe atomic cesium clock in Boulder. The PIX-55receives the WWVB time signal via its built-in antennasystem. Your clock will try to find the signal on a daily basis.The Atomic Time Synchronization Indicator in the LCDDisplay indicates the status of the signal. When you firstreceive the clock, it may be necessary to adjust the hour andminute. If your PIX-55 is located in an area that cannotreceive the Atomic time signal, DO NOT be concerned, sincethe PIX-55 is able to accurately keep the time using its quartzmechanism (plus or minus three seconds per week).8www.amano.com/time 1-800-253-9836Searchingfor signalFoundsignalPIX-55
Please visit to http://tf.nist.gov/stations/radioclocks.htm for more informationabout how radio-controlled clocks work, where they work, and what to do whenthey don’t work.Disabling or Enabling the Atomic ClockBy default, the Atomic Clock function is enabled. If you wish to disable the atomicclock synchronization, or if you wish to re-enable synchronization, please do thefollowing:1.Press the PROGRAM button until dAPI appears.2.Press the CHANGE button until 0 hr P5flashes in the display. Press the ENTERbutton.3.Press the CHANGE button until dIA9 I 8flashes in the display. Press the ENTERbutton.4.Press the CHANGE button until CLr d 4flashes in the display. Press the ENTERbutton.5.Press the CHANGE button until the lastdigit of the code is the number 3 (todisable atomic clock) or the number 4(to enable atomic clock).6.Press ENTER to accept the entry. Thedisplay will move to the first digit of thecode (0). Press ENTER to accept it.When the display flashes the correctcode (03) for disable or (04) for enable,press ENTER.7.PIX-55EPress the PROGRAM button to exit.www.amano.com/time 1-800-253-98369
Ribbon Cartridge ReplacementStep 1.Insert the clock key (required to unlock the cover),turn clockwise, lift up the cover (see figure), andremove for ribbon access. Locate the ribboncradle.Note:You MUST have the key to remove the cover forribbon replacement.The AmanoPIX-55 clockpictured to the right,shows a typicallayout with theribbon cartridgeinstalled in thecradle.Step 2.Pull the two release tabs ("B") upward, andhold with index and middle fingers (seefigure).Step 3.While holding the release tabs in an upwardposition, grasp the tab on the ribbon cassette,and pull the ribbon cassette out of the cradle(see figure).Note:If the print mechanism is down (a piece ofpaper could not be inserted), press the RESETbutton to move the carriage up. This will makethe ribbon installation easier.Step 4.Insert a new ribbon and be sure to mount itbetween the ribbon guide and the printerhead as illustrated (see figure and arrows).10www.amano.com/time 1-800-253-9836PIX-55
Step 5.Turn the knob on the cassette clockwise one turnto take up any slack in the ribbon (see figure).Step 6.Reset the INK indicatorby pressing the CHANGE and ENTER buttons at the same time.Step 7.Stamp a card to check the printing quality and confirm that you haveinstalled the ribbon properly.Step 8.Replace the cover (locks automatically).The PIX-55 ribbon cartridge in Black ink is:Amano Part No. CE-315151 Order now!The PIX-55 ribbon cartridge in Red ink is:Amano Part No. YK-629671 Order now!The PIX-55 ribbon cartridge in Green ink is:Amano Part No. YK-629771 Order now!These ribbon cartridges are normally goodfor approximately 6000 stamps, but they aresupplied in sealed plastic bags to provide anaverage shelf life of 2 plus years.The Amano Part number for a set of PIX-55 keys is AJR-201150Note – A key is required to unlock the top cover which allows youaccess to the ribbon cartridge for replacement and/or theprogramming buttons.When ordering parts and/or accessories, be sure to include your PIX-55 modelnumber.PIX-55www.amano.com/time 1-800-253-983611
Error MessagesIn the event of an error, a message will appear in the display. The possible errormessages are listed in the following table along with their probable causes andsolutions.Note – An error message can be possibly cleared by pressing the“Reset” button. The Reset button is located on the bottom right backcorner of clock. It is a small button inside the hole (see figure). YouDO NOT have to remove the back plate to press the Reset button.There is a cutout that allows access to it even if the clock is stillmounted on the wall. However, you will have to remove the top coverto access the programming buttons should you have to reprogram theclock due to an error. To remove the cover, insert the key provided(Amano Part # AJR-201150), turn clockwise and lift to remove.For error messages Pr E I through Pr E r, unplug the clock before checking tosee that the carriage is not stuck or jammed. Also, check to see that the ribboncables are in good condition. After clearing any jams, plug the clock back in.Contact us at 1-800-253-9836 if you need assistance.The dL error message signifies that an attempt was made to get into theProgram mode during the Daylight Saving changeover one-hour lockout. Waitone hour and you will be able to program the clock.Figure: PIX-55 Bottom View12www.amano.com/time 1-800-253-9836PIX-55
Table: Error MessagesError MessageCauseSolutionE r PrGeneral PrintError.Unlock cover and remove. Press theReset button (see above figure). If theerror clears, try to stamp a card. If the unitstamps without having the error messagecome up again replace the cover and lock.The configuration is still programmed inthe clock.E I PrHome SensorMotor, CarriageStuck.Unlock cover and remove. Set PIX-55 onside with the ribbon side up. Press theReset button to reset the printer carriageand blow air into the printer platen toremove or dislodge jammed objects (i.e.,staples).Timing Sensor,Carriage Stuck.Unlock cover and remove. Set PIX-55 onside with the ribbon side up. Press theReset button to reset the printer carriageand blow air into the printer platen toremove or dislodge jammed objects. If theerror reoccurs, check the wires and cablesto verify all are connected properly.Home Sensor,Carriage Stuck.Unlock cover and remove. Press theReset button to reset the printer carriageand the time should reappear on thedisplay. Try to stamp a card again so youcan hear the machine attempting tostamp. If you hear that the assemblysounds sluggish or drags, Amanorecommends that the frame be relubricated with either silicone or whitelithium grease. See the following figure forlocation. (DO NOT use WD-40 as it willdamage the plastic components).E 2 PrE 3 Pr / E 4 PrNote – Print errors can be caused by the absence of grease on theprinting carriage mechanism. If this occurs, the carriage mechanismmay not slide smoothly. This movement restriction may cause theprinter to display a print error and stop working. If this occurs, applywhite silicone grease to the horizontal metal plate that the carriagemechanism slides against (see the following figure).PIX-55www.amano.com/time 1-800-253-983613
Figure: Ribbon Carriage GreaseShould you need further assistance in clearing an error message:1.Visit our website at: http://www.amano.com/time or2.Call us at: 1 (800) 253-9836 Monday – Friday 8:00am – 5:00pm (EST)Clearing the Memory on the PIX-55 – “Prt er” ErrorMessageBefore you begin, press the reset button on the bottom of the unit. The resetbutton is located in the back right corner on the bottom of the clock. (Inside anopening). The time must be visible on the display to be able to program the unit.1. Press the PROGRAM button down for 2 seconds, then release. Yourdisplay will read “dAtE P1”2. Press the CHANGE button 4 (four) times. Your display will read“Othr P5”3. Press the ENTER button once. Your display will read “Prnt 11”4. Press the CHANGE button 7 (seven) times. Your display will read“dIA9 18”5. Press the ENTER button once. Your display will read “SoFt d1”6. Press the CHANGE button 3 (three) times. Your display will read“CLr d4”14www.amano.com/time 1-800-253-9836PIX-55
7. Press the ENTER button once. Your display will read “00”. The zeroon the right should be flashing.8. Press the CHANGE button 2 (two) times. The display will read “02”.9. Press the ENTER button once. The left zero should now be flashing.10. Press the CHANGE button 3 (three) times. The display will read“32”.11. Press the ENTER button 2 (two) times. The display will now read“dIA9 18”12. Press the PROGRAM button once to exit from programming.The programmable memory in your PIX-55 has now been reset to the factorydefault. Please insert a piece of media to conduct a test print. If the errormessage does not come back, you can now reprogram your unit to the currentdate and time. However, if the error message returns, please call 800-253-9836for additional assistance.CleaningDo not use any chemical solvents or oils to clean or lubricate your PIX-55. Thiswill damage your clock. To clean the inside of your clock, simply blow it out withair.Resetting Clock After Extended Loss of PowerIf there has been a power interruption of duration sufficient to drain the internallithium battery, the date setting, the clock setting and the Daylight Saving Timesetting will each need to be reset.PIX-55www.amano.com/time 1-800-253-983615
NOTES16www.amano.com/time 1-800-253-9836PIX-55
www.amano.com/timeAJR-224503Copyright 2009 Amano Cincinnati, Inc.07/09/0
1. Make sure the PIX-55 is plugged in. 2. Insert a piece of paper or time card into the PIX-55. The clock will automatically print YEAR, MONTH, DATE and TIME with AM or PM. 3. If the imprint is satisfactory, the PIX-55 is ready for use.
