Transcription
Beaglebone greenUser ManualRelease date:2015/9/22Version:1.0Wiki: http://www.seeedstudio.com/wiki/Beaglebone eBone-Green-p-2504.html?cPath 122 1131
Document Revision HistoryRevisionDateAuthorDescription1.0Sep 22, 2015LooveeCreate file2
ContentsDocument Revision History ·······················21. Introduction ············22. Technical Details ······33. Hardware Overview ··43.13.24.3.2.1Cape Expansion Headers ·············53.2.265 Possible Digital I/Os ···············53.2.3PWMs and ·63.2.4Analog Inputs ···73.2.53.2.63.2.7UART ················7I2C ···················8SPI ···················9Software gn materials ·········4Headers ····················5Software �···········10Getting Started ··········10Cloud9 IDE ··············10Update image ············114.4.1Step1: Download the latest microSD card image ··············114.4.2Step2: Install compression utility ········124.4.3Step3: Decompress the image ··· sion headers, but one of them only has a singledirection brought to the headers.7
3.2.6I2CThe first I2C bus is utilized for reading EEPROMS on cape add-on boards and can't be used forother digital I/O operations without interfering with that function, but you can still use it to add otherI2C devices at available addresses. The second I2C bus is available for you to configure and use.8
3.2.7SPIFor shifting out data fast, you might consider using one of the SPI ports.9
4. Software4.1Software SupportAndroid? Ubuntu? Gentoo? Whatever your software preference, get started on development withyour Beagle and the software resources byclick http://beagleboard.org/Support/Software Support.4.2Getting StartedBeaglebone Green is a tiny computer with all the capability of today’s desktop machines, withoutthe bulk, expense, or noise. Read the step-by-step getting started tutorial byclick http://beagleboard.org/getting-started to begin developing with your BeagleBone inminutes.4.3Cloud9 IDETo begin editing programs that live on your board, you can use the Cloud9 IDE. As a simpleexercise to become familiar with Cloud9 IDE, creating a simple application to blink one of the 4user programmable LEDs on the BeagleBone is a good start. Step1: Close any open file tabs. Step2: Click the " " in the top-right to create a new file.10
Step3: Copy and paste the following code into the new tabimport Adafruit BBIO.GPIO as GPIOimport timeGPIO.setup("P9 14", GPIO.OUT)while True:GPIO.output("P9 14", GPIO.HIGH)time.sleep(0.5)GPIO.output("P9 14", GPIO.LOW)time.sleep(0.5) Step4: Save the file by clicking the disk icon and giving the file a name with the .py extension. Step5: Run the codeSelect the arrow to the right of "run" (or "debug") in the toolbar to pull down the list of files to runand select your new file. Step6: Observe the BeagleBone P9 14 led blinking steadily about once a second. Step7: Stop the code by clicking "stop" in the toolbar.4.4Update imageThere are multiple ways to run initial software on your board, but it is likley that the simplest wayto get an update is to create an exact replica of a bootable microSD card and boot off of it.The BeagleBone Green that can be initialized by a program booted off of a microSD card. If youwant to update to the latest software image for your board, this is a way to do that.4.4.1Step1: Download the latest microSD card imageDownload the image from11
4gb-for-user.7z .The file you download will have an .img.xz extention. This is a compressed sector-by-sector imageof the SD card.4.4.2Step2: Install compression utilityDownload and install 7-zip by click http://www.7-zip.org/download.html .4.4.3Step3: Decompress the imageUse 7-zip to decompress the SD card .img file4.4.4Step4: Install SD card programming utilityDownload and install Image Writer for Windows by er/files/latest/download .Be sure to download the binary distribution.4.4.5Step5: Connect SD card to your computerUse the provided microSD card to SD adapter or a USB adapter to connect the SD card to yourcomputer.4.4.6Step6: Write the image to your SD cardUse either the Ubuntu Image Writer or instructions on its page to write the decompressed imageto your SD card.12
4.4.7Step7: Eject the SD cardEject the newly programmed SD card.4.4.8Step8: Boot your board off of the SD cardInsert SD card into your (powered-down) board, hold down the USER/BOOT button (if using Black)and apply power, either by the USB cable or 5V adapter.If using an original white BeagleBone, you are done.If using BeagleBone Green and the image is meant to program your on-board eMMC, you'll needto wait while the programming occurs.When the flashing is complete, all 4 USRx LEDs will be lit solid.Note: This can take up to 45 minutes. Power-down your board, remove the SD card and applypower again to be complete.13
5. Resources BEAGLEBONE GREEN SRM(pdf) BEAGLEBONE GREEN Schematic(pdf) BEAGLEBONE GREEN Schematic(OrCAD) BEAGLEBONE GREEN BOM(xls)14
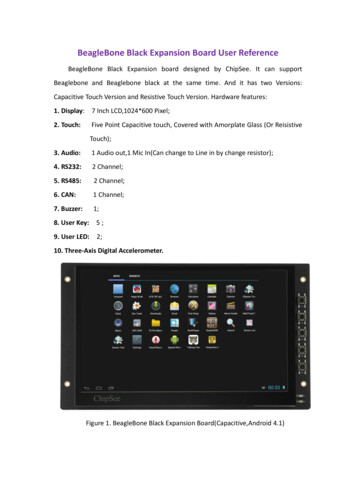
BeagleBone Green (BBG) is based on the classical open-source hardware design of BeagleBone Black (BBB) and added two Grove connectors. It has removed the HDMI port on the BBB and also updated the 5V barrel to Micro USB host. It is a low-cost, community-supported development platform for developers and hobbyists.

