Transcription
Wifi BlockUser documentationVersion 1.5
Table of contentTable of content . 2123Introduction to the WifiBlock . 41.1Data logging . 51.2Remote control . 51.3A Robot-PC connection . 5Comparison between Wifi and other wireless communication technologies . 62.1Bluetooth . 62.2XBee . 6Connecting and configuring the WifiBlock . 73.1First step: connect the WifiBlock . 73.2Second step: download the NXT-G blocks. 73.3Third step: connect to your Wifi network . 83.3.1Connect using DHCP . 83.3.2Connect using IP address . 113.43.4.1A simple Echo Web Service . 143.4.2Other available free webservices . 163.5453.3.2.1 Windows . 123.3.2.2 Linux. 133.3.2.3 Mac . 14Fourth step: Make an http request . 14Advanced features of the WifiBlockUtils block . 173.5.1The “Wifi State” action . 173.5.2“Write Wifi Config” with dynamic parameters . 173.5.3The “Read WifiBlock” action . 18Other types of requests using the Wifi Block . 214.1Sending a POST request using the Wifi Block . 214.2UDP and TCP data transmission and reception using the Wifi Block. 214.2.14.3.1 Usages of UDP and TCP . 214.2.24.3.2 UDP transmission and reception . 214.2.34.3.3 TCP transmission and reception . 22How to and Troubleshooting . 235.1The WifiBlockQuery block. 235.2How to know the IP address of my WifiBlock? . 24Humarobotics – Making your personal robot smarterPage 2
5.3The debug logs . 255.4Known limitations . 255.4.1WEP connection . 255.4.2DHCP servers and broadcast issues . 266Appendix: import NXT-G blocks in NXT-G . 277Appendix: upload a file from the NXT Brick . 298Appendix: Regulatory notice and warning . 30Humarobotics – Making your personal robot smarterPage 3
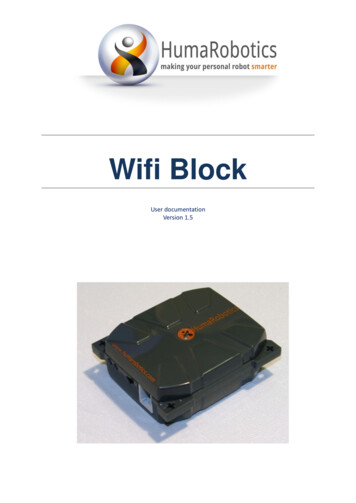
1 Introduction to the WifiBlockThe WifiBlock for Lego Mindstorms NXT is a standalone enclosure containing an electronic board witha Wifi device. Useful features are:1. Two leds (one green and one orange)2. A NXT compatible female connector3. An ON/OFF switchFigure 1 : Overview of the WifiBlockThe WifiBlock is powered by 3 AA (LR6) batteries (not supplied) that must be inserted into theWifiBlock as shown on the battery hatch marking:Figure 2 : Battery hatchThe WifiBlock connects to your Lego Mindstorms NXT brick enabling it to have a complete TCP/IPconnectivity with an access to the internet. With such equipment, your NXT robot will be able to senddata to a computer over the internet or receive information from this computer.Let’s introduce some use case for the WifiBlock.Humarobotics – Making your personal robot smarterPage 4
Figure 3 : Use case for the WifiBlock1.1 Data loggingThe « data logging » is a feature consisting in saving on a file (for example) a dataset of measuresmade by a system. Once saved, these measurements are available for further analysis or visualization.In the case of the Lego NXT robot, it can be sensor measurements, for example ultrasoundstelemeters data.Data logging can of course be made directly on the Lego Brick writing a local file that will be stored inthe memory. The main advantage brought by the WifiBlock is the ability to send data almost in realtime to a computer that can use much more memory and computational power. A graphicalvisualization or more complex analysis could then be performed by the computer using the datareceived from the Lego robot, for example to build a representation of the robot environment.1.2 Remote controlIn this case, the computer sends information to the Lego Brick using the WifiBlock connection. It ispossible to design a control interface on a computer and to send control commands to the robotsover the wireless network.1.3 A Robot-PC connectionAs seen in the two previous examples, the WifiBlock creates a true bridge between the robot andconnected computer, enabling unprecedented capabilities for the Lego Mindstorms NXT robot, likelong distance remote control with sensor return.Humarobotics – Making your personal robot smarterPage 5
2 Comparison between Wifi and other wirelesscommunication technologies2.1 BluetoothBy default, the Lego Mindstorms NXT smart brick offers a wireless connection. It is the Bluetoothtechnology. Wifi has several critical advantages compared to the Bluetooth: Bandwidth: Wifi allows to transmit more data, up to 11Mbps (theoretical max), to (http://www.tau.ac.il/ stoledo/lego/btperformance.html ). The WifiBlock being a low powerembedded system, its maximum bandwidth is 1Mbps a value that is way enough for the NXT. Range: The Bluetooth present on the NXT has a 10m range only. The Wifi range is muchbetter (up to 300 or 400m according to the norms and the surrounding environment) and inaddition, if we consider that the WifiBlock equipped robot can communicate over theinternet, this range is no longer a limitation.2.2 XBeeXbee is a radio protocol with a bandwidth that is better than the Bluetooth but is still out of reach ofthe Wifi.Even if the Xbee range is more important, it only remains a point to point connection with no TCP/IPconnectivity and the lack of internet connection.To learn more on the Xbee modules for Lego Mindstorms NXT, please refer rms-nxt,us,4,NXTBeePRO.cfmHumarobotics – Making your personal robot smarterPage 6
3 Connecting and configuring the WifiBlockThis documentation is a starting guide using the WifiBlock with NXT-G, the graphical programminglanguage of Lego Mindstorms NXT. We assume in this document that you are familiar with NXT-G.Other programming languages are proposed by HumaRobotics such as RobotC and NXC. Theseprogramming language are not described her. To know more, go to the website of Humarobotics.3.1 First step: connect the WifiBlockMake sure that the 3 batteries are correctly inserted in the WifiBlock.Connect the WifiBlock using a standard Lego Mindstorms cable to one of the sensors ports of theMindstorms. These ports are labeled from 1 to 4.Then, connect your Lego Mindstorms NXT intelligent brick to your PC using the USB cable.Figure 4: Connection between the Lego Mindstorms Brick and the WifiBlockWarning: Never connect the WifiBlock to one of the motor ports (A, B and C ports). The voltage onthese connectors is not suitable and could do irreversible damages your WifiBlock.3.2 Second step: download the NXT-G blocksDownload the source code of the 4 NXT-G blocks from the website of ts/wifiblock/The WifiBlock is a complex device, that’s why there are 4 NXT-G blocks although most of the sensorson the market require only one NXT-G block.Humarobotics – Making your personal robot smarterPage 7
Unzip these 4 blocks and import each NXT-G block into the NXT-G software (from menu:Tools/Import-Export Assistant). The four NXT-G blocks are:PictureNameDescriptionThis block is used to connect the WifiBlock to your local Wifinetwork. The main features are:WifiBlock UtilsWifiBlock Query Write the Wifi Config (either using fix IP address orusing DHCP) Read some basic values of the Wifi Config (such as theIP address, the hostname, the mac address )This block is used to get some Boolean values about theWifiBlock (is the WifiBlock connected? Is there an error on theGet action? )This block is used to set the destination web server. 2 optionsare available: Either the user writes the domain name and theWifiBlock will use a DNS resolution to find the Ipaddress of the web server Or the user writes the IP address of the distant webserverWifiBlock DestWifiBlock ComThis block is used to choose the request method (GET, POST orTCP), the port (80 is the default value) and the URL of therequested webpage (without the domain name that has beenwritten by the “WifiBlock Dest” block). This block is interestingbecause it performs a request and the response in only oneblock.Table 1 : Description of the NXT-G blocks used by the WifiBlock device3.3 Third step: connect to your Wifi network3.3.1Connect using DHCPTo connect your WifiBlock to your local Wifi network, you’ll use the “WifiBlock Utils” NXT-G block.Drag and drop this NXT-G block on your programming area.Humarobotics – Making your personal robot smarterPage 8
Figure 4 : The “WifiBlock Utils” block in NXT-GThe configuration panel is as follows:Figure 5 : The configuration panel of the "WifiBlock Utils" NXT-G blockIn the Action combo box, choose “Write Wifi Config”.The following table describes each field of the configuration panel:PortActionDebug LogsIPIP MaskGatewayPort on which your WifiBlock is physically connected to your Lego MindstormsNXT brick. Check this field; this is a common source of error!Action that can be done with the WifiBlock Utils NXT-G block. We will comeback to this list later in this document.If checked, this checkbox activate the creation of a debug file on the LegoMindstorms NXT intelligent brick. Debug logs are very useful when connectingto your network for the first time but remember to uncheck this box after toavoid using too much space on your Lego NXT intelligent brick.The IP address of your WifiBlock on your local network. This field is active only ifthe DHCP checkbox is unchecked.The IP mask of your local network. This field is active only if the DHCP checkboxis unchecked.This is the IP address of your network router (in the case of a personal network,Humarobotics – Making your personal robot smarterPage 9
SaveDHCPSSIDSecurityit is often the IP address of your modem or Wifi router). This address can alsobe discovered using the ipconfig or ifconfig command. This field is active only ifthe DHCP checkbox is unchecked.When checked, this checkbox will record your settings so that next time youswitch on your WifiBlock, the same parameters are in memory. This will avoidusing the “WifiBlock Utils” block next time. Since the “WifiBlock Utils” block ispretty heavy (it takes a lot of space on the Lego NXT Intelligent brick), writing aprogram without this block is a good practice.When this checkbox is checked, the WifiBlock will automatically determine its IPaddress by using your local DHCP server. This checkbox automatically disablesall the fields related to the IP configuration.This is the name of the Wifi network you are going to connect to. This is thename that you see when hovering the Wifi Icon on your computer (if of courseit is connected to a Wifi network).This is the encryption and authentication protocol for your Wifi network.OPEN: No Security and no encryption. Your network is entirely open and anyoneor any device can connect to it.WEP: fixed key encryption. It is a basic setting for many networks (there’s alimitation with WEP, see 5.4)WPA: More secure than the WEP security setting.WPA2: 2nd version of the WPA setting, offering advanced security.PasswordPlease make sure to select the right security mode to connect the WifiBlock.Any error at this stage will result in a connection error as the various encryptionmodes are not compatible.This is the password (or passphrase) of your Wifi network. Please refer to thedocumentation provided with your Wifi router or modem. Here again, makesure that you have entered the right password.Table 2 : Fields of the configuration panel of the WifiBlock Utils blockA good practice is to start by using DHCP, with the “Debug Logs” activated. The following image showsan example of the required fields to start connecting to a Wifi network:Figure 6 : The completed configuration panel of the WifiBlock Utils NXT-G blockCompile and send your program on the Lego Mindstorms NXT brick.Once all the parameters are entered, make sure that the NXT brick is switched on and connected toyour computer using the USB cable and that the WifiBlock is also switched on and plugged to thecorrect sensor port. Then click on the “play” button of NXT-G in order to launch the compilation ofthe program and the transmission to your NXT brick.Humarobotics – Making your personal robot smarterPage 10
Figure 7 : "Download and run" button at the center of the command panel of NXT-GIn order to check with your configuration has been sent to the WifiBlock and if it has successfullyconnected to your network, you have to look at the LEDs placed on the side of the block.Figure 8 : Visualization of the connection state with LEDsWhen you switch your WifiBlock on, the two LEDs blink alternatively, showing that the device is notconnected. Once you inject the IP configuration, the orange LED shuts down while the green one stillblinks, showing a connection attempt.Once connected, the green LED stays on stable. The orange LED will blink if the WifiBlock receives oremits information. To see this, try to ping your WifiBlock using its IP address in your computer'scommand prompt and you will see the orange LED blink.Connection time depends on your Wifi encryption. When there is no security (OPEN network),connection is quick. On the contrary, if you have a strongly secured network (like WPA2), connectiontime can increase up to 60 seconds because the calculation of the encrypted key takes moreresources and time.3.3.2Connect using IP addressHumarobotics – Making your personal robot smarterPage 11
3.3.2.1 WindowsInstead of using DHCP, you can enter you IP configuration in the WifiBlock Utils NXT-G Block. Just payattention to put an IP address that is already used on the network by another device.To know the parameters of your network, use the “ipconfig” command. This command displays thenetwork configuration of your computer and the parameters of your network as shown in theexample below:Figure 9 : Ipconfig command OutputFind the wireless connection settings and write down your default gateway (in our example192.168.1.1) as well as the value for your network mask (255.255.255.0 in the screenshot above).The IP address of the computer in our example is 192.168.1.20.You now need to find a free IP address that will be attributed to the WifiBlock. Build a new IP addressby taking your computer's IP and replacing the last number by another number between 1 and 255.Then type “ping” and this IP in your command prompt. If the “ping” command gives an answer (Ctrl C to stop the command), this IP address is already in use, so choose another one.The ping command followed by an IP address performs a request on your request to lookup if deviceis already using this IP address. If no reply is returned, this means that the device is not connected tothe network or that no device on the network is using this IP address. This is what we are looking for.Humarobotics – Making your personal robot smarterPage 12
Figure 10 : The ping command indicate the presence of a device at the looked up addressIf you get a “unable to reach the destination host” answer, the IP address is free, so write it down foryour WifiBlock.Figure 11 : the result of a « ping » command showing that no device replies on a given IP address.3.3.2.2 LinuxLaunch a command prompt and run the “ifconfig” command. This command displays the networkconfiguration of your computer and the parameters of your network. Find the wireless connectionsettings and write down your default gateway, the value for your network mask and the IP addressof the computer.You now need to find a free IP address that will be attributed to the WifiBlock. Build a new IP addressby taking your computer's IP and replacing the last number by another number between 1 and 255.Then type “ping ” and this IP in your command prompt. If the “ping” command gives an answer (Ctrl C to stop the command), this IP address is already in use, so choose another one.Humarobotics – Making your personal robot smarterPage 13
If you get a “unable to reach the destination host” answer, the IP address is free, so write it down foryour WifiBlock.3.3.2.3 MacLaunch a terminal, located in /Applications/Utilities/, then type the “ifconfig” command. IP addressesare on lines that start by 'inet' (to get only these lines, you can type “ifconfig grep inet”). Find theline that looks like:inet 192.168.1.20 netmask 0xffffff00 broadcast 192.168.1.1The IP address will be between “inet” and “netmask”.Warning: there will always be a line with the 127.0.0.1 IP, which is your machine loopback address,that you should not take into account for wifi connection.Write down your computer's IP address (in our example 192.168.1.20), your default gateway (in ourexample 192.168.1.1) and the value for your network mask (0xffffff00, equivalent to 255.255.255.0 ifyou divide the hexadecimal number by groups of two digits and convert them to decimal numbers).You now need to find a free IP address that will be attributed to the WifiBlock. Build a new IP addressby taking your computer's IP and replacing the last number by another number between 1 and 255.Then type “ping ” and this IP in your command prompt. If the “ping” command gives an answer, thisIP address is already in use, so choose another one.If you get a “unable to reach the destination host” answer, the IP address is free, so write it down foryour WifiBlock.3.4 Fourth step: Make an http requestOnce your WifiBlock is connected on your network (use a ping command to check that the WifiBlockis indeed connected and answer), you are now ready to request a webpage.The WifiBlock has been designed to read small web pages such as web services. You can write yourown web service to pilot your robot or to make data logging (see 1.1). To quickly start using theWifiBlock, Humarobotics has created several free web services to be used as a test.In the following sections, we will describe some of the web services.3.4.1A simple Echo Web ServiceThis webservice is available on the URL www.humarobotics.com/wb/echo.phpThis webservice returns the value passed as a parameter. For example, typewww.humarobotics.com/wb/echo.php?var Hello in your browser and you’ll get “Hello” as theanswer.We will try this webservice with the WifiBlock using the following NXT-G code:Humarobotics – Making your personal robot smarterPage 14
Figure 12 : NXT-G program that makes a GET requestThis NXT-G code first uses a “WifiBlock Dest” block to set the name of the Web server that host therequested web service. Then a “WifiBlock Com” block is used to actually make the GET request. Then,the result of the GET request is displayed on the Lego Mindstorms NXT intelligent brick screen. Thelast NXT-G block is a wait block to have time to see the result on the screen before the program endsand the screen is cleared.The following table shows the configuration panel of each NXT-G block of this program.NXT-G blockWifiBlockDestConfiguration PanelWifiBlockComDisplayHumarobotics – Making your personal robot smarterPage 15
WaitTable 3 : Configuration Panel of the NXT-G program that makes a GET request3.4.2Other available free webservicesHumaRobotics has made available some other simple webservices to test the WifiBlock. Here is thelist of these webservices:URL of the Web ServiceDescriptionExample with parametersReturns the currentwww.humarobotics.com/wb/date.php dateReturns the currentwww.humarobotics.com/wb/time.php essoftheWifBlockthatrequest this webpagewww.humarobotics.com/wb/cp.phpReturns the city that /wb/cp.php?c US&z 02101 returnsis associated with a Bostoncountry and a zipcode/wb/cp.php?c FR&z 33000returns Bordeauxwww.humarobotics.com/wb/dns.php ReturnstheIP /wb/dns.php?h www.facebook.comaddress of a domain returns 66.220.152.32nameTable 4 : List of available WebServices from HumaroboticsHumarobotics – Making your personal robot smarterPage 16
3.5 Advanced features of the WifiBlockUtils blockThe “WifiBlock Utils” block offers other possibilities than just writing the Wifi configuration on theWifiBlock.The 'DebugLogs' box allows you to ask the NXT Brick to store logs in a file that you can retrieve fordebug purpose (see Troubleshooting section).3.5.1The “Wifi State” actionThis action allows you to do some actions on the WifiBlock once it is configured.ActionsWifi ONAutoEraseConfigDescriptionEnable Wifi (checked: wifi enabled)Auto reconnection if connection lost (checked: auto reconnection activated)Erase the saved Wifi configuration (checked: config will be erased)Table 5 : "Wifi state" actionsRemark: You can do these actions when writing the Wifi configuration.Figure 13 : The WifiBlock Utils configuration panel when “Wifi State” is selected3.5.2“Write Wifi Config” with dynamic parametersIn the previous example, we hard coded the Wifi configuration. But if you want some setting todepend from what happened previously in your program, you can dynamically change theparameters using the block's data hub.To open the data hub of a block, click on its lower edge. You get access to the following settings:DataActionData typeNumberValue to ReadNumberDescription1: help2: Write Wifi Config3: Wifi State4: Read WifiBlockValue to be read in the WifiBlock registers, see next paragraphHumarobotics – Making your personal robot smarterPage 17
DataSecurityData typeNumberSSIDPasswordIP1, IP2, IP3, IP4IP mask, MSK2,MSK3, MSK4Gateway,GW2,GW3, GW4Wifi OnAuto mbersDescription0: Open1: WEP2: WPA3: WPA2The Wifi network nameThe Wifi network passwordIP address, divided into 4 numbersIP mask, divided into 4 numbersNumbersGateway, divided into 4 numbersBooleanBooleanBooleanBooleanBooleanWifi enabledAuto reconnection enabledThe Wifi configuration will be savedWifi configuration will be erasedDebug logs enabledTable 6 : Data accessible by the "WifiBlockUtils" data hub3.5.3The “Read WifiBlock” actionWhen you choose the “ReadWifiBlock” action, you have a read access to all values saved in theWifiBlock. Select one using the “Value to read” dropdown menu. The data will be accessible in the“Buffer” output of the data hub, with a Text data type.The following table describes the accessible data. The numbers correspond to the numbers you haveto enter in the “Value to read” field of the data hub (see previous section):DataRead VersionRead Product IDRead Sensor TypeRead Voltage1234Read Mac5Read IPRead IP MaskRead GatewayRead SSIDRead SecurityRead PassphraseRead Get ResultRead Date678910111213DescriptionReturns the firmware versionReturns the product ID, should be HRWBReturns the Sensor Type, Should return “WIFI”.Returns 10 times the battery voltage. Don't forget to divide thisvalue by 10 to get the real voltage.Returns the MAC address of the WifiBlock (works only if theWifiBlock is connected to a network)Returns the configured IP addressReturns the IP mask of the Wifi networkReturns the gateway of the Wifi networkReturns the SSID of the Wifi networkReturns the Wifi security type (OPEN, WEP, WPA, WPA2)Returns the password of the Wifi configurationReturns the result of the latest GET requestGives the date (UNIX like timestamp)Humarobotics – Making your personal robot smarterPage 18
DataRead Get Status14Read Wifi Block Status15Read HTTP responseRead WifiRetryNbRead Get LengthRead Get IPRead Get PortRead Get URL161718192021Read Get DataRead Post Status2223Read Post LengthRead Post IPRead Post PortRead Post URL24252627Read Post DataRead UDP Status2829Read UDP dest IPRead UDP dest port3031DescriptionReturns the GET statusBit[0] : Port ready (0: KO, 1: OK)Bit[1]: ReservedBit[2]: Send request (1: send)Bit[3]: Request done (1: done)Bit[6.4]: ReservedBit[7]: Request error (1: error)Returns the Wifi statusBit[0] : Enable Wifi (0: dis, 1: en)Bit[1]: Wifi save config (1: save)Bit[2]: Start scan (1: start)Bit[3]: Scan done (0: busy, 1: done)Bit[4]: Wifi status (1: connected)Bit[5]: Disable Rs232 debug (1: no Rs232)Bit[6]: Re-connexion (0: dis, 1: en)Bit[7]: Wifi erase config (1: erase)Returns the Http last response code (3 bytes)Returns the number of Wifi connection retryReturn the length of the last data received from a GET requestReturns the IP address of the last GET requestReturns the port of the last GET requestReturns the URL of the last GET request (the part after IP address,that you enter in the “data” field, see the GET request paragraph)Returns the last data received from a GET requestReturns the POST statusBit[0] : Port ready (0: KO, 1: OK)Bit[1]: ReservedBit[2]: Send request (1: send)Bit[3]: Request done (1: done)Bit[4]: Enable Dataflash StorageBit[5]: Enable Dataflash RetransmissionBit[6]: ReservedBit[7]: Request error (1: error)Return the length of the last data transmitted by a POST requestReturns the IP address of the last POST requestReturns the port of the last POST requestReturns the URL of the last POST request (the part after IP address,that you enter in the “data” field, see the GET request paragraph)Returns the last data transmitted by a POST requestReturns the UDP statusBit[0] : Port enable (0: dis, 1: en)Bit[1]: Send Tx data (1: send)Bit[2]: Send Tx done (1: done)Bit[3]: Rx data readyBit[4]: Rx data readBit[6.5]: ReservedBit[7]: Send error (1: error)Returns IP address for UDPReturns destination port for UDPHumarobotics – Making your personal robot smarterPage 19
DataRead UDP src portRead UDP Tx DataLengthRead UDP Tx DataRead UDP Rx DataLengthRead UDP Rx DataRead TCP status3233DescriptionReturns source port for UDPReturns the length of the Tx data3435Returns the Tx dataReturns the length of the Rx data3637Read TCP IPRead TCP portRead TCP Tx DataLengthRead TCP Tx DataRead TCP Rx DataLengthRead TCP Rx DataRead Dataflash Status383940Returns the Rx dataReturns the TCP statusBit[0] : Port ready (0: KO, 1: OK)Bit[1]: Send request (1: send)Bit[2]: Request done (1: done)Bit[6.3]: ReservedBit[7]: Send error (1: error)Returns IP address for TCPReturns port for TCPReturns the length of the Tx data4142Returns the Tx dataReturns the length of the Rx data4344Read Dataflash Addr45Returns the Rx dataReturns the Dataflash statusBit[0]: Write data (1: write)Bit[1]: Write done (1: done)Bit[2]: Read data (1:read)Bit[3]: Read done (1:done)Bit[6.4]: ReservedBit[7]: Dataflash errorReturn the Dataflash addressTable 7 : Data accessible by the "Read Wifi Block" actionHumarobotics – Making your personal robot smarterPage 20
4 Other types of requests using the Wifi Block4.1 Sending a POST request using the Wifi BlockA POST request allows you to send data to a server. You can do your request the same way as the
This documentation is a starting guide using the WifiBlock with NXT-G, the graphical programming language of Lego Mindstorms NXT. We assume in this document that you are familiar with NXT-G. Other programming languages are proposed by HumaRobotics such as RobotC and NXC. These programming language are not described her.