Transcription
Networking Guide for BeagleBone (Green or Black)by Brian FraserLast update: Feb 5, 2022This document guides the user through.1. Setting up and configuring networking for the BeagleBone black or green with the host.Table of Contents1. Network Setup.22. Ethernet over USB.32.1 Initial Connection between Host and Target.32.2 Connecting Target to Internet.43. Wired Ethernet Network.84. Direct Ethernet Connection (Not Recommended).125. Linux Network Commands.155.1 General Commands.155.2 Set a static IP Address (optional).155.2.1 Temporarily Set IP Address.155.2.2 Permanently Set IP Address via Ubuntu’s GUI Tools.155.2.3 Permanently Set IP Address via Configuration File.165.3 Configure Network Adapter in Linux.16Note: Guide not yet tested in the SFU Surrey Linux Lab. Some changes may be needed.Formatting1. Commands for the host Linux’s console are show as:(host) echo "Hello PC world!"2. Commands for the target (BeagleBone) Linux’s console are shown as:(bbg) echo "Hello embedded world!"3. Almost all commands are case sensitive.Revision History Jan 4, 2021: Initial publication for semesterJan 18: Added traceroute debugging stepsJan 19: Changed to (host) and (bbg) Jan 15 2022: Added troubleshooting info for if 192.168.7.1 does not show up on host forEthernet-over-usb.Feb 4: Expanded troubleshooting info for accessing internet.Generated Feb 4, 20221 / 17
1. Network SetupYou need to have an internet connection to both your Linux development OS (host PC) and theBeagleBone. Plus, you need to have your development OS be able to connect to your BeagleBone (we'lluse SSH), and your BeagleBone be able to connect to your development OS (we'll use NFS). There are acouple ways you can connect your devices.1. Ethernet over USB – RecommendedHave your BeagleBone connect to your development computer using Ethernet over USB, andyour development computer connect to the internet via WiFi or wired Ethernet (see section 2).This needs one USB A to USB micro cable (included in kit) to make the connection. NoEthernet cable is required.2. Physical Ethernet to Wired NetworkHave your development computer and your BeagleBone plugged into the same wired network,such as a home Ethernet network (see section 3).This needs one Ethernet cable connected to the BeagleBone. The other end is plugged into yourrouter.3. Ethernet via direct connection – Not RecommendedHave your BeagleBone directly connected to your development computer via a single Ethernetcable (see section 4).This needs one Ethernet cable: one end is connected to the BeagleBone; the other end is pluggedinto your computer (either via an internal Ethernet port, or an external Ethernet adapter, such asa USB Ethernet adapter).See the necessary section below for the option you are using; you may skip the sections which do notrelate to your setup. Section 5 covers some useful Linux networking commands.Generated Feb 4, 20222 / 17
2. Ethernet over USBExpected setup is: host PC running Linux (native or in a VM) is connected to the Internet via WiFi or Ethernet; host PC connected to BeagleBone (target) via USB micro cable for “Ethernet over USB”; nophysical Ethernet cable is required. host PC connected to BeagleBone (target) via a serial cable (such as the USB micro connectionto the Zen cape, which can be used via Screen) – for debugging only2.1 Initial Connection between Host and Target1. If using a VM: Configure your VM's network connection to use NAT (Network Address Translation). Launch the VM. Ensure that inside the VM you are able to access the Internet by pinging Google (forexample).(host) ping google.ca2. Connect the USB micro cable from the host to the target (connector is on the BeagleBone, to theleft of the Ethernet port). Note that USB micro port will also power the target so to physically cycle the power youmay need to disconnect both the USB and the power connector. You can run with just theUSB power for most operations. The USB cable required is a USB-A (host side) to USB-micro (target side).3. If using a VM, map the USB connection to the VM. In VMware, use the “Player” button in the top left, go toRemovable Devices Linux Foundation BeagleBoneGreenand select to Connect. In Virtual Box, via VM's menu at the very top of the window selectDevices USB Devices Seeed BeagleBoneGreen4. On the host, check the network connection with ifconfig. It should show a connector with an IPaddress 192.168.7.1. Ethernet connector may be named like “eth1” or “enxb0d52525”(host) ifconfig You may need to install the tools on the host via: The target will default to have a fixed IP address of 192.168.7.2 via the emulated USBnetwork connection (usb0).(host) sudo apt-get install net-tools5. Ping the host from the target, and the target from the host (via your serial connection) to ensure aworking connection:(host) ping 192.168.7.2(bbg) ping 192.168.7.1Generated Feb 4, 20223 / 17
For more info on ifconfig, see section 3, Wired Ethernet Network6. Troubleshooting Ensure you have connected the BeagleBone’s micro USB connector to the computer (insteadof the Zen cape’s; it’s OK to have them both connected to the host). Ensure the BBG’s lightsare on and flashing showing that it has activity. Ensure you give it enough time to finish booting. Connect to BBG using screen to see whenit shows a log-in prompt on the serial port. At this time the BBG should connect to the hostvia Ethernet-over-USB. If using a virtual machine, ensure the BeagleBone has been mapped to the Linux VM. Rundmesg in the VM before and after the BBG is connected. You should see some indication thatit has begin interfacing with the BBG. Ensure that the host is detecting the BeagleBone and creating an Ethernet-over-USBconnection for it. To do so, use ifconfig as follows: Disconnect the BeagleBone from the host and run Reconnect the BeagleBone to the host, wait until boot-up has finished, and rerun Compare the two to ensure that a new networking adapter appears. Also, note name of theadapter (such as eth7, usb0, or something more cryptic like enx8030dc9359be), and theHWaddr (MAC address) on this connection for later use.(host) ifconfig(host) ifconfig If the target reboots, the host will lose the Ethernet-over-USB connection eth1. Theconnection should come back when the board finishes rebooting. If running VirtualBox, ensure you have installed the Virtual Box Extension Pack. Try rebooting the BBG, VM (if any), and your computer. Sometimes there can be USBissues. Plug the BBG into a different USB port on the host. If the host does not get the 192.168.7.2 IP address when the BeagleBone is connected, tryassigning a static IP to the Ethernet-over-USB on the host. See Section 5.2 for directions. If software on the target stops working, the Ethernet connection on the host may disappear. If unable to ping between the host and target, run ifconfig on each to ensure correct IPaddresses. Target's usb0 connection should be IP address 192.168.7.2. Host's eth1 connection should be IP address 192.168.7.1.2.2 Connecting Target to Internet1By following the above steps, you'll be able to ping between the host and the target. However, the targetwill not yet be able to access the internet. This section configures the host to allow the target to access1Directions from Molloy (2014) Exploring BeagleBone, Ch2.Generated Feb 4, 20224 / 17
the internet through its network connection.1. Ensure your host PC (the Linux VM, likely) has access to the internet:(host) ping google.ca2. On the host PC, you should have two network adapters, likely named eth0 (actual networkconnection) and eth1 (virtual connection to target). Find them with:(host) ifconfigeth0Link encap:Ethernet HWaddr 08:00:27:a3:83:38inet addr:10.0.2.15 Bcast:10.0.2.255 Mask:255.255.255.0inet6 addr: fe80::a00:27ff:fea3:8338/64 Scope:LinkUP BROADCAST RUNNING MULTICAST MTU:1500 Metric:1RX packets:2391 errors:0 dropped:0 overruns:0 frame:0TX packets:707 errors:0 dropped:0 overruns:0 carrier:0collisions:0 txqueuelen:1000RX bytes:2670933 (2.6 MB) TX bytes:85463 (85.4 KB)eth1Link encap:Ethernet HWaddr c8:a0:30:aa:dd:a2inet addr:192.168.7.1 Bcast:192.168.7.3 Mask:255.255.255.252inet6 addr: fe80::caa0:30ff:feaa:dda2/64 Scope:LinkUP BROADCAST RUNNING MULTICAST MTU:1500 Metric:1RX packets:3 errors:0 dropped:0 overruns:0 frame:0TX packets:46 errors:0 dropped:0 overruns:0 carrier:0collisions:0 txqueuelen:1000RX bytes:626 (626.0 B) TX bytes:10416 (10.4 KB)loLink encap:Local Loopbackinet addr:127.0.0.1 Mask:255.0.0.0inet6 addr: ::1/128 Scope:HostUP LOOPBACK RUNNING MTU:65536 Metric:1RX packets:352 errors:0 dropped:0 overruns:0 frame:0TX packets:352 errors:0 dropped:0 overruns:0 carrier:0collisions:0 txqueuelen:0RX bytes:27358 (27.3 KB) TX bytes:27358 (27.3 KB) Note: Connection to internet may come up as something like ens33, and the target’s Ethernetover USB connection may come up as something like enxb0d5cc4700d7.3. On the host, use the iptables program to configure the Linux kernel firewall rules:(host) sudo iptables --table nat --append POSTROUTING --out-interface eth0 -j MASQUERADE(host) sudo iptables --append FORWARD --in-interface eth1 -j ACCEPT4. Turn on IP forwarding:(host) echo 1 sudo tee /proc/sys/net/ipv4/ip forward5. Configure the target to use the host (via Ethernet over USB) as the default gateway:(bbg) sudo route add default gw 192.168.7.1You can check this succeeded by viewing the routing tables on the target using route:(bbg) routeKernel IP routing tableDestinationGatewayGenmaskFlags Metric Refdefaultbrian-VirtualBo 0.0.0.0UG00192.168.7.0*255.255.255.252 U006. Check the target has an internet connection:(bbg) ping 8.8.8.8Generated Feb 4, 20225 / 17Use Iface0 usb00 usb0
This should successfully ping the server. Note, you won't yet be able to ping google.ca!7. These settings will not persist between reboots, so you must re-do all of these steps each timeyou reboot in order to re-enable the settings. You may be able to edit the /etc/network/interfaces file to make these settingspermanent. Consult guides online for more information.8. Configure a DNS: Append a new domain nameserver (DNS) to the end of etc/resolv.conf:(bbg) echo nameserver 8.8.8.8 sudo tee -a /etc/resolv.conf Where 8.8.8.8 is a free public DNS owned by Google. The file /etc/resolv.conf may not exist on your board (and may get erased each boot).So you may need to do this step each time the board reboots. View the /etc/resolv.conf file to ensure it looks reasonable:(bbg) 27.0.0.1::18.8.8.8Note: Your resolv.conf file may only have the last line; this seems OK. Test with:(bbg) ping google.ca9. Every time you reboot your target, you will need to re-configure the target for internet access.If desired, create a script which runs the commands:(bbg) (bbg) (bbg) (bbg) cd echo 'sudo route add default gw 192.168.7.1' internet.shecho 'echo nameserver 8.8.8.8 sudo tee -a /etc/resolv.conf' internet.shchmod x internet.sh10. Trouble shooting: If you rebooted either your target or host, you'll need to redo the settings on that device as thesettings are not persistent. If you get the error message: “ping: unknown host google.ca” when trying to pinggoogle.ca, then you don't have a DNS server setup correctly. Double check you havecompleted the DNS steps above. If you are not able to ping 8.8.8.8 from the target, but have done all the above steps, then youmay need to try the following on your host (after other iptables commands and beforeturning on IP forwarding)2:(host) sudo iptables --append FORWARD -m state --state RELATED,ESTABLISHED -j ACCEPT If unable to ping 8.8.8.8 from the target, then verify that you have selected the correctnetwork adapter (as listed by ifconfig) on the host. 2Install traceroute:Thank you to a student for this; for reference, inux-router-gateway/436683#436683Generated Feb 4, 20226 / 17
(host) sudo apt-get install traceroute Run traceroute:(host) traceroute 8.8.8.8traceroute to 8.8.8.8 (8.8.8.8), 30 hops max, 60 byte packets1 gateway (10.0.2.2) 2.150 ms 2.074 ms 1.922 ms2 gateway (10.0.2.2) 7.364 ms 7.236 ms 7.205 ms Ensure that the first IP address listed in hop 1 of output matches the IP address listed forthe Ethernet adapter you are using. On the target, when trying to ping, if you get:connect: Network is unreachabledouble check that you have successfully executed the command:(target) sudo route add default gw 192.168.7.1When you run route, it should show that there is a default rowGenerated Feb 4, 20227 / 17in the routing table.
3. Wired Ethernet NetworkThis section assumes you are connecting your BeagleBone to the same wired network that yourdevelopment PC is connected to.1. If using a virtual machine on the development computer, completely shutdown (power down, notjust close/suspend) your virtual machine and change the network adapter type to “Bridged”instead of “Network Address Translation (NAT)”. Under VMWare Player, select the VM and then “Edit Virtual Machine Settings” NetworkAdapter Bridged. OK to “Replicate physical network connection state”. Restart the VM.2. Connect an Ethernet cable to the target board and have it get an IP address from your network'sDHCP server (likely your home router). The board should automatically acquire a IP address in a few seconds ( 30); if not, you mayneed to re-run, on the BeagleBone, either dhclient or udhcpc (depending on which isinstalled) to force it.(bbg) sudo dhclient You may need to reboot the target to have it acquire an IP address at startup:(bbg) reboot3. Check the IP address of the target board using the serial connection:(bbg) ifconfigeth0loLink encap:Ethernet HWaddr c8:a0:30:aa:dd:a0inet addr:192.168.0.145 Bcast:192.168.0.255 Mask:255.255.255.0inet6 addr: fe80::caa0:30ff:feaa:dda0/64 Scope:LinkUP BROADCAST RUNNING MULTICAST MTU:1500 Metric:1RX packets:22 errors:0 dropped:0 overruns:0 frame:0TX packets:53 errors:0 dropped:0 overruns:0 carrier:0collisions:0 txqueuelen:1000RX bytes:4176 (4.0 KiB) TX bytes:9945 (9.7 KiB)Interrupt:40Link encap:Local Loopbackinet addr:127.0.0.1 Mask:255.0.0.0inet6 addr: ::1/128 Scope:HostUP LOOPBACK RUNNING MTU:65536 Metric:1RX packets:0 errors:0 dropped:0 overruns:0 frame:0TX packets:0 errors:0 dropped:0 overruns:0 carrier:0collisions:0 txqueuelen:0RX bytes:0 (0.0 B) TX bytes:0 (0.0 B)usb0 Link encap:Ethernet HWaddr 6a:41:80:a7:bf:dbinet addr:192.168.7.2 Bcast:192.168.7.3 Mask:255.255.255.252UP BROADCAST MULTICAST MTU:1500 Metric:1RX packets:0 errors:0 dropped:0 overruns:0 frame:0TX packets:0 errors:0 dropped:0 overruns:0 carrier:0collisions:0 txqueuelen:1000RX bytes:0 (0.0 B) TX bytes:0 (0.0 B)Look for eth0's “inet addr:”, such as:inet addr:192.168.0.145(Highlighted in above example)Generated Feb 4, 20228 / 17
If you do not see eth0, it means the board has likely not yet found an IP address. Wait up to aminute longer for it to get an IP address. If it does not, double check all Ethernet cableconnections and reboot the target. You may see (and ignore) some messages on the target such as:[[24.172268] net eth0: phy 4a101000.mdio:01 not found on slave 129.810445] libphy: PHY 4a101000.mdio:01 not found4. Check the IP address of the Host PC:(host) ifconfigeth0Link encap:Ethernet HWaddr 00:0c:29:7f:47:bcinet addr:192.168.0.114 Bcast:192.168.0.255 Mask:255.255.255.0inet6 addr: fe80::20c:29ff:fe7f:47bc/64 Scope:LinkUP BROADCAST RUNNING MULTICAST MTU:1500 Metric:1RX packets:196832 errors:0 dropped:0 overruns:0 frame:0TX packets:5079 errors:0 dropped:0 overruns:0 carrier:0collisions:0 txqueuelen:1000RX bytes:41734380 (41.7 MB) TX bytes:1109534 (1.1 MB)loLink encap:Local Loopbackinet addr:127.0.0.1 Mask:255.0.0.0inet6 addr: ::1/128 Scope:HostUP LOOPBACK RUNNING MTU:65536 Metric:1RX packets:747 errors:0 dropped:0 overruns:0 frame:0TX packets:747 errors:0 dropped:0 overruns:0 carrier:0collisions:0 txqueuelen:0RX bytes:277191 (277.1 KB) TX bytes:277191 (277.1 KB) Find eth0's IP address, such as: If running in a virtual machine, check the host OS's IP address as well: under Windows runipconfig from the command line.inet addr:192.168.0.1145. The addresses of the host and target (and host OS if running a VM) should be on the same subnet(have the first couple octets the same). If they are not the same then check the troubleshootingsection below. Note that if your target device is plugged into a different network than your host PC they willbe on different subnets. This may be the case in the SFU labs.6. From the host PC, ping the Target. Command and output shown below. Press Ctrl-C to stop thepinging as needed. Replace the IP address with whatever address your target has.(host) ping 192.168.0.145PING 192.168.0.145 (192.168.0.145) 56(84) bytes of data.64 bytes from 192.168.0.145: icmp seq 1 ttl 64 time 1.10 ms64 bytes from 192.168.0.145: icmp seq 2 ttl 64 time 0.585 ms64 bytes from 192.168.0.145: icmp seq 3 ttl 64 time 0.492 ms C--- 192.168.0.145 ping statistics --3 packets transmitted, 3 received, 0% packet loss, time 2001msrtt min/avg/max/mdev 0.492/0.727/1.105/0.270 ms7. From the target, ping the host PC using your serial terminal. Command and output shownbelow. Press Ctrl-C to stop the pinging as needed. Replace the IP address with whatever addressyour host has.Generated Feb 4, 20229 / 17
(bbg) ping 192.168.0.114PING 192.168.0.114 (192.168.0.114) 56(84) bytes of data.64 bytes from 192.168.0.114: icmp req 1 ttl 64 time 1.49 ms64 bytes from 192.168.0.114: icmp req 2 ttl 64 time 0.619 ms64 bytes from 192.168.0.114: icmp req 3 ttl 64 time 0.620 ms64 bytes from 192.168.0.114: icmp req 4 ttl 64 time 0.707 ms C--- 192.168.0.114 ping statistics --4 packets transmitted, 4 received, 0% packet loss, time 3004msrtt min/avg/max/mdev 0.619/0.861/1.499/0.370 ms8. Ensure your target and host can both access the internet:(host) ping google.ca(bbg) ping google.ca If the ping fails, double check your network setup.9. Troubleshooting: If the VM is not on same subnet as host OS, then make sure the VM's network adapter isconfigured for Bridged mode, instead of NAT. NAT uses the host OS's IP address for accessto the network which will work fine for outgoing connections (such as browsing to Google),but not work for incoming connections (such as running an NFS server). You may need torestart the VM if you make any changes. If your target board (BeagleBone) is on a different subnet than your host PC, double checkthat your host PC and target board are plugged into the same network. For example, youcould have a problem if the host PC is connecting to a wireless network but the target deviceis connecting to a completely separate wired network. Reboot the target device to have itacquire a new IP address. If ifconfig on the target does not show eth0 you may need to manually bring it up andpossibly assign it an IP address:(bbg) ifconfig eth0 up(bbg) ifconfig eth0 192.168.2.2 dmesg may show output similar to:[.] net eth0: initializing cpsw version 1.12 (0)[.] net eth0: phy found : id is : 0x7c0f1[.] IPv6: ADDRCONF(NETDEV UP): eth0: link is not ready[.] cpsw 4a100000.ethernet eth0: Link is Up - 100Mbps/Full - flowcontrol rx/tx[.] IPv6: ADDRCONF(NETDEV CHANGE): eth0: link becomes ready Note that the Ethernet LEDs seem to turn on at the same time the final two lines of thisoutput are displayed.Check the BeagleBone Ethernet LEDs: On the BeagleBone’s Ethernet connector there are two LEDs: Yellow LED indicates a connection. When lit it indicates that the Ethernet port ispowered on and detecting that an Ethernet cable is plugged in and connecting it toanother device (likely a router or a direct connection to computer). Green LED indicates network activity by flashing. Usually lit, flickers off whentransmitting/receiving data.Generated Feb 4, 202210 / 17
On the target, if both LEDs are turned off, you may need to manually bring the Ethernetadapter down and up, and possibly assign it an IP address:(bbg) ifconfig eth0 down(bbg) ifconfig eth0 up(bbg) ifconfig eth0 192.168.2.2 I have had it where this sequence of commands failed to immediately bring theEthernet up, but the Ethernet LEDs did turn on about a minute later.There have been issues with BeagleBone hardware (resolved now?) where the Ethernetphysical-layer chip (the phy) could incorrectly initialize at startup due to a hardware racecondition. A physical reset (pull power and reboot) could sometimes fix it (software resetinsufficient).Test if there are issues with the target’s Linux install with respect to networking by usingUBoot to ping the host: Using the serial port via the screen program, connect to the board an enter UBoot on bootby pressing any key when prompted. In Uboot, set the target to a static IP and ping the server (assuming server is on192.168.2.1): setenv ipaddr 192.168.2.2 ping 192.168.2.1 Note that Uboot can sometimes behave funny with the backspace character if youmake an error typing the command. Therefore you may want to enter the commandsin a text editor on the host and copy-and-paste them into screen. Works: Expected working output: Fails: Pinging an address which no computer is at: ping 192.168.2.1link up on port 0, speed 100, full duplexUsing cpsw devicehost 192.168.2.1 is alive setenv ipaddr 192.168.2.2 ping 192.168.2.123link up on port 0, speed 100, full duplexUsing cpsw deviceARP Retry count exceeded; starting againping failed; host 192.168.2.123 is not alive Fails: Pinging without Ethernet connection: ping 192.168.2.1cpsw Waiting for PHY auto negotiation to complete. TIMEOUT !Using cpsw deviceARP Retry count exceeded; starting againping failed; host 192.168.2.1 is not alive Test with another BeagleBone in the identical setup as your board (same cable, sameconnections, same settings) and see if it works. This can help track down issues with routerbehaviour, cables, etc. Don’t underestimate how commonly cables fail!Generated Feb 4, 202211 / 17
4. Direct Ethernet Connection (Not Recommended)You can directly connect the target device to a host PC using an Ethernet cable (or crossover). You mayskip this section if you are connecting to the BeagleBone via either Ethernet over USB or through awired network (router/switch).Expected connection is your PC (or virtual machine) is connected to the web via either WiFi or Ethernet,and you are going to connect an Ethernet cable directly from your PC to the target. (i.e., the target isconnected to the host only, not to any network such as a router).1. On the target, via a serial connection, set it to a static IP address:(bbg) ifconfig eth0 192.168.2.2 You will need root access to run this command. You may need to run the “su” command first(password is “root”) to get a root command prompt. Note that this will revert back to DHCP when the target is rebooted. You can make thechange permanent by editing /etc/network/interfaces and adding:auto eth0iface eth0 inet staticaddress 192.168.2.2netmask 255.255.255.0network 192.168.2.0broadcast 192.168.2.255 After changing the file, restart networking on the board (or reboot)(bbg) /etc/init.d/networking restart2. Edit the settings for your virtual machine.Virtual Box: You must have your VM powered down, not just suspended. Right click the VM in your Oracle VM VirtualBox Manager and select Settings. Under Network, enable Adapter 1 and set to NAT.This adapter will give your VM access to the internet through your host OS. Under Networking, enable Adapter 2 and set to Bridged. In the “Name” drop-down select your Ethernet adapter. This adapter will be the connection to the target.Launch your virtual machine.VM Ware Click the “Player” button in the top left, and select Manage, then Virtual Machine Settings. On the Hardware tab, select “Add.”, and add a new “Network Adapter” Change new network adapter to: Network Connection: “Bridged” Check “Replicate physical network connection state”Generated Feb 4, 202212 / 17
Under “Configure Adapters”, only check the wired Ethernet adapter on yourcomputer (ensure it's not a wireless one, and not a BlueTooth one). Press OK.3. On the host (inside your VM), edit the /etc/network/interfaces file and add:auto eth1iface eth1 inet staticaddress 192.168.2.1netmask 255.255.255.0network 192.168.2.0broadcast 192.168.2.255 Note that eth1 may need to be changed to another number if you are running Linux natively(likely eth0), or have a different number of network adapters connected to your VM. Useifconfig to list Ethernet adapters and pick the correct number.4. Restart the networking:(host) sudo /etc/init.d/networking restart5. Test your host's internet settings on the host: Run ifconfig. eth0 will likely have an IP address in the range of 10.0.2.15 and eth1 shouldhave an IP address of 192.168.2.1. Ping Google to prove you have a good internet connection. See troubleshooting below if there are any problems.(host) ping google.ca6. Ping the target from the host, and the host from the target.(bbg) ping 192.168.2.1(host) ping 192.168.2.27. Troubleshooting Run ifconfig on the target and host to ensure they have the correct addresses. If your VM cannot access the Internet (say pinging Google or installing via apt-get), thenensure that your host OS (Windows, for example) has a good connection to the Internet. Ensure your VM has the correct network adapters installed. In VirtualBox, check that it hasenabled the network connection: In the VM's menu, select Devices Network Ensure that two network connections are listed and that both are enabled (filledbackground around the icon). Check that the network cable connected correctly. Check that the connection is enabled in Linux. If ifconfig does not show eth0 (on thetarget) or eth1 (on the host), then enable the adapter using a command such as:(host) sudo ifconfig eth0 up Double check the VM's networking settings. Ensure you select NAT and Bridged correctly. If using VMWare, ensure that your VM’s bridged network adapter’s “configured adapter” isset to only connect to your Ethernet (and not bluetooth, WiFi, or any other systems).Generated Feb 4, 202213 / 17
For more information on configuring the network settings, gurationCommandLine/Automatic If the networking does not work, ensure you are setting up your bridged Ethernet adaptercorrectly. Ensure that you are selecting the correct one. A physical network adapter may say“PCI” or “Realtec” (and “Ethernet” may not actually be the one you need). Try changing theadapter you are bridging to be different ones in the list. In VMWare Player, if there are no network adapters shown in the drop-down list when youtry to configure your bridged network, you may want to install the latest version of VMWarePro (free through SFU CMPT), or try something like vmnetcfg and reset networking settings. Read section 3. of this guide and its troubleshooting steps for more ideas on what to try.Generated Feb 4, 202214 / 17
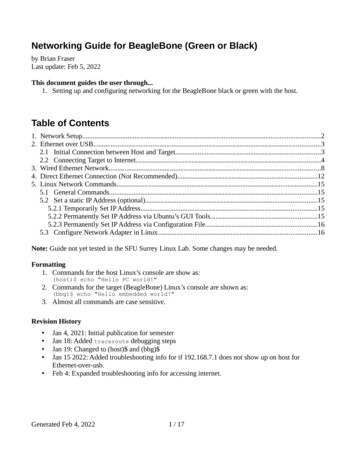
5. Linux Network Commands5.1 General CommandsHere are some useful Linux commands for working with Ethernet (may need root access). These can beused on either the host or the target. Display Ethernet configuration information: ifconfigor ip addr Turn off, and turn on Ethernet connection (to cause it to redetect it): sudo ifconfig eth0 down sudo ifconfig eth0 upOr: sudo ifdown eth0 sudo ifup eth0 Run DHCP to acquire an IP address (only on some systems): dhclient5.2 Set a static IP Address (optional)Usually, IP addresses are assigned automatically via DHCP (for normal Ethernet), or by theconfiguration of the Ethernet-over-USB system. However, when these are not working it is possible toforce the connection to have an IP address manually using static IP address assignment.5.2.1 Temporarily Set IP Address Force a new (static) IP address: ifconfig eth0 192.168.0.212Note that when the system reboots, these changes will be lost. Plus, some systems seem toautomatically override this change every now and then.5.2.2 Permanently Set IP Address via Ubuntu’s GUI Tools Click on the “Ubuntu” menu (like the Start menu) and search for and run Network (the settings).To know which connection to edit, click on each of the Wired network entries in the list to seetheir Hardware Address. Match this to the HWaddr shown by ifconfig. If you are unsure which connection in ifconfig is for the connection of interest, trydisconnecting the BeagleBone’s Ethernet-over-USB and see what connection disappears.This may help you identify them.Select the Wired network listed for the BeagleBone, and click Options (or the config icon).Go to the IPv4 Sett
Plus, you need to have your development OS be able to connect to your BeagleBone (we'll use SSH), and your BeagleBone be able to connect to your development OS (we'll use NFS). There are a couple ways you can connect your devices. 1. Ethernet over USB - Recommended Have your BeagleBone connect to your development computer using Ethernet over .