Transcription
Trimble DUO Installation GuideMarch 21, 2018
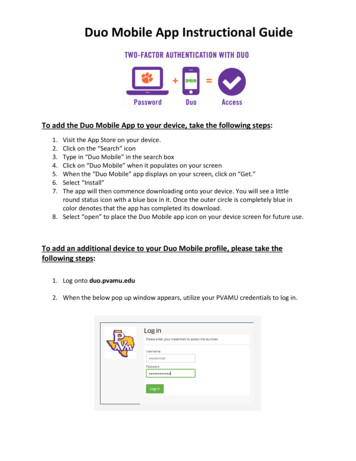
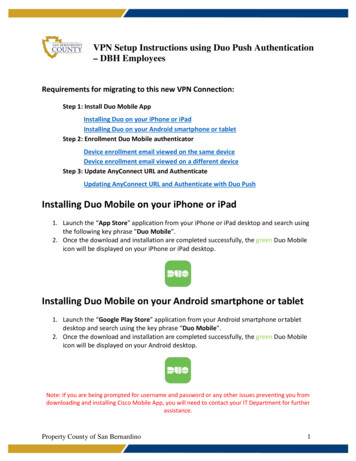
DUO ComponentsThese parts are required for a standard DUO installDUO Fixed MountDUO Stand Alone KitM010-0637DUO CableL016-0649RAM MountH-050-0013Screw PacksH-048-0523RAM to DUOH-048-0510RAM toVehicleLegal Notice: Google, Android, Google Play and other marks are trademarks of Google LLC.Page 2
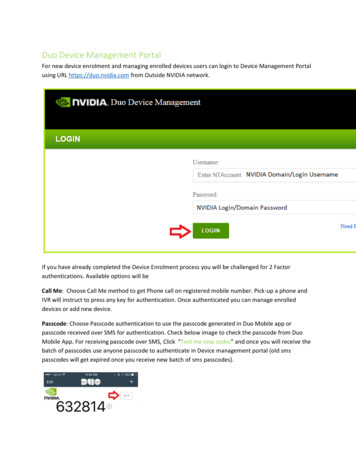
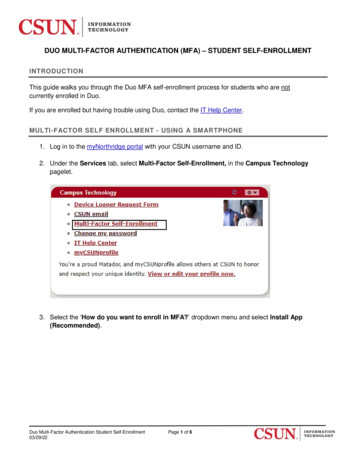
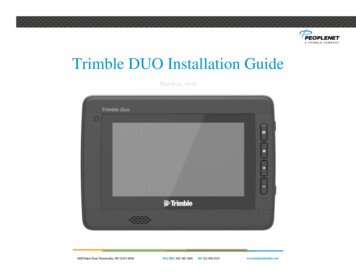
System OverviewDUO connected to Deutsch style connectorPage 3
Function Summary The DUO Main Cable connects to the vehicle diagnostic plug. It works with both Black (pre-2016) and Green (2016-and-later) diagnostic connectionsFrom that connection, the DUO draws Power, Ground, and Engine DataThe J1939 Engine Data is used for engine data tracking as well as the boot command on most vehiclesWhere the engine data boot command, called Wake-On-Can, is not available, the system will boot off the engine-start power fluctuationsPage 4
Where neither auto-boot option works, a white ignition sense lead is provided and can connect to the vehicle’s ignition circuit to trigger bootThe DUO uses the input power dip and loss of engine data when the engine is turned off to initiate its sleep timer. Once in sleep, the power draw is 2milliampsThe DUO case includes the GPS receiver for location data and the cellular modem and antenna for communicationsAntennas - Internal antennas for the various communications modules:o (1) Cellular modemo (2) Wi-Fio (3) GPSo (4) BluetoothInput powero Main input power to the Tduo Display connected to the vehicle batteryVehicle communication interfaceo J1939 (CAN 2), 250 and 500Kbit/sec communication interfacesHigh speed USB 2.0 portsMicro SIM card sloto 1 3FF SIM card slot for the LTE cellular modemSDIO card slot –o 1 full SDIO card slot for SDXC memory cards.Wireless communication interfaces:o Bluetooth w/ BLE 4.2 (Bluetooth Low Energy) – minimum requirement.o LTE cellular modem with GPS.o Wi-Fi networking with hotspot support.Ambient Light SensorVideo Inputso 1 composite CVBS video camera inputs with maximum D1 (720 x 480) resolution.Internal forward-facing speakerIntegrated microphone on the front of the unitStandard Installation Steps1. Turn the vehicle OFF2. Note the DUO DSN number. This number will be needed later3. Identify a location on the dash where the display can mount.Page 5
3.1.The location should be sturdy enough to support the DUO over time. Metal is preferable. If mounting toplastic, always use bolts with a backing plate or large washers3.2.The location should be within easy reach of the driver3.3.The location should be within the driver’s sightlines but must not infringe on the view over the dash3.4.The location must not interfere with access to, or safe operation of, any cab controls4. Mount one RAM mount base to the vehicle and attach the other base to the display using the provided screws5. Attach the RAM swivel arm, angle the display so it faces the driver, then tighten the arm6. Route the cable into the dash, making sure to avoid pinch or wear points6.1.NOTE: The Video and Audio connectors will not be used on most installs. Secure them in the dash6.2.Connect the DUO Main Cable to the DUO, tighten the thumb screws, making sure the pins seat squarelyand the thumb screws are evenly tightened7. Connect the DUO Main Cable diagnostic connector to the vehicle diagnostic plug8. Install ELD stickers.9. Turn the vehicle ignition ON and verify the device boots9.1.If it does not boot automatically, press the power button on the top/right of the face9.2.The Power button is also a battery charge indicator, with Solid Green indicating Charging, Solid Blueindicating the device is booted but not charging (as when it is unplugged), and Blinking Green indicating anissue with the battery or imminent loss of battery power10. NOTE: PeopleNet recommended connection recommendations can be found on the PeopleNet OnlineSupport Center http://peoplenet.custhelp.com/Page 6
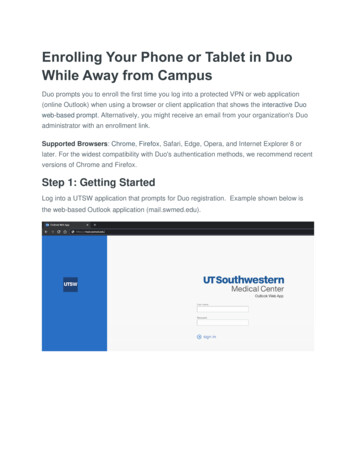
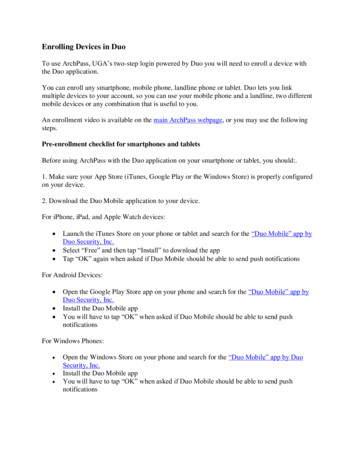
Setting PeopleNet “PMobile” to DefaultThe DUO will arrive without PeopleNet as the default boot mode. Follow these steps to set it so PMobileboots automatically on future starts.Page 7
Setting PeopleNet “PMobile” to DefaultPage 8
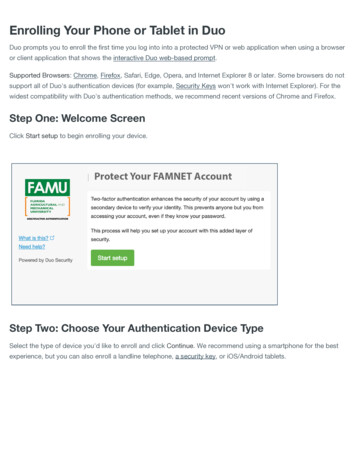
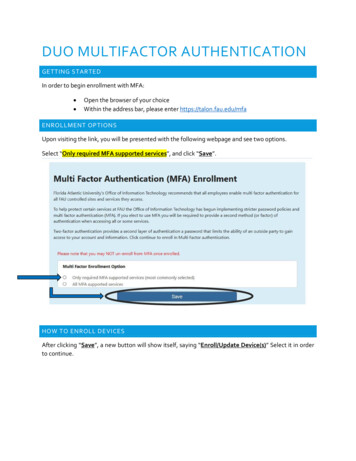
Pairing/Initialization Procedure When PMobile boots for the first time, it will indicate that itneeds an installation. If your DUO (PeopleNet Connected Tablet) is alreadypaired to a PMG (PeopleNet Mobile Gateway) or DUO(PeopleNet Mobile Gateway) which we will refer to as anOBC (On Board Computer) You can manually start the installation process by goingto default home - settings - information - admin - password 9238 - installation.Enter “9238” for the admin password, and click “OK”.You will be prompted to enter the DSN (Device Serial Number)of the OBC. The serial number is on a white sticker above thepower LED. The serial number starts with a 1 and is 8 digits long.Example: 11000682Enter the serial number of your OBC and click “OK”.Page 9
The DUO will attempt to connect to the Wi-Fi network of theDSN you entered. If establishing the connection fails, verify the OBC is onand that the correct DSN was entered. If this is the first time your DUO has connected to a OBC, it willneed to modify a setting. This setting allows the the DUO to communicate with theOBC properlyClick “OK” or let the timer expire.This will cause your PMobile software to reboot and use the newsetting. Page 10
Due to the reboot and the install not being complete yet, you willbe prompted to complete an installation again.Re-enter your OBC’s DSN and click “OK”The DUO will attempt to do the same process as before; andattempt to connect to the Wi-Fi network of the DSN you entered. If it fails, verify the OBC is on and that the correct DSNwas entered.Page 11
DUO Installation Only Once the wifi network is established, you will be prompted toenter your “Installation Credentials”. This is a new prompt unique to the DUO/DUO pairingprocess. The installation credentials are on the next screen.DUO Installation Only In the Installer ID field enter: Your Installer ID In the Installer Password enter: Your Installer Password If you do not have an installer ID/Password please reachout to your system administrator Click “OK” The step is very important, as it allows the DUO to talk to theDUO and Enterprise (back-end). It creates a trust relationshipand a certificate held by the DUO. There are a number of potential error messages depending onhow far the DUO gets into the process If you encounter an error message, verify that theinstallation credentials were typed correctly If the installation credentials are correct, try rebooting theDUO and the DUO. The most common issue is the DUO orDUO is unable to talk to the back-end, and rebooting willcause the DUO to reinitialize its modem and re-registerwith the cellular network.Page 12
After getting past the installer credentials, the installationprocess is identical to how it used to beYou will be asked if this is a “new installation” If the OBC is in a pending state (the OBCs will beshipped in this state) in the PFM (PeopleNet FleetManager) and you are going to give it a new trucknumber, then click “yes” this is a new installation If the OBC is already in an activated state or you want togive a pending OBC an already existing truck number,then click “no” this is not a new installationIf you selected “yes” this is a new installation, you will beprompted with InstallerID and Vehicle ID fields (you will not seethe Old DSN field like you see in the screenshot). Enter your Installer ID. This installer ID will not be thesame as the installation credentials, and only digits areallowed in this field. If you do not have an installer ID,enter a number that will differentiate you from otherinstallers in your fleet (the Installer ID used at this screenis recorded in the PFM, it has no impact on your ability tocomplete an install). Enter the Vehicle Number you would like assigned to thisdevice (it will be the vehicle number you use in the PFMto lookup this device) Click “Submit”If you selected, “no”, this is not a new installation, you will beprompted with InstallerID, Vehicle ID, and Old DSN fields (sameas the screenshot). Enter the Installer ID and Vehicle ID as noted above Enter “Old DSN” only if you are swapping the PMG/DUOmodule in this vehiclePage 13
After clicking “Submit” you will see “Submitting Installationrequest. This process could take several minutes” and theSubmit button will be grayed out. If you get an error code at this part and you clicked “yes,this is a new installation”, verify that the truck numberyou’re trying to use is not already in use, and you shouldhave selected “no, this is not a new installation”. If you get an error code at this part and you clicked “no,this is not a new installation”, verify that the truck numberused does already exist, and the correct DSN wasentered into the Old DSN field. Once you see “Installing Data Store, Activation nearlycomplete,” your installation request was accepted by the PFMand has gone through.Page 14
You will then be prompted with “Activating Device”. This meansthat the DUO is loading settings from the PFM. Event Journal Service and Mail Message Manager willstart off as “Activating” Once all the settings have been received, they will gofrom “Activating” to “Activated”.PMobile software will then reboot and load to the Driver Loginscreen. At this point, your installation is complete.Page 15
TestingOnce the DUO boots, a full test is recommended. Follow the steps below to confirm function.First, login to the device. If you do not have a Driver ID/Password, contact your system administrator for a test ID.Once logged in, verify the following: Go to System OBC Diagnostic Diagnostic Basic and verify: o GPS 3D Indicates the GPS is currently reading. This may not show if the vehicle is indoors.o Cell Strength is 2Indicates relative cell signal strength on a scale of 0-7.Go to System OBC Diagnostic Diagnostic Device and verify:o Ignition reads ON when the vehicle key is on and OFF when the key is off and OFF in accessory.With the key ON, go to System OBC Diagnostic Diagnostic PerformX and verify:o RPM matches engineo Odometer Type: ECM and Odo: matches dasho FUEL TYPE ECM and FUEL: 0 gallonsConfirm the Display Power button LED is green, indicating chargingo Disconnect the DUO from the cable and verify the LED turns to Blue and the display remains poweredupNOTE: A fully charged battery will supply power for roughly 15 minutes, though a new unit may not have a fullchargePage 16
Hard Reboot ButtonA hard reboot button is available under the top access panel on the display’s right side. Press the button to reset theinternal power management controller IF depressing the power button for 5 seconds doesn’t power down the DUO.Page 17
Cable Pin-OutThis DB-26 pin-out can aid in troubleshooting if the display fails to bootPin #SignalTypeDescription123456CAN2 LOJ1939 LOCH GNDReserveVIDEO INVIDEO GNDTP I/OTP I/OGroundInputGroundCAN2 Interface Low (future)J1939 Interface LowVehicle Ground Return (1A)Video in, “CVBS”Video “CVBS Ground7891011121314IGNITIONCH GNDBATT CAN2 HIJ1939 HIReserveReserveReservePower inGroundPower inTP I/OTP I/O-IgnitionVehicle Ground Return (1A)Unswitched power inputCAN2 Interface High (future)J1939 Interface High-Page 18
151617181920212223242526ReserveReserveReserveCH GNDJ1939 GNDReserveDBG RXDBG TXReserve (DGND)AUDIO GNDAUDIO OUT RAUDIO OUT LGroundGroundReceive Transmit GroundGroundAudioAudioVehicle Ground Return (1A)Shield Ground for J1939-11Debug Receive Debug Transmit Debug port &Digital GroundAudio GroundAudio outputAudio outputPage 19
Federal Communication Commission Interference StatementThis device complies with Part 15 of the FCC Rules. Operation is subject to the following two conditions: (1) This device may not causeharmful interference, and (2) this device must accept any interference received, including interference that may cause undesired operation.This equipment has been tested and found to comply with the limits for a Class B digital device, pursuant to Part 15 of the FCC Rules. Theselimits are designed to provide reasonable protection against harmful interference in a residential installation. This equipment generates, usesand can radiate radio frequency energy and, if not installed and used in accordance with the instructions, may cause harmful interference toradio communications. However, there is no guarantee that interference will not occur in a particular installation. If this equipment does causeharmful interference to radio or television reception, which can be determined by turning the equipment off and on, the user is encouraged to tryto correct the interference by one of the following measures: Reorient or relocate the receiving antenna.Increase the separation between the equipment and receiver.Connect the equipment into an outlet on a circuit different from thatto which the receiver is connected.Consult the dealer or an experienced radio/TV technician for help.FCC Caution: Any changes or modifications not expressly approved by the party responsible for compliance could void the user's authority to operatethis equipment.This transmitter must not be co-located or operating in conjunction with any other antenna or transmitter.Radiation Exposure Statement:This equipment complies with FCC radiation exposure limits set forth for an uncontrolled environment. This equipment should be installed andoperated with minimum distance 20cm between the radiator & your body.Page 20
If your DUO (PeopleNet Connected Tablet) is already paired to a PMG (PeopleNet Mobile Gateway) or DUO (PeopleNet Mobile Gateway) which we will refer to as an . Press the button to reset the internal power management controller IF depressing the power button for 5 seconds doesn't power down the DUO. Page 18