Transcription
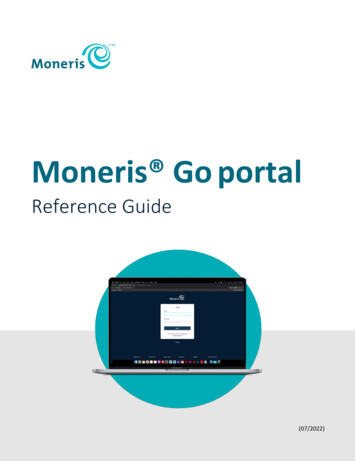
Moneris Go portalReference Guide(07/2022)
'Need help (general)?Web: ris-go-portalEmail: onlinepayments@moneris.comToll-free: 1-866-319-7450Need help (using Go portal feature/function)?Log into the Moneris Go portal, and use the portal feedback form(see Sending feedback/requesting assistance while logged in on page 122)Record your Moneris merchant ID here:
ContentsGetting started .6What is Moneris Go portal? .7How to use this guide .7How to get started .8Signing up for Moneris Go portal access .9Activating your user account . 11Adding the first store to the primary user account . 13List of Moneris Go portal features and functions . 15Logging in/logging out . 17Logging into the Moneris Go portal . 18Forgot your login password? . 20Store navigation . 22Using My Stores . 22Adding another store to the primary user account. 24Logging out of the Moneris Go portal . 26Financial transactions . 27Purchase with credit card: manual entry . 28Purchase with cash . 30Preauthorization with credit card: manual entry . 31Completion with credit card: manual entry . 33Void: manual entry . 35Refund: manual entry . 37Independent Refund with credit card: manual entry . 39Reporting & receipts . 41The dashboard . 42Returning to your store's dashboard. 42Changing your dashboard's report period . 43Financial transactions report . 44Transaction details . 45Changing the search filters for your financial transactions report. 47Exporting a financial transactions report . 54Receipts . 55Sending/printing a transaction receipt. 56Receipt example: debit/credit . 57Moneris Go portal Reference Guide3
Receipt example: cash . 58Payment requests . 59Creating a payment request. 60Send and save options . 62Sending a payment request. 62Resending a payment request . 63Saving a payment request as a draft . 65Deleting a payment request . 66Cancelling a payment request . 68Payment requests report . 69Payment request status indicators defined . 70Payment request details . 71Cross-referencing a payment with a Purchase record . 73Customer actions . 74Making a payment . 74Unsubscribing from your mailing list . 76My account . 77Account preferences. 78Store settings. 82Payment fields . 83User management . 85User accounts. 86Adding a new user account . 86Modifying an active user account . 89Deactivating a user account . 91Reactivating a user account. 93Using filters to search for users . 95User roles. 96Adding a new user role . 96Modifying a user role. 98Deleting a user role . 101List of user role permissions . 104Terminal management. 105Moneris Go terminal: general settings . 106Moneris Go terminal: receipt settings . 109Moneris Go terminal: cashback settings . 113Moneris Go terminal: tip settings. 115Moneris Go portal Reference Guide4
End-of-day procedures . 118Verifying your daily batch totals . 119Troubleshooting . 120Troubleshooting issues . 121Sending feedback/requesting assistance while logged in . 122Merchant Support . 123Moneris Go portal Reference Guide5
Getting startedGetting startedIn this section, we go over everything you need to dothatyou canusingeverythingthe Monerisportal.Insothissection,westartgo overyouGoneedtoknow to set up your PIN Pad.Moneris Go portal Reference Guide6
What is Moneris Go portal?Moneris Go portal is an application that can help you take your business wherever you go. Moneris Go portalgives you a unified experience, whether you choose to log in through a web browser (www.monerisgo.com) oryour Moneris Go terminal.Moneris Go portal features include: secure, user-friendly interface; compatibility with all mobile devices(cellphone, tablet, or desktop); compliance with the Accessibility for Ontarians with Disabilities Act (AODA);support for English and French language; access to a dashboard and real-time sales and transactional reports;virtual terminal to complete and refund transactions and send payment requests; user and roles managementfor Moneris Go terminals and the portal.How to use this guideThis guide describes how to use the features and functions of the Moneris Go portal, including how to set upyour user account for access to the portal. To begin, please follow the How to get started steps (page 8).Moneris Go portal Reference Guide7
How to get startedThe following 1-2-3 steps describe what you need to do to set up your user account and start using Moneris Goportal.1Ensure your mobile device/PC meets the minimum requirements 2Up-to-date supported browser installed (Google Chrome, Microsoft Edge, and Apple Safari)Cookies enabledInternet accessValid email address (for use in setting up your Moneris Go portal user account)Set up your accountAre you the account owner?a. Work with us to establish your Moneris merchant account and pre-register you for portal access.b. Sign up for Moneris Go portal access (see Signing up for Moneris Go portal access on page 9).c. Activate your Moneris Go portal user account (see Activating your user account on page 11).Note: Your account is treated as the primary user account, having access to all the major featuresand functions of the Moneris Go portal.d. Add a store to the primary user account (see Adding the first store to the primary user account onpage 13).Note: You will need your 13-digit merchant ID and store ID (these IDs were sent to you in yourMoneris welcome email).Are you a general user (i.e., you are not the account owner)?a. Activate your Moneris Go portal user account (see Activating your user account on page 11).3Ready to log in and use the Moneris Go portal?Once you activate your Moneris Go portal user account, you can log in and start using the Moneris Goportal features and functions (e.g., define your store settings, add new users, perform financialtransactions, etc.). See List of Moneris Go portal features and functions (page 15).Moneris Go portal Reference Guide8
Signing up for Moneris Go portal accessThe steps below describe how to sign up for Moneris Go portal access.Note: This procedure continues from the account setup steps in How to get started (page 8).1. Visit www.monerisgo.com to start on the Moneris Go portal login page (shown below).2. In the "Login" window (shown above), click on Sign up.3. When the "Sign up" window displays (shown below), fill in the required fields:a. In the First name field, enter your given name.b. In the Last name field, enter your surname.c. In the Email field, enter your email address.Note: Moneris Go will send your account activation link to this address. You will be required to click onthis link to activate your account. (This address will also serve as your Moneris Go portal username.)d. Click on the Sign up button.Moneris Go portal Reference Guide9
4. When the "A link to activate your account has been sent." response displays (shown below), continue thenext step.5. Check your email inbox to confirm that you received your Moneris Go "User account activation" email.6. Continue the setup steps in How to get started (page 8).Moneris Go portal Reference Guide10
Activating your user account(This procedure continues from the account setup steps in How to get started on page 8.)Once you receive your Moneris Go activation email in your inbox, follow the steps below to set up and configureyour Moneris Go portal user account.Note: If you did not receive your activation email, see Troubleshooting issues (page 121).1. Open the "User account activation" email in your inbox, and click on the activation link (or button) in themessage.2. When the activate account fields display (shown below), configure your login credentials:a. Set your user account's default display language by clicking on English or French.b. In the Password field, enter a login password.Note: The password that you create must be from 8 to 16 characters in length and include at least 1letter, 1 number, and 1 special character. Accents are not supported. Password fields are case sensitive.c. In the Confirm password field, re-enter the login password.d. Click on the Activate button.3. When the "Account Activated" response displays (shown below), it means you have successfully activatedyour Moneris Go portal user account.Moneris Go portal Reference Guide11
4. Click on the Sign in button to return to the Moneris Go portal login page (shown below).5. Continue the setup steps in How to get started (page 8).Moneris Go portal Reference Guide12
Adding the first store to the primary user accountFollow the steps below to add/link the first Moneris Go portal store to the primary user account.Note: This procedure continues from the account setup steps in How to get started (page 8).1. Visit www.monerisgo.com to start on the Moneris Go portal login page (shown below).2. In the "Login" window, enter your login credentials:a. In the Email field, enter the email address that you registered when you activated your Moneris Goportal user account.b. In the Password field, enter your Moneris Go portal login password.c. Click on the Sign in button.3. When the "Stores" page displays (shown below), click on the Add store button.Moneris Go portal Reference Guide13
4. When the "Add store" window displays (shown here), fill in the fields with therequired IDs, as provided by Moneris.a. In the Store ID field, enter the store ID of the store that you want to add.b. In the Merchant ID field, enter your 13-digit merchant ID.5. Click on the Submit button.6. When the "Terms and conditions" window displays (shown below), scroll through and read the terms, andthen click on the Accept button.7. When the "Dashboard" page displays (shown below), it means you have successfully added your store.8. Continue the setup steps in How to get started (page 8).Moneris Go portal Reference Guide14
List of Moneris Go portal features and functionsThis section lists supported Moneris Go features and functions, including references to procedures that willguide you on how to use those features and functions.Moneris Go portal access / store accessActionSee procedure:Log inLogging into the Moneris Go portal (page 18)Log outLogging out of the Moneris Go portal (page 26)Reset login passwordForgot your login password? (page 20)Add another storeAdding another store to the primary user account (page 24).Move between storesUsing My Stores (page 22)Financial transactionsTransaction typeTenderSee procedure:Purchasecredit*PurchasecashPurchase with credit card: manual entry (page 28)Purchase with cash (page 30)Preauthorizationcredit*Preauthorization with credit card: manual entry (page 31)Completioncredit*Completion with credit card: manual entry (page 33)Voidcredit*Void: manual entry (page 35)RefundIndependent Refundcredit*/cashcredit*Refund: manual entry (page 37)Independent Refund with credit card: manual entry (page 39)Reporting & receipts (financial transactions)ActionSee procedure:View detailed transactions reportFinancial transactions report (page 44)View graphical summaryThe dashboard (page 42)Send/print transaction receiptSending/printing a transaction receipt (page 56)Payment requestsActionSee procedure:Create payment requestCreating a payment request (page 60)Cancel payment requestCancelling a payment request (page 68)Delete payment requestDeleting a payment request (page 66)Resend payment requestResending a payment request (page 63)View payment requests reportPayment requests report (page 69)\* Some debit card brands may support manual entry for this transaction.Moneris Go portal Reference Guide15
My account preferencesPreferenceSee procedure:Personal name identificationAccount preferences (page 78)Default display languageAccount preferences (page 78)Reset password (portal/terminal)Account preferences (page 78)Store/payment settingsPayment fieldSee procedure:AVS (address verification service)Payment fields (page 83)Billing addressPayment fields (page 83)Postal codePayment fields (page 83)Customized fieldPayment fields (page 83)User accounts/roles managementActionSee procedure:Add user accountAdding a new user account (page 86)Modify user accountModifying an active user account (page 89)Deactivate user accountDeactivating a user account (page 91)Reactivate a user accountReactivating a user account (page 93)Add a user roleAdding a new user role (page 96)Delete a user roleDeleting a user role (page 101)Modify a user roleModifying a user role (page 98)Moneris Go terminal managementFeatureSee procedure:Automatic sign-out timeMoneris Go terminal: general settings (page 106)Pass terminal timerMoneris Go terminal: general settings (page 106)Report reset timeMoneris Go terminal: general settings (page 106)Manual entry transactionsMoneris Go terminal: general settings (page 106)Surcharge settingsMoneris Go terminal: general settings (page 106)ReceiptsMoneris Go terminal: receipt settings (page 109)Print delay (receipt)Moneris Go terminal: receipt settings (page 109)Print QR code (receipt)Moneris Go terminal: receipt settings (page 109)Receipt format optionsMoneris Go terminal: receipt settings (page 109)No. of Merchant copies (receipt)Moneris Go terminal: receipt settings (page 109)Header/footer (Receipt)Moneris Go terminal: receipt settings (page 109)Cashback settingsMoneris Go terminal: cashback settings (page 113)Tip settingsMoneris Go terminal: tip settings (page 115)Moneris Go portal Reference Guide16
Logging in/logging outLogging in/logging outIn this section, we go over everything you need toknow to log into/log out of the Moneris Go portal.Moneris Go portal Reference Guide17
Logging into the Moneris Go portalStart a session on the Moneris Go portal, and access your store.1. Visit www.monerisgo.com to start on the Moneris Go portal login page (shown below).2. In the "Login" window, enter your login credentials:a. In the Email field, enter the email address that you registered when you activated your Moneris Goportal user account.b. In the Password field, enter your Moneris Go portal login password.c. Click on the Sign in button.3. When you are logged in, you will see either the "Dashboard" page or the "Stores" page. Do one of thefollowing depending on which page displays on your screen:If the "Dashboard" page displays (shown below):a. You have successfully accessed your store (see The dashboard on page 42).Moneris Go portal Reference Guide18
If the "Stores" page displays (shown below):a. Click on the store tile labelled with the name of the store that you want to access.Note: To search for a specific store, enter the full/partial store name in the Search by store name field.To change the number of hits listed on a page, click on the "Show # items per page" drop-down, andselect a number (5, 10, 15, 20, 25, or 50).STORE TILESb. When the "Dashboard" page displays (shown below), it means you have successfully accessed the store(see The dashboard on page 42).Moneris Go portal Reference Guide19
Forgot your login password?If you cannot log into the Moneris Go portal because you forgot your Moneris Go portal password, follow thesteps below to reset it.1. Visit www.monerisgo.com to start on the Moneris Go portal login page (shown below).2. In the "Login" window, click on Forgot password?3. When the "Password reset" window displays (shown below), enter your Moneris Go portal user accountlogin email address, and click on the Reset button.4. When the "A link has been sent to your email" response displays (shown below), confirm that you receivedthe "Moneris Go Password reset" message in your email inbox.Moneris Go portal Reference Guide20
5. Open the email, and click on the Reset my password link contained in the message.6. When the request is processed, the Moneris Go portal "Password reset" page will open (shown below):a. In the New password field, enter a new (or the old) password.b. In the Confirm password field, re-enter the password.c. Click on the Save button.7. When the "Password successfully changed. Please log in" window displays (shown below), it means you havesuccessfully reset your login password.8. Click on the Login button to return to the Moneris Go portal login page.Note: When you next attempt to log in, enter your newly reset password (see Logging into the Moneris Goportal on page 18).Moneris Go portal Reference Guide21
Store navigationUsing My StoresIf you are logged into the Moneris Go portal and are already within (accessing) a store, you can use the "MyStores" function to access any other store that is linked to your user account.Note: For instructions on how to log in and access a store, see Logging into the Moneris Go portal on page 18.1. From any page in your store, click on your user account tile (shown below).USER ACCOUNT TILE2. When the user account menu displays (shown below), click on My stores.USER ACCOUNT MENU3. When the "Stores" page displays, locate the store tile labelled with the name of the store (and store ID) thatyou want to access, then click on that tile.Note: To search for a specific store, enter the full/partial store name in the Search by store name field.To change the number of hits listed on a page, click on the "Show # items per page" drop-down, and select anumber (5, 10, 15, 20, 25, or 50).STORE TILESMoneris Go portal Reference Guide22
4. When the "Dashboard" page displays (shown below), it means you have successfully accessed your store(see The dashboard on page 42).Moneris Go portal Reference Guide23
Adding another store to the primary user accountIf you are the owner of your Moneris Go portal and want to add another store to your (primary) user account,follow the steps below.Note: If you do not have any stores added to your account, follow the steps in How to get started (page 8).1. Visit www.monerisgo.com to start on the Moneris Go portal login page (shown below).2. In the "Login" window, enter your login credentials:a. In the Email field, enter the email address that you registered when you activated your Moneris Goportal user account.b. In the Password field, enter your Moneris Go portal login password.c. Click on the Sign in button.3. When you are logged in, you will see either the "Dashboard" page or the "Stores" page.Do one of the following depending on which page displays on your screen:If the "Dashboard" page displays (shown below):a. Click on your user account tile, and then click on My Stores in the drop-down.b. Continue at step 4 (on page 25).USER ACCOUNT TILEIf the "Stores" page displays:a. Continue at step 4 (on page 25).Moneris Go portal Reference Guide24
4. On the "Stores" page (shown below), click on the Add store button.5. When the "Add store" window displays (shown here), fill in the fields with the requiredIDs, as provided to you (the primary account owner) by Moneris.a. In the Store ID field, enter the store ID of the store that you want to add.b. In the Merchant ID field, enter your 13-digit merchant ID.6. Click on the Submit button.7. When the "Stores" page displays, confirm that the new store is added beside the other store tile(s).NEWLY ADDEDSTORE (TILE)DISPLAYS HERE8. The operation is complete. (To access the newly added store, simply click on its store tile.)Note: If you want to permit new or existing users to access/use the features available in the newly addedstore, you can add the user account(s) as desired (see Adding a new user account (page 86). You mayduplicate the login credentials of an existing user account in each new store.Moneris Go portal Reference Guide25
Logging out of the Moneris Go portalEnd your current session, and log out of the Moneris Go portal.1. While you are logged in on any Moneris Go portal page (e.g., the "Dashboard" page as shown below), clickon your user account tile.Note: The user account tile is always located in the top right corner of every Moneris Go portal page.USER ACCOUNT TILE2. When the user account menu displays (shown below), click on Logout.Note: The menu items "My stores", "My account", and "Feedback" are listed only if you have accessed oneof your stores during the current login session.USER ACCOUNT MENU3. When the Moneris Go portal login page displays (shown below), it means you have successfully logged outand ended your session.Moneris Go portal Reference Guide26
Financial transactionsFinancialtransactionsIn this section, we go over everything you need toknow to perform financial transactions through yourMoneris Go portal store's virtual terminal. .Moneris Go portal Reference Guide27
Purchase with credit card: manual entryThe steps below describe how to perform a credit card sale of goods and services by entering card data inMoneris Go portal payment fields. A Purchase verifies funds on the cardholder's card, removes the funds, andprepares the funds for deposit into your merchant account.Note: Some card brands support debit card manual entry for this transaction.1. Log into the Moneris Go portal, and access the store through which you want to perform the transaction(see Logging into the Moneris Go portal on page 18).Note: If you have multiple stores linked to your user account, you can use the My Stores function to movebetween your stores (see Using My Stores on page 22).Your user account's current default display language determines the language format of the tra
virtual terminal to complete and refund transactions and send payment requests; user and roles management for Moneris Go terminals and the portal. How to use this guide . In the Merchant ID field, enter your 13-digit merchant ID. 5. Click on the Submit button. 6. When the "Terms and conditions" window displays (shown below), scroll through .