Transcription
HSPHardware Service PackGetting Started
CopyrightThe data in this document may not be altered or amended without special notification from ETAS GmbH. ETAS GmbH undertakes no further obligation in relation to this document. The software described in it can only be used if thecustomer is in possession of a general license agreement or single license. Usingand copying is only allowed in concurrence with the specifications stipulated inthe contract.Under no circumstances may any part of this document be copied, reproduced,transmitted, stored in a retrieval system or translated into another languagewithout the express written permission of ETAS GmbH. Copyright 2018 ETAS GmbH, StuttgartThe names and designations used in this document are trademarks or brandsbelonging to the respective owners.HSP - Getting Started EN - R 2018-092
ETASContentsContents1 Introduction . . . . . . . . . . . . . . . . . . . . . . . . . . . . . . . . . . . . . . . . . . . . . . . . . . . . . .1.1 What’s new . . . . . . . . . . . . . . . . . . . . . . . . . . . . . . . . . . . . . . . . . . . . . . . . .1.2 Product Overview . . . . . . . . . . . . . . . . . . . . . . . . . . . . . . . . . . . . . . . . . . . . .1.2.1Product Structure . . . . . . . . . . . . . . . . . . . . . . . . . . . . . . . . . . . . . .1.2.2Product Versioning . . . . . . . . . . . . . . . . . . . . . . . . . . . . . . . . . . . . .1.2.3Product Feature . . . . . . . . . . . . . . . . . . . . . . . . . . . . . . . . . . . . . . . .1.3 User Information . . . . . . . . . . . . . . . . . . . . . . . . . . . . . . . . . . . . . . . . . . . . . .1.3.1User Profile . . . . . . . . . . . . . . . . . . . . . . . . . . . . . . . . . . . . . . . . . . .1.3.2Structure of the Documentation . . . . . . . . . . . . . . . . . . . . . . . . . . .1.3.3HSP Online Help - Quick Guide . . . . . . . . . . . . . . . . . . . . . . . . . . . .1.3.4Working with the Manual . . . . . . . . . . . . . . . . . . . . . . . . . . . . . . . .2 Program Installation . . . . . . . . . . . . . . . . . . . . . . . . . . . . . . . . . . . . . . . . . . . . . . .2.1 Overview . . . . . . . . . . . . . . . . . . . . . . . . . . . . . . . . . . . . . . . . . . . . . . . . . .2.1.1Program Files and Windows User Rights . . . . . . . . . . . . . . . . . . . .2.1.2Documentation . . . . . . . . . . . . . . . . . . . . . . . . . . . . . . . . . . . . . . .2.1.3System Requirements . . . . . . . . . . . . . . . . . . . . . . . . . . . . . . . . . .2.1.4Restrictions . . . . . . . . . . . . . . . . . . . . . . . . . . . . . . . . . . . . . . . . . .2.1.5Supported ETAS Products . . . . . . . . . . . . . . . . . . . . . . . . . . . . . . .2.2 Installation Procedure . . . . . . . . . . . . . . . . . . . . . . . . . . . . . . . . . . . . . . . . .2.2.1Installing HSP . . . . . . . . . . . . . . . . . . . . . . . . . . . . . . . . . . . . . . . .2.2.2Installing HSP Service Packages (HSP-SP) . . . . . . . . . . . . . . . . . . . .2.3 LAN handling Support . . . . . . . . . . . . . . . . . . . . . . . . . . . . . . . . . . . . . . . .2.4 Uninstall Procedure . . . . . . . . . . . . . . . . . . . . . . . . . . . . . . . . . . . . . . . . . . .2.4.1Uninstalling HSP . . . . . . . . . . . . . . . . . . . . . . . . . . . . . . . . . . . . . .2.4.2Uninstalling HSP Service Packages (HSP-SP) . . . . . . . . . . . . . . . . . .2.5 Lambda Meter Configuration Tool . . . . . . . . . . . . . . . . . . . . . . . . . . . . . . .HSP - Getting Started555577888891111111112121213131314151515163
ETASContents3 Using the HSP Update Tool . . . . . . . . . . . . . . . . . . . . . . . . . . . . . . . . . . . . . . . . . .3.1 Starting the HSP Update Tool (HSP-UT) . . . . . . . . . . . . . . . . . . . . . . . . . . . .3.2 "HSP Update Tool" Window . . . . . . . . . . . . . . . . . . . . . . . . . . . . . . . . . . . .3.3 Update Procedure . . . . . . . . . . . . . . . . . . . . . . . . . . . . . . . . . . . . . . . . . . . .3.4 Document the Firmware State . . . . . . . . . . . . . . . . . . . . . . . . . . . . . . . . . .3.4.1Firmware State Log File . . . . . . . . . . . . . . . . . . . . . . . . . . . . . . . . .3.4.2Firmware State History Log File . . . . . . . . . . . . . . . . . . . . . . . . . . .3.5 Driver Installation . . . . . . . . . . . . . . . . . . . . . . . . . . . . . . . . . . . . . . . . . . . .3.5.1ES520 Driver Installation . . . . . . . . . . . . . . . . . . . . . . . . . . . . . . . .3.5.2ES580 or CAN-Link II Card Driver Installation . . . . . . . . . . . . . . . . .3.5.3ES581 and ES581.4 Driver Installation . . . . . . . . . . . . . . . . . . . . . .3.5.4ES583.1 Driver Installation . . . . . . . . . . . . . . . . . . . . . . . . . . . . . . .3.5.5ES5xx/ ES8xx/ ES9xx Driver Installation . . . . . . . . . . . . . . . . . . . . . .3.6 Quit the HSP Update Tool . . . . . . . . . . . . . . . . . . . . . . . . . . . . . . . . . . . . . .17171718181818191919191919194 ETAS Network Manager . . . . . . . . . . . . . . . . . . . . . . . . . . . . . . . . . . . . . . . . . . . .4.1 Overview . . . . . . . . . . . . . . . . . . . . . . . . . . . . . . . . . . . . . . . . . . . . . . . . . .4.2 ETAS Hardware Addressing . . . . . . . . . . . . . . . . . . . . . . . . . . . . . . . . . . . . .4.3 Network Adapter Addressing . . . . . . . . . . . . . . . . . . . . . . . . . . . . . . . . . . .4.3.1Type of Network Adapter Addressing . . . . . . . . . . . . . . . . . . . . . .4.3.2Addressing the Network Adapter Manually . . . . . . . . . . . . . . . . . .4.3.3Addressing the Network Adapter via DHCP . . . . . . . . . . . . . . . . . .4.4 User Interface . . . . . . . . . . . . . . . . . . . . . . . . . . . . . . . . . . . . . . . . . . . . . . .4.4.1Configuration Dialog Window 1 — Selection of Network Adapter("Network settings for ETAS hardware (page 1)") . . . . . . . . . . . . .4.4.2Configuration Dialog Window 2 — Defining the Address Pool("Network settings for ETAS hardware (page 2)") . . . . . . . . . . . . .4.4.3Configuration Dialog Window 4 — Displaying Warning("Network settings for ETAS hardware (Page 4)") . . . . . . . . . . . . .4.5 Configuring Network Addresses for ETAS Hardware . . . . . . . . . . . . . . . . . .4.5.1Manually configuring the Network Adapter . . . . . . . . . . . . . . . . . .4.5.2Auto-Configuring Network Adapter for ETAS Hardware . . . . . . . .4.5.3Enabling APIPA in the Registry . . . . . . . . . . . . . . . . . . . . . . . . . . . .4.6 Troubleshooting Ethernet Hardware Access . . . . . . . . . . . . . . . . . . . . . . . .20202021212122225Troubleshooting General Problems. . . . . . . . . . . . . . . . . . . . . . . . . . . . . . . . . . . .5.1 Problems and Solutions . . . . . . . . . . . . . . . . . . . . . . . . . . . . . . . . . . . . . . . .5.1.1Network Adapter cannot be selected via Network Manager. . . . . .5.1.2Search for Ethernet Hardware fails. . . . . . . . . . . . . . . . . . . . . . . . .5.1.3Personal Firewall blocks Communication . . . . . . . . . . . . . . . . . . . .222425262628303132323233356 ETAS Contact Addresses . . . . . . . . . . . . . . . . . . . . . . . . . . . . . . . . . . . . . . . . . . . . 40Index . . . . . . . . . . . . . . . . . . . . . . . . . . . . . . . . . . . . . . . . . . . . . . . . . . . . . . . . . . 41HSP - Getting Started4
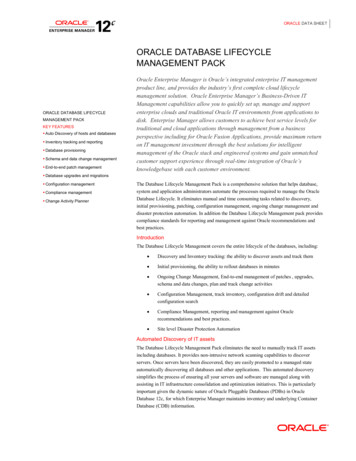
ETAS1IntroductionIntroductionThe Hardware Service Pack (HSP) is an ETAS product for firmware managementof ETAS hardware. It is an easy to use tool for adding new functionality to thehardware.With HSP, users can Check the current firmware state, Check the current firmware compatibility state, Update/ downdate the firmware and Get the update activities loggedof the connected ETAS hardware by an intuitive process.1.1What’s newFor new features of this HSP version, support of new products, and for information about firmware support use in the HSP program the menu options Help Release Notes Service Package. and Help Release Notes HSP-UT.1.2Product Overview1.2.1Product StructureThe Hardware Service Pack is a tool for the firmware management of ETAS hardware. HSP consists of two main parts: HSP Update Tool (HSP-UT) and HSP Service Packages (HSP-SP and LABCAR-FWP).epme êÇï êÉ pÉêîáÅÉ m ÅâepmJrqepmJpmepm réÇ íÉ qççäepm pÉêîáÅÉ m Åâ ÖÉëepmJpmFig. 1-1Hardware Service Pack product structureThe HSP Update Tool (HSP-UT) is the user interface for the firmware updateprocess. This tool allows users to view the state of firmware in a given ETAShardware component. Based on this information, users update the firmware.Please refer to the release note for the current HSP-UT version for informationabout supported ETAS hardware modules.HSP - Getting Started5
ETASIntroductionThe HSP Service Packages (HSP-SP) contains the actual firmware, i. e. the filesthat will be downloaded to the hardware.Additional the following drivers and supplements are contained in HSP:– The ES520 Driver (UCI) contains the PC drivers needed by theES520 for correct function with INCA and HSP-UT.– The ES580 (CAN and J2534) contains the PC drivers needed bythe ES580 (CAN-LINK II) for correct function with INCA.– The ES581.3 (CAN and J2534) contains the PC drivers needed bythe ES581.3 for correct function with a SW application, e.g. INCA,HSP-UT, etc.– The ES581.4 (USB and J2534) contains the PC drivers needed bythe ES581.4 for correct function with a SW application, e.g. INCA,HSP-UT, etc.– The ES582 (USB) contains the PC drivers needed by the ES582 forcorrect function with a SW application, e.g. INCA, HSP-UT, etc.– The ES583 (USB) contains the PC drivers needed by the ES583 forcorrect function with a SW application, e.g. INCA, HSP-UT, etc.– The ES584 (USB) contains the PC drivers needed by the ES584 forcorrect function with a SW application, e.g. INCA, HSP-UT, etc.– The ES63x component contains new sensor lines for the ES63xLambda Module supporting new Lambda sensors.– The ES5xx/ES8xx/ES9xx driver installation: Since INCA V7.1 INCAservice packs automatically install the most recent version of ETAS ECUand Bus Interfaces Distribution Package (ED-EBI and EBI-IP). You mayneed to execute the ETAS ECU and Bus Interfaces installations manually only if you use Non-ETAS software that supports ETAS hardware.– The LambdaConfigTool component contains the configuration tool"LambdaConfigTool" for the LA3/LA4 Lambda Meter. This tool isindependent from the HSP-UT.HSP - Getting Started6
ETAS1.2.2IntroductionProduct VersioningThe version of the Hardware Service Pack (HSP) is changed if either HSP UpdateTool (HSP-UT) or if any of the HSP Service Packages (HSP-SP) was changed.1.2.3Product FeatureThe main features of HSP Update Tool are: Detailed information about firmware status for several systems available Detailed information about software application and firmware compatibility After selection of product group firmware update in three steps only Free selection of the systems for firmware update among the displayedhardware User information by icons for easy readability of firmware status– for the complete system– for each updateable component in the system Icons are changing during the update process their status Up to 64 systems can be updated within the same update process Log files documents the updates Program window layout is configurable Integrated online helpHSP - Getting Started7
ETASIntroduction1.3User Information1.3.1User ProfileThis manual is intended for qualified personnel working in the fields of automotive control unit development and calibration.HSP users should be familiar with the operating system Microsoft Windows. Allusers should be capable of executing menu functions, activating buttons etc.Users should also be acquainted with the Windows file storage system, particularly the relations between files and directories. The user must know about andhave mastered the basic functions of the Windows File and Program Managerand Windows Explorer. The user should also be familiar with "Drag & Drop".All users who are not familiar with the basic techniques of Microsoft Windowsshould familiarize themselves with them before using HSP. Details of workingwith Windows are contained in the relevant manuals by Microsoft Corporation.1.3.2Structure of the DocumentationThe HSP documentation consists of an online help which describes the operation, and a Getting Started manual. This manual describes installation, containsan overview of the most important features of operation, and background information.The HSP Getting Started consists of the following chapters: "Introduction" (this chapter), "Program Installation" on page 11, "Using the HSP Update Tool" on page 17, "ETAS Network Manager" on page 20, "ETAS Contact Addresses" on page 40 and "Index" on page 41.1.3.3HSP Online Help - Quick GuideUse the Help Help menu option to invoke the general help function. Pressthe F1 function key to call context-sensitive help.The Help Quick Start menu option and the Helpgives an direct access to online help topics. Symbols menu optionThe Help Technical Support menu option opens an info box about HSP support (hotline contact).The Help Supported Hardware menu option gives an direct access to anoverview of supported hardware.The Help Release Notes HSP menu option, the Help Release NotesHSP-UT menu option gives an direct access to the HSP Releases Notes or to theHSP-UT Release Notes.The Help User's Guide ES580 menu option opens the ES580 User's Guide.The Help Info . menu option gives information about the HSP Update Toolversion and additional tool installed components.HSP - Getting Started8
ETASIntroductionThe three tabs of the help window provide you with the following options: The "Contents" tab allows you to browse the help topics by categories. The "Index" tab lists all index entries. Browse the entire list, or enter asearch term to limit the scope of listing. The "Search" tab allows you to search for individual words or termsincluded in a help topic. Type a search string and let the help function listthe entries it has found related to this term.1.3.4Working with the ManualGetting Started is available electronically and can be viewed on the screen at anytime. Using the index, full-text search, and hypertext links, you can find references fast and conveniently (see HSP GettingStarted-En.pdf).Presentation of InformationAll actions to be performed by the user are presented in a so-called “Use-Case”format. This means that the objective to be reached is first briefly defined in thetitle, and the steps required to reach the objective are then provided in a list. Thispresentation appears as follows:Definition of Objective:Any preliminary information. Step 1Any explanation for Step 1. Step 2Any explanation for Step 2. Step 3Any explanation for Step 3.Any concluding remarks.Specific example:To create a new file:When creating a new file, no other file may be open.HSP - Getting Started9
ETASIntroduction Choose File New.The “Create file” dialog box is displayed. Type the name of the new file in the “File name”field.The file name must not exceed 8 characters. Click OK.The new file will be created and saved under the name you specified. You cannow work with the file.Typographical ConventionsThe following typographical conventions are used in this document:Select File OpenMenu commands are shown in boldface.Click OKButtons are shown in boldface.Press ENTER Keyboard commands are shown in angledbrackets, in block capitals.The "Open File" dialog box is Names of program windows, dialog boxes,displayed.fields, etc. are shown in quotation marks.Select the file setup.exe.Text in drop-down lists on the screen, programcode, as well as path and file names are shownin the Courier font.Important notes for the user are shown as follows:NoteImportant note for the user.HSP - Getting Started10
ETASProgram Installation2Program Installation2.1Overview2.1.1Program Files and Windows User RightsMain Installation File (HSP)The HSP main installation file installs the Hardware Service Pack including theHSP-UT and HSP-SP.NoteYou need Windows administrator rights for installing the Hardware ServicePack HSP.You can install HSP in localized versions of the Graphical User Interface (GUI).Service Package Files (HSP-SP)If a compatible HSP version is installed on your PC there is the possibility to installadditional HSP Service Packages (HSP-SP) with Windows standard user rights.NoteFor installing the HSP Service Packages you need only Windows standard userrights.2.1.2DocumentationA printed version of the HSP documentation is not available. All HSP documentation is available in Adobe PDF file format. To read and print the manuals use theAdobe Acrobat Reader.FileDescriptionHSP-UT ReleaseNotes-En.pdfHSP Update Tool release notes(only english language)HSP-UT ReleaseNotes-Jp.pdfHSP Update Tool release notes(only japanese language)HSP GettingStarted-En.pdfHSP Getting Started(this document)HSP GettingStarted-Jp.pdfHSP Getting Started(this document in japanese language)HSP - Getting Started11
ETAS2.1.3Program InstallationSystem RequirementsItemDescriptionRequired PC hardware (IBM-compatible)2 GHz Dual-Core PC,2 GByte RAM, Network adapter,Graphics (1280 x 1024), 128 MBRAMRequired operating systemWindows 10, Windows 8.x, Windows 7 (32-bit version or 64-bitversion in 32-bit compatibilitymode)Free disk space2 GByteNoteThe CPU as well as the main memory requests must satisfy the minimumrequirements of the used operating system.2.1.4RestrictionsOperating systemProduct release tests were performed under Windows 7 and Windows 8.x. Notests were performed on multi-processor machines.Using multiple mastersWhen updating the ETAS hardware with HSP no access by other ETAS applications may be carried out on this hardware.Windows User RightsFor restrictions because of Windows user rights refer to chapter 2.1.1on page 11.Using some hardware componentsHSP-UT does not support the CAN-Link II or ES580 card. HSP-UT cannot detectthe presence of the card and consequently cannot update its firmware.NoteFor complete description of restrictions by using some hardware componentsrefer to the HSP Update Tool Release Notes.2.1.5Supported ETAS ProductsRead the list of supported hardware or the HSP Update Tool release notes fordetailed informations.HSP - Getting Started12
ETASProgram Installation2.2Installation Procedure2.2.1Installing HSPNoteYou need Windows administrator rights for installing the Hardware ServicePack HSP.There is no difference in procedure between HSP installation from a CD and froma network drive.To start the HSP installation: Double click on the setup.exe file in the HSP installation package. Follow the instructions displayed by the installationwizard.NoteThe language selection made in the HSP installation is a global setting for allETAS applications2.2.2Installing HSP Service Packages (HSP-SP)If a compatible HSP version is installed on your PC it is possible to install additional Service Packages (HSP-SP) with Windows standard user rights.NoteFor installing the HSP Service Packages you need only Windows standard userrights.The HSP Service Packages are available for all users of a PC, i.e. all installed packages are available for selection in the HSP-UT regardless of user.The file format of all HSP Service Package files is "*.spi".There are three ways to select, import and install the HSP Service Packages: select and click an HSP-SP file "*.spi" in Windows Exploreror select in HSP program "File Import Service Package"or select in HSP program "Tools Service Package Manager".NoteThe complete handling to install HSP Service Packages is described in theOnline Help of HSP.HSP - Getting Started13
ETAS2.3Program InstallationLAN handling SupportThe Hardware Service Pack supports the improved LAN handling of INCA withdifferent configurations for hardware access by Ethernet: Usage of different network adapters:– one network adapter for the company LAN and– one network adapter for the ETAS-Hardware or Usage of one network adapter:– automatic switch between company LAN and usage in automotive.For working with HSP it is necessary to configure the network environment ofyour PC for the ETAS hardware. The ETAS Network Manager supports your configuration.To start ETAS Network Manager: Select in the HSP Main Window start menuTools ETAS Network settings.The ETAS Network Manager is started.To select a network adapter: Select a network adapter from the "Available Network Adapters" field. Make the necessary settings in the "Network Settings for ETAS hardware" window. Click Finish.Details for using ETAS Network Manager are described in chapter 4 on page 20.HSP - Getting Started14
ETASProgram Installation2.4Uninstall Procedure2.4.1Uninstalling HSPNoteWindows administrator rights are required for uninstalling the HSP (HSP-UTwith all HSP-SP files).This procedure describes how to uninstall the HSP Update Tool and all installedService Packs.To uninstall HSP: Select in the Windows start menu Start System Control Programs and Functions. Select HSP Update Tool. Click Uninstall.The Windows Installer window is displayed: Click Yes to start the HSP uninstallation.The uninstall process is started.2.4.2Uninstalling HSP Service Packages (HSP-SP)NoteFor uninstalling of selected HSP Service Packages you need only Windows standard user rights.Using the HSP Service Package Manager as a part of HSP all users can uninstall aselected HSP Service Package version (e.g. previous/older released service package) without uninstalling the HSP-UT.NoteThe complete handling to uninstall HSP Service Packages is described in theOnline Help of HSP.HSP - Getting Started15
ETAS2.5Program InstallationLambda Meter Configuration ToolThe Hardware Service Pack contains also the ETAS "Lambda Meter Configuration Tool". The "Lambda Meter Configuration Tool" enables the firmwareupdate of the LA3 / LA4 modules, allows convenient setting of modules' parameters and offers the opportunity to download customer specific characteristiccurves. The HSP installation procedure automatically installs the "Lambda MeterConfiguration Tool" into the HSP directory on the PC.To start Lambda Config Tool: Select in the Windows start menu Start Programs ETAS HSP SupplementsLambda Meter Configuration Tool. The "Lambda Config Tool" is started.HSP - Getting Started16
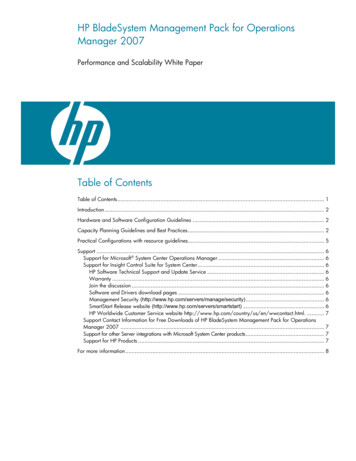
ETAS3Using the HSP Update ToolUsing the HSP Update ToolThis section describes how to update the firmware on ETAS hardware.In this manual, the word ’update’ is used to describe the process of downloadinga binary file, the actual firmware, from the PC to dedicated memory in ETAShardware. The downloaded firmware does not necessarily have to be a newerversion than the firmware originally located on the hardware.3.1Starting the HSP Update Tool (HSP-UT)The HSP-UT can be started either by double-clicking the HSP-UT icon on thedesktop or from the Start menu under Programs ETAS HSP HSPUpdate Tool. The "HSP Update Tool" window of the HSP-UT opens. In the following description this window is named "Main" window.When you select a particular version of the Hardware Service Pack, you are automatically selecting the matching version of the Service Package, i. e. the actualfirmware used by the HSP-UT.Please refer to the HSP online help for details on menu options and button functionality.NoteBefore starting the HSP-UT please make sure that no ETAS Target Server isactive, i. e., that no Target Server icon is visible in the Windows task bar.3.2"HSP Update Tool" WindowThe "HSP Update Tool" window is also named "Main" window.jÉåì êqççäÄ êe êÇï êÉtáåÇçïaÉí áäëtáåÇçïmêçéÉêíáÉëtáåÇçï çãé í íìë êHSP - Getting Started17
ETAS3.3Using the HSP Update ToolUpdate ProcedureThe sequence for updating the firmware is dependent on number of ETAS systems connected on the PC:1. Connect the hardware to the PC and to power supplyNoteNeither the power supply nor the Ethernet connection may be interruptedduring a firmware update!2. Select the HSP version1 or the LABCAR-FWP version23. Click "Search for hardware"4. Checking the firmware state and select hardware systems whose firmware you want to update5. Start firmware update6. Additionally you can check the current firmware state of one of the connected hardware systems after a hardware search operation was done.7. Quit the HSP Update Tool after firmware check or update is completed.3.4Document the Firmware StateThe HSP Update Tool automatically creates two types of log files, the "FirmwareState Log File" and the "Firmware History Log File", offering the possibility todocument the firmware state and the firmware update activities.Contents of the log files can be viewed within HSP-UT window. As the files arein plain text format, they can simply be printed using text editors like Notepad.3.4.1Firmware State Log FileThis feature makes it possible to document the current firmware state or a specific update sequence, i. e. the firmware state before and after the firmwareupdate.The Firmware State Log File will automatically be created the first time a searchfor hardware will be performed after installation of HSP. Afterwards this file willbe overwritten with every search for hardware performed. If a successful updatefollows on a search for hardware the content will be appended with this information.The content of the latest successfully executed update will remain when restarting HSP.3.4.2Firmware State History Log FileThis feature makes it possible to "browse" the history on successfully executedfirmware updates.The Firmware State History Log File will also be automatically created the firsttime an update has been done after installation of HSP and contains all previousversions of the firmware state log file. If a new firmware state log file is created,the content of this file is appended at the beginning of the history file.1.2.only HSP version V6.1 and higheronly HSP version V7.0 and higherHSP - Getting Started18
ETASUsing the HSP Update ToolWhen required it is possible to delete the content of this file. There is a maximumallowed size for this file. When the size reaches 500 kB the oldest update information will be truncated.3.5Driver Installation3.5.1ES520 Driver InstallationIf there is no ES520 driver (UCI) installed on your PC or an installed driver is notup to date you can install the required driver which is delivered with HSP. Theinstalled driver allows to perform a firmware update on your ES520 hardwareand to use it with ETAS software on this PC.3.5.2ES580 or CAN-Link II Card Driver InstallationIf there is no ES580 or CAN-Link II card driver installed on your PC or an installeddriver is not up to date you can install the required driver which is delivered withHSP. The installed driver allows to perform a firmware update on your ES580 orCAN-Link II card hardware and to use it with ETAS software on this PC.The driver is available in a 32-bit- and 64-bit version.3.5.3ES581 and ES581.4 Driver InstallationIf there is no ES581 driver (USB) installed on your PC or an installed driver is notup to date you can install the required driver which is delivered with HSP.The installed driver allows to perform a firmware update on your ES581 hardware and to use it with ETAS software on this PC.Users of the ES581 with third party applications have additionally to install anJ2534 conform driver (Pass Thru Interface) which is also delivered with HSP.3.5.4ES583.1 Driver InstallationIf there is no ES583.1 driver (USB) installed on your PC or an installed driver is notup to date you can install the required driver which is delivered with HSP.The installed driver allows to perform a firmware update on your ES583.1 hardware and to use it with ETAS software on this PC.3.5.5ES5xx/ ES8xx/ ES9xx Driver InstallationSince INCA V7.1 INCA service packs automatically install the most recent versionof ETAS ECU and Bus Interfaces (ED-EBI and EBI-IP). You may need to execute theETAS ECU and Bus Interfaces installations manually only if you use Non-ETASsoftware that supports ETAS hardware.3.6Quit the HSP Update ToolQuit the HSP Update Tool after firmware check or update is completed.NoteLeaving the tool running may interfere with other ETAS applications.HSP - Getting Started19
ETAS4ETAS Network ManagerETAS Network ManagerThe ETAS Network Manager is used for creating a configuration that will be usedby the ETAS IP Manager. The IP Manager is responsible for dynamic IP addressingof the ETAS hardware used in your network.4.1OverviewETAS software supports different configurations for hardware access via Ethernet: Using multiple network adapters:– one network adapter for the company network,– one or more network adapters for the ETAS hardware. Using one network adapter– automatic toggling between the company network and the ETAShardware.NoteYou do not require a separate network adapter to connect the ETAS hardwareto your PC. You can use the same network adapter both for the company network and the ETAS network.The ETAS Network Manager supports you in selecting the network adapter forthe ETAS hardware.The ETAS Network Manager gives you an overview of the network adaptersavailable for your PC and the type of IP address assignment. If more than onenetwork adapter is available in the system, you can select the network adapter touse for connecting the ETAS hardware to your PC. You can also specify theaddress range for the IP assignment for the ETAS hardware.You do not need administrator rights to select the network adapter and the network environment configuration for the ETAS hardware. You can togglebetween the ETAS network and the company network without rebooting yourPC.NoteWith Network Manager, you cannot create or modify the configuration for thenetwork adapter. Instead modify the network settings of your PC via the Control Panel (see the documentation for your operating system).Please note that this requires administrator rights.4.2ETAS Hardware AddressingThe ET
-The ES580 (CAN and J2534) contains the PC drivers needed by the ES580 (CAN-LINK II) for correct function with INCA. -The ES581.3 (CAN and J2534) contains the PC drivers needed by the ES581.3 for correct function with a SW application, e.g. INCA, HSP-UT, etc. -The ES581.4 (USB and J2534) contains the PC drivers needed by