Transcription
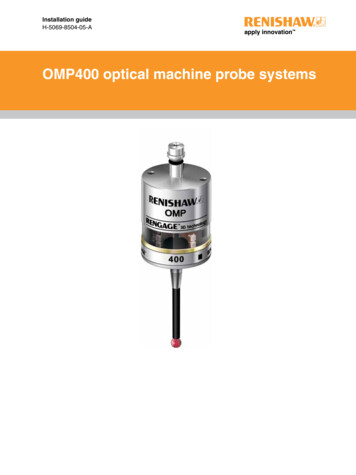
Installation guideH-5069-8504-05-AOMP400 optical machine probe systems
2008 - 2011 Renishaw plc. All rights reserved.This document may not be copied or reproducedin whole or in part, or transferred to any othermedia or language, by any means, without theprior written permission of Renishaw plc.The publication of material within this documentdoes not imply freedom from the patent rights ofRenishaw plc.Renishaw part no:H-5069-8504-05-AFirst issued:January 2008Revised:May 2008January 2009October 2009March 2011
ContentsiContentsBefore you begin. . . . . . . . . . . . . . . . . . . . . . . . . . . . . . . . . . . . . . . . . . . . . . . . . . . 1.1Before you begin. . . . . . . . . . . . . . . . . . . . . . . . . . . . . . . . . . . . . . . . . . . . . . . . . . . . . . . . . . . . . 1.1Disclaimer . . . . . . . . . . . . . . . . . . . . . . . . . . . . . . . . . . . . . . . . . . . . . . . . . . . . . . . . . . . . . . . 1.1Trademarks . . . . . . . . . . . . . . . . . . . . . . . . . . . . . . . . . . . . . . . . . . . . . . . . . . . . . . . . . . . . . . 1.1Warranty. . . . . . . . . . . . . . . . . . . . . . . . . . . . . . . . . . . . . . . . . . . . . . . . . . . . . . . . . . . . . . . . . 1.1Changes to equipment. . . . . . . . . . . . . . . . . . . . . . . . . . . . . . . . . . . . . . . . . . . . . . . . . . . . . . 1.1CNC machines. . . . . . . . . . . . . . . . . . . . . . . . . . . . . . . . . . . . . . . . . . . . . . . . . . . . . . . . . . . . 1.1Care of the probe. . . . . . . . . . . . . . . . . . . . . . . . . . . . . . . . . . . . . . . . . . . . . . . . . . . . . . . . . . 1.1Patents. . . . . . . . . . . . . . . . . . . . . . . . . . . . . . . . . . . . . . . . . . . . . . . . . . . . . . . . . . . . . . . . . . 1.2EC declaration of conformity. . . . . . . . . . . . . . . . . . . . . . . . . . . . . . . . . . . . . . . . . . . . . . . . . . . . 1.3WEEE directive. . . . . . . . . . . . . . . . . . . . . . . . . . . . . . . . . . . . . . . . . . . . . . . . . . . . . . . . . . . . . . 1.3FCC declaration (USA). . . . . . . . . . . . . . . . . . . . . . . . . . . . . . . . . . . . . . . . . . . . . . . . . . . . . . . . 1.3Safety . . . . . . . . . . . . . . . . . . . . . . . . . . . . . . . . . . . . . . . . . . . . . . . . . . . . . . . . . . . . . . . . . . . . . 1.4OMP400 basics . . . . . . . . . . . . . . . . . . . . . . . . . . . . . . . . . . . . . . . . . . . . . . . . . . . . 2.1Introduction. . . . . . . . . . . . . . . . . . . . . . . . . . . . . . . . . . . . . . . . . . . . . . . . . . . . . . . . . . . . . . . . . 2.1Optical transmission method. . . . . . . . . . . . . . . . . . . . . . . . . . . . . . . . . . . . . . . . . . . . . . . . . . . . 2.2Legacy mode. . . . . . . . . . . . . . . . . . . . . . . . . . . . . . . . . . . . . . . . . . . . . . . . . . . . . . . . . . . . . 2.2Modulated mode . . . . . . . . . . . . . . . . . . . . . . . . . . . . . . . . . . . . . . . . . . . . . . . . . . . . . . . . . . 2.2Twin probe system. . . . . . . . . . . . . . . . . . . . . . . . . . . . . . . . . . . . . . . . . . . . . . . . . . . . . . . . . . . . 2.2Trigger Logic . . . . . . . . . . . . . . . . . . . . . . . . . . . . . . . . . . . . . . . . . . . . . . . . . . . . . . . . . . . . . . 2.2Modes of operation. . . . . . . . . . . . . . . . . . . . . . . . . . . . . . . . . . . . . . . . . . . . . . . . . . . . . . . . . . . 2.3Configurable settings. . . . . . . . . . . . . . . . . . . . . . . . . . . . . . . . . . . . . . . . . . . . . . . . . . . . . . . . . . 2.3Switch-on delay . . . . . . . . . . . . . . . . . . . . . . . . . . . . . . . . . . . . . . . . . . . . . . . . . . . . . . . . . . . 2.3Switch-on / switch off methods. . . . . . . . . . . . . . . . . . . . . . . . . . . . . . . . . . . . . . . . . . . . . . . . 2.4Enhanced trigger filter . . . . . . . . . . . . . . . . . . . . . . . . . . . . . . . . . . . . . . . . . . . . . . . . . . . . . . 2.4Auto-reset facility. . . . . . . . . . . . . . . . . . . . . . . . . . . . . . . . . . . . . . . . . . . . . . . . . . . . . . . . . . 2.5
OMP400 installation guideOptical transmission method and probe identity . . . . . . . . . . . . . . . . . . . . . . . . . . . . . . . . . . 2.5Optical power . . . . . . . . . . . . . . . . . . . . . . . . . . . . . . . . . . . . . . . . . . . . . . . . . . . . . . . . . . . . 2.5ContentsOMP400 dimensions. . . . . . . . . . . . . . . . . . . . . . . . . . . . . . . . . . . . . . . . . . . . . . . . . . . . . . . . . . 2.6iiOMP400 specification. . . . . . . . . . . . . . . . . . . . . . . . . . . . . . . . . . . . . . . . . . . . . . . . . . . . . . . . . 2.7Recommended styli. . . . . . . . . . . . . . . . . . . . . . . . . . . . . . . . . . . . . . . . . . . . . . . . . . . . . . . . . . . 2.9System installation. . . . . . . . . . . . . . . . . . . . . . . . . . . . . . . . . . . . . . . . . . . . . . . . . 3.1Installing the OMP400 with an OMI-2T / OMI-2 / OMI-2H / OMI. . . . . . . . . . . . . . . . . . . . . . . . . 3.1Performance envelope with an OMI‑2T / OMI-2 / OMI-2H (modulated transmission) . . . . . . 3.2Performance envelope when using the OMP400 with the OMI (legacy transmission). . . . . . 3.3Installing the OMP400 with an OMM and MI 12. . . . . . . . . . . . . . . . . . . . . . . . . . . . . . . . . . . . . 3.4Performance envelope with an OMM (legacy transmission) . . . . . . . . . . . . . . . . . . . . . . . . . 3.5Preparing the OMP400 for use. . . . . . . . . . . . . . . . . . . . . . . . . . . . . . . . . . . . . . . . . . . . . . . . . . 3.6Fitting the stylus. . . . . . . . . . . . . . . . . . . . . . . . . . . . . . . . . . . . . . . . . . . . . . . . . . . . . . . . . . . 3.6Installing the batteries . . . . . . . . . . . . . . . . . . . . . . . . . . . . . . . . . . . . . . . . . . . . . . . . . . . . . . 3.7Mounting the probe on a shank (or machine table). . . . . . . . . . . . . . . . . . . . . . . . . . . . . . . . 3.8Stylus on-centre adjustment. . . . . . . . . . . . . . . . . . . . . . . . . . . . . . . . . . . . . . . . . . . . . . . . . . 3.9Calibrating the OMP400 . . . . . . . . . . . . . . . . . . . . . . . . . . . . . . . . . . . . . . . . . . . . . . . . . . . . . . 3.10Why calibrate a probe? . . . . . . . . . . . . . . . . . . . . . . . . . . . . . . . . . . . . . . . . . . . . . . . . . . . . 3.10Calibrating in a bored hole or on a turned diameter. . . . . . . . . . . . . . . . . . . . . . . . . . . . . . . 3.10Calibrating in a ring gauge or on a datum sphere . . . . . . . . . . . . . . . . . . . . . . . . . . . . . . . . 3.10Calibrating the probe length. . . . . . . . . . . . . . . . . . . . . . . . . . . . . . . . . . . . . . . . . . . . . . . . . 3.10Trigger Logic . . . . . . . . . . . . . . . . . . . . . . . . . . . . . . . . . . . . . . . . . . . . . . . . . . . . 4.1Reviewing the current probe settings . . . . . . . . . . . . . . . . . . . . . . . . . . . . . . . . . . . . . . . . . . . . . 4.1Probe settings record . . . . . . . . . . . . . . . . . . . . . . . . . . . . . . . . . . . . . . . . . . . . . . . . . . . . . . . . . 4.2Changing the probe settings. . . . . . . . . . . . . . . . . . . . . . . . . . . . . . . . . . . . . . . . . . . . . . . . . . . . 4.4Changing the probe settings (continued) . . . . . . . . . . . . . . . . . . . . . . . . . . . . . . . . . . . . . . . . . . 4.5Operating mode. . . . . . . . . . . . . . . . . . . . . . . . . . . . . . . . . . . . . . . . . . . . . . . . . . . . . . . . . . . . . . 4.6Maintenance. . . . . . . . . . . . . . . . . . . . . . . . . . . . . . . . . . . . . . . . . . . . . . . . . . . . . . . 5.1Maintenance. . . . . . . . . . . . . . . . . . . . . . . . . . . . . . . . . . . . . . . . . . . . . . . . . . . . . . . . . . . . . . . . 5.1Cleaning the probe . . . . . . . . . . . . . . . . . . . . . . . . . . . . . . . . . . . . . . . . . . . . . . . . . . . . . . . . . . . 5.1Changing the batteries . . . . . . . . . . . . . . . . . . . . . . . . . . . . . . . . . . . . . . . . . . . . . . . . . . . . . . . . 5.2Fault finding. . . . . . . . . . . . . . . . . . . . . . . . . . . . . . . . . . . . . . . . . . . . . . . . . . . . . . . 6.1Parts list. . . . . . . . . . . . . . . . . . . . . . . . . . . . . . . . . . . . . . . . . . . . . . . . . . . . . . . . . . 7.1
Before you begin1.1Before you beginChanges to equipmentDisclaimerRenishaw reserves the right to change equipmentspecifications without notice.RENISHAW HAS MADE CONSIDERABLEEFFORTS TO ENSURE THE CONTENT OF THIS CNC machinesDOCUMENT IS CORRECT AT THE DATE OFCNC machine tools must always be operated byPUBLICATION BUT MAKES NO WARRANTIESfully trained personnel in accordance with theOR REPRESENTATIONS REGARDINGmanufacturer's instructions.THE CONTENT. RENISHAW EXCLUDESLIABILITY, HOWSOEVER ARISING, FOR ANYINACCURACIES IN THIS DOCUMENT.Care of the probeTrademarksRENISHAW and the probe emblem used in theRENISHAW logo are registered trademarks ofRenishaw plc in the UK and other countries.apply innovation , RENGAGE and TriggerLogic are trademarks of Renishaw plc.All other brand names and product names usedin this document are trade names, service marks,trademarks, or registered trademarks of theirrespective owners.WarrantyEquipment requiring attention under warrantymust be returned to your equipment supplier.No claims will be considered where Renishawequipment has been misused, or whererepairs or adjustments have been attempted byunauthorised persons. Prior consent must beobtained in instances where Renishaw equipmentis to be substituted or omitted. Failure to complywith this requirement will invalidate the warranty.Keep system components clean and treat theprobe as a precision tool.
Before you beginOMP400 installation guide1.2PatentsFeatures of the OMP400 probe, and other similarRenishaw probes, are subject of one or more of thefollowing patents and / or patent applications:CN 101142461BCN 101171493ACN 101198836AEP 0641427EP 0974208EP 1130557EP 1185838EP 1373995EP 1457786EP 1477767EP 1477768EP 1503524 BEP 1701234EP 1734426EP 1866602EP 1880163EP 1893937EP 1988439EP 2154471IN 6963/DELNP/2007AIN 8669/DELNP/2007AIN 9914/DELNP/2007AJP 2004-279,417JP 2004-522,961JP 2006-313567JP 2008-203270JP 2008-537107JP 2008-541081JP 2008-544244JP 3,634,363JP 3967592JP 4294101US 2009-0130987-A1US 5,671,542US 6,776,344 B2US 6,839,563 B1US 6,860,026 B2US 6472981 B2US 7145468 B2US 7285935US 7441707US 7486195US 7603789US 7689679US 7792654US 7812736
FCC Section 15.19EC declaration of conformityRenishaw PLC declares that the OMP400complies with the applicable standards andregulations.Contact Renishaw plc atwww.renishaw.com/omp400 for the fullEC declaration of conformity.This device complies with Part 15 of the FCCrules.Operation is subject to the following twoconditions:1. This device may not cause harmfulinterference.2. This device may accept any interferencereceived, including interference that maycause undesired operation.WEEE directiveFCC Section 15.105This equipment has been tested and found tocomply with the limits for a Class A digital device,pursuant to Part 15 of the FCC rules. These limitsare designed to provide reasonable protectionagainst harmful interference when the equipmentis operated in a commercial environment. Thisequipment generates, uses, and can radiateradio frequency energy and, if not installedand used in accordance with the instructionmanual, may cause harmful interference to radiocommunications. Operation of this equipmentin a residential area is likely to cause harmfulinterference, in which case you will be required tocorrect the interference at your own expense.The use of this symbol on Renishaw productsand/or accompanying documentation indicatesthat the product should not be mixed withgeneral household waste upon disposal. It is theresponsibility of the end user to dispose of thisproduct at a designated collection point for wasteelectrical and electronic equipment (WEEE) toenable reuse or recycling. Correct disposal ofthis product will help to save valuable resourcesFCC Section 15.21and prevent potential negative effects on theenvironment. For more information, please contactThe user is cautioned that any changes oryour local waste disposal service or Renishawmodifications not expressly approved bydistributor.Renishaw plc, or authorised representative couldvoid the user’s authority to operate the equipment.Before you beginCFCC declaration (USA)1.3
Before you beginOMP400 installation guide1.4SafetyThe OMP400 has a glass window. Handle withcare if broken to avoid injury.Information to the userInformation to the machine supplier/The OMP400 is supplied with two non-rechargeable installer½AA lithium metal batteries. Once the chargein these batteries is depleted, please dispose ofthem in accordance with your local environmentaland safety laws. Do not attempt to recharge thesebatteries.Please ensure replacement batteries are of thecorrect type and are fitted with the correct polarityin accordance with the instructions in this manual,and as indicated on the product. For specificbattery operating, safety and disposal guidelines,please refer to the battery manufacturers'literature.It is the machine supplier's responsibility to ensurethat the user is made aware of any hazardsinvolved in operation, including those mentionedin Renishaw product literature, and to ensurethat adequate guards and safety interlocks areprovided.Under certain circumstances, the probe signalmay falsely indicate a probe seated condition. Donot rely on probe signals to halt the movement ofthe machine.Information to the equipment installer Ensure that all batteries are inserted withthe correct polarity. Do not store batteries in direct sunlight orrain. Do not heat or dispose of batteries in a fire. Avoid forced discharge of the batteries.All Renishaw equipment is designed to complywith the relevant EC and FCC regulatoryrequirements. It is the responsibility of theequipment installer to ensure that the followingguidelines are adhered to, in order for the productto function in accordance with these regulations: Do not short-circuit the batteries. Do not disassemble, pierce, deform or applyexcessive pressure to the batteries.any interface MUST be installed in a positionaway from any potential sources of electricalnoise, i.e. power transformers, servo drivesetc; Do not swallow the batteries. Keep the batteries out of the reach ofchildren. Do not get batteries wet.all 0 V/ground connections should beconnected to the machine 'star point' (the'star point' is a single point return for allequipment ground and screen cables).This is very important and failure to adhereto this can cause a potential differencebetween grounds; all screens must be connected as outlined inthe user instructions; cables must not be routed alongside highcurrent sources, i.e. motor power supplycables etc, or be near high speed data lines; cable lengths should always be kept to aminimum.If a battery is damaged, exercise caution whenhandling it.Please ensure that you comply with internationaland national battery transport regulations whentransporting batteries or the products.Lithium batteries are classified as dangerousgoods and strict controls apply to their shipmentby air. To reduce the risk of shipment delays, if youneed to return the products to Renishaw for anyreason, do not return any batteries.
If this equipment is used in a manner not specifiedby the manufacturer, the protection provided bythe equipment may be impaired.Before you beginEquipment operation1.5
Before you beginOMP400 installation guide1.6This page left intentionally blank
OMP400 basics2.1IntroductionWelcome to the OMP400, Renishaw's ultracompact probe for small to medium machiningcentres that sets new standards for reliabilityand robustness in the harshest of machine toolenvironments.Successfully combining the miniaturisation ofthe popular OMP40 with the high accuracy ofthe MP700, the OMP400 provides existing probeusers with a simple upgrade to solid-state straingauge technology and all the associated benefitsthis brings: excellent 3D performance to allow probingof contoured surfaces; improved repeatability in all probingdirections; low pre-travel variation to provide highaccuracy, even when used with long styli; a proven ten-fold improvement in life(10 million triggers); the elimination of reseat failures; high resistance to machine tool vibration; a 360 optical ‘switch-on’ facility, allowing theprobe to be turned on / reset in any position; resistance to shock and false triggeringthrough the use of digital filtering; full compatibility with Renishaw’s industryproven optical transmission systems.In addition to providing high accuracymeasurement on your machine tool, the OMP400also offers: Faster calibration:On complex 3D parts, it is common tomeasure in several different directions.Each direction of a standard mechanicalprobe must be calibrated to ensure that thepre-travel variation is compensated in themeasurement. Performing this calibration forevery 3D direction can be time-consuming.The OMP400 has almost no pre-travelvariation, so a single calibration valuemay be used for any probing angle in 2Dor 3D. This results in a vastly reducedcalibration time. An additional benefit is acorresponding reduction in errors introducedby environmental changes within themachine during a long calibration cycle.
OMP400 basicsOMP400 installation guide2.2Optical transmission methodTwin probe systemThe OMP400 can be operated in either legacyor modulated mode. The modulated mode hasa higher resistance to light interference. Certainforms of light interference can cause false triggersor mimic a start signal and falsely activate theprobe. These effects are much reduced whenmodulated transmission is selected.To operate a twin probe system, one probeneeds to be set to PROBE 1 start and the otherset to PROBE 2 start. These settings are userconfigurable.Legacy modeWhen set to legacy mode, the probe will onlyfunction with an OMI or OMM / MI 12.If start problems are experienced in legacy mode,activate the Legacy Start Filter ON option. Thisintroduces a 1 second delay to the probe switchon time, and improves the probe's resistance tofalse starts caused by light interference.NOTE: The probing program on the machine willneed to take account of this delay.Modulated modeWhen set to modulated mode, the probe will onlyfunction with an OMI-2, OMI-2T OMI-2H orOMI-2C interface.Modulated transmission is capable of providingtwo different coded start signals. This allows theuse of two probes with one interface. Twin probeinstallations require an OMI-2T interface.In a twin probe system, such as a spindle probeand an optical tool setting probe, the spindleprobe would be set to PROBE 1 start and the toolsetter to PROBE 2 start.NOTE: When used in conjunction with an OMI‑2T,the OMP400 switch on method must be set tooptical on (standard).Trigger Logic Trigger Logic (see Section 4 - Trigger Logic )is a method that allows the user to view and selectall available mode settings in order to customisea probe to suit a specific application. TriggerLogic is activated by battery insertion and usesa sequence of stylus deflection (triggering) tosystematically lead the user through the availablechoices to allow selection of the required modeoptions.Current probe settings can be reviewed bysimply removing the batteries for a minimum of5 seconds, and then replacing them to activatethe Trigger Logic review sequence
Configurable settingsThe OMP400 probe can be in one of threemodes.Switch-on delayStand-by mode: where the probe is awaiting aswitch-on signal;Operational mode: activated by one of theswitch-on methods described later in thissection. In this mode the OMP400 is ready foruse.Configuration mode: where Trigger Logic may be used to configure the following probesettings.When the standard switch-on is selected, theprobe will be operational in less than 0.8 seconds.After being switched on, the OMP400 mustremain operational for a minimum of 1 secondbefore being switched off.A second switch-on mode is available wherea 3 second delay is invoked after the probestart signal is received. This feature is aimed atmachines where 'Auto-start' is required, i.e. itwill ensure that when the probe receives a startsignal during a tool change, it will switch-oncorrectly in the spindle. To ensure that the probeactivates correctly, it is important to make surethat it is stationary when it is switched on. If theprobe is not stationary during a start sequence,there is a possibility that the strain gauges couldauto-zero in the incorrect position and produce apermanently triggered output. The 3 second delayensures that the start sequence only occurs whenthe probe is safely located in the machine spindle(this assumes that the tool change process iscompleted in less than 3 seconds).NOTES:The probing program on the machine will need totake account of this delay.When used in conjunction with an OMI‑2T, theOMP400 switch on method must be set to opticalon (standard).OMP400 basicsModes of operation2.3
OMP400 basicsOMP400 installation guide2.4Switch-on / switch off methodsEnhanced trigger filterThe following switch-on / switch-off options areuser-configurable.Probes subjected to high levels of vibration orshock loads may output signals without havingcontacted any surface. The enhanced trigger filterimproves the probe's resistance to these effects.1.Optical on / Optical off.2.Optical on / Timer off.NOTE: A visual indication of currently selectedprobe settings is provided, on battery insertion,by the three multicoloured LEDs located withinthe probe's window (see Section 4 - TriggerLogic ).When the filter is enabled, a constant 8 or 16 msdelay is introduced to the probe's output. Theprobe is factory set to 8 ms. If false triggering isnoticed then consider increasing the filter delay to16 ms.NOTES:It may be necessary to reduce the probe'sapproach speed to allow for increased stylusovertravel during the extended time delay.Whilst there is also a 0 ms setting, this isfor Renishaw's use only. Renishaw does notrecommend that you use this setting as falsetriggering is likely to occur.OMP400 switch-onmethodOMP400 switch-off methodSwitch-off options areconfigurableSwitch-on timeOptical onOptical switch-on iscommanded by machineinput.Optical offOptical switch-off is commanded bymachine input.A timer automatically switches theprobe off after 90 minutes from lasttrigger if not turned off by machineinput.Legacy filter off:0.8 secondsLegacy filter on:1.6 secondsModulated0.7 seconds.Timer off (time out)Time out will occur (12, 33 or 134seconds - user configurable) afterthe last probe trigger or reseat.Optical on (3 seconddelay)Optical switch-on iscommanded by machineinput.Timer off (time out)Time out will occur (12, 33 or 134seconds - user configurable) afterthe last probe trigger or reseat.3 seconds.NOTE: After being switched on, the OMP400 must be on for 1 second before being switched off.
The Auto-reset function in the OMP400compensates for stylus forces, due to highaccelerations and changes in probe orientation,that can cause the probe to trigger when usinglong styli ( 100 mm).This feature is suitable for radial rotations(e.g. vertical to horizontal). It is selectable usingTrigger Logic .NOTE: The Auto-reset function cannotcompensate for rotations around the probe'saxis when horizontal with long styli ( 100 mm). Amanual reset will be required in this situation.When a manual reset is required, the methodused will depend on the probe's switch-off setting: In optical off mode, the probe must beswitched off then on again. In timer off mode, the probe must beswitched on using an M code start signal.Optical transmission method andprobe identityThe OMP400 can be operated in either legacyor modulated mode. The modulated mode hasa higher resistance to light interference. Certainforms of light interference can cause false triggersor mimic a start signal and falsely activate theprobe. These effects are much reduced whenmodulated transmission is selected.Legacy modeWhen set to legacy mode, the probe will onlyfunction with an OMI or OMM / MI 12.If start problems are experienced in legacy mode,activate the Legacy Start Filter ON option. Thisintroduces a 1 second delay to the probe switchon time, and improves the probe's resistance tofalse starts caused by light interference.NOTE: The probing program on the machine willneed to take account of this delay.Modulated modeWhen set to modulated mode, the probe will onlyfunction with an OMI-2, OMI-2T OMI-2H orOMI-2C interface.For most applications, the spindle probe shouldbe set to PROBE 1 start.PROBE 2 start should only be selected fora secondary spindle probe in a twin probeapplication.Optical powerWhere the separation between the OMP400 andthe receiver is small (no more than 2 m), the lowoptical power setting may be selected. This settingreduces the optical transmission range andextends battery life.OMP400 basicsAuto-reset facility2.5
OMP400 installation guideOMP400 basicsOMP400 dimensions19 (0.75)50 (1.97)Ø40(1.57)UK2.611 11 50 (1.97)Stylus overtravel limitsStylus length X/ YZ50 (1.97)12 (0.47)6 (0.24)100 (3.94)22 (0.87)6 (0.24)Dimensions given in mm (in)
Principal applicationSmall to medium machining centres and mould and die applicationsDimensionsLengthDiameter50 mm (1.97 in)40 mm (1.57 in)Weight (without shank)With batteriesWithout batteries262 g (9.24 oz)242 g (8.53 oz)Transmission type360 infra-red optical transmissionSwitch-on methodsMachine M code or Auto-startSwitch-off methodsMachine M code or timerOperating rangeUp to 5 m (16.4 ft)Receiver/interfaceOMI-2T, OMI-2, OMI-2H, OMI-2C, OMI or OMM / MI 12Sense directionsOmni-directional X, Y, ZRepeatability0.25 µm (10 µin) 2 sigma – 50 mm stylus length*0.35 µm (14 µin) 2 sigma – 100 mm stylus length2D lobing in X, Y 0.25 µm (10 µin) 2 sigma – 50 mm stylus length* 0.25 µm (10 µin) 2 sigma – 100 mm stylus length3D lobing in X, Y, Z 1.00 µm (40 µin) 2 sigma – 50 mm stylus length* 1.75 µm (70 µin) 2 sigma – 100 mm stylus lengthStylus trigger forceXY plane Z direction0.06 N, 6 gf (0.22 ozf) typical minimum2.55 N, 260 gf (9.17 ozf) typical minimumStylus overtravel forceXY plane Z direction1.04 N, 106 gf (3.74 ozf) typical minimum §5.5 N, 561 gf (19.78 ozf) typical minimum †Stylus overtravelXY plane Z planeThe stylus trigger force is theforce exerted on the componentwhen the probe triggers. However,the maximum force applied tothe component will occur afterthe trigger point and will begreater than the trigger force. Themagnitude depends on a numberof factors affecting probe overtravelincluding measuring speed andmachine deceleration. If theforces applied to the componentare critical, contact Renishaw forfurther information. 11 6 mm (0.23 in)* Performance specification is for a test velocity of 240 mm/min (9.45 in/min) with a 50 mm carbon fibre stylus. Test velocity does not constrain performance in application.§ Stylus overtravel force in XY plane occurs 70 µm after the trigger point and rises by 0.1 N/mm, 10 gf/mm (9.1 oz/in) until the machine tool stops (in the high forcedirection and using a 50 mm carbon fibre stylus).† Stylus overtravel force in Z direction occurs 10 µm to 11 µm after the trigger point and rises by 1.2 N/mm, 122 gf/mm (109.6 oz/in) until the machine tool stops.OMP400 basicsOMP400 specification2.7
OMP400 installation guideOMP400 basicsEnvironment2.8IP ratingIPX8Storage temperature-10 C to 70 C ( 14 F to 158 F)Operating temperature 5 C to 50 C ( 41 F to 122 F)Battery types2 x 1/2 AA (3.6 V) Lithium Thionyl ChlorideBattery reserve lifeApproximately one week after a low battery warning is first given.Typical battery lifeSee table below.LEGACY optical transmission modeStand-by life(typical)5% usage 72 minutes/day(days-typical)Continuous use(hours-typical)Standard powermodeLow powermodeStandard powermodeLow powermodeStandard powermodeLow powermodeOne yearOne year759095110MODULATED optical transmission modeStand-by life(typical)5% usage 72 minutes/day(days-typical)Continuous use(hours-typical)Standard powermodeLow powermodeStandard powermodeLow powermodeStandard powermodeLow powermodeOne yearOne year708585105
OMP400 basicsRecommended styliHigh modulus carbon fibre styli are designed tominimise pre-travel and improve accuracy, asthe stem material is extremely stiff. This inherentstiffness makes the following styli most suitable forstrain gauge applications.2.9BDACPart numberA-5003-7306Carbon fibreA-5003-6510Carbon fibreA-5003-6511Carbon fibreA-5003-6512Carbon fibreABall diameter mm (inch)6.0 (0.24)6.0 (0.24)6.0 (0.24)6.0 (0.24)BLength mm (inch)50.0 (1.97)100.0 (3.94)150.0 (5.91)200.0 (7.88)CStem diameter mm (inch)4.5 (0.18)4.5 (0.18)4.5 (0.18)4.5 (0.18)DEWL mm (inch)38.5 (1.52)88.5 (3.48)138.5 (5.45)188.5 (7.42)Mass (grammes)4.16.27.58.7
OMP400 basicsOMP400 installation guide2.10This page left intentionally blank
System installation3.1Installing the OMP400 with anOMI-2T / OMI-2 / OMI-2H / OMICNC machining centre spindleMounting bracketOMI-2T / OMI-2H / OMI-2 / StylusWorkpiecePowersupply(optional)Tool setting probe, only with OMI-2T / OMI-2HThe probe and OMI-2T / OMI-2H / OMI-2 / OMIOperation in temperatures of 0 C to 5 C or 50 Cdiodes must be in the others field of view or line of to 60 C (32 F to 41 F or 122 F to 140 F) willsite, and within the performance envelope shown. result in some reduction in range.The OMP400 performance envelope is based onth
The OMP400 has a glass window. Handle with care if broken to avoid injury. Information to the machine supplier/ installer It is the machine supplier's responsibility to ensure that the user is made aware of any hazards involved in operation, including those mentioned in Renishaw product literature, and to ensure