Transcription
TeamViewer 9ManualMeetingRev 9.2-07/2014TeamViewer GmbH Jahnstraße 30 D-73037 Göppingenwww.teamviewer.com
Table of contents1About TeamViewer . 51.1About the software . 51.2About the manual . 52Basics. 62.1How TeamViewer works. 62.2Description of the main TeamViewer window . 62.2.12.2.22.2.32.2.4The Remote Control tab. 6The Meeting tab . 6The menu bar of the main TeamViewer window . 7The status bar of the main TeamViewer window . 83Meeting . 93.1Meeting functions - overview . 93.2Hosting a meeting . 103.2.1 Hosting an instant meeting . 103.2.2 Hosting a meeting via the QuickConnect button . 113.3Joining a meeting . 133.3.1 Joining a meeting via a link/web browser . 133.3.2 Joining a meeting with the TeamViewer QuickJoin module . 133.3.3 Joining a meeting with the TeamViewer full version . 143.4Schedule meetings . 153.4.13.4.23.4.33.4.43.5Schedule meetings in Microsoft Outlook . 15Schedule meetings in TeamViewer . 16Managing scheduled meetings . 17Recurring meetings . 19The role distribution in a meeting . 193.5.13.5.23.5.33.5.4The organizers . 19The presenter . 19The participants . 19The rights of meeting participants . 20TeamViewer 9 Manual – Meetingwww.teamviewer.comPage 2 of 63
3.6Meeting Room . 213.7Overview of the TeamViewer Panel . Menu bar options . 21The Participants widget – Seeing and managing participants . 22The Screen sharing widget – Managing displayed contents . 23The My video widget – Transfer video via webcam. 25The Voice over IP widget – Transfer voice . 25The Conference call widget – Establishing a conference call . 26The Chat widget – Transmitting text messages . 26The File box widget – Providing files . 27The Whiteboard widget – Drawing on the screen . 27Record meeting. 283.8.1 Recording a meeting . 283.8.2 Playing a recorded meeting . 293.8.3 Convert a recorded meeting to AVI video format . 293.9Transmitting sound and video . 294Computers & Contacts – Managing Contacts .314.1The TeamViewer account . 324.1.1 Creating a TeamViewer account . 324.1.2 Managing your TeamViewer account . 334.1.3 Logging in and out of your TeamViewer account in Computers & Contacts . 334.2Computers & Contacts options . 354.2.14.2.24.2.34.2.44.2.54.2.64.2.7Online status of computers/contacts . 36Adding groups . 36Share groups . 37Adding computers/contacts . 37Creating a quick connection from Computers & Contacts – Prompt for confirmation . 38The computer or contact context menu . 39Chatting via Computers & Contacts . 395TeamViewer modules .425.1The TeamViewer full version . 425.2The TeamViewer QuickJoin module . 435.3TeamViewer Portable. 435.4TeamViewer on mobile devices (Android, iOS) . 435.5Customizable modules . 446Installation & configuration .456.1Installing the TeamViewer full version . 456.1.1 Advanced settings . 46TeamViewer 9 Manual – Meetingwww.teamviewer.comPage 3 of 63
6.2Activating the TeamViewer license . 467Options .487.1Category General . 487.2Category Security . 507.3Category Remote Control . 507.4Category Meeting . 507.5Category Computers & Contacts . 537.6Category Audio conferencing . 557.7Category Video . 567.8Category Custom invitation . 577.9Category Advanced . 58TeamViewer 9 Manual – Meetingwww.teamviewer.comPage 4 of 63
About TeamViewer1 About TeamViewer1.1About the softwareTeamViewer is an intuitive, fast and secure application for meetings and remote control. As an all-inone solution, TeamViewer can be used to:1.2 Show your desktop for meetings, presentations or collaboration. Use the TeamViewer meeting function, e.g. for training sessions. Use the meeting apps for Android and iOS to participate in a meeting while being on theroad. Provide ad-hoc remote support to colleagues, friends or customers. Establish a connection between computers with different operating systems. TeamViewerruns under Windows, Mac OS or Linux.About the manualThis manual describes the use of TeamViewer for meetings.If you are looking for help about the TeamViewer remote control functions, please read theTeamViewer 9 Manual – Remote Control available separately on our website.Unless stated otherwise, the described functionality always refers to the TeamViewer full version forMicrosoft Windows.Instructions are given on the assumption that the TeamViewer full version is already installed onyour computer. If you need help installing the program, read section 6, page 45 first.The Mac OS and Linux version are mostly identical to the Windows version, although some of thefunctions are not yet available. Feel free to use our free trial versions to get an idea of the variousfunctions and contact our support team if you need further assistance.Mac OS, iPhone and iPad are trademarks of Apple Inc. Linux is a registered trademark of LinusTorvalds in the US and other countries. Android is a trademark of Google Inc. Windows, Microsoftand Outlook are registered trademarks of Microsoft Corporation in the US and other countries. Forsimplification purposes, this manual refers to the operating systems Microsoft Windows XP,Microsoft Windows Vista, Microsoft Windows 7 and Microsoft Windows 8 simply as“Windows”. All supported Windows Operation Systems can be found on our ting-systems-are-supported.aspx.TeamViewer 9 Manual – Meetingwww.teamviewer.comPage 5 of 63
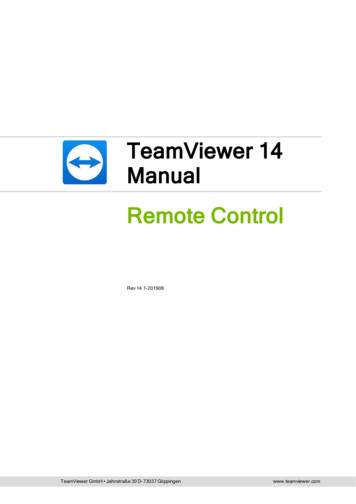
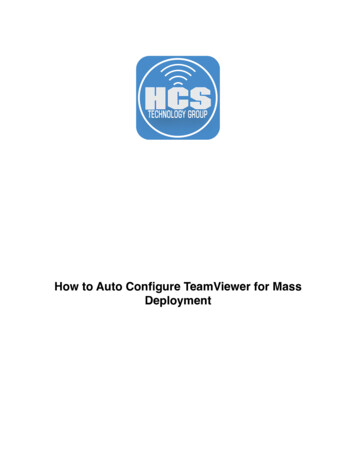
Basics2 Basics2.1How TeamViewer worksWith TeamViewer, you can easily and quickly start meetings or join them. With the use of a MeetingID (which is automatically generated by TeamViewer and forwarded by the initiator), participantscan connect to a meeting. The minimum requirement for connecting is the TeamViewer full versionor a corresponding module and the Meeting ID.All TeamViewer connections are highly encrypted and are thus protected from being accessed bythird parties. For detailed technical information regarding connections, security and data privacy inTeamViewer, see the security statement on our website x.2.2Description of the main TeamViewer windowThe main TeamViewer window is divided into the Remote Control and Meeting tabs.The TeamViewer main window.2.2.1The Remote Control tabMore Information about the use of TeamViewer for remote control, support or home office can befound in the TeamViewer 9 Manual – Remote Control.2.2.2The Meeting tabThe Meeting tab is divided into the following two areas:TeamViewer 9 Manual – Meetingwww.teamviewer.comPage 6 of 63
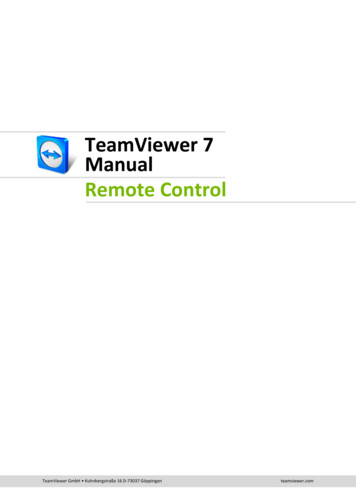
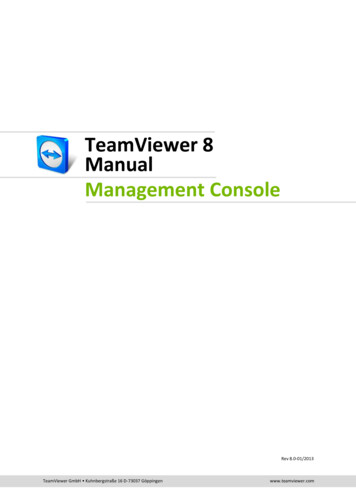
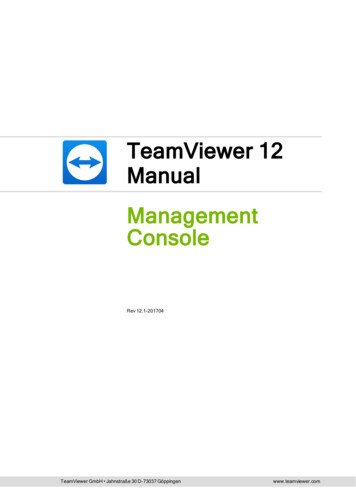
BasicsHost MeetingIn this area, you have the option to start a meeting by clicking onthe Start instant meeting button (see section 3.2.1, page 10).With the links Schedule a meeting and My meetings, you can createmeetings for later use (see section 3.4.1, page 15) and manageplanned meetings (see section 3.4.3, page 17).The Host Meetings area.Join MeetingIn the text fields Meeting ID and Your name, you can enter aMeeting ID and your name. The Meeting ID is a unique number thatis being created individually for every meeting and serves for joiningmeetings. During a meeting, your name is visible to all participants(see section 3.7.2, page 22).To join a meeting, enter the aforementioned data in the text fieldsand click the Join meeting button. If the initiator of the meetingspecified a password, it must be entered in the dialog that will open.Otherwise, you are connected directly to the meeting. For moreinformation, see section 3.3, page 13.The Join Meeting area.2.2.3The menu bar of the main TeamViewer windowThe menu bar of the main TeamViewer window.The menu bar is located along the upper edge of the main TeamViewer window and contains themenu items Connection, Extras and Help.ConnectionThe Connection menu features the options Invite Partner. and Setup unattended access. . Thesetwo options are not relevant to hosting or joining a meeting. You can find further information in theTeamViewer 9 Manual – Remote Control. To quit TeamViewer, click Exit TeamViewer.TeamViewer 9 Manual – Meetingwww.teamviewer.comPage 7 of 63
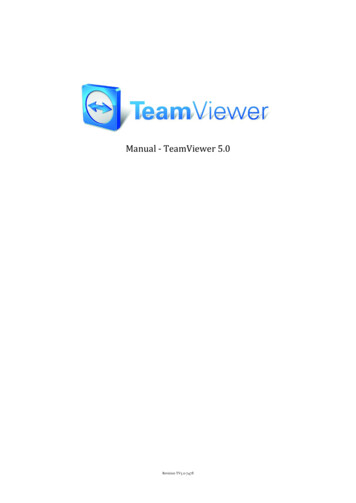
BasicsExtrasThe Extras menu contains the following options: To access the settings (see section 7, page 48) click Options. To play or convert videos of recorded TeamViewer sessions (see section 3.8, page 28), clickPlay or convert recorded session. . To recommend TeamViewer to others, click Tell-A-Friend. To access the log files created by TeamViewer (especially if the TeamViewer support shouldrequire them for analysis), click Open log files. . To activate your license key on this computer, click Activate license (see section 6.2,page 46). To display available license updates, click Check for license updates.HelpThe Help menu contains the following options:2.2.4 If you need help with TeamViewer, you can access our support website by clickingTeamViewer web help. To open up the TeamViewer website, click TeamViewer website. To view a brief introduction in TeamViewer, click How it works . To provide feedback on TeamViewer, click Feedback. To check whether you are running the latest version of TeamViewer, click Check for newversion. To obtain information about TeamViewer and the currently active license, click About.The status bar of the main TeamViewer windowThe status bar of the TeamViewer main window.The status bar is located along the bottom edge of the main TeamViewer window. It contains astatus light indicating the status of your connection as well as a button for accessing Computers &Contacts (see section 3.8.1, page 28).The status light has the following three values: Green: Ready to connect. You can start or join a meeting. Yellow: Authenticating. The authentication process for setting up a TeamViewer session hasstarted. You or your partner must enter a password. Red: The connection was aborted or no connection could be established.TeamViewer 9 Manual – Meetingwww.teamviewer.comPage 8 of 63
Meeting3 MeetingThis section describes the use of the meeting function of TeamViewer using the TeamViewer fullversion as an example.You can use this function to present your screen to other people via the Internet.To start a meeting, you need the TeamViewer full version. To join meetings, you can use theTeamViewer full version, the QuickJoin module, a web browser or the TeamViewer for meetings appfor iOS and Android. For more detailed information about the TeamViewer modules, see section 5,page 42.Recommendation: To participate in meetings, it is recommended to connect directly to the meetingvia a dynamic link. The link is available in an invitation message from the initiator of the meeting. Byfollowing the link, you are automatically connected to the meeting without the need to enter furtherdata. For more information, see section 3.3.1, page 13.3.1Meeting functions - overviewThe Meeting function provides the following options: Start instant meetings with up to 25 participants or present your screen to individualpersons. Plan meetings in advance and export them as a meeting request to Microsoft Outlook whereyou can conveniently invite participants. Managing meetings: Manage scheduled meetings using the My meetings functionintegrated in TeamViewer. Join meetings without TeamViewer software via web browser. Start meetings via the TeamViewer QuickConnect button to present individual windows. Foradditional information, see section 3.2.2, page 11. Join meetings while you are on the road using the Android and iOS app TeamViewer formeetings.Examples: Use the Meeting function for training sessions. Present individual applications to demonstrate their handling to participants. Give your PowerPoint presentation via the Internet to customers all over the world. Exchange ideas with colleagues at other locations. Use the different communication meansoffered by TeamViewer (e.g. chat, video conferencing or Voice over IP).TeamViewer 9 Manual – Meetingwww.teamviewer.comPage 9 of 63
MeetingNote: Please note that the number of possible meeting participants depends upon your license.The current licensing overview is located on our aspx.3.2Hosting a meetingYou can start instant meetings with TeamViewer to exchange ideas with colleagues or customers ona short notice or to present your screen to them. If you just want to present individual windows, youcan also start a meeting via the TeamViewer QuickConnect button. In addition, you can schedulemeetings to start them at a later point in time.3.2.1Hosting an instant meetingIn this section, you learn how to start an instantmeeting and then how to invite participants to thismeeting.Start a meeting with a single click.To host an instant meeting, follow these steps:1. Start TeamViewer.2. Click the Meeting tab.3. In the Host Meeting area, click the Start instant meeting button.4. You just started a meeting. The TeamViewer Panel will open (see section 3.7, page 21).5. Invite participants and make additional adjustments before you transfer your screen.TeamViewer 9 Manual – Meetingwww.teamviewer.comPage 10 of 63
MeetingTo invite participants to a meeting that has already started, follow these steps:1. In the Participants widget within the TeamViewer Panel (see section 3.7.2, page 22), click thebutton.2. If you're logged into your TeamViewer account, continue with step 3, if not, continue withstep 4.3. a) Select the contact you wish to invite from the list. The contact will receive an invitation message, which he must confirm.b) Click on By e-mail or phone . The Invite Participants dialog will open.4. If necessary, change the invitation message in the dialog according to your demands.5. a) To send the invitation using your default e-mail program, click the Open as E-Mail button.b) To distribute the invitation message via additional communication channels, such as socialnetworks, chats or intranet, click the Copy to Clipboard button.Tip: You can also invite participants via telephone or otherwise. For this purpose, you simplypass the Meeting ID displayed in the Participants widget and, if necessary, the correspondingmeeting password.Note: You can only invite contacts from your Computers & Contacts list who have granted youprompt for connections (see section 4.2.5, page 38).3.2.2Hosting a meeting via the QuickConnect buttonNote: To be able to use this function, you will need a TeamViewer account (see section 4.1,page 32).The QuickConnect button in an applicationwindow.TeamViewer 9 Manual – MeetingWith the QuickConnect function, you can present anyapplication window or folder to a computer or contactin your Computers & Contacts list or even collaboratewith the partner in this window. The QuickConnectbutton is displayed at the upper side of all windows.www.teamviewer.comPage 11 of 63
MeetingTo establish a connection to a contact using the QuickConnect button, follow these steps:1. Start TeamViewer.2. Log in to your TeamViewer account (see section 4.1.3, page 33).3. Open the application that you would like to present to your computer/contact.4. Click the QuickConnect buttonin the title bar of the application window.5. Select the computer/contact to which you would like to present the application window to.Activate the Allow partner to interact option if you would like to allow your partner tocontrol the respective application as well. Your contact receives a message about the desired connection request that must beconfirmed.6. If your contact agrees the connection, only the selected application is transmitted. Otherwindows or applications are not visible to your contact.With a click on the QuickConnect button, all available connection contacts aredisplayed.The QuickConnect button can be deactivated for all or only individual applications, if needed.Likewise, you can change the position of the button. These settings are available in the TeamVieweroptions in the category Advanced (see section 7.9, page 58).The QuickConnect button can also be deactivated directly via the button itself as described below.To deactivate the QuickConnect button in a window, follow these steps:1. Click the QuickConnect buttonof an opened window.2. In the lower area, click the Disable this feature link. A dialog with the option of disabling the button in all applications or just this applicationwill open.3. If you want to deactivate the QuickConnect button only for this application, activate theDisable the QuickConnect button only for this application button.4. Click the Disable button.5. The QuickConnect button is deactivated. This setting can be undone in the advanced optionsof TeamViewer (see section 7.9, page 58).TeamViewer 9 Manual – Meetingwww.teamviewer.comPage 12 of 63
Meeting3.3Joining a meetingIf you want to join a meeting, you have several options:Use either the link for joining meetings which you received from the initiator, the TeamViewer QuickJoin module, the TeamViewer full version, or your web browser.The easiest and quickest way to join a meeting is to use the link from an invitation message. Noadditional data has to be entered and you are connected directly to the meeting.3.3.1Joining a meeting via a link/web browserYou received an invitation message with a link for participating in a meeting.If you received an invitation message for a meeting, it contains a link in the formhttps://go.teamviewer.com/mXXXXXXXX (each "X" corresponds to a number between 1-9). Byfollowing the link, the web browser will open and you are connected to the meeting without theneed to enter additional data.In this process, the TeamViewer QuickJoin module is temporarily executed on your computer. Italready contains the Meeting ID and, if necessary, the meeting password and connects automaticallyto the meeting. For more information about the TeamViewer QuickJoin module, see section 5.2,page 43.You received a Meeting ID and want to connect to the meeting via web browser.To join a meeting via a web browser, follow these steps:1. Open the following URL in your web browser: https://go.teamviewer.com.2. Enter the Meeting ID in the Meeting-ID text field.3. Click the Join meeting button.4. If the initiator specified a meeting password, enter the meeting password in the subsequentdialog. Confirm your entry by clicking on the Log On button. The Meeting window will open.5. You see the screen of the presenter and can interact with the participants via theTeamViewer Panel (see section 3.7, page 21).Note: If you cannot execute any other application on your computer, click the browser versionlink before executing step 3. The Meeting window then opens in the browser. This methodrequires the installation of Flash version 10 or higher and is limited in its scope of functionscompared to the application-based methods.3.3.2Joining a meeting with the TeamViewer QuickJoin moduleWith the TeamViewer QuickJoin module, you can easily and quickly join meetings.To join a meeting with the TeamViewer QuickJoin module, follow these steps:1. Start the QuickJoin module.TeamViewer 9 Manual – Meetingwww.teamviewer.comPage 13 of 63
Meeting2. Enter the Meeting ID in the Meeting ID text field.3. Underneath it, enter your name in the Your name text field.4. Click the Join button.5. If the initiator specified a meeting password, enter it in the subsequent dialog. Confirm yourentry by clicking on the Log On button. The Meeting Room window will open. If the initiator starts the meeting or it is already started, the screen of the presenter willbe shown.6. You can see the screen of the presenter and can interact with the participants using theTeamViewer Panel.3.3.3Joining a meeting with the TeamViewer full versionAnother option of joining meetings is to use the TeamViewer full version. As a meeting participant,it does not offer any additional functions compared to the QuickJoin module.To join a meeting with the TeamViewer full version, follow these steps:1. Start TeamViewer.2. Click the Meeting tab.3. In the Join Meeting area, enter the Meeting ID in the Meeting ID text field.4. Underneath it, enter your name in the Your name text field.5. Click the Join meeting button.6. If the initiator specified a meeting password, enter it in the subsequent dialog. Confirm yourentry by clicking on the Log On button. The Meeting Room window will open. If the initiator starts the meeting or it is already under way, the screen of the presenterwill be shown.7. You can see the screen of the presenter and can interact with the participants using theTeamViewer Panel.TeamViewer 9 Manual – Meetingwww.teamviewer.comPage 14 of 63
Meeting3.4Schedule meetingsNote: To be able to use this function, you will need a TeamViewer account (see section 4.1,page 32).TeamViewer provides the option of scheduling meetingsin advance. These meetings are stored in yourTeamViewer account so they are available at any time.Microsoft Outlook can be used to conveniently inviteparticipants and manage scheduling dates via its calendarfunction. In the following section, you can learn moreabout this function.Simple schedule a meeting.3.4.1Schedule meetings in Microsoft OutlookYou have the option to schedule meetings directly in Microsoft Outlook. During the installationprocess of TeamViewer, the TeamViewer Meeting Add-In is installed to Microsoft Outlook. Using thisAdd-In, you can quickly and easily schedule TeamViewer meetings without the need to leave Outlookand switching to the TeamViewer application.The TeamViewer Add-In can be called up in the Microsoft Outlook menu under Start New Meeting.The TeamViewer Meeting Add-In for Microsoft Outlook.To schedule a meeting in Microsoft Outlook, follow these steps:1. Open Microsoft Outlook.2. Click the New Meeting icon in the Start tab. A new meeting invitation will open. If you are not logged into your TeamViewer accountalready, a dialog box will open where you must log in (see section 4.1.3, page 33).3. You can now invite participants and use further functions offered by Outlook.TeamViewer 9 Manual – Meetingwww.teamviewer.comPage 15 of 63
MeetingYou can make changes to the meeting data at any time. These will synchronize bidirectionallybetween Microsoft Outlook and TeamViewer. Afterwards, you can then send updated meetingchanges via Outlook.All TeamViewer meetings will still be saved in My Meetings (see section 3.4.3, page 17) and can becalled up or managed in any TeamViewer full version.Note: If desired, the Meeting Add-In can be deactivated or removed within the Outlook andTeamViewer options.3.4.2Schedule meetings in TeamViewerTo schedule a meeting, follow these steps:1. Start TeamViewer.2. Click the Meeting tab.3. In the Host Meeting area, click the Schedule a meeting link. (If you are already logged in toTeamViewer with your TeamViewer account, proceed with step 6.)4. The TeamViewer - Sign In dialog will open.5. Log in to your TeamViewer account by entering your username and password.6. The Schedule a Meeting dialog will open.7. Enter the desired data.8. Click the Save button.9. The My Meetings dialog (see section 3.4.3, page 17) dialog will open.10. If Microsoft Outlook is installed on your computer, a new meeting request is opened inOutlook.11. You can now use Outlook to invite participants or use other functions offered by Outlook.Note: If Micr
TeamViewer 9 Manual - Meeting www.teamviewer.com Page 5 of 63 1 About TeamViewer 1.1 About the software TeamViewer is an intuitive, fast and secure application for meetings and remote control. As an all-in-one solution, TeamViewer can be used to: Show your desktop for meetings, presentations or collaboration.