Transcription
How to Auto Configure TeamViewer for MassDeployment
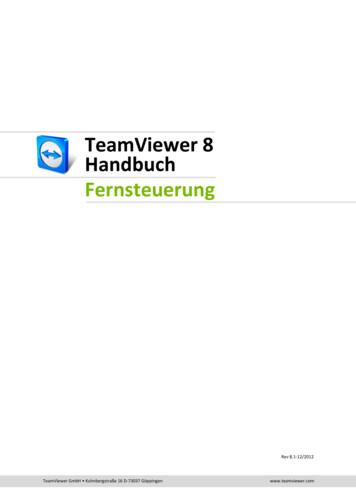
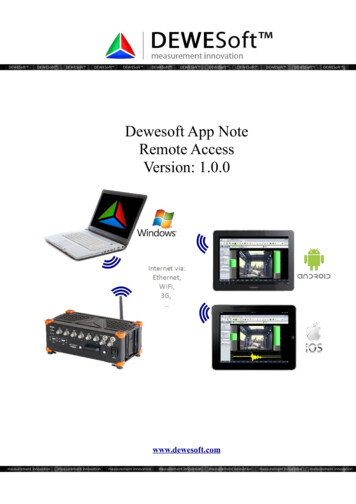
HCS Technology GroupNOTE: All testing for this guide was done using TeamViewer version 12 onmacOS Sierra 10.12.3.Step 1. Log in to your TeamViewer Management Console, then select “Design & Deploy”Step 2. Select the “Add Host” button, then select “Host”.How to Auto Configure TeamViewer for Mass DeploymentPage 1
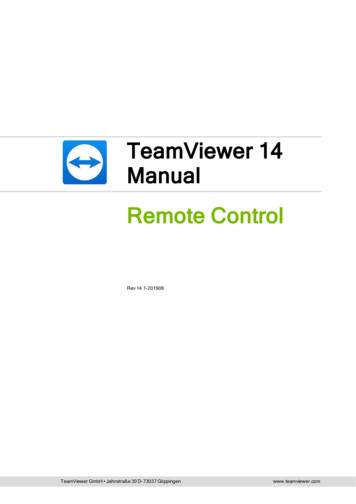
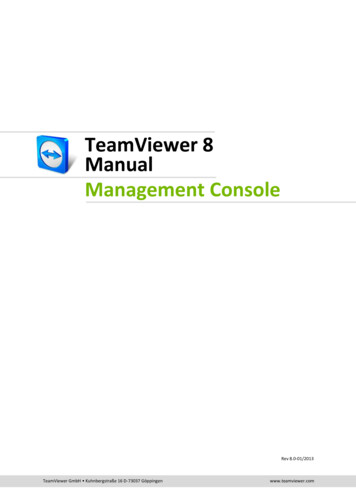
HCS Technology GroupStep 3. Provide a Name and make sure the items in the screen shot below are checked, then click“Save”.How to Auto Configure TeamViewer for Mass DeploymentPage 2
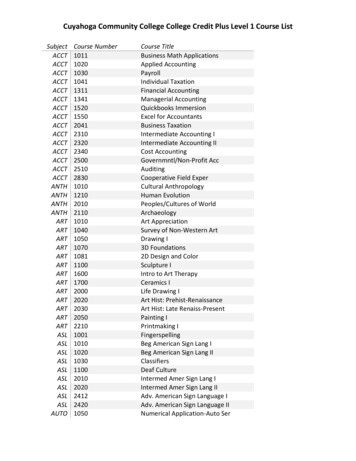
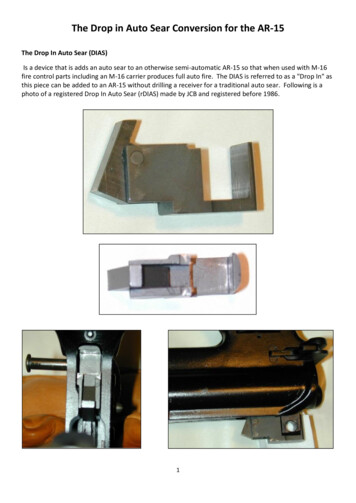
HCS Technology GroupStep 4. When presented with the screen below, copy the link to a text document, we will need this in alater step. Click “OK” when done.Step 5. Select your newly created Custom Module, then click the “Edit” button.Step 6. You need to take note of three items:1. The API Token - Copy this to a text document. You will need it in a later step.2. The Configuration ID - Copy this to a text document. You will need it in a later step.How to Auto Configure TeamViewer for Mass DeploymentPage 3
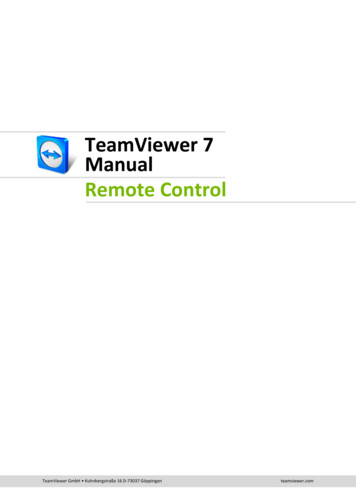
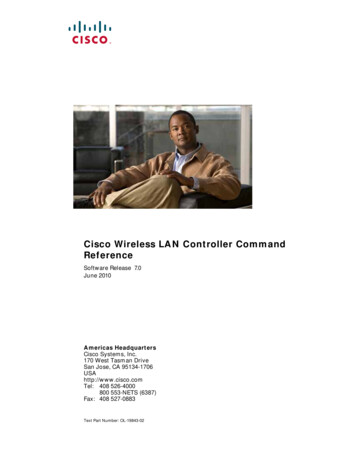
HCS Technology Group3. Click the “Download Assignment Tool” link. This will download a file to your “Downloads” folder. Wewill need this file in a later step.Click "Save" when done, and logout of the TeamViewer Management Console.Step 7. A few things are needed to configure the mass deployment of Teamviewer.1. The link you copied in Step 4. This is a link to download the custom Teamviewer installer.Go to the link you copied in Step 4, it should look similar to this: https://get.teamviewer.com/abc1234Once there, right click on the link that says “Try again”, then select “Copy Link”. This is the real link tothe file, the first link was just a link that re directed to the real link. Create a new web browser windowthen paste the copied link into the URL field. It should look something like ion 234.pkgHow to Auto Configure TeamViewer for Mass DeploymentPage 4
HCS Technology GroupCopy that link to a text document, you will need it when we create the script.2. A web server that can host the Assignment Tool file that you downloaded in step 6.Go to your “Downloads” folder. You should see a file named “TeamViewer Assignment”. You willneed to host this file on your web server. TeamViewer does not host this file. Once hosted on yourweb server, take note of the URL as it will be needed for the script. Example:https://www.example.com/TeamViewer Assignment3. A script that automates the install process. The following script worked fine in my testing. All testingwas done using TeamViewer version 12 on macOS Sierra 10.12.3. Create a bash script with thefollowing. Make sure it’s executable when done. IE. chmod x /pathtoscriptNOTE: All items in BLUE need to be changed to your information. You can name the script whateveryou want but if you want to package the script you will need to name it “postinstall”. No quotes in thename and do NOT use .sh in the name or it will fail when it’s packaged.————————#!/bin/bash#This will get the computer nameComputerName (/usr/sbin/scutil --get ComputerName)#This will download the items needed to install and configure Teamviewerset -euxcd /Downloadscurl -O https://download.teamviewer.com/download/version 34.pkgcurl -O https://www.example.com/TeamViewer AssignmentHow to Auto Configure TeamViewer for Mass DeploymentPage 5
HCS Technology Groupchmod x TeamViewer Assignment/usr/sbin/installer -pkg /Downloads/Install%20TeamViewerHost-idcabc1234.pkg -target /cd /Downloads./TeamViewer Assignment -apitoken “put your api token here“ -datafile /Library/Application\ Support/TeamViewer\ Host/Custom\ Configurations/put your config ID here/AssignmentData.json -devicealias" {ComputerName}" -allowEasyAccess true -wait 10 -verbose#Cleanuprm -rf rm -rf /Downloads/TeamViewer AssignmentLet’s breakdown the script.The first section is a variable that will return the computer name. This will be used in the next section ofthe script and will provide the computer name during the automated install of TeamViewer.The second section will switch to the Downloads folder, then use the curl command to download theTeamViewer installer and the TeamViewer Assignment tool that you have hosted on our web server.Once downloaded, it will use the TeamViewer Assignment file to configure things. You will need theAPI Token and the Configuration ID that you copied in step 6.The last section will remove the TeamViewer installer and assignment files from the Downloads folder.Step 8. Packaging the bash script for distribution with ARD, Jamf Pro, Munki, or any other applicationthat can distribute .pkg file to multiple Macs.NOTE: These steps assume the "scripts" folder is on the Desktop. Replace “keith” with the name ofyour user folder when building the package.1. Create a folder on your Desktop called scripts.2. Create a script named “postinstall” and put it in the scripts folder on the Desktop. If you named thescript we created in step 7 "postinstall" you're good to go. If not, change the name of the script to“postinstall”. No quotes in the name and do NOT use .sh in the name or it will fail when it’s packaged.3. Run the following command. Enter your administrator password when prompted.How to Auto Configure TeamViewer for Mass DeploymentPage 6
HCS Technology Groupsudo pkgbuild --identifier com.teamviewer.install --nopayload --scripts TeamViewer.pkgStep 4. The package will be created and saved to your desktop. This completes the how to guide.How to Auto Configure TeamViewer for Mass DeploymentPage 7
This will download a file to your "Downloads" folder. We will need this file in a later step. Click "Save" when done, and logout of the TeamViewer Management Console. Step 7. A few things are needed to configure the mass deployment of Teamviewer. 1. The link you copied in Step 4. This is a link to download the custom Teamviewer installer.