Transcription
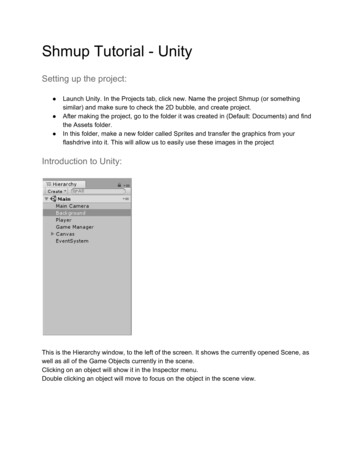
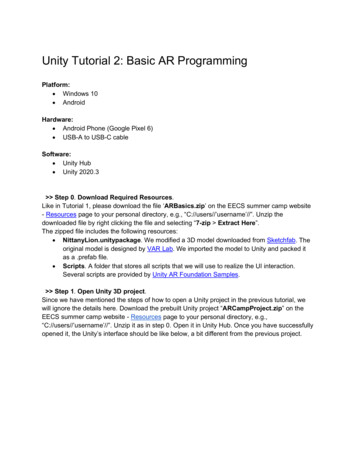
Unity Tutorial 2: Basic AR ProgrammingPlatform: Windows 10 AndroidHardware: Android Phone (Google Pixel 6) USB-A to USB-C cableSoftware: Unity Hub Unity 2020.3 Step 0. Download Required Resources.Like in Tutorial 1, please download the file ‘ARBasics.zip’ on the EECS summer camp website- Resources page to your personal directory, e.g., “C://users//’username’//”. Unzip thedownloaded file by right clicking the file and selecting “7-zip Extract Here”.The zipped file includes the following resources: NittanyLion.unitypackage. We modified a 3D model downloaded from Sketchfab. Theoriginal model is designed by VAR Lab. We imported the model to Unity and packed itas a .prefab file. Scripts. A folder that stores all scripts that we will use to realize the UI interaction.Several scripts are provided by Unity AR Foundation Samples. Step 1. Open Unity 3D project.Since we have mentioned the steps of how to open a Unity project in the previous tutorial, wewill ignore the details here. Download the prebuilt Unity project “ARCampProject.zip” on theEECS summer camp website - Resources page to your personal directory, e.g.,“C://users//’username’//”. Unzip it as in step 0. Open it in Unity Hub. Once you have successfullyopened it, the Unity’s interface should be like below, a bit different from the previous project.
Step 2. Import Required Resource.Like in the previous tutorial, we need to import some resources from the downloadedfile. Double click NittanyLion.unitypackage in the unzipped ARBasics folder. On the pop-upwindow, make sure all components are checked and click “Import”. Note that currently, we donot need to drag the prefab and drop on the Hierarchy window.Similar to step 5 of the previous tutorial, navigate to “Assets” in your Project Window. Drag the“scripts” folder to the empty space. Step 3. Add Plane Detection.As in most of the AR applications, we first need to detect a plane, then place a virtual object onthat plane. Click AR Session Origin, find Inspector section on the right of the main window Click Add Component, search for “plane” Select AR Plane ManagerThen we need to assign a GameObject as the template for the virtual plane. In the Hierarchywindow, Right-click the empty space Select XR AR Default Plane Drag the AR Default Plane to the Prefabs folder in Project window Delete AR Default Plane in the Hierarchy window by right-clicking it and click “Delete” Drag the AR Default Plane prefab to the script “AR Plane Manager”
Step 4. Add Virtual Object Placement.This step allows rendering the Nittany Lion as an AR object. Select the AR Session Origin inthe Hierarchy window Drag the PlaceOnPlane.cs to the AR Session Origin Inspector There are two new components: AR Raycast Manage and Place On Plane
Go to Prefabs folder, drag the NittanyLion Prefab to Placed Prefab in Place On PlaneHit “Play” button. You will find a Nittany Lion generated in your Scene view. Note: this NittanyLion is generated during runtime. You will not find it in Edit mode. Step 5. Add UI Interaction.In the previous tutorial, we already learned how to use script to add animation to theGameObject. In this step, we will use script to realize the UI interaction during runtime, evenwhen you are using the smartphone. Note that you may not be able to find the UI components inthe Scene view. Just switch to the Game view.
We need to create an empty GameObject to manage the UI interaction. Right-click the empty space in Hierarchy window Select “Create Empty” Change its name to “UIManager” Attach the script “RotateControl.cs” to this GameObject Drag “AR Session Origin” to the field “Ar Control” Drag the “Text(TMP)” under “ButtonRotAxis” to the field “Axis Text” The Inspector window of “UIManager” should be like this (Transform does not matter)The next step is to bind the functions in the script to the UI components.
In the Inspector window of “ButtonRotAxis”, scroll down to find “On Click ()” field. Clickthe plus sign. Drag the UIManager to corresponding field. Select the function“RotateControl OnButtonSwitchAxis”. The results should be like this In the Inspector window of “ButtonRotAdd”, “Add Component”. Type “trigger” to add“Event Trigger”. Click “Add New Event Type Pointer Down”. Click the plus sign.Drag the UIManager to corresponding field. Select the function “RotateControl OnButtonRotateClockWise”. Check the small box inside it. Click “Add New EventType Pointer Up”. Click the plus sign. Drag the UIManager to corresponding field.Select the function “RotateControl OnButtonRotateOff”. The results should be likethis In the Inspector window of “ButtonRotMinus”, “Add Component”. Type “trigger” to add“Event Trigger”. Click “Add New Event Type Pointer Down”. Click the plus sign.Drag the UIManager to corresponding field. Select the function “RotateControl OnButtonRotateAntiClockWise”. Check the small box inside it. Click “Add New EventType Pointer Up”. Click the plus sign. Drag the UIManager to corresponding field.Select the function “RotateControl OnButtonRotateOff”. The results should be likethis
Hit the “Play” button. Interact with the three buttons and see what happens. It would be better todrag the Game View to rearrange the window to see Game View and Scene View together.Next, we will learn how to change the Nittany Lion’s color during runtime. In the Inspector window of “UIManager”, attach the script “ColorControl.cs” Drag “AR Session Origin” to the field “Ar Control” Drag “Slider” to the field “Slider”
Drag the “Text(TMP)” under “ButtonColor” to the field “Color Text”Similarly, bind the functions of the script to UI components In the Inspector window of “ButtonColor”, click the plus sign in the “On Click ()” field.Drag the UIManager to corresponding field. Select the function “ColorControl OnButtonColor”. The results should be like thisHit the “Play” button. Interact with the button and slider to see what happens. Step 6. Build Your Project.The building process is the same as in the previous tutorial. The difference only lies when youopen the application on your Android phone. On the smartphone, enable the Camera Access while using the application.Enjoy the AR application that was built by yourself!
Appendix (Optional): Step 1. Import AR Required Package.Right click and delete the Main Camera object. Follow the steps to install some packages: Go to the menu on the top and find Window Package Manager Open the Package Manager, go to Unity Registry, search for “AR”, and installo AR Foundationo ARCore XR Plugin Choose the package and click the install button on the bottom right.After the installation, we need to create some GameObjects: Go to Hierarchy window, Right click on the empty space:o Create new XR object AR Session Origino Create new XR object AR Session Step 2. Configure the Project.To build the project on Android phones, we need to configure the settings. Click the File menu and go to Build Settings
In the Build Settings window, under Platform, select Android and click SwitchPlatform. After switching is done, click the Player Settings.In the new window, make sure to work on the Android Settings tab:
Configure the settings:o Other Settings Rendering. Check the Auto Graphics APIo Uncheck the Multithreaded Rendering.(See the figure below for configurations)o Select Android 7.0 'Nougat' (API Level 24) or higher for Minimum API Levelo Change the Scripting Backend to IL2CPPo Under Target Architectures, check ARM64(See the figure below for configurations)
oGo to XR Plug-in Management, check ARCore.
Step 3. Add UI Components.To realize this, we need to create several buttons and sliders. Right-click the empty space in Hierarchy window, select UI Button, repeat to createfour buttons Right-click the empty space in Hierarchy window, select UI Slider Switch to the Game View to see the UI componentsThe addition of UI components will automatically add a Canvas, which holds all thecomponents. You can find that the UI buttons and slider are too small and even overlapped witheach other. To address this, we need to adjust several settings. Navigate to the Inspector window of Canvas, find the component “Canvas Scaler” Switch the “UI Scale Mode” to “Scale With Screen Size” Adjust the “Reference Resolution” to 1920 x 1080 Navigate to the Inspector window of “Button”, change its name to “ButtonRotAxis”,adjust corresponding “Rect Transform” to make it look better. Repeat this process for all UI components
We modified a 3D model downloaded from Sketchfab. The original model is designed by VAR Lab. We imported the model to Unity and packed it as a .prefab file. Scripts. A folder that stores all scripts that we will use to realize the UI interaction. Several scripts are provided by Unity AR Foundation Samples. Step 1. Open Unity 3D project.