Transcription
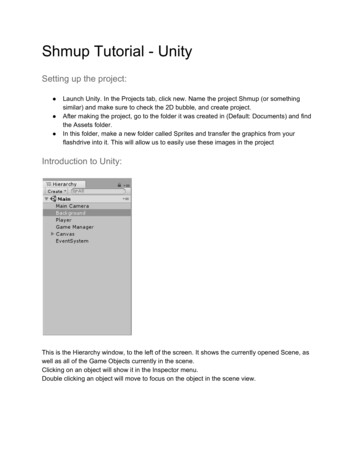
Shmup Tutorial - UnitySetting up the project: Launch Unity. In the Projects tab, click new. Name the project Shmup (or somethingsimilar) and make sure to check the 2D bubble, and create project.After making the project, go to the folder it was created in (Default: Documents) and findthe Assets folder.In this folder, make a new folder called Sprites and transfer the graphics from yourflashdrive into it. This will allow us to easily use these images in the projectIntroduction to Unity:This is the Hierarchy window, to the left of the screen. It shows the currently opened Scene, aswell as all of the Game Objects currently in the scene.Clicking on an object will show it in the Inspector menu.Double clicking an object will move to focus on the object in the scene view.
This is the Inspector window, to the right of the screen.This window displays details of whatever object is currently selected, and allows for componentsto be added to the object.
This is the Scene view, and should be in the middle of the screen. The Scene view shows theplacement of Game Objects in the game, and allows for selection and movement of the objects.It can also be switched to the Game view, which will show whatever the default camera can see.This is the Project area, at the bottom of the screen.All folders and assets in the project are displayed here, and can be selected to view variousdetails in the Inspector, or double clicked to open in an editor, if one is available.New items can be created by right clicking in the open area of the panel.This also has the Console tab, which will show any printed messages, or errors that occuredwhile running.Creating the Background: In the GameObject menu at the top of the editor, find the 2D tab, and create a newSprite.Find this new Sprite in the Hierarchy tab (Default: Left side of editor) and name itBackground in the Inspector (Default: Right side of editor).In the Sprite Renderer component of the Background, select the small circle to the rightof the Sprite value and select the bgGradient image.
In the Transform section of the Inspector, change the Scale X value to 600 and theScale Y value to 1.25, to make the background about the right size.Creating the Player: Create a new Sprite as before, but name this one Player and set it’s Sprite to the Playerimage.Below the name, open the tag menu and select the Player tagIn the Sprite Renderer component, change the Order in Layer value to 10. This will makethe player appear on top of other sprites.Set the Transform Position Y to -4.Change the Transform Rotation Z to 90.Making the Player move: In the Project tab (Default: Bottom of editor) right click in the Assets folder and clickCreate C# Script.Name this script PlayerScript with no spaces.Double click the new PlayerScript to open it in the code editorThe code starts with a Start and Update function.
In the Update function, write the following lines of code:Vector2 newPos new Vector2 (0, -4);newPos.x Camera.main.ScreenToWorldPoint (Input.mousePosition).x;newPos.x Mathf.Clamp (newPos.x, -3, 3);this.gameObject.transform.position newPos; Drag the PlayerScript from the Project tab into the Inspecter area of the Player object,below the Sprite RendererIntroducing projectiles Create a new Sprite and name it Projectile.Assign the new Sprite the projectile image.Set the Order in Layer value to 5.Create a new Script, call it ProjectileScript, and open it.In the Update function, write the following lines of code:Vector2 newPos new Vector2 ();newPos.x this.gameObject.transform.position.x;newPos.y this.gameObject.transform.position.y;
newPos.y (5 * Time.deltaTime);this.gameObject.transform.position newPos; Drag the ProjectileScript into the Projectile object.Create a new folder in the Assets folder, and name it Prefabs.From the Hierarchy tab, drag the Projectile object into the Prefabs folder.Once it has been copied into the folder, delete the object instance in the HierarchySpawning Projectiles on click: Go back into the PlayerScript code editorBelow the line - public class PlayerScript : MonoBehaviour {Enter the following code:public GameObject projectile; Back in the Inspector window of the Player object, there should be a new value in thePlayerScript section called Projectile. Select the small circle near it and select the GameObject named Projectile from the list,if it is not visible, make sure the Assets tab is selected in the list. Go back into the PlayerScript code editor once more. Below the code previously written in the Update function write this code:if (Input.GetMouseButtonDown (0)) {Instantiate (projectile, tity);
}Preventing Projectile Overload: Currently, projectiles are never destroyed, so they stack up very quicklyTo change this, first reopen the ProjectileScriptNear the end of the Update function, write the following code:if (newPos.y 6)Destroy (this.gameObject);Adding the Incomer Object: Create a new Sprite, and name it IncomerSet the Sprite to the incomer image, and change Order In Layer to 5
Open the Tag dropdown menu, and click the New Tag ButtonClick the small icon under Tags and name the new Tag “Enemy” without quotes Click on the incomer again, and choose the new Enemy TagCreate a new Script called IncomerScriptIn the Update function, add the following code:Vector2 newPos new Vector2 ();newPos.x this.gameObject.transform.position.x;newPos.y this.gameObject.transform.position.y;newPos.y - (5 * Time.deltaTime);this.gameObject.transform.position newPos;
Drag the IncomerScript into the Incomer objectDrag the new Incomer into the Prefabs folder and delete the Incomer already spawnedAddition Collision Handling: Select the Projectile Prefab, and click the Add Component buttonIn the menu, or with the search tool, find an add a Box Collider 2D. It is found in thePhysics 2D sectionIn the Inspector menu, make sure the Is Trigger checkbox is checked in the newlycreated Box ColliderAdd a Box Collider 2D to the Player, and Incomer objects as well, make sure they arealso set to a TriggerAdd a RigidBody2D to the Projectile object, and make sure Gravity Scale is set to 0
Open the ProjectileScriptBelow the Update function, write the following code:void OnTriggerEnter2D(Collider2D other) {if (other.gameObject.tag "Enemy") {Destroy (other.gameObject);Destroy (this.gameObject);}}
Randomly Spawning Incomers: Create a new Script called GameManager and open itAt the top of the script, below - public class GameManager : MonoBehaviour {Write the code:float timer 0f;public GameObject enemy;Inside the Update function, write the following code:if (timer 0) {Vector2 spawnPos new Vector2 ();spawnPos.y 6;spawnPos.x Random.Range (-3, 3);Instantiate (enemy, spawnPos, Quaternion.identity);timer 1f;} else {timer - Time.deltaTime;}Create an Empty Game Object and name it Game Manager.Drag the new GameManager script onto the object.
Adding Score: Open the GameManager ScriptBelow the code - public GameObject enemy;Write the following code:public static int score 0; Open the ProjectileScriptIn the Update function, after the line - if (other.gameObject.tag "Enemy") {Append the line:GameManager.score 1;
Go to the GameObject creation menu, find UI and create new Text.Name this new Text object Score (Note: The Text object will be created inside the newCanvas object).Make sure the position of the Score is 0, 0, 0.In the Transform field, click on the box above the word Anchors, it will say center aboveit, and middle on the side.In the new menu, hold Alt and click on the icon showing the box in the top left (or whereyou want the score).
Find the Text component, and change the color to white, or a color of your choice.Return to the GameManager Script, and below the lines saying Using System, write thefollowing line of code:using UnityEngine.UI;Now, below the line - public static int score 0;Write the line:public Text scoreText;Click on the GameManager object, and it should have a new field called Score TextOpen the menu to change the field, and select the ScoreText object in the Scene tabReturn once more to the GameManager Script
In the Update function, right above the line - if (timer 0) {Type the following code:scoreText.text "Score: " score;Creating a Game Over screen Find the GameObject - UI menu again, and create a new Image objectName it GameOverOpen the Anchor presets menu again, in the Transform sectionAlt click on the icon with the box in the middleIn the Image component, find the Source Image field, and select the gameOver imagefrom the Assets tabChange Scale X to 5 and Scale Y to 2 (or otherwise scale it to your preference)Note: You can double click a gameobject in the Hierarchy tab to instantly look at thatobjectTo the left of the Image (Script) there should be a checked blue box. Uncheck the box tomake the score invisible
Open the GameManager script, and under - public Text scoreText;Add the lines of code:public Image gameOver;public static bool lost false;public PlayerScript player;Open GameManager object in the Inspector, and assign the new Game Over field thenewly created Image from the Scene tabFind the Player field, and assign it the Player in the Scene tabReturn to the GameManager scriptBelow the line - scoreText.text "Score: " score;Add the following:if (lost) {gameOver.enabled true;Time.timeScale 0;player.enabled false;}Open the IncomerScriptAdd the following lines to the end of the Update function:if (newPos.y -5) {GameManager.lost true;Destroy (this.gameObject);
}Adding Retries: Return to the GameManager ScriptAt the top, below - using UnityEngine.UI;Add the following line:using UnityEngine.SceneManagement; At the end of the Update function, add the following:if (Input.GetKeyDown (KeyCode.Return) && lost) {SceneManager.LoadScene (SceneManager.GetActiveScene ().name);lost false;score 0;gameOver.enabled false;Time.timeScale 1;player.enabled true;}
Shmup Tutorial - Unity Setting up the project: Launch Unity. In the Projects tab, click new. Name the project Shmup (or something similar) and make sure to check the 2D bubble, and create project. After making the project, go to the folder it was created in (Default: Documents) and find . well as all of the Game Objects currently in the scene.