Transcription
Travel Setup Guidefor Concur StandardLast Updated: December 10, 2021Applies to these SAP Concur solutions: Expense Professional/Premium edition Integrated with Professional/Premium Travel Stand-alone Standard edition Integrated with Standard Travel Stand-alone Concurforce Travel Professional/Premium edition Integrated with Professional/Premium Expense Integrated with Professional/Premium Request Stand-alone Standard edition Integrated with Standard Expense Stand-alone Invoice Management Professional/Premium edition Integrated with Professional/Premium Expense Stand-alone Standard edition Integrated with Standard Expense Stand-alone Request (formerly Travel Request) Professional/Premium edition Integrated with Professional/Premium Expense Integrated with Professional/Premium Travel Stand-alone
Table of ContentsTravel Setup .1Section 1: About this Guide .1Travel Service Guides . 1Service Description Guide . 1Section 2: Introduction.2Section 3: Log in to Travel - Access the Setup Wizard .2Section 4: Setup Wizard .3Implement Travel by Itself (Without Expense) . 3Implement Travel with Expense . 5Step 1 – Travel Policy. 5Overview . 5Step 2 – Travel Rules . 6Define Search Options. 6Step 3 – Configurable Messaging . 9Step 4 – Custom Text. 9Step 5 – Organization Units . 9Overview . 9What the Admin Sees . 9What the User Sees . 10Add a New Organization Unit . 11Work with Properties. 12Modify an Organization Unit . 13Delete an Organization Unit . 14Step 6 – Policy Violation Codes . 15Step 7 – Company Locations . 15Overview . 15Map Coordinates . 15Create a New Company Location Manually . 16Edit a Company Location Manually . 18Delete a Company Location Manually . 19Import Company Locations . 20Step 8 – Form of Payment . 22Overview . 22Add a New Corporate Ghost Card . 23Define Payment Options . 26Edit a Corporate Ghost Card . 27Delete a Corporate Ghost Card . 28Travel Setup Guide For Concur StandardLast Updated: December 10, 2021 2004 - 2022 SAP Concur All rights reserved.i
Enable AirPlus A.I.D.A. . 28Step 9 – Discounts and Travel Content . 28Overview . 28Add Corporate Discounts for Air, Car, Hotel, and Rail; Set the Preference Level forNon-GDS Airline and Hotel Vendors; Upload Hotel Property Discounts . 29Enable a Direct Connect Provider . 29Requirements for Each Air Connector . 30Requirements for Each Rail Connector . 30Requirements for Each Car Connector . 32Requirements for Each Hotel Connector . 32Requirements for Each Ground Connector . 34Enable Travelfusion Suppliers. 34Enable Government Rates . 35Step 10 – Custom Trip Fields. 35Overview . 35Considerations for Creating Custom Fields . 35Treatment of Existing Data . 36Determine the Types of Fields . 36Order of Display . 36Guest Travel Bookings . 36Configure and Enable a Custom Trip Field . 37Add More Custom Trip Fields . 40Step 11 – Custom Profile Fields . 41Overview . 41Important . 41Considerations for Creating Custom Fields . 41Treatment of Existing Data . 41Determine the Types of Fields . 42Order of Display . 42Configure and Enable a Custom Profile Field . 43Add More Custom Profile Fields . 46Step 12 – Unused Tickets . 47Overview . 47Step 13 – Site Customization . 47Overview . 47Upload a Company Logo . 48Set Up Self-Registration . 49Allow/Disallow Refundable Fares; Allow/Disallow Booking Hotels with Deposit;Allow/Disallow Policy by Leg (Flex Faring); Default to Mixed Classes (Flex Faring) . 49Step 14 – Manage Users . 51Overview . 51Menus . 52Add and Modify User Information Manually . 52Add and Modify User Information via Import . 52Manually Add a New User – Travel WITHOUT Expense. 53Manually Add a New User – Travel WITH Expense . 55iiTravel Setup Guide For Concur StandardLast Updated: December 10, 2021 2004 - 2022 SAP Concur All rights reserved.
Locate an Existing User – Travel WITH or WITHOUT Expense . 59Edit User Information – Travel WITH or WITHOUT Expense. 60Delete Users – Travel WITH or WITHOUT Expense . 61Import Users – Travel WITH Expense . 61Import Users – Travel WITHOUT Expense . 62View Import Status – Travel WITH or WITHOUT Expense. 63Access User Profiles – Travel WITH or WITHOUT Expense . 64Step 15 – Invite Users. 65Overview . 65Invite Users . 65Step 15/16 – Agency Settings . 66Overview . 66Work with General Settings . 67Work with TSA Settings . 68Work with Agency Invoice Settings . 69Section 5: Travel Reporting . 69Overview . 69Run a Travel Report . 69Section 6: Travel System Admin . 70Overview . 70Travel System Admin . 72Default Travel System Admin Settings . 72Section 7: Additional Configuration Information . 80Gogo Inflight Wi-Fi . 80Sabre Profiles . 80Dual Fare Display (Sabre Only). 81Concur Meeting/Third-Party Meeting . 81Hotel Previous Stay History . 81Offline Approval Error Queue . 81Section 8: Appendix A – Find the Travel Service Guides & Fact Sheets . 83Section 9: Appendix B – Password Defaults. 83Travel Setup Guide For Concur StandardLast Updated: December 10, 2021 2004 - 2022 SAP Concur All rights reserved.iii
Revision HistoryDateNotes / Comments / ChangesJanuary 21, 2022Updated the copyright year; no other changes; cover date not updatedDecember 10, 2021Updated instructions for Product Settings pageAugust 30, 2021Removed references to CIBT (retired this date).March 19, 2021Updated About this Guide and Setup Wizard sectionsJuly 24, 2020Updated the procedure on pages 55-56 to reflect updates to the Users pageUI.April 27, 2020Renamed the Authorization Request check box to Request on the guide’s titlepage; cover date not updatedFebruary 17, 2020Updated China terminology to Hong Kong, ChinaJanuary 15, 2020Updated the copyright; no other changes; cover date not updatedMay 23, 2019Added information about Dual Fare Display (Sabre Only)May 13, 2019Minor edits; removed information on password hintsFebruary 12, 2019Updated the copyright; no other changes; cover date not updatedMay 29, 2018Updated to include the changes for May 2018 including:SectionDescription/ActionSite CustomizationRemoved setting for the privacy agreementMarch 30, 2018Added notes about best practice of not allowing personal or sensitive data incustom fieldsJanuary 23, 2018Added: NOTE: The LoginID must be unique across all Concur products. If aLoginID is currently in use in any Concur product, it cannot be assigned againunless the original occurrence is changed. For example, assume that aLoginID was assigned in error. That LoginID can only be used again if anadmin (either manually or via import) renames the original occurrence,allowing the LoginID to be used again.January 28, 2018Updated to include the changes for January 2018 including:January 28, 2018SectionDescription/ActionDefault Travel SystemAdmin SettingsIn the TSA Settings section, the Date of BirthUnknown check box automatically appearsChanges not related to the releaseRemoved these sections; created new Travel Service Guides: Travel Admin – Travel Policy tab Travel Admin – Policy Violation Codes tabRefer to the Approvals, Rules, and Classes/Policies Travel Service Guide.Older revision history has been removed.ivTravel Setup Guide For Concur StandardLast Updated: December 10, 2021 2004 - 2022 SAP Concur All rights reserved.
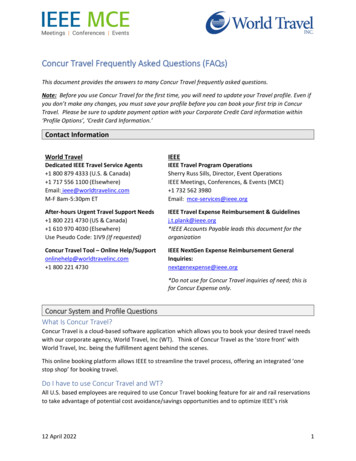
Travel SetupSection 1: About this GuideThe information in this guide applies to Travel in Concur Standard. There is aseparate guide for Expense in Concur Standard.Travel Service GuidesThere are travel service guides available for many of the features described in thissetup guide. Where this setup guide describes how to configure each option in theTravel Setup Wizard – for example, how to enable a direct connect – the travelservice guides are more comprehensive and provide important information like: Steps required before using the Travel Setup Wizard, like obtaining therequired agreement with a vendor Additional implementation steps, for example, in Travel System Admin What the user sees; the user experience How the feature works The benefits of using the feature FAQsSome of the features in this guide require that you review the travel service guidebefore implementing the feature in Travel (direct connects); most do not (travelrules, organization units, custom text, etc.).In those cases where it is important to review the information in the travel serviceguide for successful implementation, this type of message appears.For this feature/option, additional steps are required. In some cases, the required stepsmust be completed before using the Travel setup wizard (like obtaining a vendoragreement). Refer to the name Travel Service Guide.To locate for guide, see Find the Travel Service Guides & Fact Sheets in the appendix of thisguide.Service Description GuideSAP Concur has added the Service Description Guide link to the Help menu onthe SAP Concur home page. This change is provided in accordance with SAP ConcurLegal requirements.To access the Service Description Guide link, click Help (upper-right corner) onthe SAP Concur home page and then click the Service Description Guide link.Travel Setup Guide For Concur StandardLast Updated: December 10, 2021 2004 - 2022 SAP Concur All rights reserved.1
The Service Description Guide – SAP Concur page appears.Section 2: IntroductionUse the Travel Setup Wizard to manage company options, user data, and travelbooking settings. You can access the setup wizard by clicking Administration Setup Travel at the top of any page. Once in the setup wizard, you can accessdifferent pages by using the left-side menu. None of these steps/pages aredependent on the other.Section 3: Log in to Travel - Access the Setup Wizard To log in to Travel and access the Setup Wizard:1. Go to www.concursolutions.com.2Travel Setup Guide For Concur StandardLast Updated: December 10, 2021 2004 - 2022 SAP Concur All rights reserved.
2. Type your Login ID in the User Name field.3. Type your password in the Password field.NOTE: Remember the password is case sensitive.4. Click Login.5. Click Administration Setup at the top of any Travel page.Section 4: Setup WizardThe setup wizard allows you to manage all administrative settings and preferences.The Setup Wizard page and the setup process differ slightly if you areimplementing Travel by itself versus implementing Travel with Expense.Implement Travel by Itself (Without Expense)The Setup Wizard page has 16 steps (detailed in the table below).The first 14 steps match exactly the steps available when implementing Travel withExpense; the last 2 steps differ. Each is described on the remaining pages of thisguide.Step1OptionDescription/ActionTravel PolicyEdit travel policy namesTravel Setup Guide For Concur StandardLast Updated: December 10, 2021 2004 - 2022 SAP Concur All rights reserved.3
StepOptionDescription/Action2Travel RulesManage travel rules (pre-defined and custom),benchmark lowest fares, manager notifications, searchoptions, and other travel features3ConfigurableMessagingManage trip-specific custom messaging4Custom TextManage custom text (labels)5Organization UnitsManage organization units (groups)6Policy Violation CodesManage messaging and codes for users when bookingout-of-policy trips7Company LocationsDefine company locations8Form of PaymentManage ghost cards9Discounts and TravelContentManage vendor discounts, preference levels, hotelimports, direct connect providers, visa/passport services,Travelfusion suppliers, and government rates10Custom Trip FieldsManage questions asked of the user during the bookingprocess11Custom Profile FieldsManage profile fields12Unused TicketsManage unused tickets for all users13Site CustomizationUpload the customer's logo, and manage otherconfiguration settings14Manage UsersCreate, modify, and delete usersNOTE: This option appears only if the implementationdoes not include Expense Standard.15Invite UsersEmail notification sent out to users at launchNOTE: This option appears only if the implementationdoes not include Expense Standard.15 / 16Agency SettingsManage trips-on-hold, companions, etc., TransportationSecurity Administration (TSA) settings, and agencyinvoiceNOTE: If the implementation includes Expense Standard,then this step becomes step 15.4Travel Setup Guide For Concur StandardLast Updated: December 10, 2021 2004 - 2022 SAP Concur All rights reserved.
Implement Travel with ExpenseThe Setup Wizard page has 15 steps (detailed in the table above).Step 1 – Travel PolicyOverviewA policy is a collection of travel settings and preferences. Concur provides two travelpolicies per configuration. You can create an unlimited number of additional policies.Use the Travel Policy step to: Edit the names of the provided (default) policies Create new policies Delete policies For complete details, screen captures, and setup steps, refer to the Approvals, Rules,and Classes/Policies Travel Service Guide.Travel Setup Guide For Concur StandardLast Updated: December 10, 2021 2004 - 2022 SAP Concur All rights reserved.5
Step 2 – Travel RulesTabDescription/ActionTravel Rules Benchmark Fare Manager Notification Search OptionsSee below.Travel Features Refer to the Approvals, Rules, and Classes/Policies TravelService Guide.Refer to the Lowest Logical Fare (LLF) / Benchmark LowestAirfare Travel Service Guide.Refer to the Approvals, Rules, and Classes/Policies TravelService Guide.Refer to the Approvals, Rules, and Classes/Policies TravelService Guide.Define Search Options To define search options:1. In the left-side menu, click Travel Rules.6Travel Setup Guide For Concur StandardLast Updated: December 10, 2021 2004 - 2022 SAP Concur All rights reserved.
2. Click the Search Options tab.3. Select the desired policy.4. Modify the settings as needed. Help text is available to explain nuances.SettingDefaultDescription/ActionDefault SearchWindow(Domestic)3 HoursSelect the number of hours for the default searchwindow, for both domestic and international travel.Default SearchWindow(International)5 HoursTravel PolicyTime Window(Domestic)3 HoursTravel Setup Guide For Concur StandardLast Updated: December 10, 2021 2004 - 2022 SAP Concur All rights reserved.The default window will pre-populate when thetraveler selects dates and times on the Flight tab.The traveler can change the default window whensearching but cannot search a smaller time windowthan is defined in the Minimum time window fieldor a longer time than is defined in the Maximumtime window field below.Select the number of hours for the default window forbenchmark lowest fares, for both domestic andinternational travel.7
SettingDefaultDescription/ActionTravel PolicyTime Window(International)5 HoursThe default window will pre-populate when thetraveler selects dates and times on the Flight tab.The traveler can change the default window whensearching but cannot search a smaller time windowthan is defined in the Minimum time window fieldor a longer time than is defined in the Maximumtime window field below.NOTE: For Worldspan only, the Anytime option willappear only for users if the Maximum Window fieldis set to 12 hours.Use domesticsearch windowfor intra-regionflightsOnSelect to enable.NOTES: Domestic is defined as within a country, forexample, Chicago to New York. International is defined as crossing a countryborder, for example, Paris to Hong Kong, China.Enabling this feature will cause intra-region itinerariesto default to the domestic time window, for example,London to Frankfurt will become domestic rather thaninternational.Minimum timewindow2 HoursSelect the minimum time window (in hours) that auser can define for searches.Maximum timewindow9 HoursSelect the maximum time window (in hours) that auser can define for searches.NOTES: For Worldspan only, the Anytime option willappear only for users if the Maximum Windowfield is set to 12 hours. For Sabre only, the admin can select an optiongreater than 9 from the Maximum Window listonly if Bargain Finder Max is enabled and if theMax Search Results field is set to 200. (BargainFinder Max is set in Travel System Admin.)Default SearchTypeInitiallydefault toSearch byPriceClick one of these: Initially default to Search by Price Initially default to Search by Schedule Always default to Search by Schedule Only Search by Schedule: When using the TravelWizard, users will not have a choice to search byprice or schedule. Travelers are automaticallydirected to the Shop by Schedule tab but theShop by Fares tab is available for use.8Travel Setup Guide For Concur StandardLast Updated: December 10, 2021 2004 - 2022 SAP Concur All rights reserved.
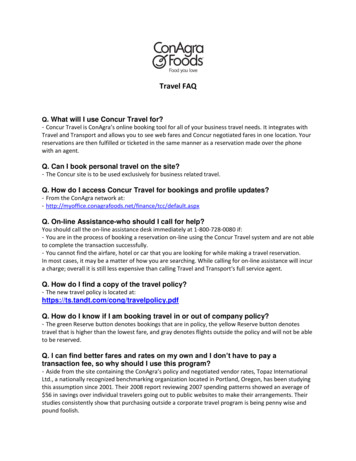
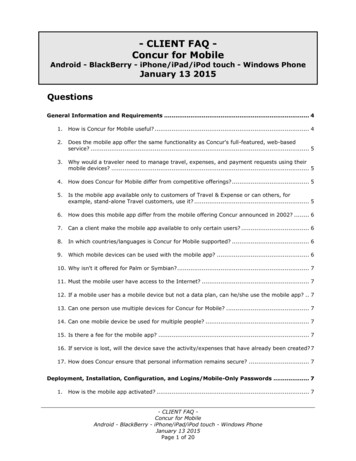
SettingDefaultDescription/ActionDon't showprices onScheduleOffSelect (enable) this check box if you do not wantprices to appear.NOTE: Choosing Only Search By Schedule as thedefault search type and enabling Don't show priceson Schedule will force travelers to always go to theShop by Schedule tab where they see a schedulewith no prices. The traveler will be able to selectindividual combinations of flights and the low-faresearch would begin when travelers quote theiroptions.5. Click Save.Step 3 – Configurable Messaging For complete details, screen captures, and setup steps, refer to the ConfigurableMessage Boards Travel Service Guide.Step 4 – Custom Text For complete details, screen captures, and setup steps, refer to the Custom TextTravel Service Guide.Step 5 – Organization UnitsOverviewUse the Organization Units step to create groups. Then, you can apply certainsettings and features by organization unit.NOTE: Please be sure to consult your fulfillment TMC on all additions, changes, anddeletions if your company is using organization units to manage companylevel profiles. Changes will have a signification impact to their operationalprocess.WHAT THE ADMIN SEESIf enabled, the admin sees the Organization Unit dropdown in the profile in theManage User step. This will be editable for any user with access to the setupwizard.Travel Setup Guide For Concur StandardLast Updated: December 10, 2021 2004 - 2022 SAP Concur All rights reserved.9
WHAT THE USER SEESIf enabled and made visible to users, the user sees the Org Unit/Divisiondropdown in his/her profile in the Company Information section. This will be set toeither view-only or editable, depending on the configuration setup.10Travel Setup Guide For Concur StandardLast Updated: December 10, 2021 2004 - 2022 SAP Concur All rights reserved.
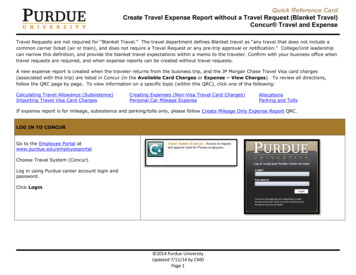
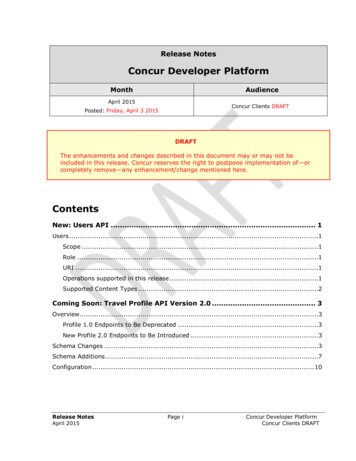
Add a New Organization Unit To add a new Organization Unit:1. In the left-side menu, click Organization Units.2. Click Add New Organization Unit.The Add New Organization Unit window appears.3. Make the appropriate choices as described in the following table.FieldDescription/ActionOrganization UnitEnter a name for the organization unit.Travel Setup Guide For Concur StandardLast Updated: December 10, 2021 2004 - 2022 SAP Concur All rights reserved.11
FieldDescription/ActionSabre ProfilesTemplate IDThis field appears only if using Sabre Profiles.Third Party DataIf passing to a third party, determine the value to be passed.Work with your fulfillment TMC to determine the Sabre ProfilesTemplate ID.4. Click OK.NOTE: Admins may also assign organization units via the User Upload feature.Work with PropertiesThere are three options available via check boxes:12 Allow users to view Organization Unit in their profile Allow users to edit Organization Unit in their profile – If selected (enabled),the check box above will automatically be selected, allowing users to view aswell as edit in their profile Require Organization Unit – If selected (enabled), the two check boxes abovewill automatically be enabled, allowing users to view and edit in their profileTravel Setup Guide For Concur StandardLast Updated: December 10, 2021 2004 - 2022 SAP Concur All rights reserved.
To use the properties:1. In the left-side menu, click Organization Units.2. Select (enable) the desired properties.Modify an Organization Unit To modify an organization unit:1. In the left-side menu, click Organization Units.Travel Setup Guide For Concur StandardLast Updated: December 10, 2021 2004 - 2022 SAP Concur All rights reserved.13
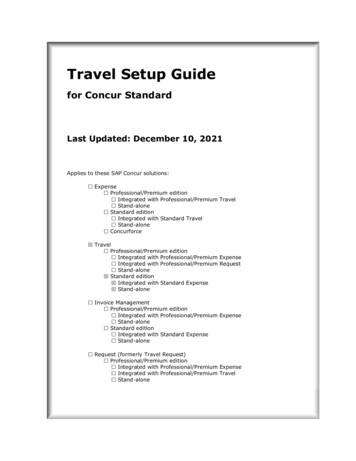
2. Click Edit to the left of the desired organization unit.The Edit Organization Unit window appears.3. Make the appropriate changes.4. Click OK.Delete an Organization Unit To delete an organization unit:1. In the left-side menu, click Organization Units.14Travel Setup Guide For Concur StandardLast Updated: December 10, 2021 2004 - 2022 SAP Concur All rights reserved.
2. Click Delete to the left of the unit.3. Then: If no users are assigned to that unit, click OK to delete. If users are assigned to the unit, you will be asked to choose areplacement unit.Step 6 – Policy Violation Codes For complete details, screen captures, and setup steps, refer to the Approvals, Rules,and Classes/Policies Travel Service Guide.Step 7 – Company LocationsOverviewUse the Company Locations step to set up company locations for yourorganization. There are several uses for company locations: You can assign users to company locations in order to automatically add awork address to their user records. Users have the ability to update their ownhome or work addresses in their profile. Users can use company locations to search for hotels in Concur Travel. Whenusers search for a hotel using a company location, users can choose from thislist of locations.Use the: Company Locations tab to manage them manually Import tab t
separate guide for Expense in Concur Standard. Travel Service Guides There are travel service guides available for many of the features described in this setup guide. Where this setup guide describes how to configure each option in the Travel Setup Wizard - for example, how to enable a direct connect - the travel