Transcription
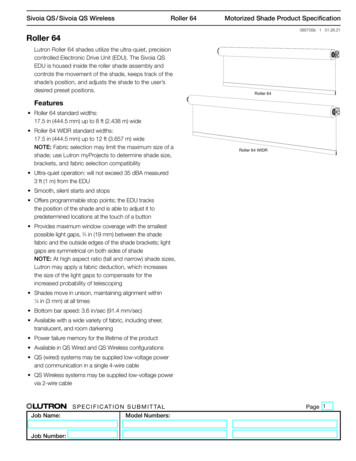
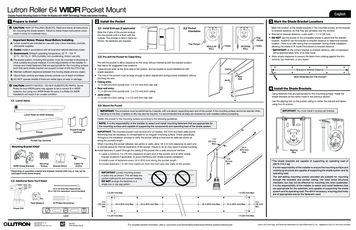
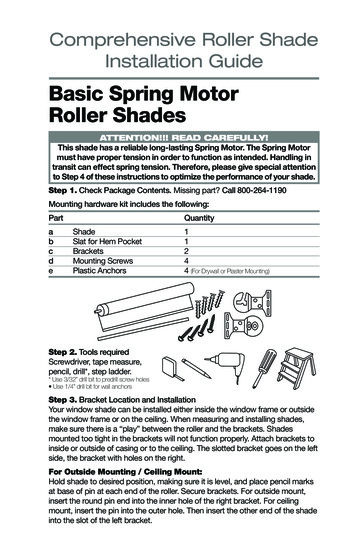
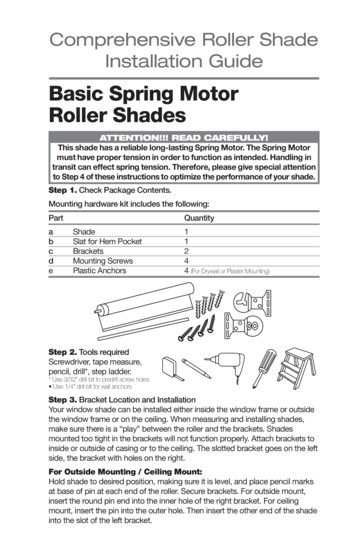
Comprehensive Roller ShadeInstallation GuideBasic Spring MotorRoller ShadesATTENTION!!! READ CAREFULLY!This shade has a reliable long-lasting Spring Motor. The Spring Motormust have proper tension in order to function as intended. Handling intransit can effect spring tension. Therefore, please give special attentionto Step 4 of these instructions to optimize the performance of your shade.Step 1. Check Package Contents.Mounting hardware kit includes the following:PartQuantityabcde11244 (For Drywall or Plaster Mounting)Shade Slat for Hem PocketBracketsMounting ScrewsPlastic AnchorsStep 2. Tools requiredScrewdriver, tape measure,pencil, drill*, step ladder.* Use 3/32” drill bit to predrill screw holes Use 1/4” drill bit for wall anchorsStep 3. Bracket Location and InstallationYour window shade can be installed either inside the window frame or outsidethe window frame or on the ceiling. When measuring and installing shades,make sure there is a “play” between the roller and the brackets. Shadesmounted too tight in the brackets will not function properly. Attach brackets toinside or outside of casing or to the ceiling. The slotted bracket goes on the leftside, the bracket with holes on the right.For Outside Mounting / Ceiling Mount:Hold shade to desired position, making sure it is level, and place pencil marksat base of pin at each end of the roller. Secure brackets. For outside mount,insert the round pin end into the inner hole of the right bracket. For ceilingmount, insert the pin into the outer hole. Then insert the other end of the shadeinto the slot of the left bracket.
2inside mountingoutside mountingceiling mountingFor Inside Mounting:Allow 1/4” clearance between top of frame and fully rolled-up shade. This willprovide enough clearance to lift shade into slotted bracket. Spring loaded tipprovides up to 3/8” extra width if needed. Always insert the pin end into theright side bracket first. If the brackets are installed as illustrated (facing out),place the pin into the inner hole of the right bracket. If the brackets are installedfacing down (like Ceiling Mount), place the pin into the outer hole of the rightbracket. Push into bracket to compress the spring, then place the metal tab onthe left side of the shade into the slot of the left bracket. For standard shades,the slotted bracket goes on the left side, the bracket with holes on the right. Forreverse-roll shades (inside mount only!), the slotted bracket goes on the right,and the open part of the bracket must face the window – the bracket can bemounted to the top or side of the window frame.Reverse Roll Mounting:For reverse-roll shades (inside mount only!), the slotted bracket goes on theright, and the open part of the bracket must face the window – the bracketshould be mounted to the top of the window frame [see illustration].Standard Shades [theshade cloth rolls off theback of the shade] – theslotted bracket goeson the left side of thewindow, and the slotopening faces up or out,toward the room.(Inside Mount Only!)Reverse Roll Shades [theshade cloth rolls off the frontof the shade] – the slottedbracket goes on the right sideof the window opening, andthe slot opening faces backtoward the window.Step 4. Adjust Spring TensionSpring Tension should be adjusted to assure best performance and to suitpersonal preference.The tension on the spring should be neither too loose nor too tight. When awindow shade refuses to roll up, the spring is too loose. When it won’t staydown the roller spring is too tight.To Increase Tension: lower the shade about 18 inches from the top, andthen remove it from the brackets. Roll-Up the shade all the way to the topby hand, and then place the shade back into the brackets as described inStep 3. Repeat as often as necessary to achieve desired tension.Caution: over-winding may result in permanent damage to the spring motor.To Decrease Tension: remove the shade from the brackets, and then unrollabout 18 inches of shade material, and then place the shade back into thebrackets as described in Step 3. Repeat as often as necessary to achievedesired tension.
3Comprehensive Roller Shade Installation GuideStep 5. How to OperateIf this shade does not roll straight, correct as follows:Make sure brackets are mounted level, or the shade will not roll straight.If shade veers toward the right, correct by lowering shade completely andplacing a piece of tape (multiple pieces may be necessary) as close to the leftedge of the roller as possible. It will act as a shim.tape / shimrollerIf shade veers toward the left, correct by lowering shade completely andplacing a piece of tape (multiple pieces may be necessary) as close to the rightedge of the roller as possible. It will act as a shim.Cleaning your BlindsCleans easily with a damp sponge or soft cloth. Allow the shade to hang it’s fulllength for a minimum of 72 hours to minimize wrinkles and creases.Standard Cord ControlRoller ShadeTools requiredTape measure, pencil, drill, drill bits, screw driver, step stool.Note: use a 5/64” drill bit to pre-drill the screw holes (for attachment to a wall studor header board). Use a 1/4” drill bit for plastic anchors (for hollow dry wall orplaster mounting).Step 1. Mount the BracketsAttach the brackets to the window frame, molding or ceiling. The bracket forthe cord control end of the shade has a post that fits into the end of the cordmechanism (see illustration). The other bracket is for the pin end of the shade.Mark the screw locations with a pencil – pre-drill the screw holes using a 5/64”drill bit. If mounting to hollow drywall, use the wall anchors provided – pre-drillthe holes with a ¼” drill bit.
4Cord Control BracketPin End BracketStep 2. Install the ShadePush the cord control mechanism onto the bracket post such that the cordhangs straight down. Slide the pin end of the shade into its bracket from thefront such that it rests in the center recess.Step 3. Attach the Safety Cord GuideThe cord guide must be attached per these instructions in order for your shadeto function properly. The Cord Guide is pre-attached to the Cord Control, andmust be attached inside or outside the window opening, to the window frameor wall as you prefer.The base of the Cord Guide can be attached vertically, horizontally or at anangle. Note that the ‘U’ shaped guide that the chain passes through swivelsand can be set in any position to facilitate smooth operation.Attach the Cord Guide with the 1-1/4” screws provided. Pre-drill the screwholes using a 3/32” drill bit if mounting to a solid surface.If the Cord Guide is attached to hollow drywall, please use the wall anchorsprovided. Use a ¼” drill bit to drill the holes for the anchors.DO NOT PUT TENSION ON THE CORD/BEAD CHAIN!front view side viewInstall the Cord Guide such that the cord hangs loosely – this optimizes theperformance of the clutch, and assures that the Cord Connector will passthrough the Cord Guide with relative ease. Do not twist or cross the controlcord/bead chain. In order to position the base properly, adjust the cord sothat the Cord Guide is at the bottom of the cord loop and let it hang freely.Compress the spring by hand so that the chain moves freely through the ‘U’channel.Hold the tension device and the bracket against the window frame or wall andthen move it upward at least ¼” - mark the position of the bracket (mark thelocation of the screw holes with a pencil). Insert and secure two screws throughthe holes in the base of the Cord Guide.
5Comprehensive Roller Shade Installation GuideStep 4. Operating the ShadePulling gently on the cord in one direction lifts the shade; pulling it in the otherdirection lowers it.Cleaning the ShadesDusting: Vacuum using the soft brush attachment.Washing: Use a cloth, sponge or soft brush and a mild detergent. Use warm orcold water, not hot water. Place toweling on the floor or window sill and washthe blind in sections.Premium Cord ControlRoller Shade (for Wide Shades)Tools Required:Tape measure, pencil, drill, drill bits, screw driver, step stool.Note: use a 5/64” drill bit to pre-drill the screw holes (for attachment to a wallstud or header board). Use a 1/4” drill bit for plastic anchors (for hollow drywall or plaster mounting).Step 1. Mount the Bracketsattach the brackets to the window frame, molding or ceiling as shown. Thebrackets are “universal” – there are no “right” and “left” brackets. Mark thescrew locations with a pencil – pre-drill the screw holes using a 5/64” drill bit.Step 2. Install the ShadePut the spring loaded pin into the round hole of the bracket, push thespring loaded tip into the bracket, and then insert the hook arms on theopposite side of the shade into the two hook arm receiver holes of thebracket. Once the two hook arms are through the holes, gently pull downuntil the two hook arms have locked securely to the bracket.
6For cord control shades, the bottom of the clutch should always pointstraight down.Step 3. Install the Bracket Covers – For Outside Mount Shades Only!Bracket covers slide onto the brackets as shown until they snap into position.Step 4. Attach the Safety Cord GuideThe cord guide must be attached per these instructions in order for yourshade to function properly. The Cord Guide is pre-attached to the CordControl, and must be attached inside or outside the window opening, tothe window frame or wall as you prefer.The base of the Cord Guide can be attached vertically, horizontally or atan angle. Note that the ‘U’ shaped guide that the chain passes throughswivels and can be set in any position to facilitate smooth operation.Attach the Cord Guide with the 1-1/4” screws provided. Pre-drill the screwholes using a 3/32” drill bit if mounting to a solid surface.If the Cord Guide is attached to hollow drywall, please use the wallanchors provided. Use a ¼” drill bit to drill the holes for the anchors.DO NOT PUT TENSION ON THE CORD/BEAD CHAIN!front view side view
7Comprehensive Roller Shade Installation GuideInstall the Cord Guide such that the cord hangs loosely – this optimizes theperformance of the clutch, and assures that the Cord Connector will passthrough the Cord Guide with relative ease. Do not twist or cross the controlcord/bead chain. In order to position the base properly, adjust the cord sothat the Cord Guide is at the bottom of the cord loop and let it hang freely.Compress the spring by hand so that the chain moves freely through the‘U’ channel.Hold the tension device and the bracket against the window frame or walland then move it upward at least ¼” - mark the position of the bracket(mark the location of the screw holes with a pencil). Insert and secure twoscrews through the holes in the base of the Cord Guide.Step 5. Operating the ShadeCordless ShadesRaise the Shade: Grip the center of the bottom hem (do not release yourgrip until you have set the shade at the desired height) – pull the shadeaway from the window sill, if necessary – pull straight down to release thespring motor that controls the movement of the shade – allow it to rise toany desired point, then pull downward gently to stop/set the shade.Lower the Shade: pull straight down and stop/set the shade as describedabove.Adjusting Spring Roller Tension: to tighten (increase tension!), lowerthe shade about 18” from the top, and then remove the shade from thewindow brackets. Roll up the shade by hand, and then replace in thebrackets. Repeat as necessary to get the desired tension.To loosen (decrease tension!), raise the shade to the top, and then removethe shade from the brackets. Unroll the shade about 18”, and then replacein the brackets.The spring roller should not be too tight. Remember, when the windowshade will not roll up, the spring is too loose. When it won’t stay down, theroller spring is too tight.Caution: over-winding may result in permanent damage.Cord Control ShadesPulling gently on the cord in one direction raises the shade; pulling it inthe other direction lowers it. On shades where the fabric rolls against thewindow, the front cord lifts the shade. On shades where the fabric rollstoward the room, the rear cord lifts the shade.Motorized ShadesSee the separate sheet of instructions that describes the programming ofthe remote control(s).Step 6. Hold-Down Fasteners for Outdoor ShadesIf you purchased a shade for outdoor use, Reclosable Snap-TogetherFasteners are included to help control movement of the shade in windyconditions.Peel the cover from one side of each fastener set to expose the adhesive.
8Attach both to the bottom hem of theshade. Then peel the cover from the otherside and attach to the sill or wall to holdthe bottom of the shade in place. Pull thehem away from sill/wall to separate thefasteners. Press in place to re-attach.If your shade has a decorative externalhem bar, cut the fasteners in halflengthwise, and then attach to the hembar.Cleaning the ShadesDusting: Vacuum using the soft brush attachment.Washing: Use a cloth, sponge or soft brush and a mild detergent. Usewarm or cold water, not hot water. Place toweling on the floor or windowsill and wash the blind in sections.Cassette ValanceSystemStep 1. Mount The BracketsMount the brackets to the wall or window frame, with the outside bracketsno further than 2 inches (50mm) from the ends of the headrail. On wideshades, space the additional bracket(s) at equal intervals.2” (5cm) maximumSPACE EVENLYSPACE EVENLY2” (5cm) maximumCassette 80For wall or outside mounts,use the rear bracket holes.Make sure the release tab is always mounted on thebottom.For inside ceiling mounts,use the top bracket holes.Make sure the release tab is always mounted on thebottom
9Comprehensive Roller Shade Installation GuideMount the headrail. Position the headrail with the front panel (A) restingon the top lip of the brackets. Push the bottom front of the headrail firmlybackwards and toward the window until the lip on the rear of the headrailengages the bracket and snaps into place, (B) as shown.ABCassette 120For wall or outside mounts,use the rear bracket holes.Make sure the release tab is always mounted on the top.For inside ceiling mounts,use the top bracket holes.Make sure the release tab is always mounted on the topMount the headrail. Position the headrail with the back panel (A) restingon both bottom hooks of all brackets. Push the front of the headrail firmlyupwards and toward the window until the groove at the top of the headrailsnaps into place, (B) as shown.BAStep 2. Removing the ShadeCassette 80: From the bottom rear of the headrail, insert a flatheadscrewdriver in between the head rail and release the tab. Gently twistthe screwdriver and pry open the bracket to release the head rail. As yourelease the brackets, support the headrail to keep it from falling.Cassette 120: from the top of the head rail insert a flathead screwdriver inbetween the headrail and release the tab. Gently twist the screwdriver andpry open the bracket to release the head rail. As you release the brackets,support the headrail to keep it from falling.
mounted to the top or side of the window frame. Reverse Roll Mounting: For reverse-roll shades (inside mount only!), the slotted bracket goes on the right, and the open part of the bracket must face the window - the bracket should be mounted to the top of the window frame [see illustration]. Step 4. Adjust Spring Tension