Transcription
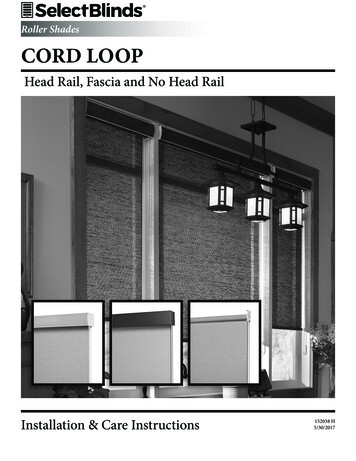
Roller ShadesCORD LOOPHead Rail, Fascia and No Head RailInstallation & Care Instructions152038 H5/30/2017
GETTING STARTEDA few simple tools are required:- Measuring tape- Power drill, drill bits- 1 4” Hex head and/or Phillips driver bit- PencilAdditional fasteners other than thosesent with your shade may be requireddepending on the mounting surface.Wallboard and plaster require theuse of anchors such as expansionor toggle bolts. Brick, tile or stoneneed special plugs and drill bits.Remember to always pre-drill holesin wood to avoid splitting.PN: CS5402PN: CS5002(W or BLK)CS5008 (W or BLK)CS5529CS5530Depends on size ofshadePN: CS563x (3”)CS557x (3”)CS561x (4”)Depends on size ofshadeMountingBrackets forShades withHead RailMountingBrackets forShades withoutHead RailMountingBrackets forShades withFasciaPN: 20201012PN: CS1000PN: CS2000PN: CS11011 1 4”Head RailSpacerHoldHex HeadExtensionBlockDownBracketand Side(optional) BracketScrewMount Bracket(optional)(optional)STEP 1: BRACKET INSTALLATIONSHADES WITH HEAD RAILShades are shipped with the required number of bracketsfor proper installation. End brackets should be locatedapproximately 3” from either end. Depending on the width ofthe shade, additional brackets may be necessary, evenly spacedbetween the two end brackets.Using the installation bracket as a template, measure to theedge of the bracket and mark the hole locations with a pencilfor drilling.Shade Width# of BracketsUp to 40”2 40” - 72”3 72”- 84”4 84” and up5Brackets must be in line and level. Shim brackets on insidemounts if necessary. The head rail must be level for the shadeto operate properly.INSIDE MOUNTThe minimum mounting depth for an inside mount is 1”.A minimum of 3 3 4” is needed to fully recess the shade.1”Make sure the brackets are level and aligned.Attach using two screws.Inside MountShallow Mount - Minimum 1” surfaceFlush Mount - Minimum 3 3 4” surface1
OUTSIDE MOUNTThe minimum mounting height for outside mounted shades is1”.1”Make sure the brackets are level and aligned.Outside MountMinimum 1” surfaceAttach each bracket using two screws.SPACER BLOCKS (OPTIONAL)Each spacer block projects brackets 3 8” away from mountingsurface.Make sure the brackets are level and aligned.Outside Mount with Spacer BlocksAttach each bracket using two screws. Screws should be longenough to secure the bracket to the mounting surface.EXTENSION BRACKETS (OPTIONAL)Optional extension brackets are used to project the back of theshade up to 2 1 2” from the mounting surface.Attach the mounting bracket to the extension bracket with thenut and bolt provided.2”2 1 2”Outside Mount with Extension BracketsMinimum 2” surfaceSIDE MOUNT (OPTIONAL)Measure from window sill up to desired mounting position oneach side of the window frame. Mark position.Mount side mount brackets on each side of window frame asshown. Make sure to confirm the head rail will sit perfectlylevel.2”1 1 8”Side MountMinimum 2” surface heightMinimum 1 1 8” surface depthOnce side mount brackets are installed and properlypositioned, attach the mounting brackets using the nuts andbolts provided.2
SHADES WITH FASCIA OR NO HEAD RAILEnd PlugSideThe installation brackets are always mounted so that the innersurfaces face each other.End PlugSideControl SideControl SideT-HookBrackets must be in line and level. Shim brackets on insidemounts if necessary. The head rail must be level for the shadeto operate properly.T-HookFootINSIDE MOUNTA deduction has been made on your inside mount shadeto make sure that there is enough clearance to fit inside thewindow opening. In most cases the brackets will need to beplaced approximately 1 16” in from the window casing. Makesure that the brackets are placed so that the shade is securelyengaged with the tabs on the brackets. 16”1 16”1Inside MountMinimum 1 1 2” surfaceOUTSIDE MOUNTOutside mount brackets should be installed so that themeasurement from the outside of the left bracket to the outsideof the right bracket is the ordered shade width plus 3 16”1 1 2”Make sure the brackets are level and aligned.Attach each bracket using two screws.Outside MountMinimum 1 1 2” surfaceEXTENSION BRACKETS (OPTIONAL)Optional extension roller brackets are used to provideadditional clearance.Mount in the same manner as above.SIDE MOUNT/EXACT (OPTIONAL)Use this method only if shade was ordered as a side mount/exact.Side Mount3
STEP 2: SHADE INSTALLATIONSHADES WITH HEAD RAILCenter the shade in the window opening and push the head railinto the mounting brackets as shown.Push the rail back until itis fully engagedSHADES WITH FASCIA OR NO HEAD RAILOnce the brackets are secured and level, the fabric roll can beinserted. Make sure your hands are clean to avoid soiling thefabric.While facing the inside of the shade, be sure the clutch androller end plug are inserted into the roller. Hold the shade withthe bottom of the clutch facing the floor, and the beaded cordhanging straight down. Be sure the shade is fully rolled on thetube.Insert the foot of the control-side bracket into the slottedcenter hole of the clutch. Set the post of the end plug into theV of the support bracket. Rotate the T-hook on the supportbracket to lock in the post and secure the fabric roll.STEP 3: FASCIA INSTALLATION (IF ORDERED)Attach the fascia by first hooking the top lip of the fascia panelonto the bracket as shown.Swing the bottom of the fascia panel towards the bracket andgently press at the bottom of the panel until the lip on the fasciaengages and snaps lock to the bracket.4BracketV slotEnd PlugPostFig.15No head rail bracket pictured
CHILD SAFETY - INSTALL TENSION DEVICEWARNINGTo avoid entanglement and strangulation, keep cords out of reach of youngchildren. Move cribs and furniture away from shade cords.TENSION DEVICEThe tension device reduces the hazards of strangulation and entanglement of young children by limiting access to thecontrol cord.The cord tensioner must be installed to make the shade fully operable.Read the instructions in the mounting hardware packet prior to installing the tensioner.SAFETY LABELSIn compliance with WCMA/ANSI safety standards, the warning labels on the bottom rail are designed to be permanent.DO NOT remove the permanent warning label on the bottom rail. This assures that future owners of this product will beaware of potential dangers associated with this shade.OPERATIONPulling down on the back cord will lower the shade. Pulling down on the front cord will raise the shade.If shade was ordered as a reverse roll, the front cord will lower the shade and the back cord will raise the shade.SKEW ADJUSTMENT (IF NECESSARY)If the shade does not raise evenly, first make sure the mountingbrackets are mounted level with each other.If the shade is level and it still skews, operate the shade tothe full down position. Prepare a strip of masking tapeapproximately 5” long. On the side of the shade opposite ofthe skewing direction, and as close to the end of the roller aspossible, lift the fabric toward the back of the shade using yourfingers and slide the tape with the sticky side facing the rollerup as far as possible. The tape should be running parallel to theroller.Roll the shade up and check for skewing. If the shade is stillskewing, add another strip of tape on top of the first one. If theshade is now skewing in the opposite direction, tear off about1” of tape from the last strip installed. Tear the tape off the endclosest to the center of the shade.5Place tape at this end
HOLD DOWN BRACKETS (OPTIONAL)Optional hold down brackets are mounted with the suppliedscrews.With the shade at its proper drop, place the pin of each holddown into the hole in each end cap and mark the screw holes.Make sure the pins are level and aligned.Raise the shade, then screw the hold down bracket into themounting surface.SHADE REMOVALHEAD RAILPartially lower the shade and insert a flat head screwdriver asshown.Twist the screwdriver until the head rail disengages from thebracket.As you release the brackets, support the head rail to keep itfrom falling.FASCIA OR NO HEAD RAILRotate the T-hook on the support bracket. Lift the post up andoff the support bracket.CLEANING AND CAREThe shade fabric is easy to care for. Regular dusting with a feather duster or vacuum cleaner brush is recommended. Moststains can be blotted with a damp sponge and mild detergent. Before using anything stronger than mild detergent andlukewarm water, test an unobtrusive corner of the shade. If you have any questions, call your dealer for advice.6
Roller ShadesCORDLESSInstallation & Care Instructions152739B1/19/2018
GETTING STARTEDA few simple tools are required:- Measuring tape- Power drill, drill bits- 1 4” Hex head and/or Phillips driver bit- PencilAdditional fasteners other than those sent with your shade may be requireddepending on the mounting surface. Wallboard and plaster require the use ofanchors such as expansion or toggle bolts. Brick, tile or stone need special plugsand drill bits. Remember to always pre-drill holes in wood to avoid splitting.PN: CSR1001CPN: CS5402MountingBrackets forShades withHead RailPN: CS2000SpacerBlock(optional)MountingBrackets forShades withoutHead RailPN: CS1101HoldDown Bracket(optional)PN: 20201012PN: CS10001 1 4”Hex HeadBracketScrewHead RailExtensionand Side MountBracket (optional)PN: CSR3209x (sm)CSR3809x (lg)No Head RailBracket Covers(Outside mountor optional forinside mount)1PN: CSR1009PN: CSR1005WCSR1005BCSR1005BLKBottom RailHandleEnd CapLabel
STEP 1: BRACKET INSTALLATIONShades are shipped with the required number of brackets for proper installation.End brackets should be located approximately 2” from either end. Dependingon the width of the shade, additional brackets may be necessary, evenly spacedbetween the two end brackets.Using the installation bracket as a template, measure to the edge of the bracketand mark the hole locations with a pencil for drilling.Brackets must be in line and level. Shim brackets on inside mounts if necessary.The head rail must be level for the shade to operate properly.Shade Width # of BracketsUp to 40” 40” - 72” 72”- 84” 84” and up2345SHADES WITH HEAD RAILINSIDE MOUNTThe minimum mounting depth for aninside mount is 1”.A minimum of 3 3 4” is needed to fullyrecess the shade.1”Make sure the brackets are level andaligned.Inside MountShallow Mount - Minimum 1” surfaceFlush Mount - Minimum 3 3 4” surfaceAttach using two screws.OUTSIDE MOUNTThe minimum mounting height foroutside mounted shades is 1”.Make sure the brackets are level andaligned.1”Outside MountMinimum 1” surfaceAttach each bracket using two screws.2
SPACER BLOCKS(OPTIONAL)Each spacer block projects brackets 3 8”away from mounting surface.Make sure the brackets are level andaligned.Outside Mountwith Spacer BlocksAttach each bracket using two screws.Screws should be long enough to securethe bracket to the mounting surface.Additional 3 8” projectionEXTENSION BRACKETS(OPTIONAL)Optional extension brackets are used toproject the back of the shade up to 2 1 2”from the mounting surface.Attach the mounting bracket to theextension bracket with the nut and boltprovided.2”2 1 2”Outside Mountwith Extension BracketsMinimum 2” surfaceSIDE MOUNT (OPTIONAL)Measure from window sill up to desiredmounting position on each side of thewindow frame. Mark position.Mount side mount brackets on each sideof window frame as shown. Make surethe head rail will sit perfectly level.Once side mount brackets are installedand properly positioned, attach themounting brackets using the nuts andbolts provided.2”1 1 8”Side MountMinimum 2” surface heightMinimum 1 1 8” surface depth3
SHADES WITH NO HEAD RAILINSIDE MOUNTAttach brackets so that the plastic tab isfacing the window.1 1/4”tocenterlineof screwMake sure that the screw head is fullyrecessed inside the clear plastic part ofthe mounting bracket.2”1 1 2”Inside MountMinimum 1 1 2” surfaceOUTSIDE MOUNTAttach brackets as shown so that theplastic tab is facing up.3 8”minimumMake sure that the screw head is fullyrecessed inside the clear plastic part ofthe mounting bracket.Outside MountEXTENSION BRACKETS(OPTIONAL)Minimum 1 1 2” surfaceOptional extension roller brackets areused to provide additional clearance.Mount in the same manner as above.Extension BracketSIDE MOUNT/EXACT(OPTIONAL)Use this method only if shade wasordered as a side mount/exact.Side Mount4
STEP 2: SHADE INSTALLATIONSHADES WITH HEAD RAILCenter the shade in the windowopening and push the head rail into themounting brackets as shown.Push the rail back until itis fully engagedSHADES WITH NO HEAD RAILINSIDE MOUNT OR EXTENSION BRACKETHook the rail onto the front of the bracket and rotate it until the back of the railsecurely snaps into place.OUTSIDE/WALL MOUNTHook the rail onto the bottom of the bracket and rotate it until the back of therail securely snaps into place.OPERATIONTo lower the shade simply pull down on the bottom rail, stopping when you’vereached the desired level.To raise the shade, gently pull down on the bottom rail and release. The shadewill automatically retract.5
TENSION ADJUSTMENT (IF NECESSARY)If the shade does not retract fully, youmay need to increase the tension byusing a flat head screwdriver.On a STANDARD ROLL the adjustmentis made at the LEFT end of the shade.On a REVERSE ROLL the adjustment ismade at the RIGHT end of the shade.Increase Tension Decrease TensionUPSTOP ADJUSTMENT (IF NECESSARY)If the bottom rail grip will be used, skip tothe next section.Retract the shade and let it stop at thetop. If you do not like where the upstopis set it can be adjusted using a flat headscrewdriver.On a STANDARD ROLL the adjustment ismade at the RIGHT end of the shade. On aREVERSE ROLL the adjustment is made atthe LEFT end of the shade.Lower BottomRailBe sure the shade is fully raised beforemaking adjustments.Warning: When setting the upstop, DONOT allow the bottom rail to jamb betweenthe installation brackets. This will result indamage to the fabric.APPLY END CAP LABELWhen any necessary tension adjustmentsare complete, apply the included head raillabel over the hole in the end cap.6CorrectRaise BottomRailXIncorrect
BOTTOM RAIL HANDLE (OPTIONAL)Center the Handle on the bottom rail.Hook the top handle legs onto the bottomrail. Rotate the handle down and push untilthe bottom legs snap into place.SKEW ADJUSTMENT (IF NECESSARY)If the shade does not raise evenly, first make sure the mounting brackets aremounted level with each other.If the shade is level and it still skews, operate the shade to the full down position.Prepare a strip of masking tape approximately 5” long. On the side of the shadeopposite of the skewing direction, and as close to the end of the roller as possible,lift the fabric toward the back of the shade using your fingers and slide the tapewith the sticky side facing the roller up as far as possible. The tape should berunning parallel to the roller.Roll the shade up and check for skewing. If the shade is still skewing, addanother strip of tape on top of the first one. If the shade is now skewing in theopposite direction, tear off about 1” of tape from the last strip installed. Tear thetape off the end closest to the center of the shade.Place tape at this end7
HOLD DOWN BRACKETS (OPTIONAL)Optional hold down brackets are mountedwith the supplied screws.With the shade at its proper drop, place thepin of each hold down into the hole in eachend cap and mark the screw holes.Make sure the pins are level and aligned.Raise the shade, then screw the hold downbracket into the mounting surface.SHADE REMOVALHEAD RAILPartially lower the shade and insert a flathead screwdriver as shown.Twist the screwdriver until the head raildisengages from the bracket.As you release the brackets, support thehead rail to keep it from falling.NO HEAD RAILINSIDE MOUNTPartially lower the shade and use a flathead screwdriver to press the clear tabon the mounting bracket. Rotate theshade to remove.OUTSIDE/WALL MOUNTPress down on the clear tab and thenrotate shade to release.8
CLEANING AND CAREThe shade fabric is easy to care for. Regular dusting with a feather duster orvacuum cleaner brush is recommended. Most stains can be blotted with a dampsponge and mild detergent. Before using anything stronger than mild detergentand lukewarm water, test an unobtrusive corner of the shade. If you have anyquestions, call your dealer for advice.TROUBLESHOOTINGOVER-EXTENDED SHADE (STUCK IN THE DOWNPOSITION):If the shade is pulled down past the orderedlength to full extension of the fabric it maynot unlock. If this happens the roller needsto be turned by hand to unlock the releasedevice. Turn the roller a 1 4 turn in thedirection that lowers the shade. Then releaseto allow the shade to raise.9Standard RollReverse Roll
Roller ShadesPOWER TOUCHTM RECHARGEABLEInstallation & Care Instructions152733A7/9/2018
GETTING STARTEDA few simple tools are required:- Measuring tape- Power drill, drill bits- 1 4” Hex head and/or Phillips driver bit- #2 Phillips head screwdriver- PencilAdditional fasteners other than those sent with your shade may be requireddepending on the mounting surface. Wallboard and plaster require the use ofanchors such as expansion or toggle bolts. Brick, tile or stone need special plugsand drill bits. Remember to always pre-drill holes in wood to avoid splitting.PN: CS5402PN: CS5002(W or BLK)CS5008 (W or BLK)CS5529CS5530Depends on size ofshadePN: 20201012MountingBrackets forShades withouthead rail1 1 4” HexHeadBracketScrewMountingBracketPN: CS2000SpacerBlock(optional)PN: CS1000PN: CS1101Head rail Extensionand Side mountBracket(optional)HoldDownBracket(optional)PN: CS5199PN: CWV4024PN: CS5201PN:CS52071ChargerCable Tie(for NoHead RailShades)Cable TieMounting Base(for No HeadRail Shades)Wand HangerScrews1
STEP 1: BRACKET INSTALLATIONSHADES WITH HEAD RAILShades are shipped with the required number of brackets for proper installation.End brackets should be located approximately 3” from either end. Dependingon the width of the shade, additional brackets may be necessary, evenly spacedbetween the two end brackets.Using the installation bracket as a template, measure to the center of the bracketand mark the hole locations with a pencil for drilling.Brackets must be in line and level. Shim brackets on inside mounts if necessary.The head rail must be level for the shade to operate properly.Shade Width # of BracketsUp to 40” 40” - 72” 72”- 84” 84” -114”23453”3”INSIDE MOUNTThe minimum mounting depth for aninside mount is 1”.A minimum of 3 3 4” is needed to fullyrecess the shade.1”Make sure the brackets are level andaligned.Inside MountShallow Mount - Minimum 1” surfaceFlush Mount - Minimum 3 3 4” surfaceAttach using two screws.OUTSIDE MOUNTThe minimum mounting height foroutside mounted shades is 1”.Make sure the brackets are level andaligned.1”Attach using two screws.Outside Mount2Minimum 1” surface
SPACER BLOCKS (OPTIONAL)Each spacer block projects brackets 3 8” away from mounting surface.Make sure the brackets are level and aligned.Attach using two screws. Screws should be long enough to secure the bracket tothe mounting surface.Outside Mount with Spacer BlocksEXTENSION BRACKETS (OPTIONAL)Optional extension brackets are used to project the back of the shade up to 2 1 2”from the mounting surface.Attach the mounting bracket to the extension bracket with the nut and boltprovided.2”2 1 2”Outside Mount with Extension BracketsMinimum 2” surfaceSIDE MOUNT (OPTIONAL)Measure from window sill up to desiredmounting position on each side of thewindow frame. Mark position.Mount side mount brackets on each sideof window frame as shown. Make sure toconfirm the head rail will sit perfectly level.Once side mount brackets are installed andproperly positioned, attach the mountingbrackets using the nuts and bolts provided.32”Side MountMinimum 2” surface
SHADES WITH NO HEAD RAILThe installation brackets are always mounted so that the inner surfaces face eachother.Brackets must be in line and level. Shim brackets on inside mounts if necessary.The head rail must be level for the shade to operate properly.Idler Side Bracket Motor Side bracketT-HookFoot1 1 2”1 1 2”Inside MountOutside MountMinimum 1 1 2” surfaceMinimum 1 1 2” surfaceSTEP 2: CONNECT WANDSHADES WITH HEAD RAILPlug the control wire into the wand wire . The plugs will only fit together oneway. The wires are bundled at the back of the head rail.SHADES WITH NO HEAD RAILWhile holding wires in the channel of thewand holder, attach the wand holder to theend of the motor with the screws provided,using a #2 phillips head screwdriver. Be surethat the wires are not twisted or pinched.Plug the wand wires into the motor wires.4wires
STEP 3: SHADE INSTALLATIONSHADES WITH HEAD RAILCenter the shade in the window opening and push the head rail into themounting brackets as shown.Push the rail back until itis fully engagedSHADES WITH NO HEAD RAILInsert the foot of the motor-side bracketinto the slotted center hole of the motorend of the fabric roll.Set the post of the idler end into theV of the support bracket. Rotate theT-hook on the support bracket to lockin the post and secure the fabric roll.SupportBracketNubV slotIdler PostBundle excess wire and secure with thecable tie mounting base and cable ties.Fig.15STEP 4: WIRE MANAGEMENTRemove the release liner from themounting base and attach it to thewindow casing (for inside mount) orwall (for outside mount), in a positionthat will be hidden from view.Cable TiePull the wires toward the back of theshade.Bundle the excess wire and secure it tothe mounting base with the includedcable tie.5Mounting Base
OPERATIONPress the DOWN or UP button to lower or raisethe shade. Press the STOP/FAVORITE to stop theshade at the desired position.To fully raise or lower the shade, simply press theUP or DOWN button and then release. The shadewill automatically stop when it reaches the upperor lower limit. (See below if the upper or lowerlimits are not set at the desired positions)UpStop/FavoriteDownNote: Upper and lower limits stops are set at thefactory. An intermediate, or “favorite” positionis not set at the factory. See page 7 for moreinformation.ADJUST MOTOR LIMITS (IF DESIRED)The upper and lower limits have been set at the factory. If you need to makeadjustments to the limits, follow the instructions below.Press the SETTING button on the back of the wand and hold it in until themotor stops beeping. This will clear both the upper and lower factory limits aswell as a favorite if one was set.Set Upper Limit - Press the UP button to get the shade close to the desired upperlimit and then press the STOP button to stop the shade. Tap the UP or DOWNbutton to move the shade to the desired position. To save the location, press theSETTING button until the motor beeps.Set Lower Limit - Press the DOWN button to get the shade close to the desiredlower limit and then press the STOP button to stop the shade. Tap the UP orDOWN button to move the shade to the desired position. To save the location,press the SETTING button until the motor beeps.UpStop/FavoriteDownSettingButton6
FAVORITE POSITIONSETTING AND USING A FAVORITEPOSITIONUse the UP or DOWN buttons to position theshade at the desired “favorite” position. Firstpress and hold the SETTING button on theback of the wand. While holding the SETTINGbutton press and hold the UP button. Releaseboth buttons when the shade beeps.With the shade at either the upper or lowerlimit, simply press the STOP/FAVORITEbutton to bring the shade to the “favorite”position. To go to the “favorite” position fromany other location, make sure the shade hasbeen stopped for at least three seconds beforepressing the STOP/FAVORITE button.SettingButtonCHANGING A FAVORITEPOSITIONUse the UP or DOWN buttons to position theshade at the new desired “favorite” position.First press and hold the SETTING button on theback of the wand. While holding the SETTINGbutton press and hold the UP button. Releaseboth buttons when the shade beeps.This establishes a new “favorite” position anderases the old.7UpStop/FavoriteDown
SKEW ADJUSTMENT (IF NECESSARY)If the shade does not raise evenly, first make sure the mounting brackets aremounted level with each other.If the shade is level and it still skews, roll the shade all the way down. Prepare astrip of masking tape approximately 5” long.On the side of the shade opposite of the skewing direction, and as close to theend of the roller as possible, apply the tape with the sticky side facing the fabric.The tape should be placed on the back of the roller, out of sight.Roll the shade up and check for skewing. If the shade is still skewing, addanother strip of tape on top of the first one. If the shade is now skewing in theopposite direction, tear off about 1” of tape from the last strip installed.Place tape at this endHOLD DOWN BRACKETS (OPTIONAL)Optional hold down brackets are mounted withthe supplied screws.With the shade at its proper drop, place the pinin each end cap and mark the screw holes.Make sure the pins are level and aligned.Raise the shade, then screw the hold downbracket into the mounting surface.Flex the hold downs out to reinsert the bottomrail.8
CHARGING THE MOTOR BATTERYWhen the shade begins to operate slower thannormal, or only beeps when you attempt tooperate, it is time to charge the battery.Plug the 8.4v charger into the port on thewand.Plug the charger into an electrical outlet.ChargingPortA red light on the charger indicates that thebattery is charging.Allow the batteries to charge until the light onthe charger turns green. A typical charge cyclecan take between 4-6 hours.Do not leave the charger plugged in for morethan 24 hours. This could prematurely age thebattery.SHADE REMOVALIf you need to remove your shade, followthe instructions below.Partially lower the shade and insert a flathead screwdriver as shown.Twist the screwdriver until the head raildisengages from the bracket.As you release the brackets, support thehead rail to keep it from falling.For no-head rail simple reverse theinstallation process.CLEANING AND CAREThe Shade fabric is easy to care for. Regular dusting with a feather duster orvacuum cleaner brush is recommended. Most stains can be blotted with a dampsponge and mild detergent. Before using anything stronger than mild detergentand lukewarm water, test an unobtrusive corner of the shade. If you have anyquestions, call your dealer for advice.9
TROUBLE SHOOTINGPROBLEMThe motor does not work or runsslowlyThe shade moves the oppositedirection of the control buttons.SOLUTIONRecharge battery.Press and hold the SETTING button,then press and hold the STOP button.Hold both until the motor jogs(approx. 10 seconds).10
Roller ShadesMOTORIZED SHADESimplicity with rechargeable motorInstallation & Care Instructions152709O5/3/2022
GETTING STARTEDIMPORTANT: The remote control has not been linked to the shades. Installall shades prior to linking the remote. The lower and upper limits have been setat the factory.A few simple tools are required:- Measuring tape- Power drill, drill bits- 1 4” Hex head and/or Phillips driver bit- PencilAdditional fasteners other than those sent with your shade may be requireddepending on the mounting surface. Wallboard and plaster require the use ofanchors such as expansion or toggle bolts. Brick, tile or stone need special plugsand drill bits. Remember to always pre-drill holes in wood to avoid splitting.PN: CKIT007(W or BLK)CKIT008(W or BLK)CKIT042CKIT043Depends on size of shadeMounting Bracketsfor Shades withouthead railPN: CKIT013Q2PN: CKIT013Q3PN: KIT2011PN: KIT2012Mounting Brackets forShades with Head Rail- 2 packMounting Brackets forShades with Head Rail- 3 packSpacerBlock (optional)- 2 packSpacerBlock (optional)- 3 packPN: CKIT002PN: CKIT028PN: KIT2013PN: KIT2014PN: CKIT037Tie Wrap Kit (noheadrail shades only)HoldDown Bracket(optional)Head RailExtension andSide MountBracket - 2 packHead RailExtension andSide MountBracket- 3 packCharger1
STEP 1: BRACKET INSTALLATIONImportant: If a solar recharge unit is being installed, read the solar panelbooklet prior to installing mounting brackets.SHADES WITH HEAD RAILShades are shipped with the required number of brackets for proper installation.End brackets should be located approximately 3” from either end. Dependingon the width of the shade, additional brackets may be necessary, evenly spacedbetween the two end brackets.Using the installation bracket as a template, measure to the edge of the bracketand mark the hole locations with a pencil for drilling.Brackets must be in line and level. Shim brackets on inside mounts if necessary.The head rail must be level for the shade to operate properly.Shade Width # of BracketsUp to 40” 40” - 72” 72”- 84” 84” and up23453”3”INSIDE MOUNTThe minimum mounting depth for an insidemount is 1”.A minimum of 3 3 4” is needed to fully recess theshade.Make sure the brackets are level and aligned.Attach using two screws.21”Inside MountShallow Mount - Minimum 1” surfaceFlush Mount - Minimum 3 3 4” surface
OUTSIDE MOUNTThe minimum mounting height for outsidemounted shades is 1”.1”Make sure the brackets are level and aligned.Outside MountAttach using two screws.Minimum 1” surfaceSPACER BLOCKS (OPTIONAL)Each spacer block projects brackets 3 8” away frommounting surface.Make sure the brackets are level and aligned.Attach using two screws. Screws should be longenough to secure the bracket to the mountingsurface.Outside Mount with SpacerBlocksEXTENSION BRACKETS (OPTIONAL)Optional extension brackets are used toproject the back of the shade up to 2 1 2”from the mounting surface.Attach the mounting bracket to theextension bracket with the nut and boltprovided.1 3/8”2 1 2”Outside Mount with Extension BracketsMinimum 1 3/8” surfaceSIDE MOUNT (OPTIONAL)Measure from window sill up to desiredmounting position on each side of thewindow frame. Mark position.1 3/8”Mount side mount brackets on each sideof win
the skewing direction, and as close to the end of the roller as possible, lift the fabric toward the back of the shade using your fingers and slide the tape with the sticky side facing the roller up as far as possible. The tape should be running parallel to the roller. Roll the shade up and check for skewing. If the shade is still


