Transcription
Operating Instructions and Parts Manual“J” Series Pallet TrucksFor models with serial no. 11XX0001 and higher.WALTER MEIER (Manufacturing) Inc.427 New Sanford RoadLaVergne, Tennessee 37086Ph.: 800-274-6848www.waltermeier.comPart No. M-140080Revision D 05/2011Copyright 2011 Walter Meier (Manufacturing) Inc.
Warranty and ServiceWalter Meier (Manufacturing) Inc., warrants every product it sells. If one of our tools needs service or repair, one ofour Authorized Service Centers located throughout the United States can give you quick service. In most cases, anyof these Walter Meier Authorized Service Centers can authorize warranty repair, assist you in obtaining parts, orperform routine maintenance and major repair on your JET tools. For the name of an Authorized Service Center inyour area call 1-800-274-6848.MORE INFORMATIONWalter Meier is consistently adding new products to the line. For complete, up-to-date product information, checkwith your local Walter Meier distributor, or visit waltermeier.com.WARRANTYJET products carry a limited warranty which varies in duration based upon the product (MW Metalworking, WW Woodworking).WHAT IS COVERED?This warranty covers any defects in workmanship or materials subject to the exceptions stated below. Cutting tools,abrasives and other consumables are excluded from warranty coverage.WHO IS COVERED?This warranty covers only the initial purchaser of the product.WHAT IS THE PERIOD OF COVERAGE?The general JET warranty lasts for the time period specified in the product literature of each product.WHAT IS NOT COVERED?Five Year Warranties do not cover woodworking (WW) products used for commercial, industrial or educationalpurposes. Woodworking products with Five Year Warranties that are used for commercial, industrial or educationpurposes revert to a One Year Warranty. This warranty does not cover defects due directly or indirectly to misuse,abuse, negligence or accidents, normal wear-and-tear, improper repair or alterations, or lack of maintenance.HOW TO GET SERVICEThe product or part must be returned for examination, postage prepaid, to a location designated by us. For thename of the location nearest you, please call 1-800-274-6848.You must provide proof of initial purchase date and an explanation of the complaint must accompany themerchandise. If our inspection discloses a defect, we will repair or replace the product, or refund the purchase price,at our option. We will return the repaired product or replacement at our expense unless it is determined by us thatthere is no defect, or that the defect resulted from causes not within the scope of our warranty in which case we will,at your direction, dispose of or return the product. In the event you choose to have the product returned, you will beresponsible for the shipping and handling costs of the return.HOW STATE LAW APPLIESThis warranty gives you specific legal rights; you may also have other rights which vary from state to state.LIMITATIONS ON THIS WARRANTYWALTER MEIER (MANUFACTURING) INC., LIMITS ALL IMPLIED WARRANTIES TO THE PERIOD OF THELIMITED WARRANTY FOR EACH PRODUCT. EXCEPT AS STATED HEREIN, ANY IMPLIED WARRANTIES ORMERCHANTABILITY AND FITNESS ARE EXCLUDED. SOME STATES DO NOT ALLOW LIMITATIONS ON HOWLONG THE IMPLIED WARRANTY LASTS, SO THE ABOVE LIMITATION MAY NOT APPLY TO YOU.WALTER MEIER SHALL IN NO EVENT BE LIABLE FOR DEATH, INJURIES TO PERSONS OR PROPERTY, ORFOR INCIDENTAL, CONTINGENT, SPECIAL, OR CONSEQUENTIAL DAMAGES ARISING FROM THE USE OFOUR PRODUCTS. SOME STATES DO NOT ALLOW THE EXCLUSION OR LIMITATION OF INCIDENTAL ORCONSEQUENTIAL DAMAGES, SO THE ABOVE LIMITATION OR EXCLUSION MAY NOT APPLY TO YOU.Walter Meier sells through distributors only. The specifications in Walter Meier catalogs are given as generalinformation and are not binding. Members of Walter Meier reserve the right to effect at any time, without priornotice, those alterations to parts, fittings, and accessory equipment which they may deem necessary for any reasonwhatsoever. JET branded products are not sold in Canada by Walter Meier.2
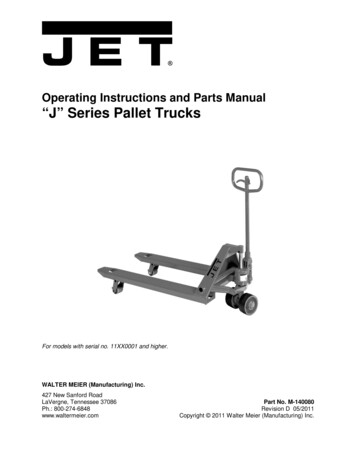
Read and understand the entire owner’s manual before using the pallet truck. Do not place hands or feet under the pallet truck at any time. Do not operate a loaded pallet truck on ramps, or inclines. Do not tip load pallet truck forks. This may cause damage to the forks and personal injury if therear of the pallet truck suddenly "pops up". Never leave a loaded pallet truck unattended in the raised position. Always lower load to the floor. Do not load pallet truck beyond its rated capacity 5,000 lbs. Secure load before transporting. To prevent accidental tipping, make sure load is centered on the forks. Do not move a loaded pallet truck by other than manual force. Failure to comply with these warnings may result in personal injury and/or property damage.IntroductionCongratulations on your purchase of a JET Pallet Truck.To better understand the proper use and safe operation of this pallet truck, please take a few minutes tocarefully read and follow the instructions contained in this manual. When finished reading andunderstanding the manual, please file in a safe and convenient location for the life of the pallet truck.This pallet truck is designed to push and pull palletized material loads up to 5,000 pounds only.You will notice several important features about your JET Pallet Truck. One, its 2-1/2” lowered heightand tapered fork tips allow easy entry into pallets. The PT-3348J four-way pallet truck features a 2”lowered height.The heavy-gauge steel frame is reinforced with cross-welded steel plates to prevent forks from bendingand solid steel push rods are used for added strength. The pump features top-of-the-stroke and overloadby-pass valve systems. A durable powder coat finish provides long lasting steel protection.Extra wide polyurethane covered steel steer wheels and nylon load wheels feature lifetime lubricated,double sealed bearings to provide smooth, quiet rolling and added stability.Record Your Purchase Information HerePurchased from:Date:Model Number:Stock Number:Serial Number:Date in Service:3
Table of ContentsWarranty . 2Warnings. 3Introduction . 3Purchase Information . 3Table of Contents . 4Specifications . 4Assembly . 5-6Pallet Truck Operation. 6-7Up-Down Cam Adjustment . 7Bleed the Pump. 7Lubrication . 7Seal and O-Ring Replacement . 8Troubleshooting. 9Parts Breakdown & Parts List . 10-13Test Certificate . 15SpecificationsModel #Stock #W1W2L1L2H1H2A (dxw)B (dxw)CNet 35PT-2036J14008520 ”2-1/2”x3-3/4”45-1/8”150PT-2042J14008420 ”2-1/2”x3-3/4”45-1/8”161PT-2048J14008320 The above specifications were current at the time this manual was published, but because of our policyof continuous improvement, Walter Meier (Manufacturing) Inc, reserves the right to changespecifications at any time and without prior notice, without incurring obligations.4
AssemblyNote: Individual trucks are assembled andready to use. Pallet trucks purchased in cratequantities (6 units to a crate) require someassembly. Match the “number” label on thehandle to the “number” label on the frame, priorto assembly.Tools Needed for Assembly Hammer Flat Head Screwdriver Pliers or 17mm Wrench1. Insert the base of the handle (A, Fig. 1) intothe pump bracket (B, Fig. 1).2. Align the holes (C, Fig. 1) at the base of thehandle with the holes in the pump bracket.3. Using a screwdriver, pry the cam (D, Fig. 1)up and slip the bolt head under the notch inthe cam. Do not adjust the nut.Fig 14. Insert handle pins (E, Fig. 2) into the holesof the pump bracket and handle. Align thespring pin holes (F, Fig. 2) in the handle pinand the pump bracket.5. Tap the handle pins into place with ahammer.Fig 25
Using a hammer, tap the spring pins (A, Fig. 3)into the pump bracket and handle pins.Note: If the holes aren’t lined up use a17mm wrench or pliers to turn the handlepin until the spring pin holes line up.6. Repeat for the opposite side handle pin.7. Pull the handle down and remove theretaining tube (B, Fig. 3) by pulling straightout. Discard retaining tube.Note: If the pallet truck does not raise or lowerproperly, you may have air bubbles in the pumpfrom shipping. Refer to “Bleed the Pump” onpage 7.Fig 3Pallet Truck OperationTo raise the forks, place handle in the UPposition (bottom part of the handle slot), seeFig. 4.To lower forks, pull lever handle to DOWNposition (upper part of the slot).To freely move the handle, set the lever inNeutral (center notch of slot).To Lift a Load1. Lower forks to lowest position, Figure 4.2. Insert forks under load, or into pallet.3. Place lever in UP position (bottom part ofslot), Figure 4.4. Move handle up, and down until forks reachdesired height.To Move a Load1. Place lever in NEUTRAL position (centernotch of slot), Figure 4.2. Pull or push pallet truck to desired location.6
To Lower a Load1. Pull lever to the DOWN position (upper partof slot), Figure 5.2. Pull forks away from load.Up-Down Cam Adjustment1. Set the lever in the NEUTRAL position,Figure 5.2. Turn the cam nut while pumping the handle,Figure 6.3. When lifting stops, give the nut one moreturn.4. The cam nut is properly adjusted whenpumping the handle in the NEUTRALposition causes no movement of thehydraulic ram.Cleaning the Release Valve (Bleed thePump)Over time, the hydraulic pump assembly maybecome clogged with debris, air bubbles, andnot function properly.To clean the release valve and bleed the pump:1. Pump handle quickly, raising pallet truck tofull extent.While continuing pumpingaction, pull lever to down position.2. When forks reach total down position, valveis flushed. Repeat if necessary.LubricationCheck the oil level annually by removing the oilplug found on the top of the pump housing.When changing or adding oil, fill the tankthrough the oil plug screw hole to 80% capacitywith hydraulic jack oil, about 2” deep in pumphousing, see Figure 7. Do not use any othertype of oil.There is one grease fitting (#55B in thebreakdown) located on the table. Lubricate thispoint on a semi-annual basis.Wheel bearings are sealed and require nolubrication.Crank Shaft features oil lightbushings that also require no lubrication.Lightly oil all moving parts.7
Seal and O-Ring Replacement for Pistonand Plunger Piston1. Raise the pallet truck by pumping handle.2. Remove the bolts #70. This will free thepump and handle assembly from the pallettruck.3. Empty the oil into a suitable container.Pump handle until all oil has drained.Dispose of used hydraulic oil, or fluidaccording to local disposal regulations.4. Pull out piston plunger #33, and/or rampiston #25.5. Remove all o-rings and seals, see Figure 8.6. Insert new o-ring or seal one at a timemaking sure to replace with the same sizethat was removed.7. Reassemble and fill the oil tank through theoil plug screw hole to 80% capacity with newhydraulic jack oil, about 2” deep in pumphousing, see Figure 7.8
TroubleshootingConditionProbable CausesCorrective Action1. Make sure there is no oilleakage from Release Plug#36 or Pressure AdjustmentScrew #27, and add oil.1. Oil low in tank.Hydraulic unit does not lift.2. Air in pump.3. Worn O-ring in ram cylinder.2. Place the lever in the downposition and pump thehandle repeatedly.3. Consult authorized repairstation.1. See “Cleaning the ReleaseValve” page 7.Once lifted, truck lowers by itself.1. Steel ball not seated inhydraulic unit.2. Consult authorized repairstation.2. Worn O-ring in ram cylinder.3. See “Cleaning the ReleaseValve” page 7.3. Release valve not seatedproperly.4. Release valve not adjustedproperly.5. Oil leakage from ReleasePlug #36 or PressureAdjustment Screw #27.2. Up-down cam nut #15 out ofadjustment.3. Brokenlinkage.Lever does not set at NEUTRALposition.forkrodsand1. Up-down cam nut out ofadjustment.95. Tighten Release Plug #36.Replace O-rings on ReleasePlug #36 and/or PressureAdjustment Screw #27.Consult authorized repairstation.1. Replace cam #53.1. Cam #53 broken.Fork does not lower.4. Reload truck within loadcapacity, and adjust valveby Pressure AdjustmentScrew #27.2. Refer to “Adjusting Up-DownCam” page 7.3. Consult authorized repairstation, or replace brokenparts.1. Refer to “AdjustingDown Cam” page 7.Up-
Parts Breakdown for the “J” Series Pallet Trucks10
Parts List for the “J” Series Pallet TrucksIndex PartNo.No.DescriptionSizeQty.1. PT2748A-001.Handle. 12. PT2748A-002.Handle Cap . 13. PT2748A-003.Lever . 14. PT2748A-004.Spring Pin .5x16mm . 15. PT2748A-005.Bolt .M8x20 . 16. PT2748A-006.Oil Lite Bushing . 27. PT2748A-007.Spring Pin .3x28mm . 18. PT2748A-008.Oil Lite Bushing . 19. PT2748A-009.Roller . 110 . PT2748A-010.Roller Pin . 111 . PT2748A-011.Release Rod. 112 . PT2748A-012.Chain Joint . 213 . PT2748A-013.Chain . 114 . PT2748A-014.Anchor Bolt . 115 . PT2748A-015.V-Nut .M8. 116 . PT2748J-101A .Dust Seal * . 117 . PT2748J-101A .O-Ring * .29.8x3.5mm . 118 . PT2748J-101A .U-Packing * .30x38x6mm . 119 . PT2748J-101A .O-Ring * .4.8x1.9mm . 220 . PT2748J-101A .Dust Seal * . 121 . PT2748J-101A .U-Packing * .18x26x5 . 123 . PT2748J-101A .O-Ring * .6x1.9mm . 124 . SB-14MM.Steel Ball .14mm . 125 . PT2748J-025 .Ram Piston (all models except PT-3348J) . 1. PT3348J-025 .Ram Piston (PT-3348J Only) . 126 . PT2748A-026.Oil Plug . 127 . PT2748A-027.Pressure Adjust Screw. 128 . PT2748J-101A .O-Ring * .11.6x2.4mm . 129 . PT2748A-029.Release Screw . 130 . PT2748A-030.Spring .10x2.3x27mm . 130A . PT2748A-30A .Valve. 131 . SB-6MM .Steel Ball .6mm . 132 . PT2748A-032.E-Ring .15mm . 133 . PT2748L-033 .Plunger Piston . 134 . PT2748A-034.Spring Cap . 135 . PT2748A-035A .Spring .38x5x121mm . 136 . PT2748A-036.Release Plug . 137 . PT2748A-037.Washer .20mm . 138 . PT2748A-038.Spring .8x1.5x12.8mm . 138A . PT2748A-038A .Spring .4.8x0.7x15mm . 139 . PT2748A-039.Valve Housing . 140 . SB-6MM .Steel Ball .6mm . 240A . SB-9MM .Steel Ball .9mm . 141 . PT2748A-041.Spring Pin .3x28mm . 242 . PT2748A-042.Spring Pin .8x25mm . 143 . PT2748A-043.Snap Ring .44mm . 144 . PT2748A-044.Spring Pin .8x45mm . 146 . PT2748A-046.Wheel Shaft (all models except PT-1636J) . 1. PT1636J-046 .Wheel Shaft (PT-1636J Only). 147 . PT2748J-109 .Pump Housing Assembly (all models except PT-1636J & PT-3348J) . 1. PT1636J-109 .Pump Housing Assembly (PT-1636J Only) . 1. PT3348J-109 .Pump Housing Assembly (PT-3348J Only) . 111
Index PartNo.No.DescriptionSizeQty.48 . PT2748A-048. Handle Pin. 249 . PT2748A-049. Bearing Base . 150 . BB-51109. Ball Bearing .51109 . 151 . PT2748A-051. Spring.6.3x1.2x25mm . 152 . PT2748A-052. Release Nozzle . 153 . PT2748A-053. Cam . 154 . PT1636J-054 . Spring Pin .6x30mm . 255 . PT2748A-055. Table (all models except PT-1636J & PT-3348J) . 1. PT1636J-055 . Table (PT-1636J Only) . 1. PT3348J-055 . Table (PT-3348J Only) . 155B . PT2748A-055B . Grease Fitting. 160 . PT2748L-103 . Steer Wheel Assembly W/Bearings . 260A . BB-6205VV . Steer Wheel Ball Bearing .6205VV . 260B . BB-6304VV . Steer Wheel Ball Bearing .6304VV . 261 . PT2748A-061. Cap . 262 . TS-1550071 . Washer.10mm . 263 . TS-0720091 . Lock Washer .10mm . 264 . TS-1491021 . Bolt.M10x20 . 265 . TS-1551031 . Lock Washer .5mm . 666 . TS-1481041 . Bolt.M5x16 . 667 . . Fork Frame (N/A) . 168 . TS-1550061 . Washer.8mm . 269 . TS-1551061 . Lock Washer .8mm . 270 . TS-1504031 . Socket Head Cap Screw .M8x14 . 271 . PT2748A-071. Crank Shaft (PT-2736J / PT-2742J / PT-2748J). 1. PT2048A-071. Crank Shaft (PT-2036J / PT-2042J / PT-2048J). 1. PT1636J-071 . Crank Shaft (PT-1636J Only). 1. PT3348J-071 . Crank Shaft (PT-3348J Only). 173 . PT2748J-073 . Oil Lite Bushing . 274 . PT2748A-074. Table Pin . 275 . PT2748A-075. Oil Lite Bushing . 276 . PT2748J-076 . Lifting Yoke (PT-2736J / PT-2742J / PT-2748J). 1. PT2048J-076 . Lifting Yoke (PT-2036J / PT-2042J / PT-2048J). 1. PT1636J-076 . Lifting Yoke (PT-1636J Only). 1. PT3348J-076 . Lifting Yoke (PT-3348J Only). 177 . PT2748J-077 . Spring Pin (all models except PT-3348J) .6x35mm . 1. PT3348J-077 . Spring Pin (PT-3348J Only) .6x30mm . 178 . PT2748J-078A . Arm Pin (all models except PT-3348J) .16x96mm . 2. PT3348J-078 . Arm Pin (PT-3348J Only) . 279 . PT2748J-079 . Spring Pin .5x25mm . 280 . PT2748J-080BN . Black Nylon Load Wheel W/Bearings (all models except PT-3348J) . 2. PT3348J-080ZS . Steel Load Wheel W/Bearings (PT-3348J Only) . 280A . BB-6004VV . Load Wheel Bearing (all models except PT-3348J). 6004 . 4. BB-6203LS . Load Wheel Bearing (PT-3348J Only) .6203 . 481 . PT2748J-081 . Spring Pin .5x30mm . 281A . PT2748J-081A . Snap-Ring (all models except PT-3348J) .20mm . 4. PT3348J-081A . Snap Ring (PT-3348J Only) .17mm . 482 . PT2748J-082 . Load Wheel Axle (all models except PT-3348J) . 2. PT3348J-082 . Load Wheel Axle (PT-3348J Only) . 283 . PT2748J-083 . Arm (all models except PT-3348J) . 2. PT3348J-083 . Arm (PT-3348J Only). 212
Index PartNo.No.DescriptionSizeQty.85 . PT2748J-085 . Oil Lite Bushing (all models except PT-3348J) . 4. PT3348J-085 . Oil Lite Bushing (PT-3348J Only) . 486 . PT2748J-086A . Rod Pin (all models except PT-3348J) .16x145mm . 2. PT3348J-086 . Rod Pin (PT-3348J Only). 287 . PT2748J-087 . Oil Lite Bushing (all models except PT-3348J) . 4. PT3348J-087 . Oil Lite Bushing (PT-3348J Only) . 488 . PT2736J-088 . Rod (PT-1636J / PT-2036J / 2736J) . 2. PT2742J-088 . Rod (PT-2042J / PT-2742J) . 2. PT2748J-088 . Rod (PT-2048J / PT-2748J) . 2. PT3348J-088 . Rod
Never leave a loaded pallet truck unattended in the raised position. Always lower load to the floor. Do not load pallet truck beyond its rated capacity 5,000 lbs. Secure load before transporting. To prevent accidental tipping, make sure load is centered on the forks. Do not move a loaded pallet truck by other than manual force.