Transcription
D2L Brightspace – Daylight ExperienceQuiz Question Types
Copyright 2019 KSU Division of University Information Technology ServicesThis document may be downloaded, printed, or copied for educational use without further permissionof the University Information Technology Services Division (UITS), provided the content is not modifiedand this statement is not removed. Any use not stated above requires the written consent of the UITSDivision. The distribution of a copy of this document via the Internet or other electronic mediumwithout the written permission of the KSU - UITS Division is expressly prohibited.Published by Kennesaw State University – UITS 2019The publisher makes no warranties as to the accuracy of the material contained in this document andtherefore is not responsible for any damages or liabilities incurred from UITS use.D2L Brightspace is a trademark of Desire2Learn Incorporated.
University Information Technology ServicesD2L Brightspace – Daylight ExperienceQuiz Question TypesTable of ContentsIntroduction . 4Learning Objectives. 4Creating Quiz Question Content . 5Creating True or False Questions . 7Creating Multiple Choice Questions . 10Creating Multi-Select Questions . 15Creating Written Response Questions. 19Creating Short Answer Questions . 20Creating Multi-Short Answer Questions . 24Creating Fill in the Blanks Questions . 28Creating Matching Questions . 32Creating Ordering Questions . 37Creating Arithmetic Questions . 40Creating Significant Figures Questions . 45Additional Help . 49
IntroductionD2L Brightspace - Daylight Experience is an excellent tool for instructors. This document has beendeveloped to review the quiz question types available to you in the Quizzes Tool. The following willhelp you gain a greater understanding of D2L Brightspace - Daylight Experience, as it relates to creatingvarious types of questions in your quizzes.Learning ObjectivesAfter completing the instructions in this booklet, you will be able to: Identify the various question types available. Understand question views and configuration. Create various types of questions. Manage questions in the quiz and question library.Revised: 10/22/2019Page 4 of 49
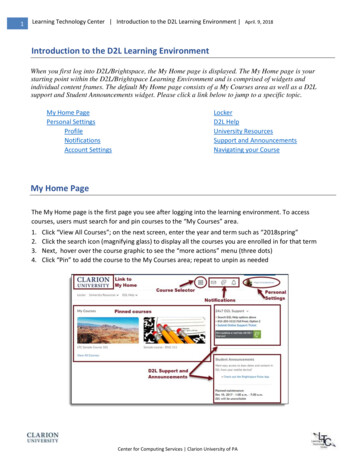
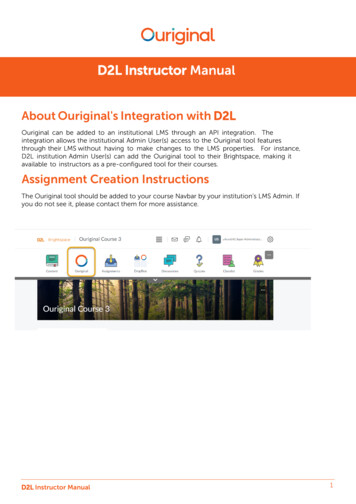
Creating Quiz Question ContentD2L possesses a variety of question types to add to your quizzes. You may also create sections toorganize your quiz questions and create question pools to build randomized sections. Following is a listof the types of questions available for configuration and use: True or FalseMultiple ChoiceMulti-SelectWritten ResponseShort AnswerMulti-Short AnswerFill in the BlanksMatchingOrderingArithmeticSignificant FiguresWith virtually any question type, the question field is a text field containing a formatting toolbarabove it to provide tools to format the text entered, insert photos and other objects such asequations, files, and links, as well as a tool to open the text in the Full Screen Editor to accessadditional formatting options. To begin creating any question type, use the following steps:1. Click Quizzes on the Navbar.Figure 1 – Quizzes2. The Manage Quizzes window appears. Click the Quiz to which you want to add a question(e.g., Chapter 1 Quiz).Figure 2 - Open QuizNote: You may also edit the quiz by clicking the drop-down arrow to the right of the quiz name andselecting Edit.Page 5 of 49
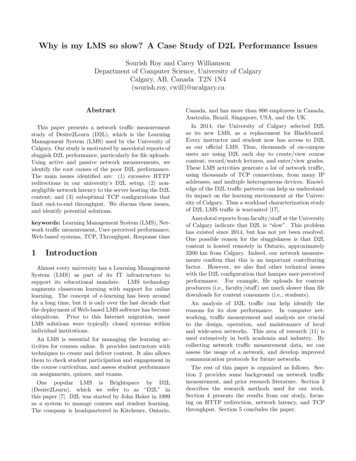
3. The Edit Quiz window appears. Under Quiz Questions, click the Add/Edit Questions button.Figure 3 - Add/Edit Questions4. Click Add (See Figure 4).5. A drop-down menu will appear to allow you to select from adding a new question, section, orquestion pool. Click New Question (See Figure 4).Figure 4 – Add and click New Question6. In the drop-down menu, click the type of question you want to create.Figure 5 – Select Question TypePage 6 of 49
Creating True or False QuestionsTrue or false questions present a statement that is either correct or incorrect. The following explainshow to configure a true or false question:1. After selecting True or False as the question type, the True or False configuration window willopen. Click in the Question Text section to enter your question.Figure 6 - Question Text2. A toolbar appears above the text field to provide tools to format the text entered, insert photosand other objects such as equations, files, and links, as well as a tool to open the text in the FullScreen Editor to access additional formatting options.Figure 7 - Text Formatting Toolbar3. To use the full screen editor, click the Open in Full Screen Editor button in the toolbar.Figure 8 - Click the Open in Full Screen ButtonPage 7 of 49
4. The Full Screen Editor window opens to provide access to format text size, appearance, andalignment; insert photos, links, equations, tables, and more (See Figure 9).5. Click the Close Full Screen Editor button when all formatting is complete (See Figure 9).Figure 9 - Full Screen Editor6. In the Answers section, indicate the correct answer for the true/false question by clicking thecheckbox associated with it (See Figure 10).7. Under Answers, enter a point value for the correct answer (See Figure 10).8. A preview of your question is displayed to the right of the screen (See Figure 10).Figure 10 - Question PreviewPage 8 of 49
9. To add question feedback, hints, descriptions, and/or enumeration, click the Options buttonabove the question (See Figure 11).10. Make a selection in the drop-down menu (See Figure 11).a. Add Feedback: Inserts a text field below answers to enter your feedback (See Figure 11).b. Add Hint: Inserts a single text field below the question to provide a hint (See Figure 11).c. Add Short Description: Inserts a description field above the question (See Figure 11).d. Add Enumeration: Enables a drop-down menu above the point value field to allow you toselect the enumeration style (See Figure 11).Figure 11 - Question Options11. When you are finished making selections for the question, you have several options forproceeding:a. Save: Saves the question to the quiz with the question options selected (See Figure 12).b. More Options: Click the drop-down arrow to access more options.i. Save and New: Saves the question and creates a new blank question (See Figure 12).ii. Save and Copy: Saves the question and creates a copy for you to modify(See Figure 12).c. Cancel: Cancels without saving the question (See Figure 12).Figure 12 – OptionsPage 9 of 49
12. Following is a preview of the question.Figure 13 - True or False QuestionCreating Multiple Choice QuestionsMultiple choice questions present a statement or question with a list of possible answers, with a singlebest possible answer. If you create a question that contains more than one possible answer, weightvalues can be assigned according to the level of correctness for each possible response.1. After selecting Multiple Choice as the question type, the Multiple Choice configuration windowwill open. Click in the Question Text section to enter your question (See Figure 14).2. A toolbar will appear above the text field to provide tools to format the text entered, insertvideos, photos and other objects such as equations, files, and links, as well as view the text infull-screen to access additional formatting options (See Figure 14).Figure 14 - Question TextPage 10 of 49
3. Enter the answer selection options, indicating the correct answer by placing a checkmark in theappropriate checkbox.Figure 15 - Answer Options4. You also have the following options regarding answers:a. Change Order: Move question order by clicking and dragging the icons to the desiredlocation if you will not be using the randomize answers functionality (See Figure 16).b. Remove: To remove answer choices, click the (x) to the right of the field that you want toremove (See Figure 16).c. Add Answer: If you need additional options, click the Add Answer link below the answeroptions. An additional answer entry field will be added each time you click the link(See Figure 16).d. Randomize: If you want to randomize answers for each quiz attempt, click the Randomizeanswers for each student checkbox (See Figure 16).5. Assign the Default Points for your question (See Figure 16).Figure 16 - Additional Question ControlsPage 11 of 49
6. A preview of your question is displayed in a panel to the right of the question text and answers.Figure 17 - Question Preview7. To add question feedback, hints, descriptions, custom weights, and/or enumeration, click theOptions link above the question (See Figure 18).8. Make a selection in the drop-down menu (See Figure 18).Figure 18 - Question OptionsPage 12 of 49
a. Add Feedback: Inserts a text field below each answer to enter your feedback.Figure 19 - Add Feedbackb. Add Hint: Inserts a single text field below the question to provide a hint.Figure 20 - Add Hintc. Add Short Description: Inserts text field above the question to enter a short description forthe question.Figure 21 - Add Short DescriptionPage 13 of 49
d. Add Custom Weights: Inserts a percentage box in front of each question to allow entry ofcustom weight values for each answer.Figure 22 - Add Custom Weightse. Add Enumeration: Enables a drop-down menu above the point value field to allow you toselect the enumeration style.Figure 23 - Add Enumeration9. When you have made all of the desired selections for the question, you have the followingoptions available:a. Save: Saves the question to the question library with the options selected (See Figure 24).b. Save and New: Saves the question and creates a new blank question (See Figure 24).c. Save and Copy: Saves the question and creates a copy for you to modify (See Figure 24).d. Cancel: Cancels without saving the question (See Figure 24).Figure 24 - Save OptionsPage 14 of 49
10. Following is a preview of the question.Figure 25 - Multiple Choice QuestionCreating Multi-Select QuestionsMulti-select questions provide the ability to create questions with multiple responses to answer thequestion completely. You have the ability to determine how responses with be graded. The followingexplains how to configure a multi-select question:1. After selection of Multi-Select as the question type, the New Multi-Select Questionconfiguration window will open. Enter an optional Title (See Figure 26).2. Under Points, enter a value (See Figure 26).3. Under Difficulty, the value defaults to 1 but you may select between 2 and 5 as an alternative(See Figure 26).Figure 26 - New Multi-Select QuestionPage 15 of 49
4. Click in the Question Text section to enter your question (See Figure 27).5. A toolbar will appear above the text field with tools to format the text entered, insert videos,photos and other objects such as equations, files, and links, as well as view the text in fullscreen to access additional formatting options (See Figure 27).Figure 27 - Question Text6. Under Options, click the drop-down arrow to assign a specific type of enumeration style to theanswers (See Figure 28).7. The answer display style defaults to vertical, but you can select horizonal if desired(See Figure 28).Figure 28 – OptionsPage 16 of 49
8. Under Grading, select the desired grading format. You have the following options(See Figure 29):a. All or nothing: Selected by default, full points are awarded for the question only if ALL thecorrect answers are selected (See Figure 29).b. Right minus wrong: Points are awarded based on the number of correct answers minus thenumber of incorrect answers selected. To determine how much each answer is worth, thetotal number of points assigned to the question is divided by the total number of answerchoices entered (See Figure 29).c. Correct answers: Points are awarded for each correct answer selected and each incorrectanswer left blank. Incorrect answers selected and correct answers left blank are ignored(See Figure 29).9. If you want the answers for each attempt to be randomized, click the checkbox belowRandomize options (See Figure 29).Figure 29 - Grading Format & Randomze Options10. In the Value column, enter response options for the question in each textbox for the desirednumber of response options (See Figure 30).11. In the Correct column, place a checkmark in checkbox next to each correct answer(See Figure 30).12. In the Feedback column, enter any feedback you wish to provide for each response option(See Figure 30).Figure 30 - Multi-Select AnswersPage 17 of 49
13. Continue entering responses and feedback until you have reached the desired number ofoptions (See Figure 31).14. If you would like to delete any response, click the Remove Entry icon (See Figure 31).15. If you would like to add a question hint or feedback not based on an individual response,expand the field and enter your text in the textbox (See Figure 31).16. When all responses have been entered, click Save (See Figure 31).Figure 31 - Click Save17. Your multi-select question has been added to the quiz.18. Following is a preview of the question.Figure 32 - Multi-Select QuestionPage 18 of 49
Creating Written Response QuestionsWritten response questions are long answer (e.g., paragraph or essay) responses graded by theinstructor, which may not be set to auto-grade. You will evaluate the response and provide a score tosend to the gradebook. The following explains how to configure a written response question:1. After selecting Written Response as the question type, the Written Response configurationwindow will open. Click in the Question Text section to enter your question (See Figure 33).2. A toolbar will appear above the text field to provide tools to format the text entered, insertvideos, photos and other objects such as equations, files, and links, as well as view the text infull-screen to access additional formatting options (See Figure 33).Figure 33 - Question Text3. Under Points, enter a value (See Figure 34).4. Click Save (See Figure 34).Figure 34 - Enter Points and SavePage 19 of 49
5. Following is a preview of the question.Figure 35 - Written Response QuestionCreating Short Answer QuestionsShort answer questions require one-word or brief sentence responses to the question. If you want alonger response, the written response question would be the better type to use. The following explainshow to configure a short answer question:1. After selecting Short Answer as the question type, the Short Answer configuration window willopen. Click in the Question Text section to enter your question (See Figure 36).2. A toolbar will appear above the text field to provide tools to format the text entered, insertvideos, photos and other objects such as equations, files, and links, as well as view the text infull-screen to access additional formatting options (See Figure 36).Figure 36 - Question TextPage 20 of 49
3. After entering your question text, select one of the following Evaluation options for the answer(e.g., Text) (See Figure 37):a. Text: Auto-grading searches for a matching character pattern in the answer text with orwithout letter case correctness (See Figure 37).b. Case Sensitive: Auto-grading searches for a matching character pattern in the answer textthat must have letter case correctness (See Figure 37).c. Regular Expression: Auto-grading uses meta-characters to search for one or more matchingstrings in the answer text's character pattern. What you set as meta-character parametershelps determine letter case sensitivity (See Figure 37).Note:For a list of characters used in regular expressions, see the D2L Brightspace Daylight RegularExpressions Guide in the UITS Documentation Center.Figure 37 - Evaluation Options4. To add question feedback, hints, descriptions, custom weights, and/or enumeration, click theOptions link above the question (See Figure 38).5. Make a selection in the drop-down menu (See Figure 38).Figure 38 - Question OptionsPage 21 of 49
a. Add Feedback: Inserts a text field below each answer to enter your feedback.Figure 39 - Add Feedbackb. Add Hint: Inserts a single text field below the question to provide a hint.Note: You will receive a warning message if Hints are turned off in the quiz settings.Figure 40 - Add Hintc. Add Short Description: Inserts text field above the question to enter a short description forthe question.Figure 41 - Add Short Description6. Enter the correct answer to the question (See Figure 42).Note: You may enter more than one version of the answer, particularly when selecting regularexpression.Page 22 of 49
7. Click Add Blank to add the number of answers corresponding to the number of blanks in yourquestion (See Figure 42).8. Enter the number of points to award for the correct answer (See Figure 42).9. Click Save (See Figure 42).Figure 42 - Enter Answer and Save10. Following is a preview of the question.Figure 43 - Short Answer QuestionPage 23 of 49
Creating Multi-Short Answer QuestionsMulti-short answer questions require multi-solution answers with separate input boxes for each part ofthe question. The following explains how to configure a Multi--Short Answer question:1. After selecting Multi-Short Answer as the question type, the New Multi-Short Answer Questionconfiguration window will open. Enter an optional Title (See Figure 44).2. Under Points, enter a value (See Figure 44).3. Under Difficulty, the value defaults to 1 but you may select between 2 and 5 as an alternative(See Figure 44).Figure 44 - New Multi-Select Question4. Click in the Question Text section to enter your question (See Figure 45).5. A toolbar will appear above the text field to provide tools to format the text entered, insertvideos, photos and other objects such as equations, files, and links, as well as view the text infull-screen to access additional formatting options (See Figure 45).Figure 45 - Question TextPage 24 of 49
6. Under Options, three input boxes appear by default. The number of input boxes correlates tothe number of responses that are necessary to successfully earn points for the answer(See Figure 46).Note: You can add additional input boxes if more than three answers are needed to properly answerthe question.7. Use the drop-down boxes to select the necessary column size/width for the following columns(See Figure 46):a. Row (e.g., 1-6) (See Figure 46).b. Column (e.g., 20, 40, or 60) (See Figure 46).Figure 46 - Answer Options8. Enter the answers in the Answer boxes (See Figure 47).Note: The weight of each answer will be evenly distributed by default between the three input boxes.9. If you will accept a variety of responses in the three input boxes that your students see whiletaking the quiz, enter the number of additional acceptable responses, and click Add Answers(See Figure 47).Figure 47 - Enter AnswersPage 25 of 49
10. Then, enter the additional acceptable responses in the additional boxes.Figure 48 - Enter Additional Questions11. For each acceptable answer, select one of the following Evaluation options for the answer:a. Case Insensitive: Auto-grading searches for a matching character pattern in the answer textwith or without letter case correctness (See Figure 49).b. Case Sensitive: Auto-grading searches for a matching character pattern in the answer textthat must have letter case correctness (See Figure 49).c. Regular Expression: Auto-grading uses meta-characters to search for one or more matchingstrings in the answer text's character pattern. What you set as meta-character parametershelps determine letter case sensitivity (See Figure 49).Note:For a list of characters used in regular expressions, see the D2L Brightspace Daylight RegularExpressions Guide in the UITS Documentation Center.Figure 49 - Evaluation OptionsPage 26 of 49
12. If you want to enter a question hint, click the drop-down arrow to expand the field(See Figure 50).13. A text entry box will appear. Enter the hint text for the question (See Figure 50).Figure 50 - Enter Question Hint14. If you want to enter question feedback, click the drop-down arrow to expand the field(See Figure 51).15. A text entry box will appear. Enter the hint text for the question (See Figure 51).Figure 51 - Enter Question Feedback16. When you are satisfied with your question and optional settings, click Save.17. Following is a preview of the question.Figure 52 – Multi-Short Answer QuestionPage 27 of 49
Creating Fill in the Blanks QuestionsFill in the Blanks questions require students to fill-in one or more missing words in the statement orphrase. Answers should be no more than one or two words. The following explains how to configure aFill in the Blanks question:1. After selecting Fill in the Blanks as the question type, the New Fill in the Blanks Questionconfiguration window will open. Enter an optional Title (See Figure 53).2. Under Points, enter a value (See Figure 53).3. Under Difficulty, the value defaults to 1 but you may select between 2 and 5 as an alternative(See Figure 53).Figure 53 - New Fill in the Blanks QuestionNote: You may also insert an image into the question, if desired.4. Under Question Text, one question text box and one answer blank box will appear by default.You may add additional question text boxes and answer blanks if needed as follows:a. If you will have a multi-part fill in the blank question, enter the number of additionalquestion text boxes and answer blanks you will need (See Figure 54).Note: If you add more than one blank and text field at a time, all text entry boxes will appear first,followed by all answer boxes (e.g., text #2, text #3, blank #2, blank #3). If you add one of each at atime, the result will be text entry box followed by answer blank with the corresponding blank number(e.g., text # 2, blank # 2, text #3, blank #3) (See Figure 54).Page 28 of 49
b. Click Add Text and Add Blank accordingly (See Figure 54).Figure 54 - Add Blank/Text5. Click in the Text # 1 section to enter your question (See Figure 55).6. A toolbar will appear above the text field to provide tools to format the text entered, insertvideos, photos and other objects such as equations, files, and links, as well as view the text infull-screen to access additional formatting options (See Figure 55).7. If you there is more than one acceptable correct answer, enter the number of additionalanswer blanks you will need (See Figure 55).8. Cllick Add Answer (See Figure 55).9. Click in the Blank #1 section to enter the answer to question (See Figure 55).10. Enter the weight value of the answer (e.g., two answers worth 50% each of the the total points(See Figure 55).11. For each acceptable answer, select one of the following Evaluation options for the answer:a. Case Insensitive: Auto-grading searches for a matching character pattern in the answer textwith or without letter case correctness (See Figure 55).b. Case Sensitive: Auto-grading searches for a matching character pattern in the answer textthat must have letter case correctness (See Figure 55).c. Regular Expression: Auto-grading uses meta-characters to search for one or more matchingstrings in the answer text's character pattern. What you set as meta-character parametershelps determine letter case sensitivity (See Figure 55).Note:For a list of characters used in regular expressions, see the D2L Brightspace Daylight RegularExpressions Guide in the UITS Documentation Center.Page 29 of 49
Figure 55 – Answer Settings12. Click in the Text # 2 section to enter the next part of your question (See Figure 56).13. Repeat steps six through 11 above until all question and answer boxes have been configured(See Figure 56).Figure 56 - Additional Question PartsNote: You can remove any question part or blank by clicking the delete button.Figure 57 – Delete ButtonPage 30 of 49
14. If you want to enter a question hint, click the drop-down arrow to expand the field(See Figure 58).15. A text entry box will appear. Enter the hint text for the question (See Figure 58).Figure 58 - Enter Question Hint16. If you want to enter question feedback, click the drop-down arrow to expand the field(See Figure 59).17. A text entry box will appear. Enter the hint text for the question (See Figure 59).Figure 59 - Enter Question Feedback18. When you are satisfied with your question and optional settings, click Save.19. Following is a preview of the question.Figure 60 - Fill in the Blank QuestionPage 31 of 49
Creating Matching QuestionsMatching questions provide a list of items with a set of possible answers. Students must correctlyidentify the relationships between them and match according. The following explains how to configurea Matching question:1. After selecting Matching as the question type, the New Matching Question configurationwindow will open. Enter an optional Title (See Figure 61).2. Under Points, enter a value (See Figure 61).3. Under Difficulty, the value defaults to 1 but you may select between 2 and 5 as an alternative(See Figure 61).Figure 61 - New Matching QuestionNote: You may also insert an image into the question, if desired.4. Click in the Question Text section to enter your question (See Figure 62).5. A toolbar will appear above the text field to provide tools to format the text entered, insertvideos, photos and other objects such as equations, files, and links, as well as view the text infull-screen to access additional formatting options (See Figure 62).Figure 62 - Question TextPage 32 of 49
6. Under Choices, two choices and two matches will appear by default. You may add additionalchoices and matches as needed.7. Under Grading Options, All or nothing is selected by default but you may change it. Thefollowing explains the various grading options:a. All or nothing: Selected by default, full points are awarded for the question only if ALL thecorrect answers are selected (See Figure 63).b. Right minus wrong: Points are awarded based on the number of correct answers minus thenumber of incorrect answers selected. To determine how much each answer is worth, thetotal number of points assigned to the question is divided by the total number of answerchoices entered (See Figure 63).c. Correct answers: Points are awarded for each correct answer selected and each incorrectanswer left blank. Incorrect answers selected and correct answers left blank are ignored(See Figure 63).Figure 63 - Grading Options8. To add more choices, enter a value in the Add Choice entry field (See Figure 64).9. Click Add Choice (See Figure 64).Figure 64 - Add ChoicePage 33 of 49
10. Click in the Value # 1 section to enter your first item to match (See Figure 65).11. A toolbar will appear above the text field to provide tools to format the text entered, insertvideos, photos and other objects such as equations, files, and links, as well as view the text infull-screen to access additional formatting options (See Figure 65).12. Continue entering choices in the Value boxes until you are ready to enter the match to eachvalue (See Figure 65).Figure 65 - Choice Values13. Under Matches, click to add the necessary number of matches to the items listed above(See Figure 66).14. Then, click Add Match (See Figure 66).Figure 66 - Add MatchesPage 34 of 49
15. Click in the Value # 1 section to enter your first item to match (See Figure 67).16. A toolbar will appear above the text field to provide tools to format the text entered, insertvideos, photos and other objects such as equations, files, and links, as well as view the text infull-screen to access additional formatting options (See Figure 67).17. Continue entering match choices in the Value boxes until you are ready to save the question(See Figure 67).Figure 67 - Matching ValuesNote: You can remove any question part or blank by clicking the delete button.Figure 68 – Delete ButtonPage 35 of 49
18. If you want to enter a question hint, click the drop-down arrow to expand the field(See Figure 69).19. A text entry box will appear. Enter the hint text for the question (See Figure 69).Figure 69 - Enter Question Hint20. If you want to enter question feedback, click the drop-down arrow to expand the field(See Figure 70).21. A text entry box will appear. Enter the hint text for the question (See Figure 70).Figure 70 - Enter Question Feedback22. When you are satisfied with your question and optional settings, click Save.23. Following is a preview of the question.Figure 71 - Matching QuestionPage 36 of 49
Creating Ordering QuestionsOrde
D2L Brightspace - Daylight Experience is an excellent tool for instructors. This document has been developed to review the quiz question types available to you in the Quizzes Tool. The following will help you gain a greater understanding of D2L Brightspace - Daylight Experience, as it relates to creating various types of questions in your .