Transcription
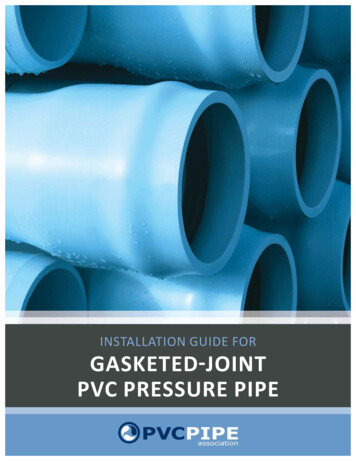
INSTALLATION GUIDE FORGASKETEDͳJOINTPVC PRESSURE PIPE
PRESSURE PIPETABLE OF CONTENTSIntroduc on3Receiving3Unloading and HandlingStorage6Trenching7De-Watering8Field Cu ng8Lowering Pipe into the Trench9Cleaning and Inspec on9Lubrica onJoint Assembly1010-11Installing Pipe through Casings12Installa on of Fi ngs and Valves12Tracer Wire12Trench Construc on13Founda on13Bedding14Haunching14Ini al Backfill15Final Backfill15Compac ng the Backfill16Overnight Precau ons16Acceptance Tes ng24-516-18Special Considera ons18Checklist19Uni-Bell Literature20Members21UNIͳBELL PVC PIPE ASSOCIATION WWW.UNIͳBELL.ORG
PRESSURE PIPEINTRODUCTION:This document has been developed by the Uni-Bell PVC Pipe Associa on for use as a field installa on guide.General informa on regarding the correct installa on of gasketed-joint PVC pressure pipe is included. Relevantproduct standards are: American Water Works Associa on (AWWA) C900 “Standard for Polyvinyl Chloride (PVC) Pressure Pipe andFabricated Fi ngs, 4 in. through 12 in., for Water Distribu on” AWWA C905 “Standard for Polyvinyl Chloride (PVC) Pressure Pipe and Fabricated Fi ngs, 14 in. through 48in., for Water Transmission and Distribu on” AWWA C907 “Standard for Injec on-Molded Polyvinyl Chloride (PVC) Pressure Fi ngs, 4 in. through 12 in.,for Water, Wastewater, and Reclaimed Water Service” AWWA C909 “Standard for Molecularly Oriented Polyvinyl Chloride (PVCO) Pressure Pipe, 4 in. through 24in., for Water, Wastewater, and Reclaimed Water Service”For more detailed informa on, consult the pipe manufacturer or refer to AWWA C605 “Standard for UndergroundInstalla on of PVC and PVCO Pressure Pipe and Fi ngs,” and AWWA Manual M23 “PVC Pipe – Design andInstalla on.” The Handbook of PVC Pipe: Design and ConstrucƟon provides addi onal guidance on PVC pipedesign and installa on. For informa on on this publica on, please contact Uni-Bell.The Uni-Bell PVC Pipe Associa on, formed in 1971, funds PVC pipe research and development, provides technicalservice and support, develops recommended standards, and promotes proper use of PVC pipe with gasketedjoints.Uni-Bell members are manufacturers who are dedicated to producing high quality PVC pipe products for theindustry.The statements contained in this installa on guide are those of the Uni-Bell PVC Pipe Associa on and are notwarran es, nor are they intended to be warran es. Inquiries for informa on on specific products, their a ributesand recommended uses, and the manufacturer’s warranty should be directed to member companies.RECEIVING:When a load of pipe arrives at the job site, it is your responsibility to check it thoroughly. If possible, inspect eachpiece for damage. Check quan es against the shipping list. Note that once the pipe leaves the manufacturer’splant, it becomes the property of the trucker. Any damaged or missing items must be documented on the bill oflading. Set aside any damaged items and no fy the shipper.INSTALLATION GUIDE FOR PVC PRESSURE PIPE3
PRESSURE PIPEUNLOADING AND HANDLING:It is also your responsibility to unload the shipment. UNLOAD WITH REASONABLE CARE. Careless unloading canresult in damaged product or personal injury.Use a forkli or a front-end loader with fork a achment, if available. Make sure that the forks are long enoughto support the bundles. When unloading by hand, remove one piece at a me and block the shipment to keeppipe from rolling off the truck.Follow the following precau ons:4 DO NOT drop pipe off the truck. DO NOT insert a forkli fork into a pipe end to transport. Lower the pipe into the ditch. DO NOT drop.UNIͳBELL PVC PIPE ASSOCIATION WWW.UNIͳBELL.ORG
PRESSURE PIPEThe table below is provided for use as a guide in selec on of handling equipment:APPROXIMATE WEIGHT OF 20-FOOT PIPE LENGTHS (lbs)PVC Pressure Pipe CIODPipe 08701100xxxxxxPVC Pressure Pipe IPSPipe 1802803904706107701000140022003100INSTALLATION GUIDE FOR PVC PRESSURE PIPE5
PRESSURE PIPESTORAGE:If you can unload the shipment in unit packages, the pipe will be easier to store. Stack the packages on reasonablylevel ground. If you unload one piece at a me, place the pipe bevel to bell. Never stack more than eight feet inheight. Do not stack the pipe next to heat sources or engine exhausts. Gaskets should also be protected fromheat, oil, and grease.6UNIͳBELL PVC PIPE ASSOCIATION WWW.UNIͳBELL.ORG
PRESSURE PIPETRENCHING:Do not let the excavated material block sidewalks, drives, or u lity outlets. Follow all safety rules and regula ons.Protect workers by using shee ng and trench boxes in hazardous areas and by sloping the trench walls in drysoils. When shee ng or a trench box is moved, make sure that the pipe is not moved and that the side-supportmaterial is not disturbed.For informa on on trench terminology and recommended prac ces, see the “Trench Construc on” sec on.INSTALLATION GUIDE FOR PVC PRESSURE PIPE7
PRESSURE PIPEDEͳWATERING:Keep the trench as dry as possible un l the pipe has been installed and enough backfill placed to prevent thepipe from floa ng. PVC pipe will float if not filled with water or weighted down. The height of loose backfillmaterial required to prevent flota on of empty pipe is conserva vely equal to 1½ mes the pipe diameter.FIELD CUTTING:PVC pipe can be easily cut with a power handsaw or power-driven abrasive disc. Be sure you make a square cut.Bevel the end with a beveling tool, wood rasp, or power sander to the same angle and length as provided on thefactory-finished pipe. Redraw the inser on line on the spigot using a factory-marked spigot as a guide.8UNIͳBELL PVC PIPE ASSOCIATION WWW.UNIͳBELL.ORG
PRESSURE PIPELOWERING PIPE INTO THE TRENCH:Place the pipe and fi ngs into the trench using ropes and skids, slings on the backhoe bucket, or by hand. Donot throw the pipe or fi ngs into the trench or allow any part of the pipe to take an unrestrained fall onto thetrench bo om. At this point, the pipe and other accessories are in a good posi on for final inspec on. Ensurethere are no damaged materials before assembly begins.CLEANING AND INSPECTION:Gaskets may be supplied separately or already installed in the pipe. See the pipe manufacturer’s literature formore informa on.When gaskets are supplied separately, make sure they are clean and dry before inser on in the bell groove. Thegasket groove and spigot should be wiped clean and dried before assembly.When gaskets are already installed in the pipe, the gaskets, the groove area behind the gaskets, and the pipespigot ends should be wiped clean. Check each gasket to insure that it is inserted uniformly into the race.DO NOT REMOVE THE GASKETS FROM THE RACE FOR CLEANING. Many gaskets are not removable and will bedamaged by a empts to remove them.INSTALLATION GUIDE FOR PVC PRESSURE PIPE9
PRESSURE PIPELUBRICATION:Lubricant should be applied to the bevel of the spigot end and approximately mid-way back to the inser on line.Some manufacturers recommend applying lubricant to the gasket surface which makes contact with the spigotend. Use only the lubricants supplied or recommended by the pipe manufacturer.JOINT ASSEMBLY:Push the lubricated spigot end past the gasket into the bell un l the inser on line on the spigot is even with theedge of the bell. DO NOT OVERINSERT.10UNIͳBELL PVC PIPE ASSOCIATION WWW.UNIͳBELL.ORG
PRESSURE PIPEIf you have trouble with assembly, disassemble the joint and examine the gasket. If the gasket is removable,replace if damaged. If non-removable gaskets are damaged, cut off the bell, bevel the new edge, and use acoupling to assemble. Be sure that the gasket is properly seated and that both pipe lengths are in straightalignment. Repeat assembly steps as stated on previous page. Correct assembly is achieved when the inser online on the spigot is lined up with the edge of the bell. If mul ple inser on lines exist, insert un l only one lineis visible.The bar-and-block method of joint assembly is recommended, as the installer is able to feel the amount of forcebeing used and whether the joint goes together smoothly. Larger pipe may require mechanical assistance toapply sufficient force to assemble the joint.When mechanical devices are used, care must be taken to ensure that the spigot is inserted to the properdepth and that previously assembled pipe joints are not disturbed. This is accomplished by inser ng only tothe inser on line on the spigot end. If the spigot is over-inserted, back the pipe out un l the inser on line isvisible. In all cases, straight alignment of the pipe is essen al for proper assembly. If the pipe is misaligned, overinserted, or assembled with excessive force, the following are possible consequences: rolled gasket split bell failure to pass acceptance tes ng (e.g., hydrosta c pressure test) over-inser on of previously assembled jointsManual Bar-and-Block MethodINSTALLATION GUIDE FOR PVC PRESSURE PIPE11
PRESSURE PIPEINSTALLING PIPE THROUGH CASINGS:When the pipeline intercepts a heavily traveled, protected, or landscaped area it may be necessary to install thepipe through a casing. There are four precau ons to observe while pushing the pipe through the casing:1. Install spacers on the PVC pipe.2. Minimize the fric on force during the push.3. Avoid over-inser on.4. Install a water-permeable seal at the casing ends.Casing size: The casing should be large enough to readily accommodate the maximum outside diameter at thepipe bells and the projec ons of the suppor ng spacers. The casing should not be so large as to permit excessive“whipping” or “snaking” of the PVC pipe when it is pressurized.Casing spacers: Casing spacers are available to provide proper separa on between the casing and the PVC pipeto be installed. Spacers come complete with runners to provide clearance for the bell-and-spigot assemblies.The casing-spacer manufacturer should be contacted for informa on on the loca on and number of spacersrequired.INSTALLATION OF FITTINGS AND VALVES:The inser on depths of valve and fi ng joints are usually less than those of PVC pipe joints. For proper inser ondepth of PVC fi ngs, check with the manufacturers of the fi ngs. For iron fi ngs, cut the spigot end to removethe factory bevel. Make sure the pipe spigot end is squarely cut, deburred, and the sharp edge removed. Insertthe pipe spigot into the iron fi ng bell un l the pipe end contacts the fi ng. See AWWA Standard C605 “Standardfor the Underground Installa on of PVC and PVCO Pressure Pipe and Fi ngs.”Joint Restraint Devices: Mechanical thrust-restraint devices are available which clamp to the wall of the pipeand e back to a ma ng collar on the fi ng or pipe bell. Integral self-restraining bell and spigot joints are alsoavailable. Contact the joint restraint manufacturer for installa on recommenda ons.TRACER WIRE:Properly installed tracer wire will aid in loca ng PVC pipe. Typically, an insulated wire or plas c-coated metalstrip is laid above the pipe a er installa on. The tracer wire is generally accessible at a riser, but is not electricallyconnected to the riser.12UNIͳBELL PVC PIPE ASSOCIATION WWW.UNIͳBELL.ORG
PRESSURE PIPETRENCH CONSTRUCTION:Terms used in pipe installa on are illustrated in the trench cross-sec on below. The use of proper embedmentmaterials is very important to minimize trench se lement. For pipe from 4-inch through 12-inch diameter, thepar cle size of material in contact with the pipe shall not exceed ¾-inch for angular rock and 1½ inches for roundrock. For 14-inch diameter and larger pipe, maximum par cle size in contact with the pipe is 1½ inches.FOUNDATION:A founda on is required when the trench bo om is unstable. The bo om of the trench is over-excavated andbrought back up to grade with suitable material. Where over-excava on occurs, ensure that the eleva on underthe en re length of the pipe is brought up (rather than only at the bells). Proper placement of over-excavatedmaterials will provide proper support of the pipe and will prevent sagging between joints.INSTALLATION GUIDE FOR PVC PRESSURE PIPE13
PRESSURE PIPEBEDDING:Bedding may be used to bring the trench bo om up to grade before the pipe is installed. The purpose of beddingis to provide con nuous support under the pipe. Where required (such as when rock is encountered), a minimumdepth of 4 to 6 inches is typical.Holes for pipe bells should be provided at each joint to ensure uniform support for the pipe. Bell holes should beno larger than necessary for pipe assembly.HAUNCHING:Proper placement of material in the haunch reduces voids and increases pipe support. If granular materials areused, they may be properly placed using techniques such as shovel slicing. Place material under the haunchesand at least halfway up the pipe to provide side support. Make sure material is properly compacted. DO NOTDISTURB SIDE SUPPORT WHEN MOVING SHEETING OR TRENCH BOX.The pipe s ffness and an cipated loadings will dictate whether or not granular material and/or compac on ofthe haunch material are necessary.14UNIͳBELL PVC PIPE ASSOCIATION WWW.UNIͳBELL.ORG
PRESSURE PIPEINITIAL BACKFILL:The material placed over the crown of the pipe to a height of 6 to 12 inches is the ini al backfill. The purpose ofthe ini al backfill is to protect the pipe from the final backfill. Where not otherwise specified, the ini al backfillmay consist of the na ve material in the trench provided it is not frozen and is free from large stones, debris,and other organic materials.Machine compac on of ini al backfill directly over the pipe is no
AWWA C909 “Standard for Molecularly Oriented Polyvinyl Chloride (PVCO) Pressure Pipe, 4 in. through 24 in., for Water, Wastewater, and Reclaimed Water Service” For more detailed informa on, consult the pipe manufacturer or refer to AWWA C605 “Standard for Underground Installa on of PVC and PVCO Pressure Pipe and Fi « ngs,” and AWWA Manual M23 “PVC Pipe – Design and Installa on .