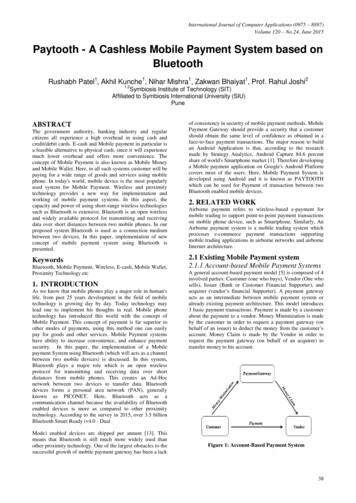
Transcription
E-Bill & Payment GuideContentsAccess eBillSetup Authorized Users & Authorized User LoginSetup Electronic RefundsView Student Account Activity and Student Account StatementsSetup Payment Profile and Save a Preferred Payment MethodMake Changes to a Saved Payment MethodMake Payments (including Express and Future Payments)Enroll in the Semester-Based Installment Payment Plan1. Access e-Bill Payment SystemOnly students will initially be able to access the e-Bill system. Parents/others will not be able to access thesystem until the student has set up their Authorized Users. (see Step 2 below) Students, access https://payment.brown.edu Select the “Student Access” option You will be redirected to the Brown University authentication page; use the same user name and password thatyou use to access University services.2. Setup Authorized Users & Authorized User LoginStudents must complete this step to allow parents/others to view the student account and makepayment. Students select “Authorized Users” from the “My Profile Setup” menu (on the right side of the home page). Add your Authorized User(s) email address within the “Add Authorized User” tab.1
Select Yes/No to the access type you would like for your Authorized User, then select “Continue” button.Read the Authorized Users Agreement, check the “I Agree” box at the bottom, then “Continue”.Multiple Authorized Users may be added by repeating the steps above.Your authorized user will receive an email with a temporary password to access the system. Temporarypasswords expire within a few days. We recommend that Authorized Users login and change their passwordas soon as possible. If the email has not been received within 5 minutes, we recommend checking spam / junkemail boxes.Authorized User Login: Before taking the following steps, verify that your student has completed the requiredsetup above and confirm which email address the student entered on your behalf. This is the email address youmust enter in order to gain access to the system. Authorized Users - Access https://payment.brown.edu – Enter your email address, full name, and reset thepassword. (Be sure to enter the email address that the student setup for authorized user access). If you havebeen setup as an Authorized User on multiple student accounts, those accounts will all belinked/viewable when you login. If the Authorized User is having trouble accessing the payment.brown.edu system, please contactour office at bursar@brown.edu or 401-863-2484. Our office will validate setup and resendpassword.3. Set up Electronic Refunds (Students Only)Only students can complete this process. Before setting up an electronic refund account, Two-Step Security setup isrequired. This only takes a few moments and provides extra security. From the home page, select “Security Settings” under the “My Profile Setup” menu.2
Select a primary method for verification (Text, Email, Google Authentication). A passcode will be sent via theselected method to confirm. Enter the passcode and click “Verify” Once two-step verification is setup, return to the Home Page, then select “Electronic Refunds” fromthe “My Profile Setup” menu. Select the Green “Set up Account” button to begin the process. Enter the checking or savings account information and Save the Payment method.o (NOTE: Checking the “Set as your preferred payment method” box, will allow easy setup of bankaccount information for electronic payments later and will allow you to schedule a payment for afuture date.)An authorization form will be presented, which you will need to agree and saveTo request a refund of a valid student account credit balance, go to the Bursar Office website and complete theStudent Refund Request Form. 3
4. View Student Account Activity and Student Account StatementsThe e-Bill system contains student account activity history and any student account statements that were producedduring the academic year. Note, student account statements are only produced at the beginning and middle of eachsemester. The account activity section will reflect the most current account information. Select “Account Activity” under the “My Account” tab to view all charges and payments made to your StudentAccount. You may choose to display Account Activity by Term or display Full Account Activity. If you wish to view or print a Student Account Statement or a 1098-T Tax Statement, select the “BillingStatements” or the “1098-T Tax Statements” tab, then select “View” to open the statement in a new browserwindow. (We find Chrome or Firefox browsers and Adobe Acrobat v8 or higher are best for displaying thestatements. Be sure pop-up blockers are disabled.)4
5. Setup a Payment Profile & Save a Preferred Payment MethodStudents and Authorized Users can ONLY see the Payment Profile they personally created. Students cannot see apayment profile that was setup by an Authorized User. Select “Payment Profile” under “My Profile Setup” from the home page. Select “Electronic Check (checking/savings)” from the Method dropdown box, then click “Select”.Pay close attention to the account number. The account number must be from a U.S. personal savings orchecking account only and cannot be from a debit card, money market account, or other type of bank account.Enter the Account Information, create a name for your saved payment method, then select “Continue”. Once the payment method has been saved, return to the “Payment Profile” tab and use the gear iconmark your account as preferred.to Students Only - When you add a bank account as a saved payment method, you can easily select that accountfor direct deposit of student account refunds.5
6. Make Changes to Saved Payment MethodSaved payment methods cannot be edited. In order to change a saved payment method, a new payment methodmust be entered and then the existing method may be deleted. Select “Payment Profile” from the My Profile menu.Go to the Add New Payment Method section and select “Electronic Check (checking/savings)” from thedropdown box. When adding the newest payment method, please pay close attention to the account number. The accountnumber should be a U.S. personal savings or checking account number and not the number listed on a bank,money market or debit card.CONTINUE and check to agree to the payment agreement. A confirmation screen confirms that your paymentmethod has been saved. The payment method will appear under “Saved Payment Methods” Installment Payment Plans: If the account number attached to an Installment Payment Plan must bechanged– you MUST update EACH scheduled installment payment. From the home page go to thescheduled payments section; select the Gear Icon at the far right, select “Edit”. Using the drop down next to the Method option, select the new payment method you just created andselect “SAVE”. This must be repeated for each scheduled installment payment.Return to the Payment Profile section and using the gear icon, select “Delete” for the incorrect paymentmethod.6
Confirm that you want to delete that payment method by clicking “OK”. You will not be able to delete thepayment method if there are any scheduled payments still using the wrong account.7. Make Payments (Including Express and Future Payments)Make a Payment From the Home Page, select “Make Payment”.Select the appropriate radio button to pay “Current Account Balance”, “Amount Due”, “Future Amount Due”,or “Pay by Term”.Review the payment amount in the corresponding amount box at the right. Change the dollar amount ifneeded, confirm that the Payment Total at the bottom matches the intended amount, select “Continue”.Select the Payment Method from the “Method” dropdown box, then select “Continue”.Follow the prompts to complete the payment and receive payment confirmation and receipt.7
Make an Express Payment The Express payment option allows fewer ‘clicks’ to complete the payment process after a preferred paymentmethod has been established.The Express Payment method provides a clear view of how much will be paid, the payment method and theconfirmation email address.From the Home Page, select “Make Payment”. Then select the appropriate option from the dropdown box topay the Current Term Balance, pay a Specific Charge, or pay Other Amount.Follow the prompts to complete the payment and receive payment confirmation and receipt.Make a Future Payment You have the ability to change the date that the payment will be processed to the student account. On theAccount Payment page, you can click in the Payment Date and schedule it for a future date. You MUST have asaved Payment Method in order to schedule a payment.8. Enroll in the semester-based Installment Payment PlanThe Installment Payment Plan (IPP) can be used to pay one semester's expenses, interest-free, over scheduledmonthly installments. Students and families will need to re-enroll for each semester. At the time of enrollment,the non-refundable enrollment fee must be paid and all installment payments must be scheduled to beautomatically deducted from a U.S. checking or savings account. More information is provided on our InstallmentPayment Plan website. An outstanding balance of 500 or more from a previous semester will prevent IPPenrollment. Important Note: Choosing to make an optional down payment does not replace the first installmentpayment. A down payment will reduce all upcoming installments equally. Under the “Payment Plan” tab, students and Authorized Users click the “Enroll Now” button to begin Select the Payment Plan Term from the dropdown box and select the plan.8
Review the plan to confirm the charges and financial aid that has been included and the schedule for futurepayments. Note: The plan enrollment fee will be withdrawn today. If you choose to make an optional downpayment, that will be withdrawn today. Choosing to make an optional down payment does not replace thefirst installment payment. A down payment will reduce all upcoming installments equally. Review the Payment Plan Agreement and click to “Agree” to the plan. Review the ACH Payments Agreement and click to Agree to the scheduled payments. You do not need toschedule or make payments in advance of this date, they will process automatically. A final confirmation page confirms your enrollment in the Installment Payment Plan. On the home page youwill also see the schedule of the upcoming payments.9
IMPORTANT NOTE on Making Additional or Advance Payments:If you choose to make any payments in addition to the IPP scheduled payments, all upcoming installment payments willbe reduced equally. The IPP payments cannot be skipped. If you wish to pay one of the Installment Payment Planpayments early (advance payment), you must take the following steps: Log into your account at https://payment.brown.edu Go to the Payment Plans Tab Use the green “Pay Next Installment” button at the bottom of the page. You will be reminded that thepayment is already scheduled. The Payment Amount will be displayed. If you wish to pay the full payment amount, select “Continue” and follow the system prompts. If you wish to pay less than the full payment amount, enter the desired payment amount, select “Continue” andfollow the prompts. The remaining amount of your scheduled installment will be automatically deductedaccording to the IPP schedule.10
Access eBill . Setup Authorized Users & Authorized User Login . Setup Electronic Refunds . View Student Account Activity and Student Account Statements . Setup Payment Profile and Save a Preferred Payment Method . Make Changes to a Saved Payment Method . Make Payments (including Express and Future Payments)
