Transcription
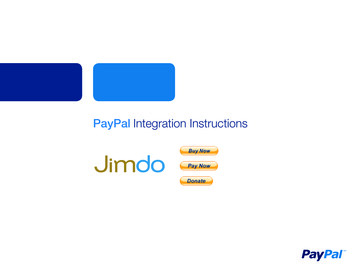
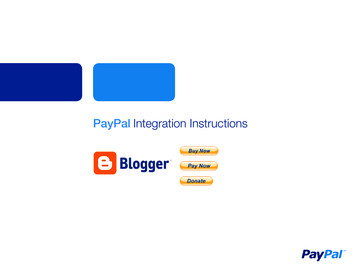
PayPal Integration Instructions
Table of ContentsOverview . 1Part 1: Create a PayPal Payment ButtonStep 1: Login . 2Step 2: My Account Overview . 2Step 3: My Business Setup . 2Step 4: My Payment Solution . 3Step 5: Create PayPal Payment Button page . 4Step 6: Button Code Page . 5Part 2: Adding the PayPal Payment Button to your BlogStep 7: Login blogger . 6Step 8: Layout View . 6Step 9: Add a Gadget . 6Step 10: HTML/JavaScript Gadget . 7Step 11: Add your PayPal button HTML Code . 7Step 12: You are done! . 8Step 13: View Your Blog . 8Step 14: Test the Button . 8Appendix A. Buy Now Payment Page. 9Appendix B. Donations Payment Page . 10Appendix C. How to find the Donate Button . 11
PayPal Integration InstructionsOVERVIEWCollecting money on your blog is easy with PayPal.It is a simple process with two parts:Part 1 – Create a PayPal Payment ButtonPart 2 – Add the PayPal Payment Button to your Blog1 – PayPal Payment Buttons2 – BlogSpot SidebarPayPal offers “Payment Buttons” that when clicked takeusers to PayPal hosted webpage where they can payyou with their credit cards (or their PayPal account if theyhave one). These buttons say “Buy now”, “Pay now”,or “Donate”. You can even use your own buttons (orhyperlinks) and just point them to the same PayPal hostedpayment pages – in this way you can say whatever youwant to say to solicit payments from your readers. Forexample, “Buy me a cup of coffee” or “Support our efforts”.This is the most common location to add a payment buttonis on the BlogSpot sidebar. This is a prominent location,and it ensures the button will always visible to your readers.PayPal Integration Instructions Blogger1
Part 1: Create a PayPal Payment ButtonPART 1: CREATE A PAYPAL PAYMENT BUTTONStep 1: LoginLog in to your PayPal account at www.paypal.com.The My Account Overview page opens.Step 2: My Account OverviewClick either the Merchant Tools tab or the My BusinessSetup link.The My Business Setup page opens.Step 3: My Business SetupClick the Start Now button in the “Set up my paymentsolution” section.The Configure my payment solution page opens.PayPal Integration Instructions Blogger2
Part 1: Create a PayPal Payment ButtonStep 4: My Payment SolutionClick on the “Donate” button if you want to collectiondonations from people.Click the “Buy Now” button if you want to sell products topeople.Note: If you do not see the Donate button on this page,see the Appendix for an alternative way to create theDonate button.The big difference between the Buy Now and Donatebuttons is that when clicked the Donate button will displaya payment page where people can choose the amount ofmoney they want to give you, while the Buy Now buttonwill display a payment page with that has a fixed amountyour clients will pay.See the Appendix for pictures of the payment experiencesusing the Donate and Buy Now buttons.In this example, we will assume you chose the Donate button.After clicking the button that is right for you, the CreatePayPal payment button page opens.PayPal Integration Instructions Blogger3
Part 1: Create a PayPal Payment ButtonStep 5: Create PayPal Payment Button pageThe key fields for the Donate button are self-explanatoryand highlighted in the picture below.All other fields are optional. These can be left empty ortheir default values.Click Create Button, and the Button code page opens.PayPal Integration Instructions Blogger4
Part 1: Create a PayPal Payment ButtonStep 6: Button Code PageYou have successfully generated your PayPal button!On the “Website” tab you will find .html code for yourbutton. In the next section, you will use this HTML codeto add the PayPal payment button into your blog.You are now ready to insert this HTML code into yourblog page.Picture 3 – PayPal payment button HTML CodePART 2: ADDING THE PAYPAL PAYMENT BUTTON TO YOUR BLOGNow that you have created your PayPal payment button,let’s add it to your blog.Step 7: Login bloggerStep 8: Layout ViewSelect “Layout” to switch to the Layout (design) view ofyour blog.PayPal Integration Instructions Blogger5
Part 2: Adding the PayPal Payment Button to your BlogStep 9: Add a GadgetIn the Layout view, click the “Add a Gadget” button on right.The Add a Gadget pop-up window will open.Step 10: HTML/JavaScript GadgetScroll down in the list of gadgets and select the“HTML / JavaScript” gadget.PayPal Integration Instructions Blogger6
Part 2: Adding the PayPal Payment Button to your BlogStep 11: Add your PayPal button HTML CodeFirst, type in a title like “Buy me a cup of coffee” or “Supportmy blog” or whatever phrase you would like displayed aboveyour PayPal Payment button. Then, insert (paste) the HTMLbutton code you generated in step X into the Content areaof the dialog box.(Do this by placing the cursor inside the content box; rightclick the mouse and select “Paste”)Click the “Save” button.Step 12: You are done!You should see your new gadget title displayed on the page.Click the “Save arrangement” button to ensure yourchanges are saved.PayPal Integration Instructions Blogger7
Part 2: Adding the PayPal Payment Button to your BlogStep 13: View Your BlogYou should see a yellow box at the top that says, ‘Yourchanges have been saved.”Click “View Blog” to see your new payment button in thesidebar of your blog.Step 14: Test the ButtonClick your new PayPal Payment button to see that it works.You should be taken to a PayPal webpage where yourreaders can pay with their credit cards.Congratulations!PayPal Integration Instructions Blogger8
Appendix A. PayPal Payment PageAPPENDIX A. PAYPAL PAYMENT PAGEWhen your customers click on a PayPal payment buttonor link they will be taken to a PayPal webpage where theycan pay with their credit cards or their PayPal account.The picture on right shows the PayPal payment page forthe “Buy Now” and “Pay Now” buttons.PayPal “Buy Now” and “Pay Now” Payment PagePayPal Integration Instructions Blogger9
Appendix B. DonationsAPPENDIX B. DONATIONSSoliciting donations is a very common activity for bloggers.Anyone can create and use a Donate button. If youidentified yourself as a non-profit organization when youcreated your PayPal account, then PayPal may reviewyour account to confirm you are collecting money for acharity. Standard PayPal fees apply for money collectedusing the donate button.Clicking the Donate button will take your clients to aPayPal payment page where they can choose how muchto donate, and pay with either a credit card or their PayPalaccount (see picture). The only difference between theDonate button and the Buy Now button is that the donatebutton enables people to choose how much money to pay,while the Buy Now button has a fixed payment amount.PayPal Donations Payment PagePayPal Integration Instructions Blogger10
Appendix C. How to find a Donate ButtonAPPENDIX C. HOW TO FIND THE DONATE BUTTONIn some countries the Donate button is not accessible fromthe same location as the other PayPal payment buttons.If you do not see the Donate button on the “ConfigureMy Payment Solution” page, then follow the instructionsbelow to get to the Donate button creation page.Step 1: Login to your PayPal accountStep 2Step 3Step 2: Merchant Services TabClick the PayPal Merchant Services tab at top of the page.The Merchant Tools page will openStep 3: Merchant Services LinkClick the Merchant Services link in the upper left area ofthe page.You will remain on the Merchant Tool page, and thecontents of the page may change.Step 4: Donations LinkClick the Donations Link in the lower right area of thesame page.You will be taken to the Create PayPal Payment Buttonpage with the Donate button selected.You can now go to Step 5 in Part 1 of this document andfollow the instructions for how to create your Donate button.Step 4PayPal Integration Instructions Blogger11
the same location as the other PayPal payment buttons. If you do not see the Donate button on the “Configure My Payment Solution” page, then follow the instructions